

Feature Focus: Roto Brush 2
- June 23, 2020
- 15 replies
- 35219 views
Hello Beta Testers!
We are pleased to inform you that Roto Brush 2 is now available for beta testing in the 17.1.2x32 build of After Effects (Beta). This new propagation engine incorporates the technology behind Project Fast Mask from MAX 2018 to streamline rotoscoping/isolating a subject or object from a background.
The amazing notiansans from Learn How to Edit Stuff has created a great tutorial video for Roto Brush 2 in After Effects (Beta) showing the basic workflow as well as a comparison with original Roto Brush.
What We Need From You
We are looking primarily for feedback on how the new propagation engine is performing with real-world footage, though all feedback is welcome. Your testing efforts and input are highly appreciated.
If you are willing and able to share footage with the After Effects team where Roto Brush 2 is having difficulty isolating a subject when propagating, please follow these steps to submit the footage and project:
- In the Project panel, select the composition that contains the footage with Roto Brush applied.
- Go to File > Dependencies > Collect Files
- In the Collect Files dialog:
- Set "Collect Source Files" to "For Selected Comps"
- Enabled the "Reduce Project" checkbox
- Click "Collect" and select a location to collect the project file and footage
- Zip up the folder containing the newly-collected project and footage.
- Add the .zip to your Creative Cloud storage ( or Dropbox, OneDrive, etc ) and email a link with a brief description of what you were experiencing to rotobeta@adobe.com. All footage submitted will be kept confidential and will not be shared with third-parties.
Getting Started with Roto Brush 2
The application of Roto Brush with the new propagation engine is largely the same as in previous After Effects versions:
-
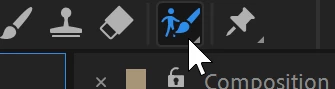
Select the Roto Brush Tool in the toolbar ( Alt/Option + W ).
-
Double-click on an existing layer in the Composition panel. This will open up the layer in the Layer panel.
-
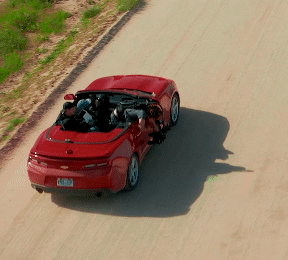
Paint a green foreground stroke on the subject, object, or region you are attempting to roto. Avoid painting across edges as this might confuse the selection. This creates a base frame ( visible as a blue highlight in the Time Ruler of the Layer panel. )
-
Refine the selection by painting additional foreground strokes, or paint background strokes by holding Alt/Option to remove portions of the selection.
Foreground stroke, adding to selection: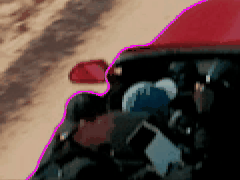
Background stroke, removing from selection: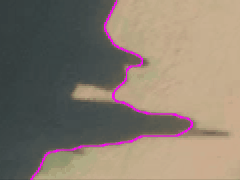
-
Once you are happy with the selection on the base frame, press the Spacebar to start propagating the selection through the footage. This will trigger the propagation of the matte from the base frame to the new frame. You can also use Cmd/Ctrl + Left/Right arrows to propagate frame-by-frame either forward or backward, if you would like to go slower and evaluate the propagation more closely. This might be more ideal for footage which requires more correction strokes.
- After you have propagated the matte through all of the video frames you need and you are happy with the result, you can freeze the propagation using the Freeze button at the bottom of the Layer panel. After freezing, you can still make adjustments to the matte itself in the Roto Brush effect without re-propagating. If you need to add or remove from a selection after freezing, you can unfreeze the propagation with the same button.
Correcting the Roto Brush matte:
As Roto Brush propagates the matte from frame to frame, the selection may start to include unwanted regions or "lose" portions of the original selection. To correct this, paint a background stroke ( holding Alt/Option ) on the first frame where the unwanted change occurs to remove unwanted regions, or paint a new foreground stroke to include anything that was missed. As with the base frame, avoid painting across the edge of the selection as much as possible.
Adjusting and Refining the final matte:
The result of the propagation can be further refined and improved via the controls in the "Roto Brush Matte" group in the Roto Brush effect, especially with the "Reduce Chatter" property. Additionally, the Refine Edge Tool can be used for highly-detailed edges like hair and further controlled in the "Refine Edge Matte" property group. There are also options that compensate for motion blur and decontaminating edge colors.
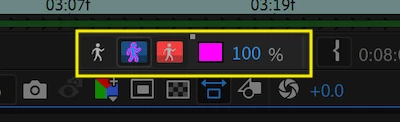
Use the toggles at the bottom of the Layer panel to view the matte results, or open the Composition panel to view the result in-context with other layers.
Toggles in Layer panel for viewing alpha, alpha boundary, and alpha overlay
Additional Resources
For more details on the Roto Brush workflow, below you'll find links to both Adobe documentation as well as tutorials from Roto Brush users.
- Adobe Roto Brush Documentation
- Create INCREDIBLE Selections in After Effects with Roto Brush
- Learn Advanced Roto Brush in 20 Minutes
Please note: Due to the enhancements in the new version, some of the tutorials may be outdated or encourage practices which may not yield the best results. For example, painting very close to an edge may result in a poor result if any pixels from the background are accidentally included in a selection.
Thanks very much for trying out After Effects (Beta) and Roto Brush 2!
