ninose11
Inspiring
June 30, 2018
Question

AECC 2018 - why does AE mask leave thin perimeter line when it erases shape???

  • June 30, 2018
  • 3 replies
  • 3751 views

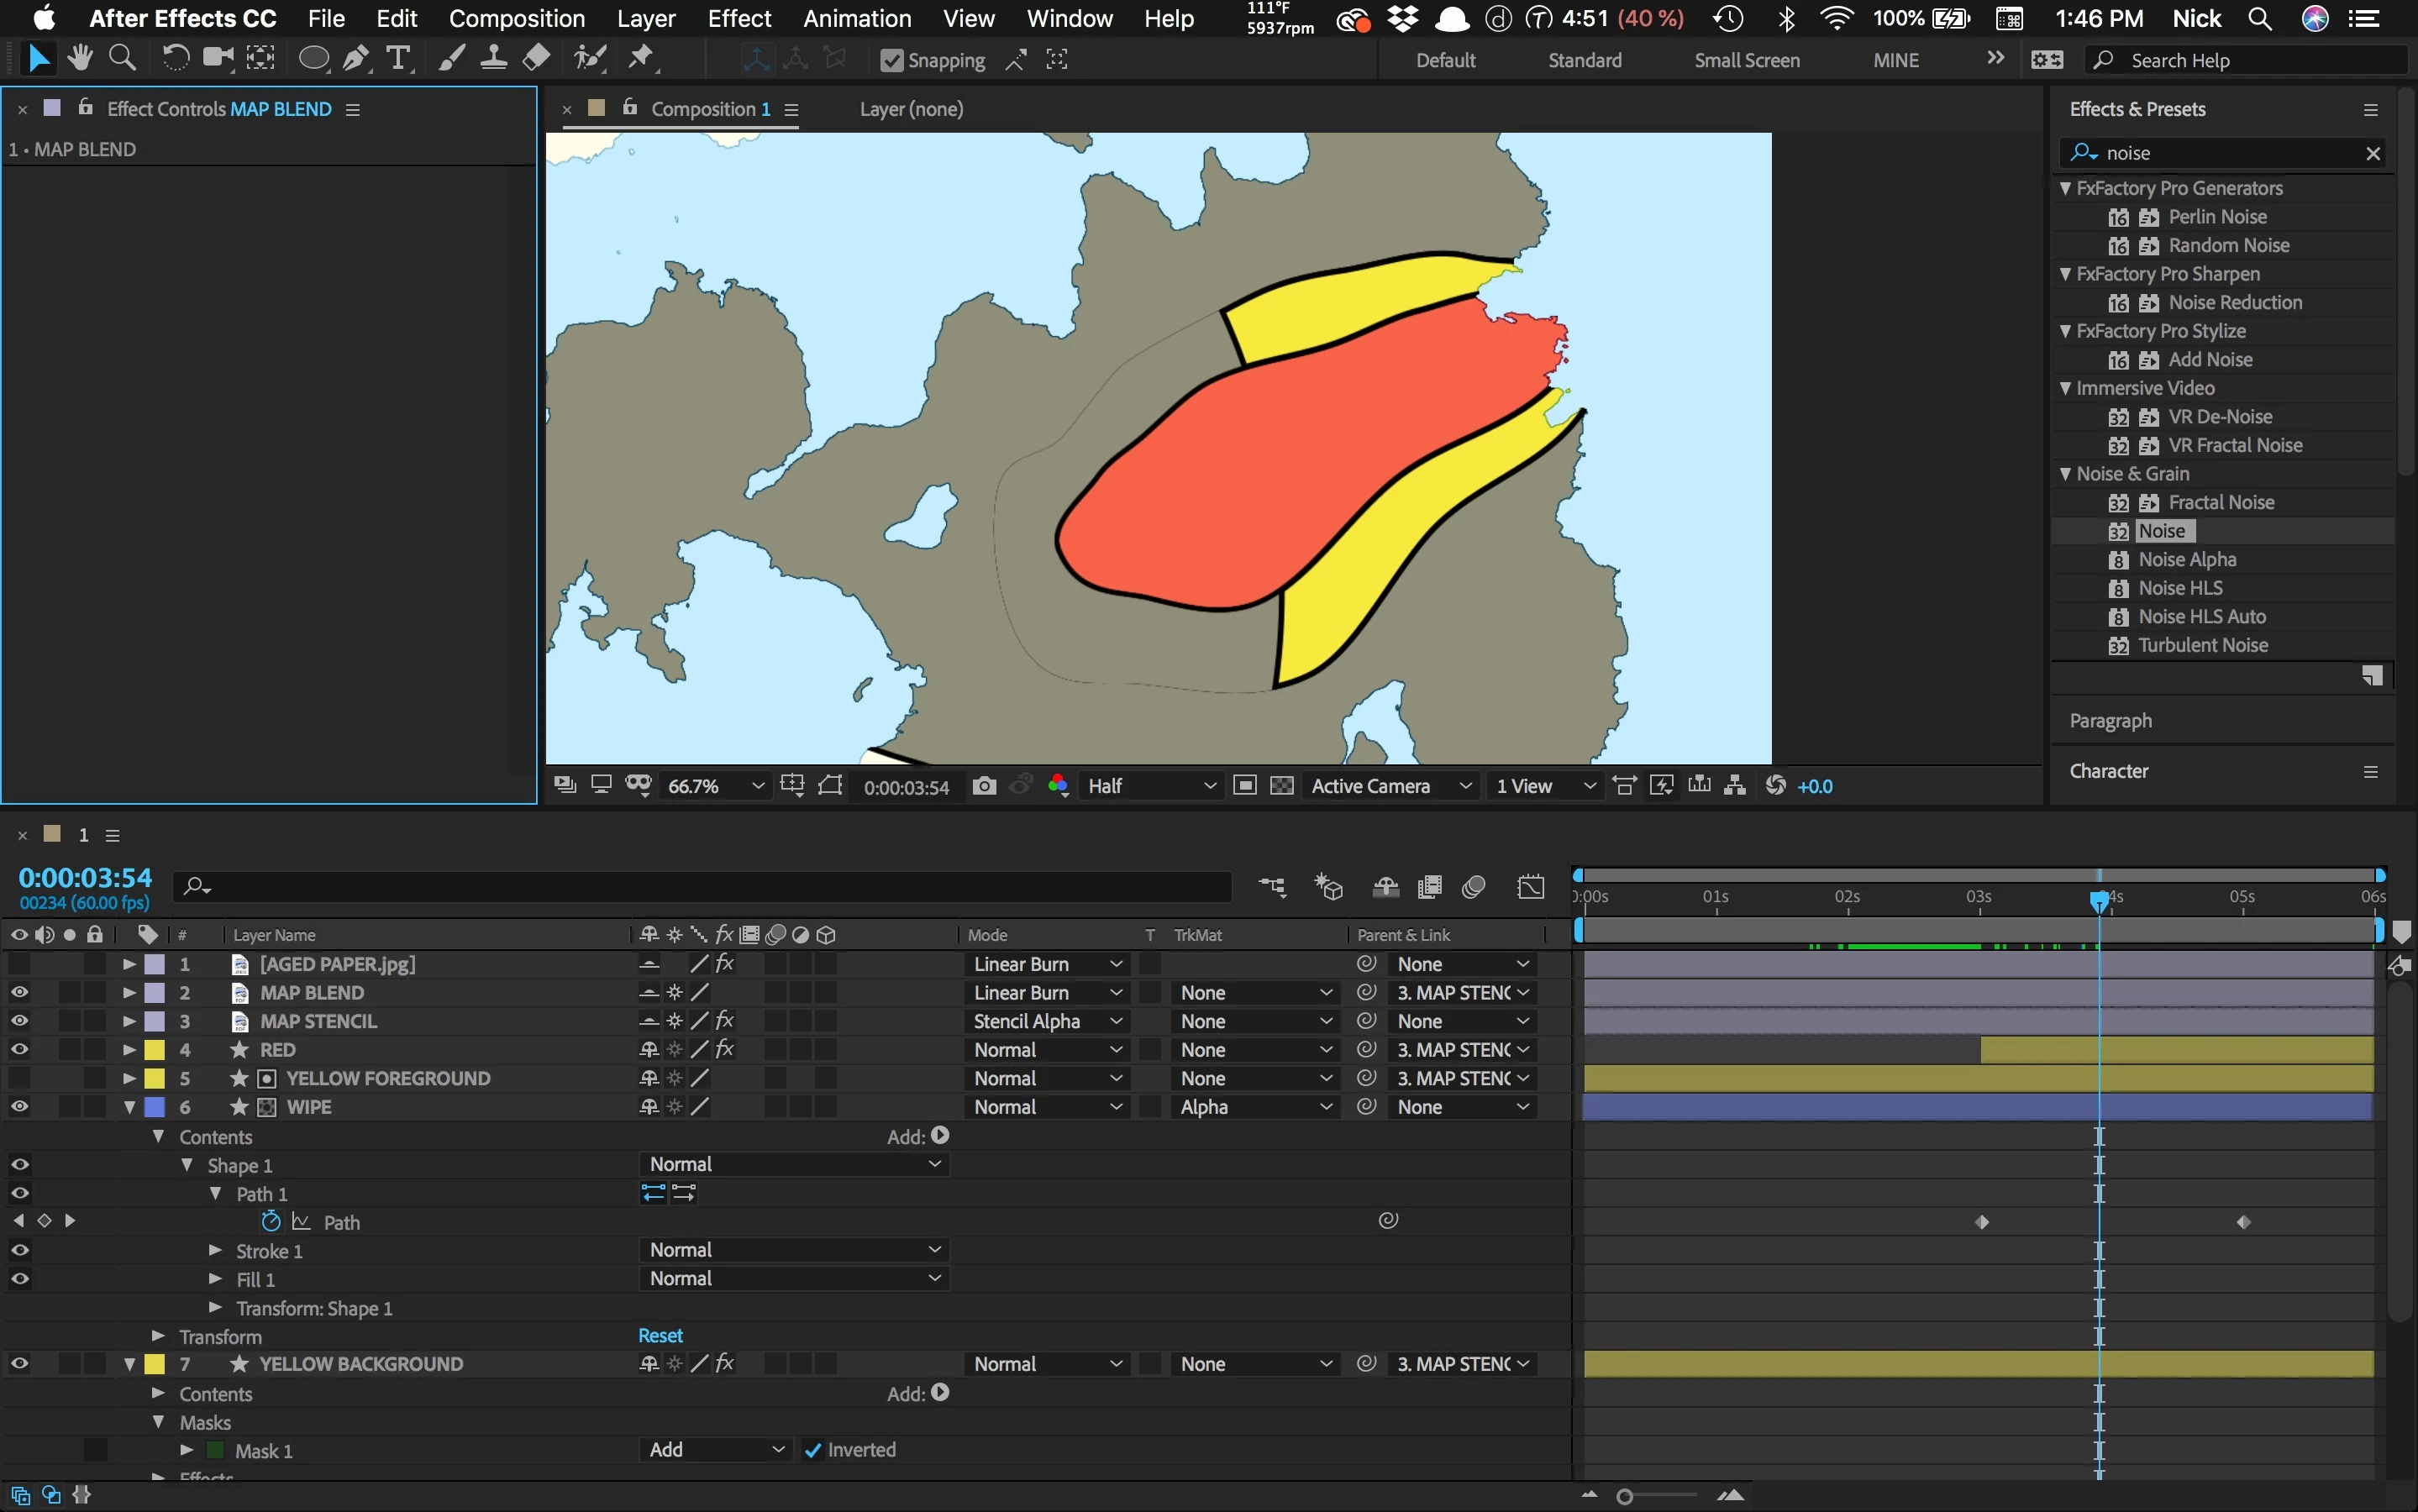
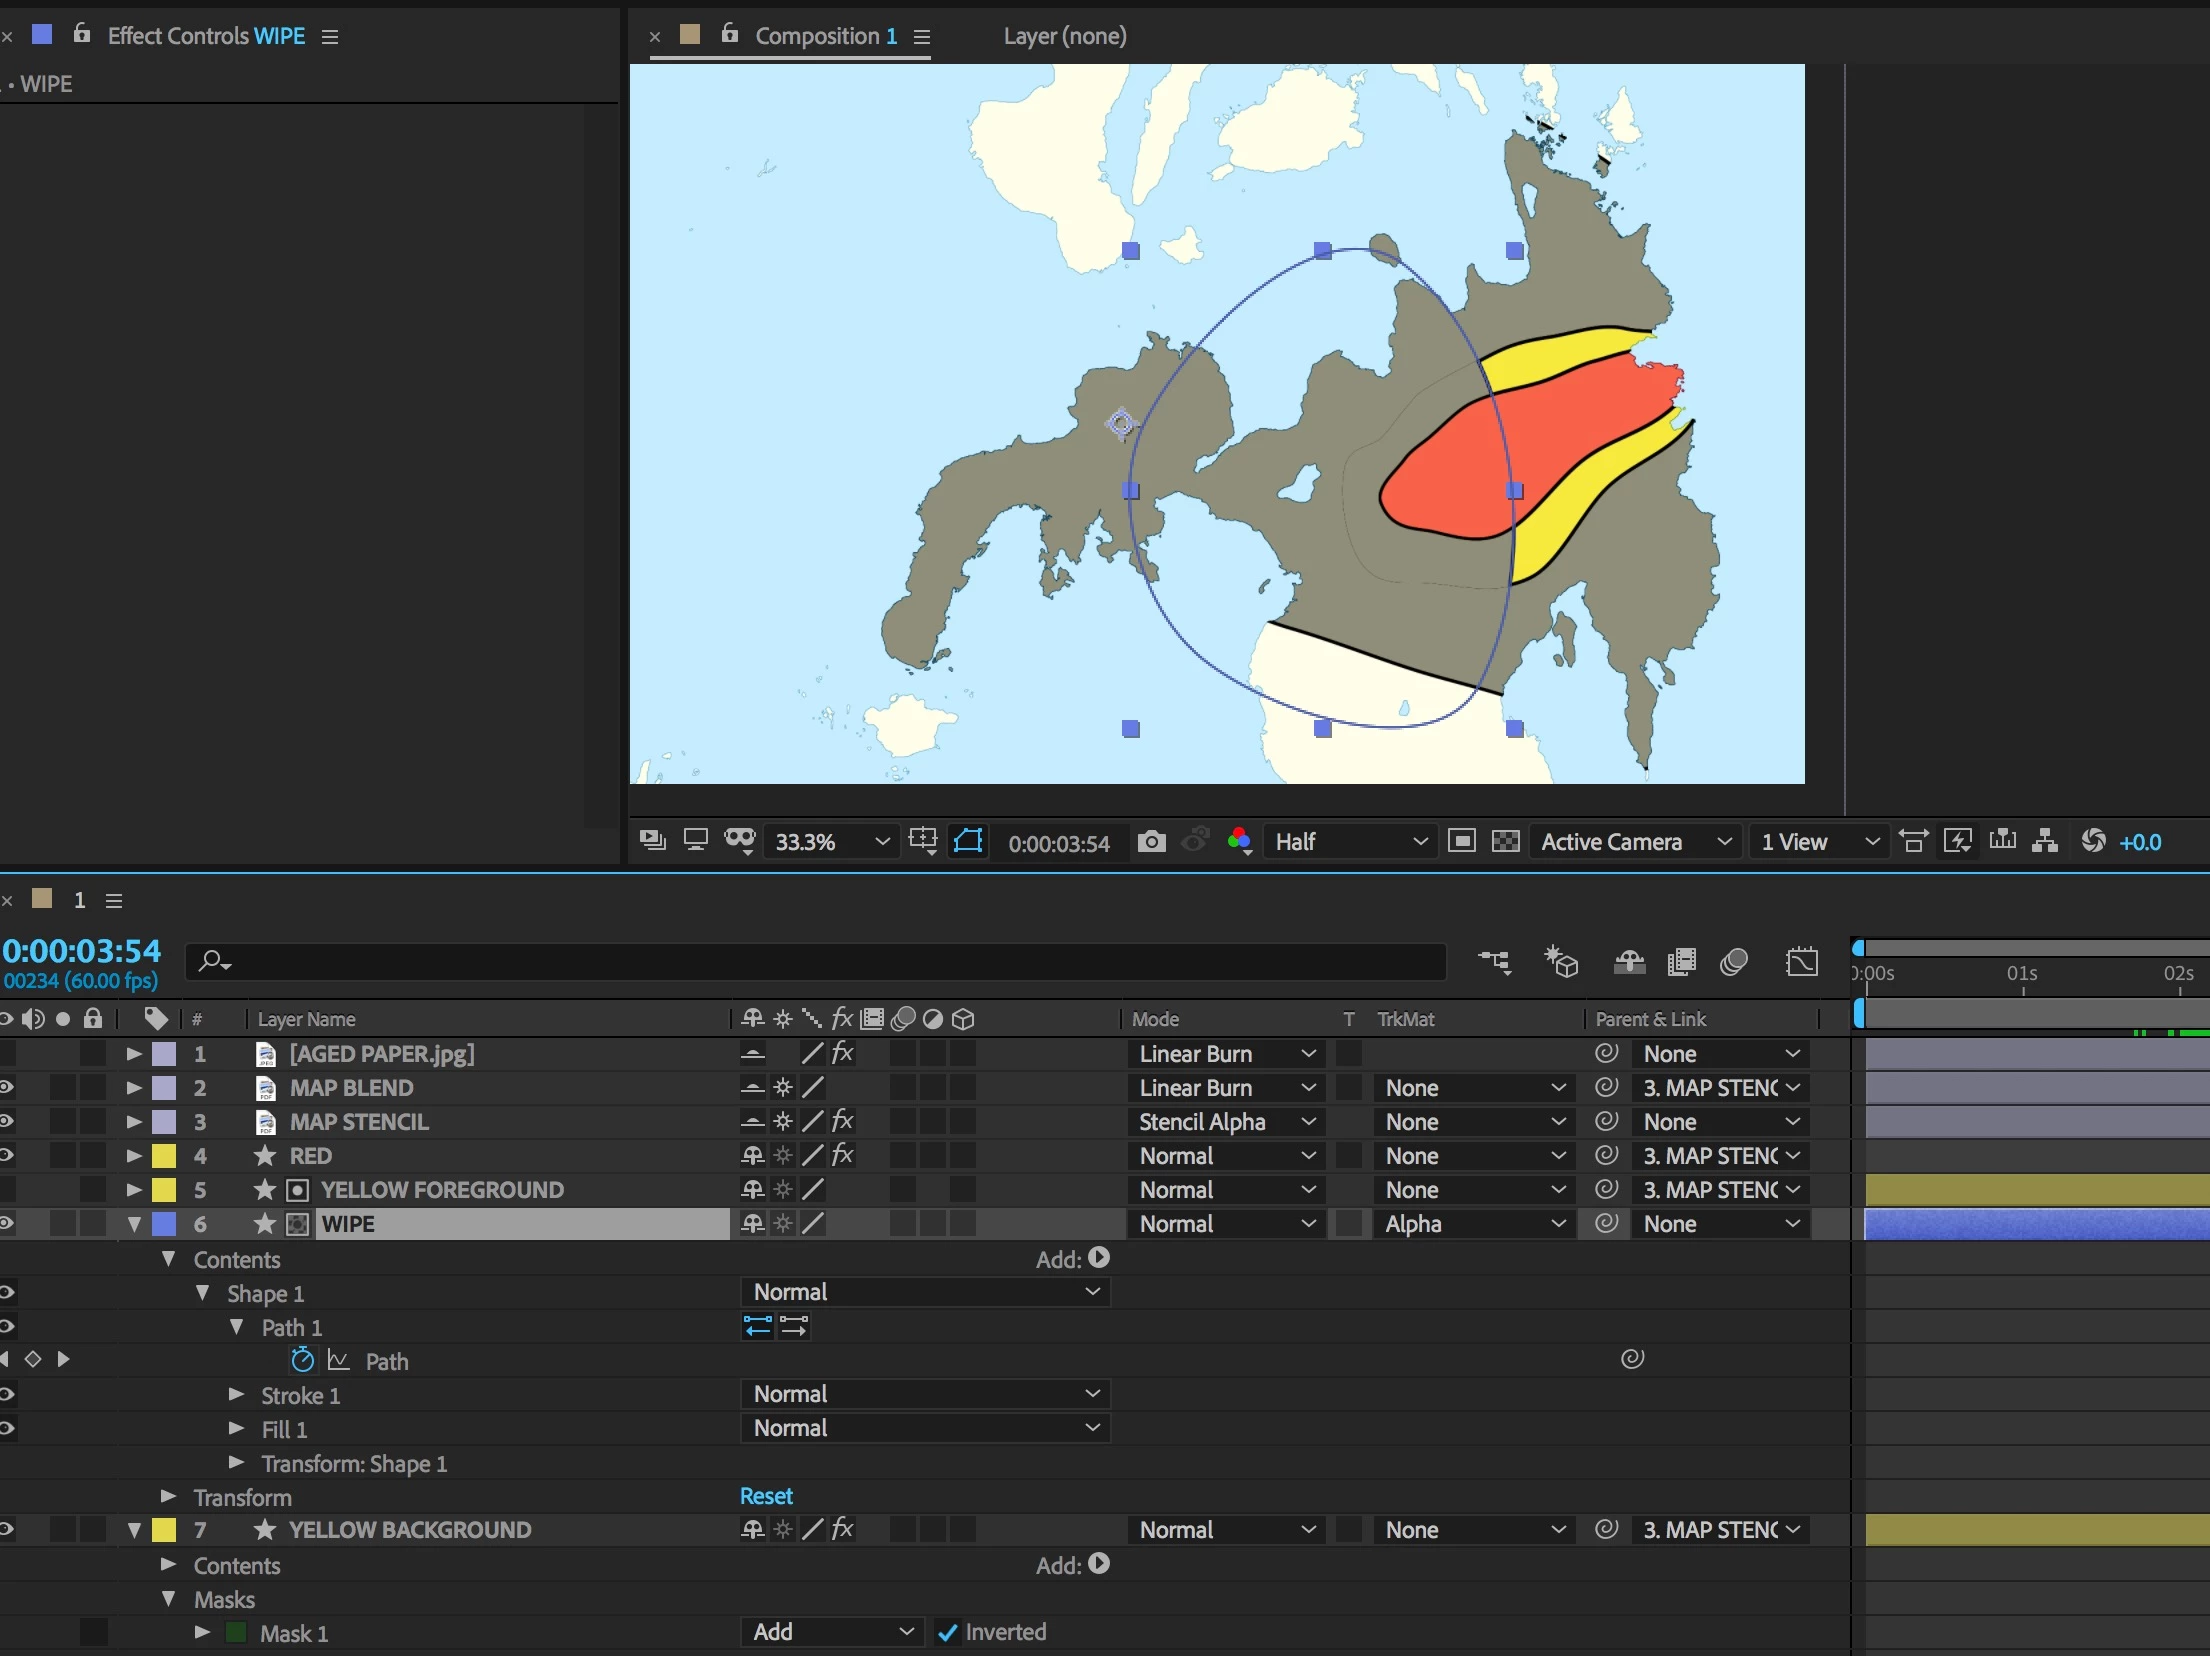
I'm running into a problem concerning animating masks over shapes in my After Effects CC 2018 project. In the example below I animated a mask wiping away a yellow layer. The problem is that as the yellow layer gets wiped away by the mask, a very thin contour line remains, probably less than a pixel wide, but it's still visible. And I have no idea what's causing it or how to get rid of it. Thanks very much in advance for any help with this.   

This topic has been closed for replies.

3 replies

Roei Tzoref
Legend
June 30, 2018

if you are using 2 masks to complete each other on two different layers (one is add, the other is subtract or inverted), you may be experiencing seam issues that are related to the anti-aliasing that is happening across the edges. if this is the case, one way to overcome that is to set the upper layer to Alpha Add blend mode. if that doesn't work, simply set the expansion to 1 pixel more (or less depends on which of the layers) and get rid of the seam.

from the help files: Use blending modes and layer styles in After Effects

Alpha Add

Composites layers normally, but adds complementary alpha channels to create a seamless area of transparency. Useful for removing visible edges from two alpha channels that are inverted relative to each other or from the alpha channel edges of two touching layers that are being animated.

also this:

https://www.provideocoalition.com/after-effects-hidden-gems-weekly-alpha-add-mode/

ninose11
ninose11Author
Inspiring
July 1, 2018

Thank you very much for your help as well Roei and everyone else who replied. I don't remember how I did it, but I finally managed to get rid of the line.

Participant
August 18, 2022

Hi, it is a long time! But since I bumped into this post in an attempt to figure things out, I might as well mention what helped me out.
I was having the issue with Set Matte and all that I needed to do was change the Use for Matte, from alpha to Full.
Hope it helps anyone else from 2022 that might come across this post.

P.M.B
Legend
June 30, 2018

My immediate thought was also that it's simply the half resolution causing the issue.  Switch full and I bet the line vanishes.

Also check your fast preview settings (that little lightning bolt icon under comp window)

~Gutterfish
ninose11
ninose11Author
Inspiring
June 30, 2018

Hi Gutterfish, yes, the line is still there in full resolution and Fast Preview is set to "Off/Final Quality". Thank you for your help as well.

Community Expert
June 30, 2018

The first thing you should do is check the comp with the magnification factor set to 100% and the resolution to full. Your screenshot shows 66% and Half resolution so you are not really seeing the actual pixels. You are looking at an interpolated set of pixels. Never make critical decisions on a composite at anything but 100% magnification factor and Full resolution.

I also don't understand what the Yellow foreground layer is doing. It is turned off and it is being used as a track matte for the animated mask layer. Then you have a Yellow Background layer that is not masked. The line could easily come from the Yellow Background layer.

If that doesn't fix it try selecting the yellow layer and pressing the U key twice to reveal all modified properties. Then turn the layer's visibility on and off. If the outline stays there then start turning on and off other layers until it disappears. I can't really tell what is going on in the composition because you have not shown all modified properties of the layers that are giving you problems. I think the outline is showing because the stroke for top Yellow Foreground and the Yellow Background are the same size. Try reducing the stroke on the bottom layer by 1 pixel.

If this were my project I would be just animating one shape layer and using a fixed track matte to cut off the right side. the right side boundary would be used as a track matte for the red layer, then Set Matte can be used to cut off the right side of the yellow layer. Set keyframes for the path on the yellow layer and you're done. It's a lot cleaner workflow.

ninose11
ninose11Author
Inspiring
June 30, 2018

Hi Rick, thank you so much for taking the time to help me. I checked my settings and I'm in full resolution mode. But even when I'm zoomed in 100% or 200%, I still see that line. Sorry but I'm not clear on your last paragraph. I've essentially been using one shape to mask the other using Alpha Matte. Is a fixed matte something else?