Applying bulge effect to sync with audio amplitude effect?
Hi all! I'm still fairly new to expressions, so hopefully question is clear enough. I have a circular logo whose scale changes based on the amplitude of audio tied to it. (The point is to make it look like a speaker bouncing with a lot of bass.) For context, the expression to make this happen includes this line:
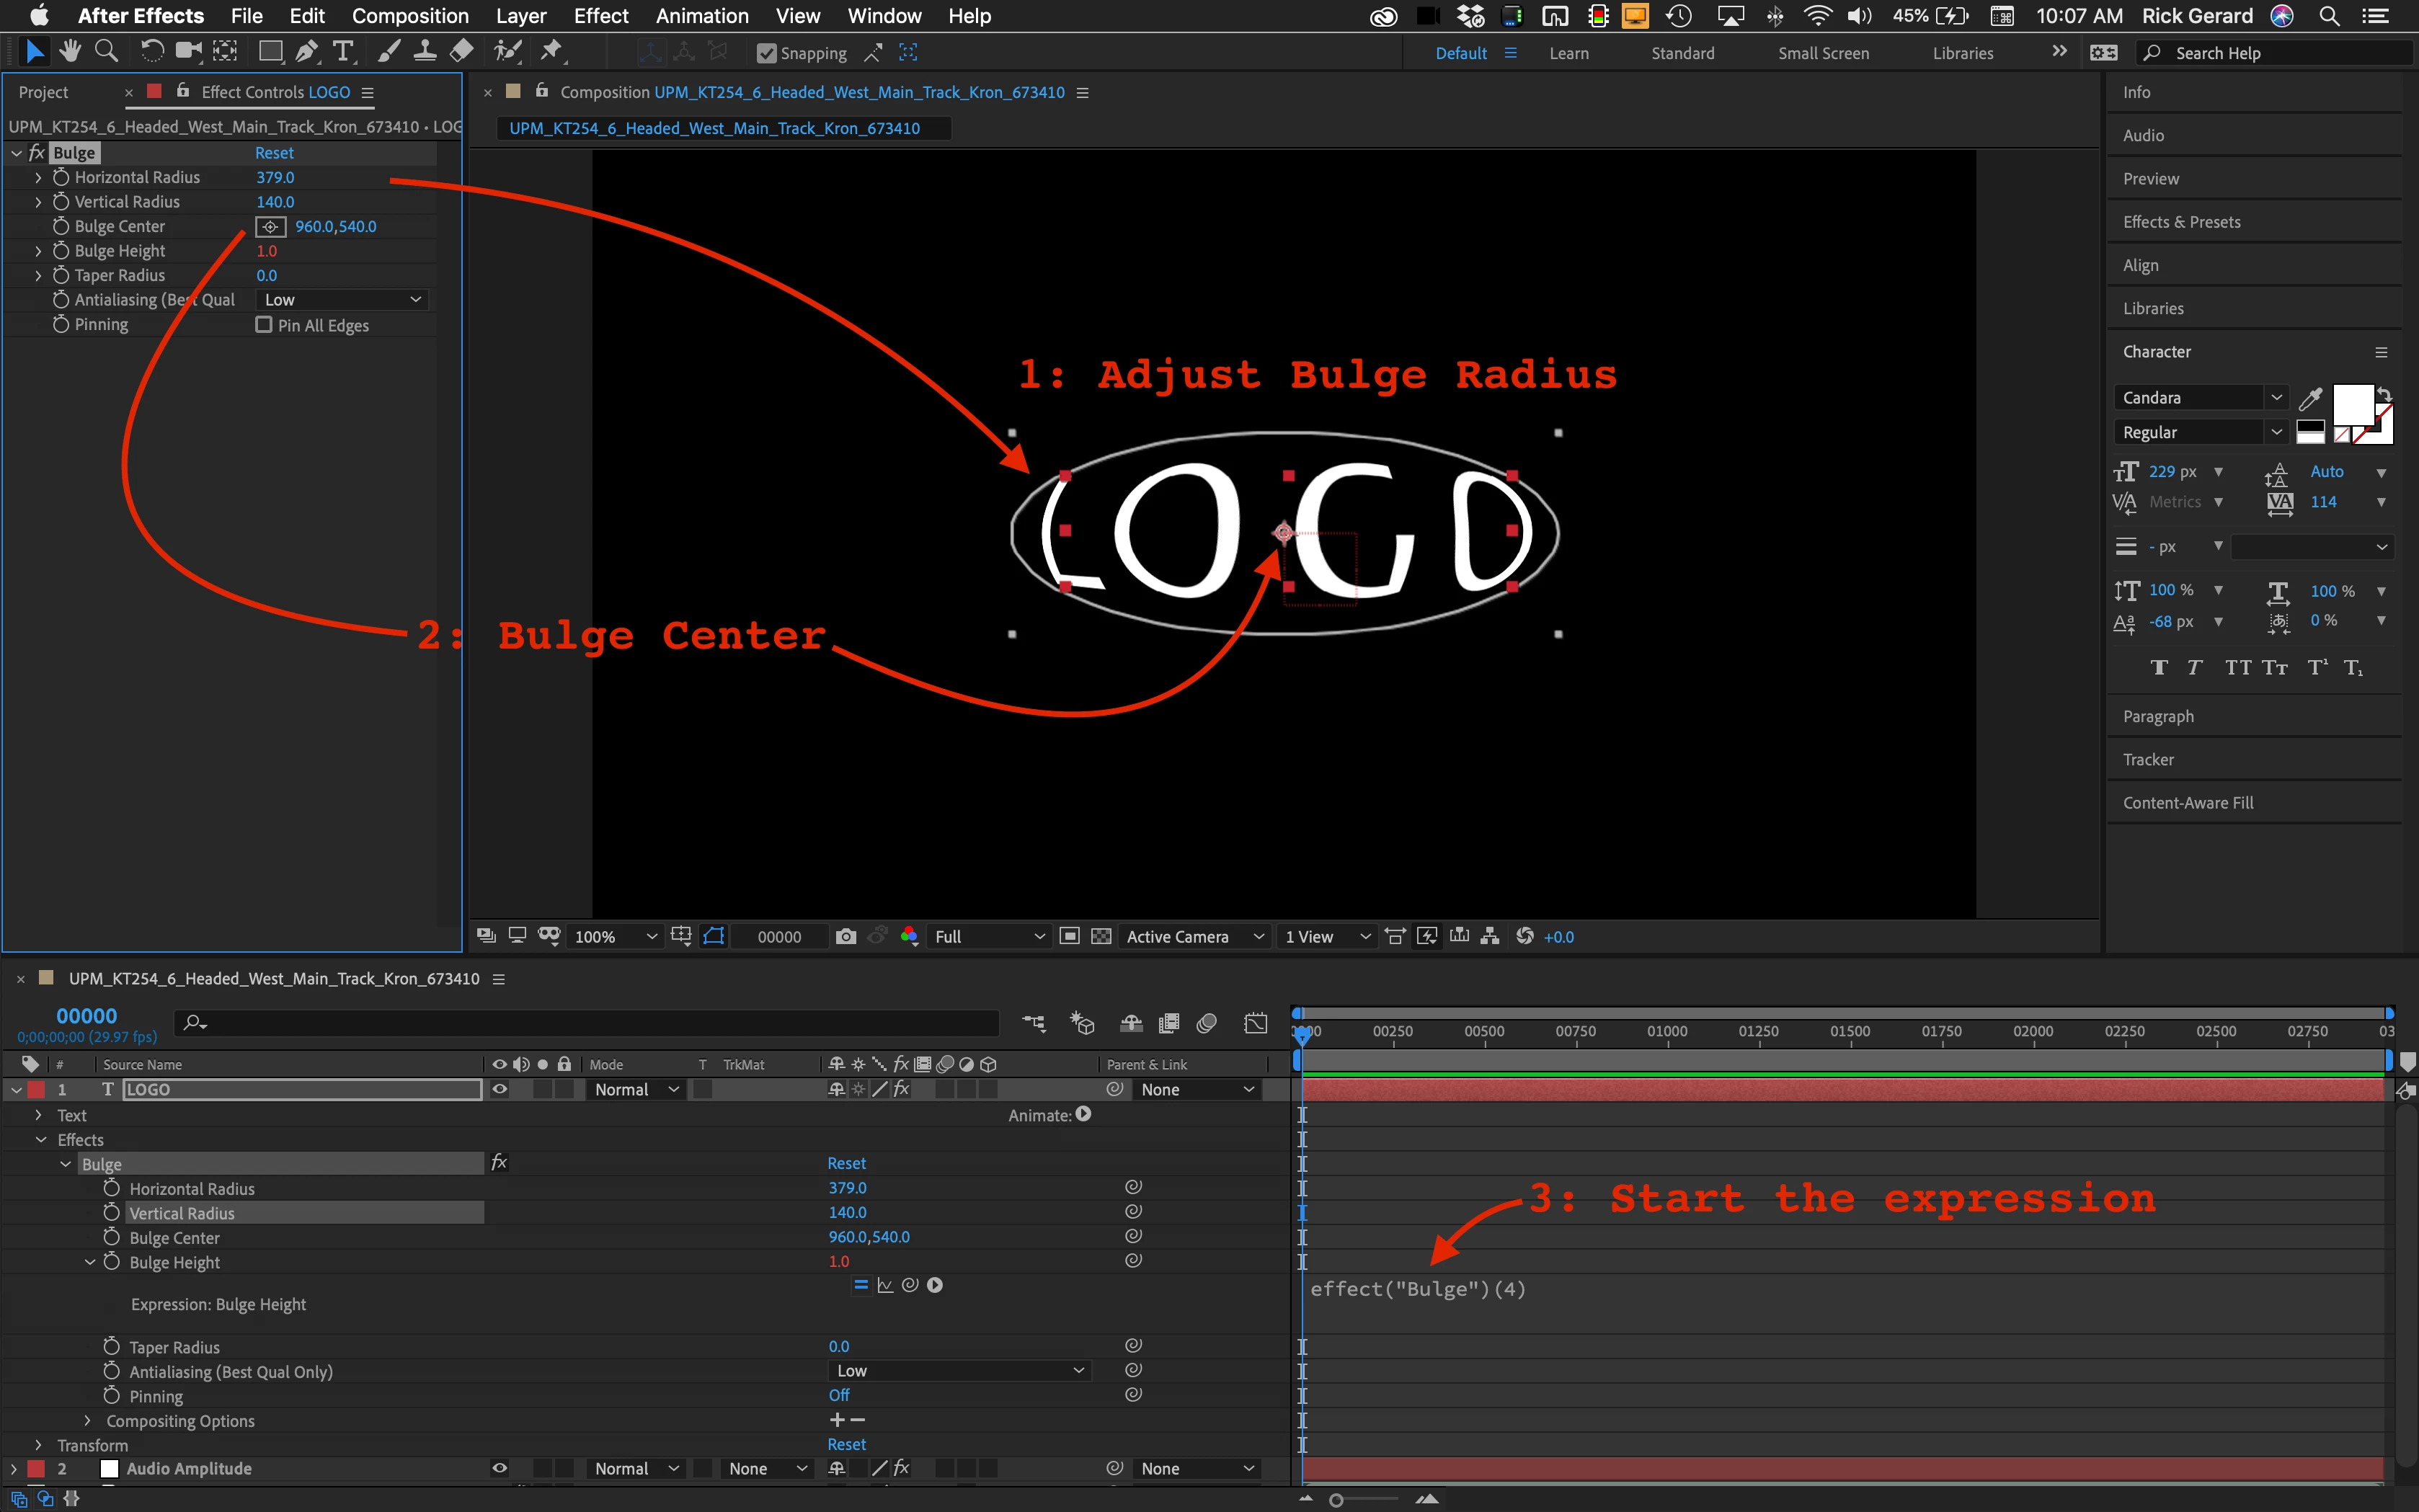
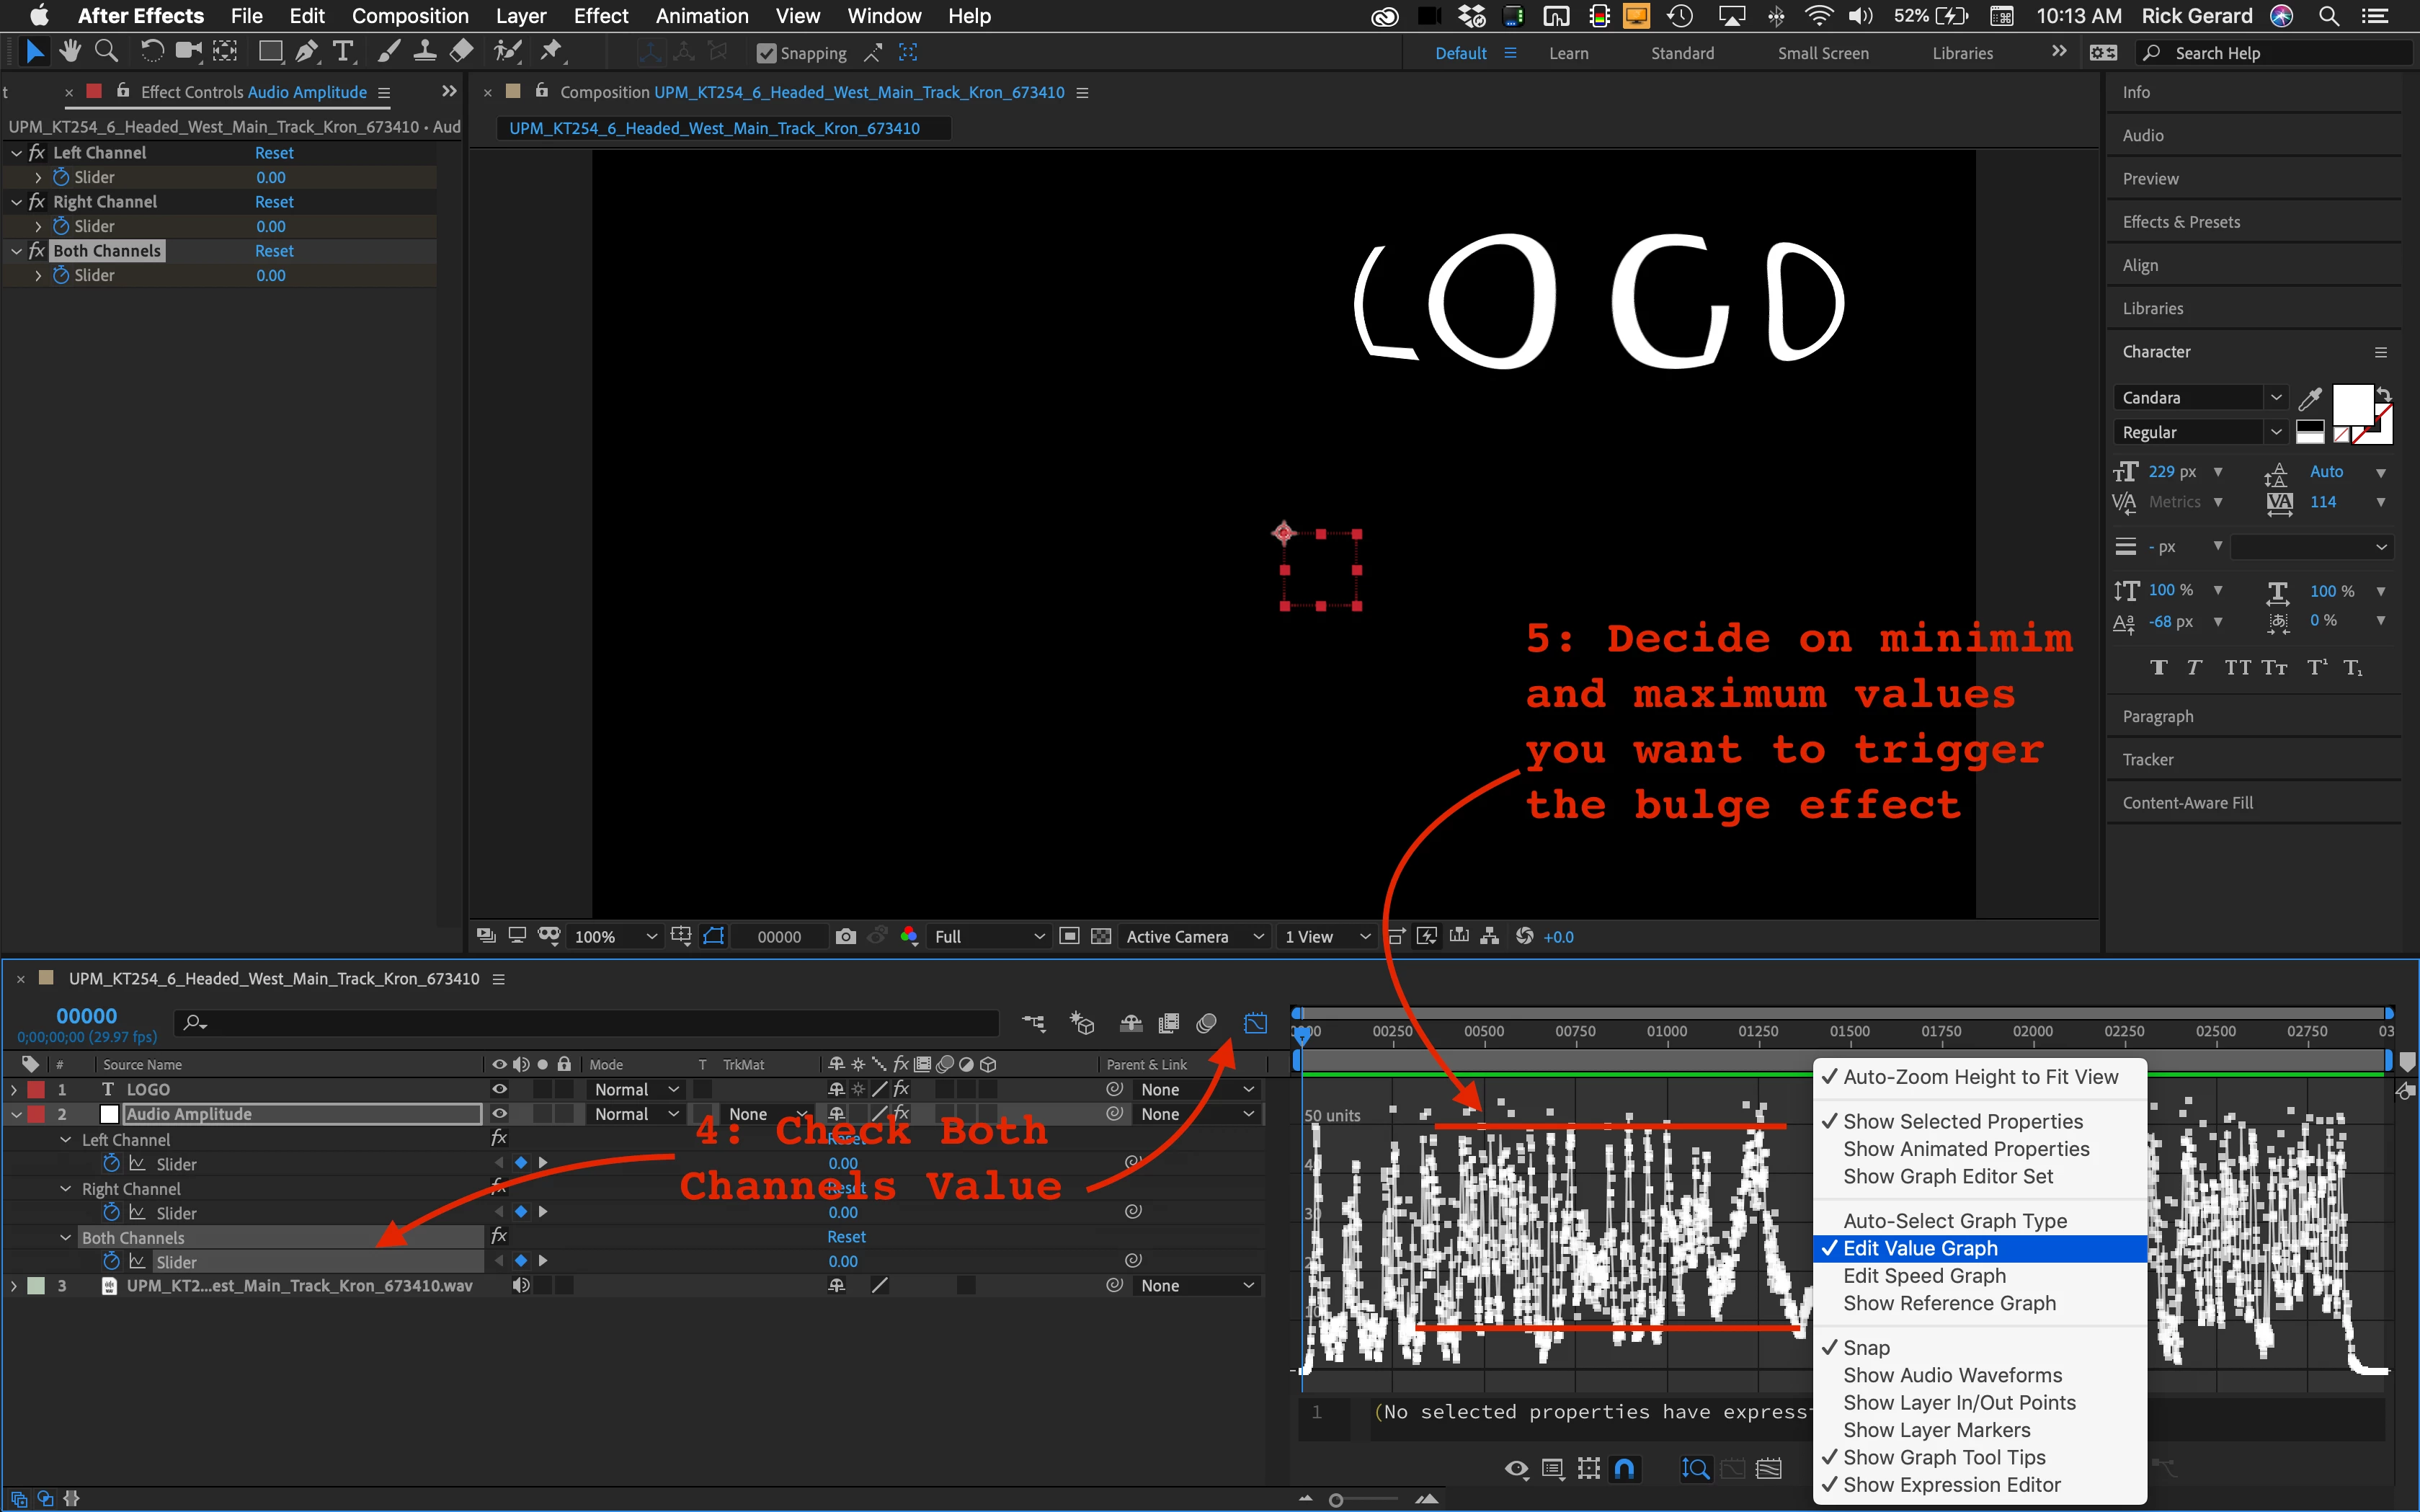
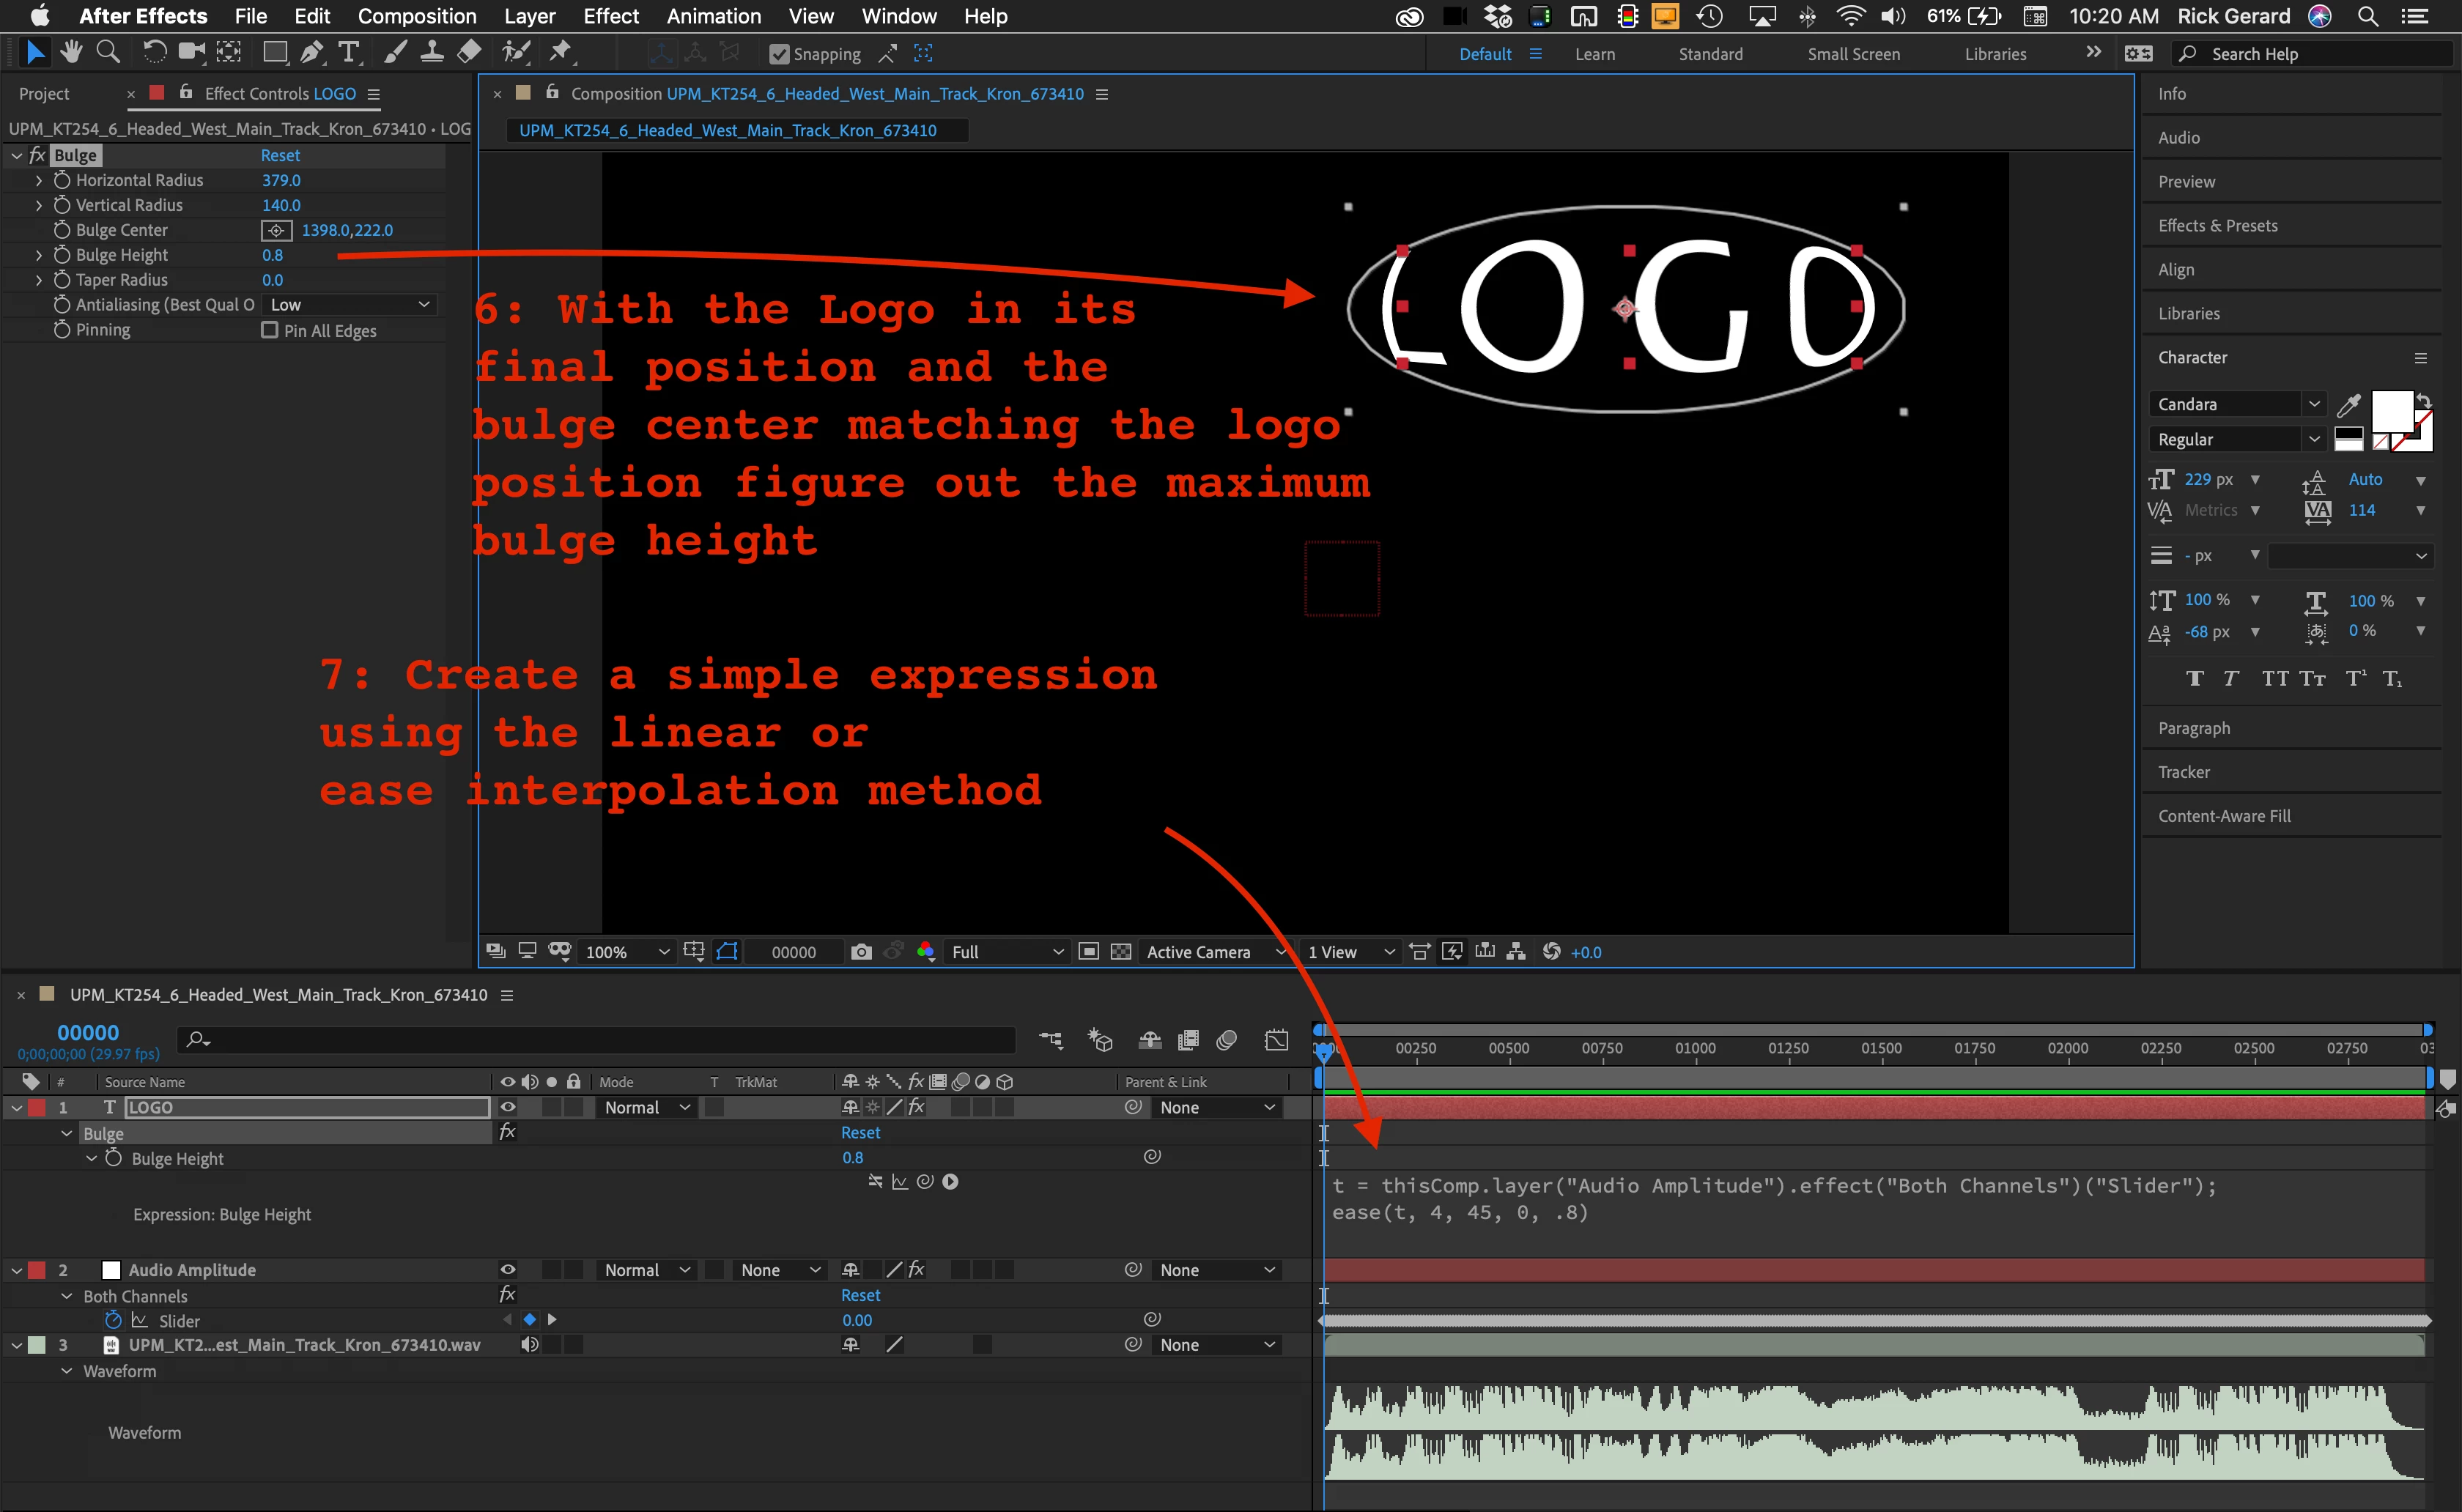
temp = thisComp.layer("Audio Amplitude").effect("Both Channels")("Slider");
[temp+70, temp+70]
It works great. But to 100% pull off the illusion, it also needs a very slight bulge effect to distort the center of the "speaker". I can do that to the layer as a whole with Effects > Distort > Bulge, but it would need to sync with the amplitude expression. (The closest example I can find in another forum is here, but I'm not good enough with expressions yet to get it to work without an error.) Could someone offer a tip or more thorough example? Thanks in advance!