The first thing you do is tie the shape layer position to the text layer position with a simple expression:
thisComp.layer(index - 1).transform.position
Using the layer index instead of the layer name makes it easy to save the setup as an animation preset.
Then you add an ellipse and an expression control slider for the radius of the ellipse. You'll also retrieve the size of the text layer and the top and left values to position the ellipse in one of the corners. If you put ellipse 1 in the bottom left corner the expressions look like this:
// Ellipse 1 size
r = effect("radius")("Slider")/2;
[r, r]
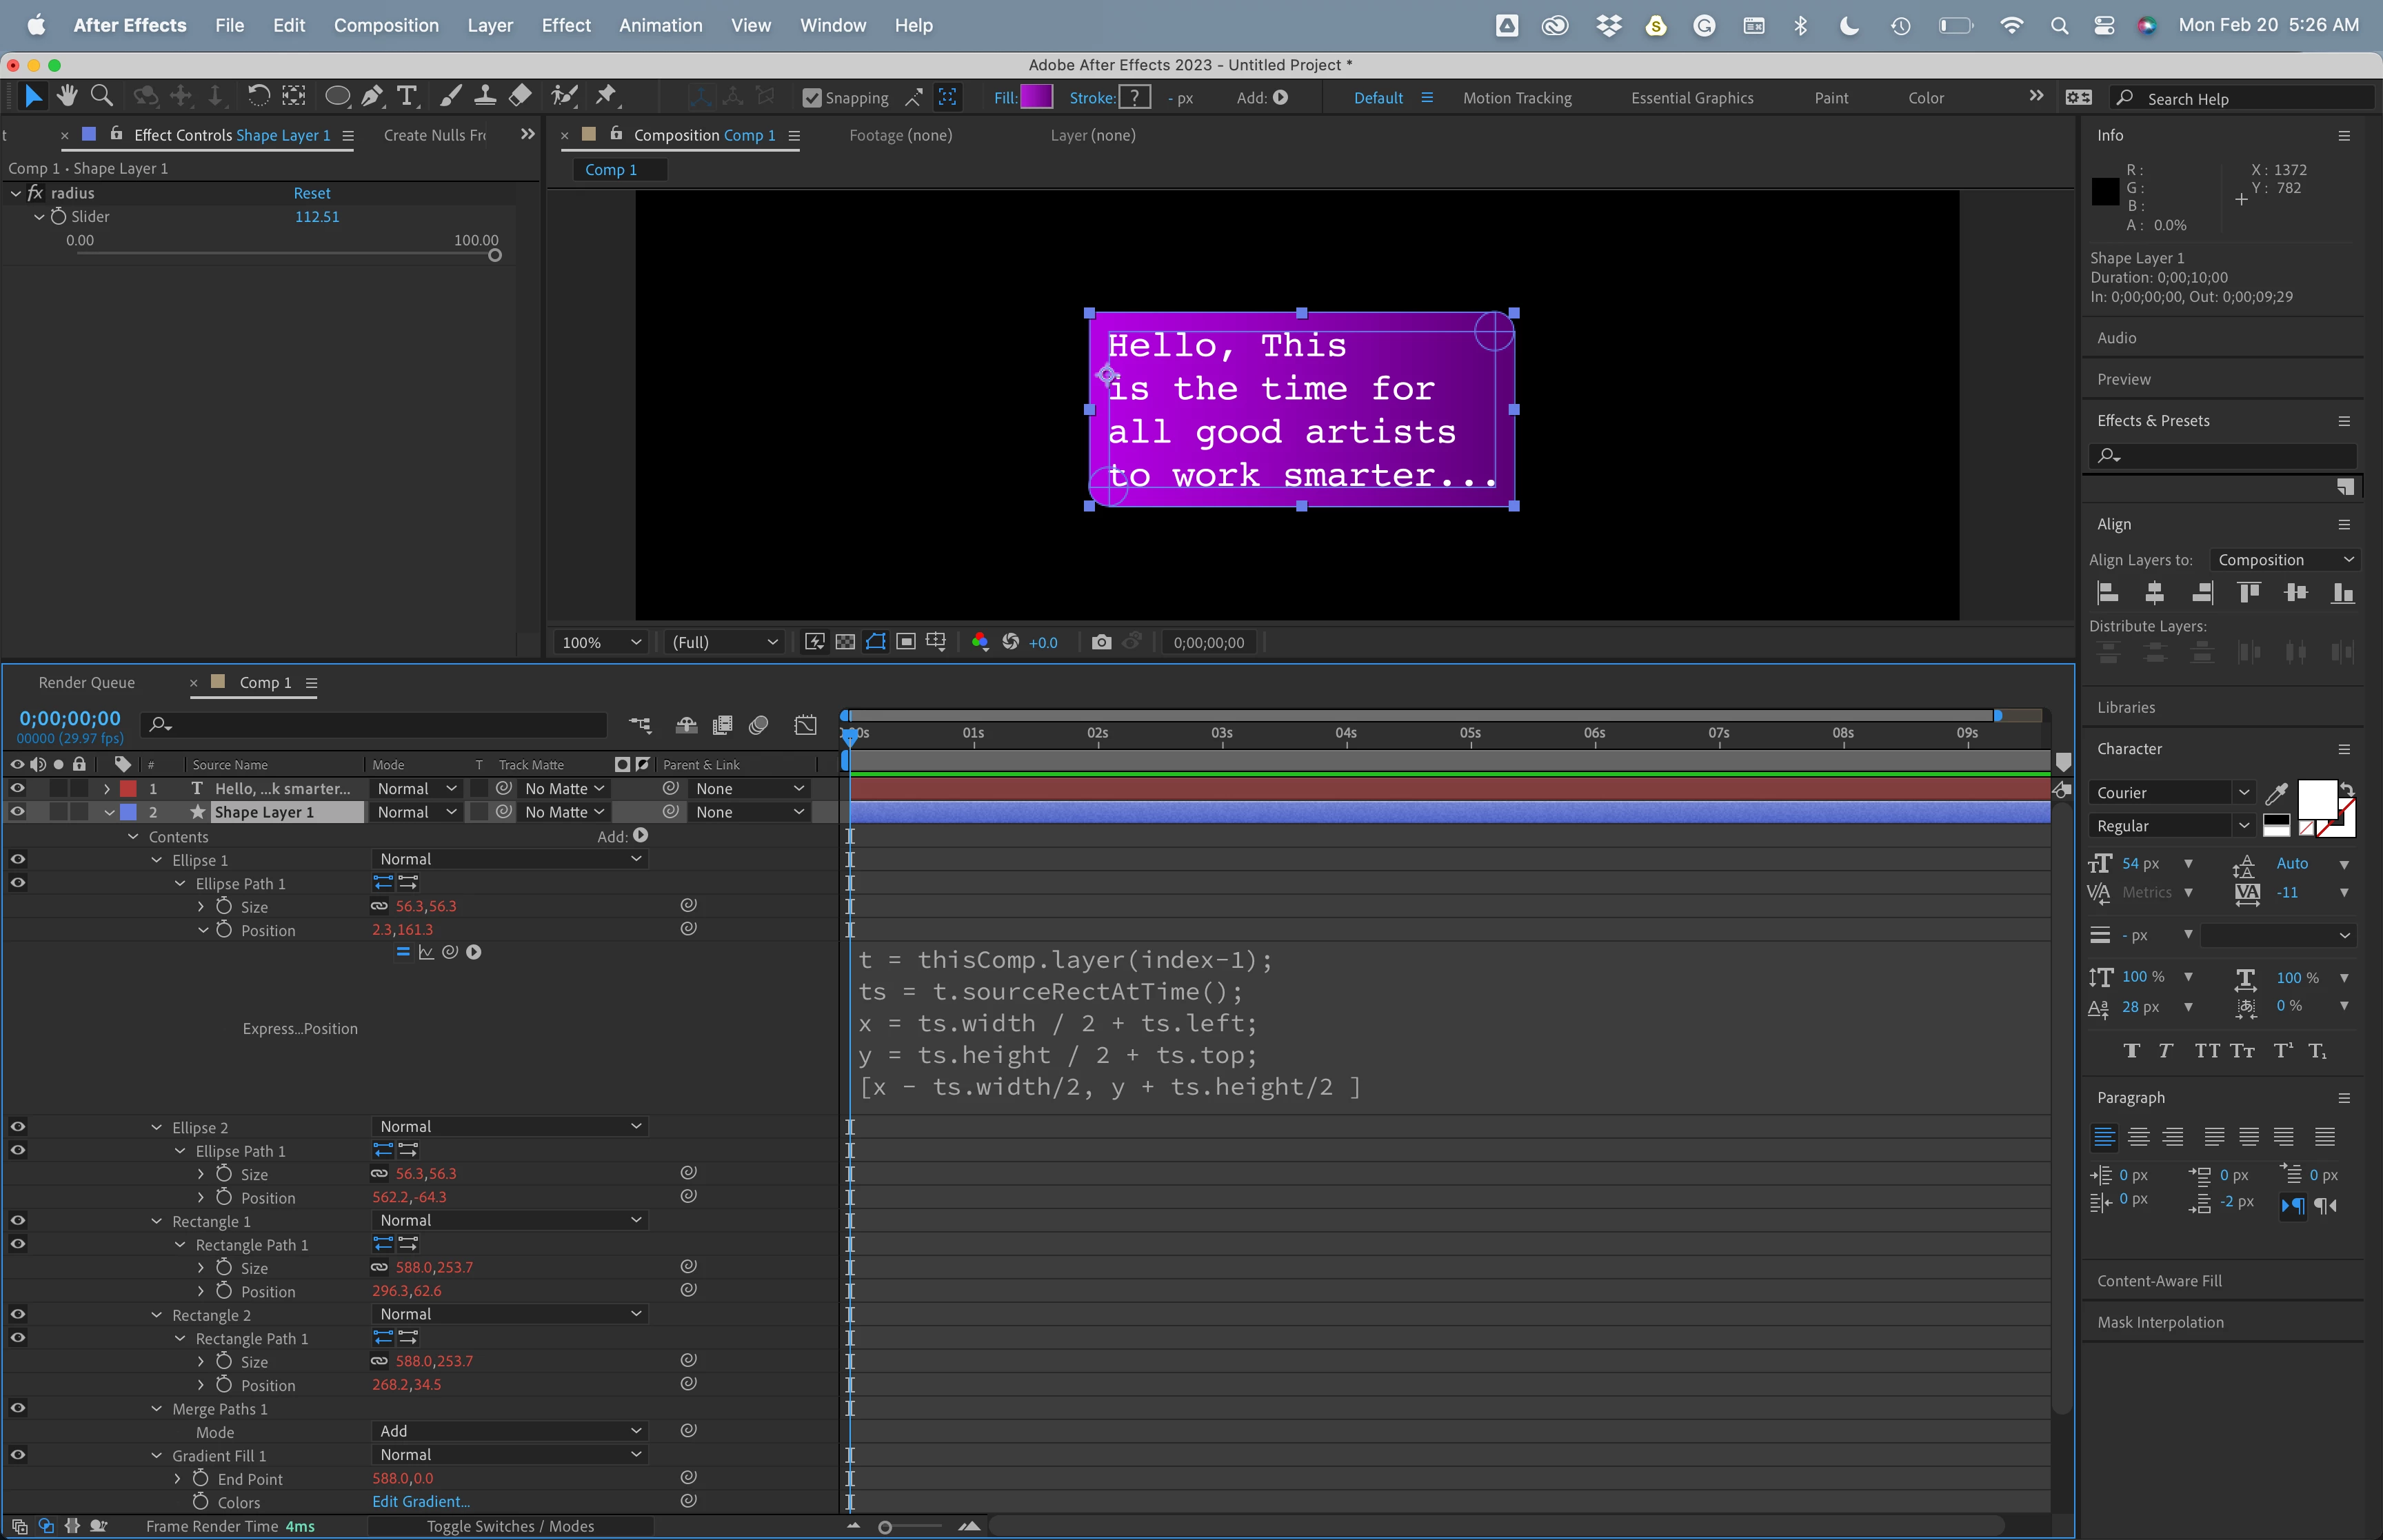
// Ellipse 1 Position
t = thisComp.layer(index-1);
ts = t.sourceRectAtTime();
x = ts.width / 2 + ts.left;
y = ts.height / 2 + ts.top;
[x - ts.width/2, y + ts.height/2 ]
Next, add a second ellipse and add these expressions:
// Ellipse 2 Size
content("Ellipse 1").content("Ellipse Path 1").size
// Ellipse 2 Position
t = thisComp.layer(index-1);
ts = t.sourceRectAtTime();
x = ts.width / 2 + ts.left;
y = ts.height / 2 + ts.top;
[x + ts.width/2, y - ts.height/2 ]
This will put the second ellipse at the top right corner of the text area.
Now you add Rectangle 1 and pull the size plus the radius of the ellipses and offset the rectangle appropriately.
// Rectangle 1 Size
t = thisComp.layer(index-1);
ts = t.sourceRectAtTime();
r = content("Ellipse 1").content("Ellipse Path 1").size[0]/2;
[ts.width + r, ts.height + r]

// Rectangle 1 Position
t = thisComp.layer(index-1);
ts = t.sourceRectAtTime();
x = ts.width / 2 + ts.left;
y = ts.height / 2 + ts.top;
r = content("Ellipse 1").content("Ellipse Path 1").size[0]/4;
[x + r, y + r]
Follow that up with Rectangle 2 but this time offset the position to the other side.
// Rectangle 2 position
t = thisComp.layer(index-1);
ts = t.sourceRectAtTime();
x = ts.width / 2 + ts.left;
y = ts.height / 2 + ts.top;
r = content("Ellipse 1").content("Ellipse Path 1").size[0]/4;
[x - r, y -r]
You keep the same expression for Rectangle 2 Size or you can just point rectangle 2 size to Rectangle 1.
The last step is to add Merge Paths and a Gradient fill. If you tie the ending position of the gradient fill to the. width of the text area the gradient will expand or contract with the size of the text.
If you want more padding, you'll have to adjust the expressions by adding a padding slider and value. You should be able to figure that out.
I've attached a project file and embedded (by dragging in the reply field) a screenshot.
Here's an animation preset that does the whole thing. Just add it using the animation menu and drag the new shape layer below any text layer.
