Participant
January 18, 2018
Question

Combining paths for stroke generation

  • January 18, 2018
  • 1 reply
  • 5452 views

Hi All -

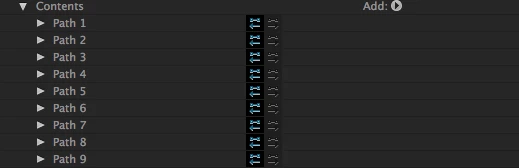
So I have a logo made up of multiple paths (it's the name of a company, but the letterforms have been modified, so I can't just use text). I imported from AI and Created Shapes from Vector Layer. I've deconstructed everything that created down to just the paths (which may not have been necessary):

I'm trying to create an effect similar to this one: After Effects Tutorial - Automating outline effects - YouTube  which requires the Stroke effect. I can't seem to figure out how to:

  1. get those paths into a single path
  2. get that path into a Mask I can target with the Generate>Stroke effect

Everything I've tried googling leads me to the Merge Paths function, but that doesn't seem to do what I need. All that does is giveme a merged "thing" i can put a regular stroke on, but nothing I can use with the Generate>Stroke Effect.

Any thoughts or guidance?

    This topic has been closed for replies.

    1 reply

    Community Expert
    January 18, 2018

    Shape layer paths are not masks so you can't use the Stroke Effect with those paths. You can select each path, one at a time, set a keyframe for the shape layer path, which makes sure that you have selected the path, cut it using Ctrl/Cmnd + x, which does not cut the path, just the keyframe, then create a new layer, select the pen tool, click anywhere, and then paste using Ctrl/Cmnd + v. As long as the original shape layer was not repositioned, scaled, or rotated the paths will line up.

    An easier way to do this may be to use Trim Paths. Use the Search Help field at the top right corner of AE to find out how to setup and use trim paths. It's pretty easy.

    The tutorial you are watching is fair. The technique he uses will not follow curves very accurately, but your design may not require that. You can copy (cut) keyframes for Shape Layer paths or Mask Paths using the same set a keyframe and cut technique, then paste them directly to the position property of a null or any other X,Y position property by simply setting the first keyframe and pasting. If you have a hundred paths you need to copy and paste it will take a while, but it will be more accurate and faster than motion tracking in the long run. You end up with a set of rove over time keyframes for each path you copy and that makes it very easy to adjust the timing.

    Here's a short tutorial I did on the basic technique with the additional step of converting the X Y motion path to a X Z motion path for a camera. It may give you some ideas.

    If we knew a little more about your project we could probably give you some more suggestions that will make your production more efficient. There are a huge percentage of tutorials on YouTube that present inefficient techniques that can, in some cases, get the job done. There are a bunch that present ideas and workflows that are dead ends. You have to vet your trainers. The tutorial you are looking at is not too bad, it's just not as efficient as it could be and it will only work on a limited number of shape layers. It wouldn't work at all if you were trying to trace around the outside of a large circle in just a few frames. You would get a stream of particles that formed a diamond-shaped or octagonal path if there was not enough distance between the keyframes to approximate a circle.