If I had this project and I wanted to stay with illustrator files and not do an extrusion and add texture maps I would start in Illustrator by creating the L shape that you are going to extrude first and make note of the dimensions. Then I would create a separate layer for each surface that I would see. It would be a very good idea to work with Pixel Preview and Snap To Pixel turned on in AI so things line up, and your artboard should be the same frame size as the final comp. The AI file would look something like this as you were creating the shapes for each surface:

The Layer Panel would look something like this when the artwork was prepared and the 3D layer was ready to create. All of the surfaces are exactly at the center of the artboard.
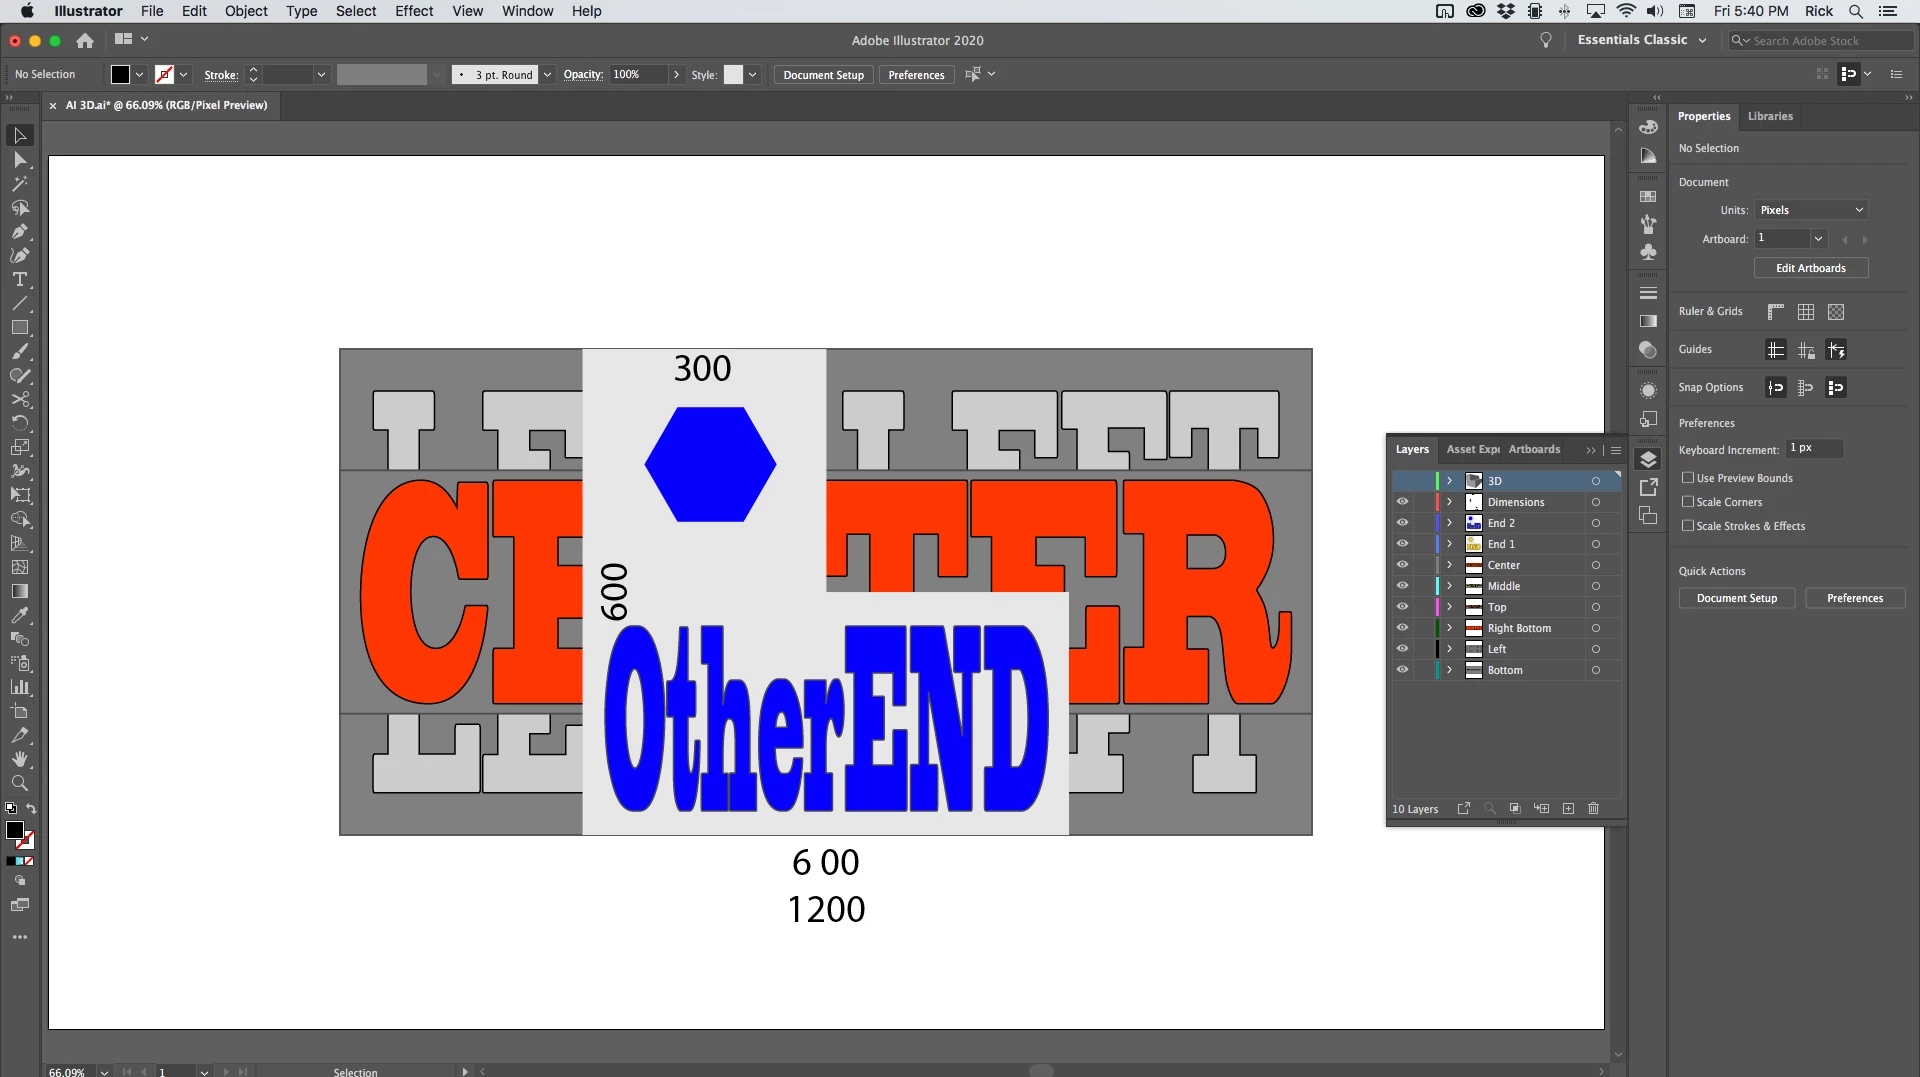
In this case, my end layer is 600 X 600 with a 300 X 300 cutout. I plan to extrude the end of 1200 pixels. These are my extrusion settings:
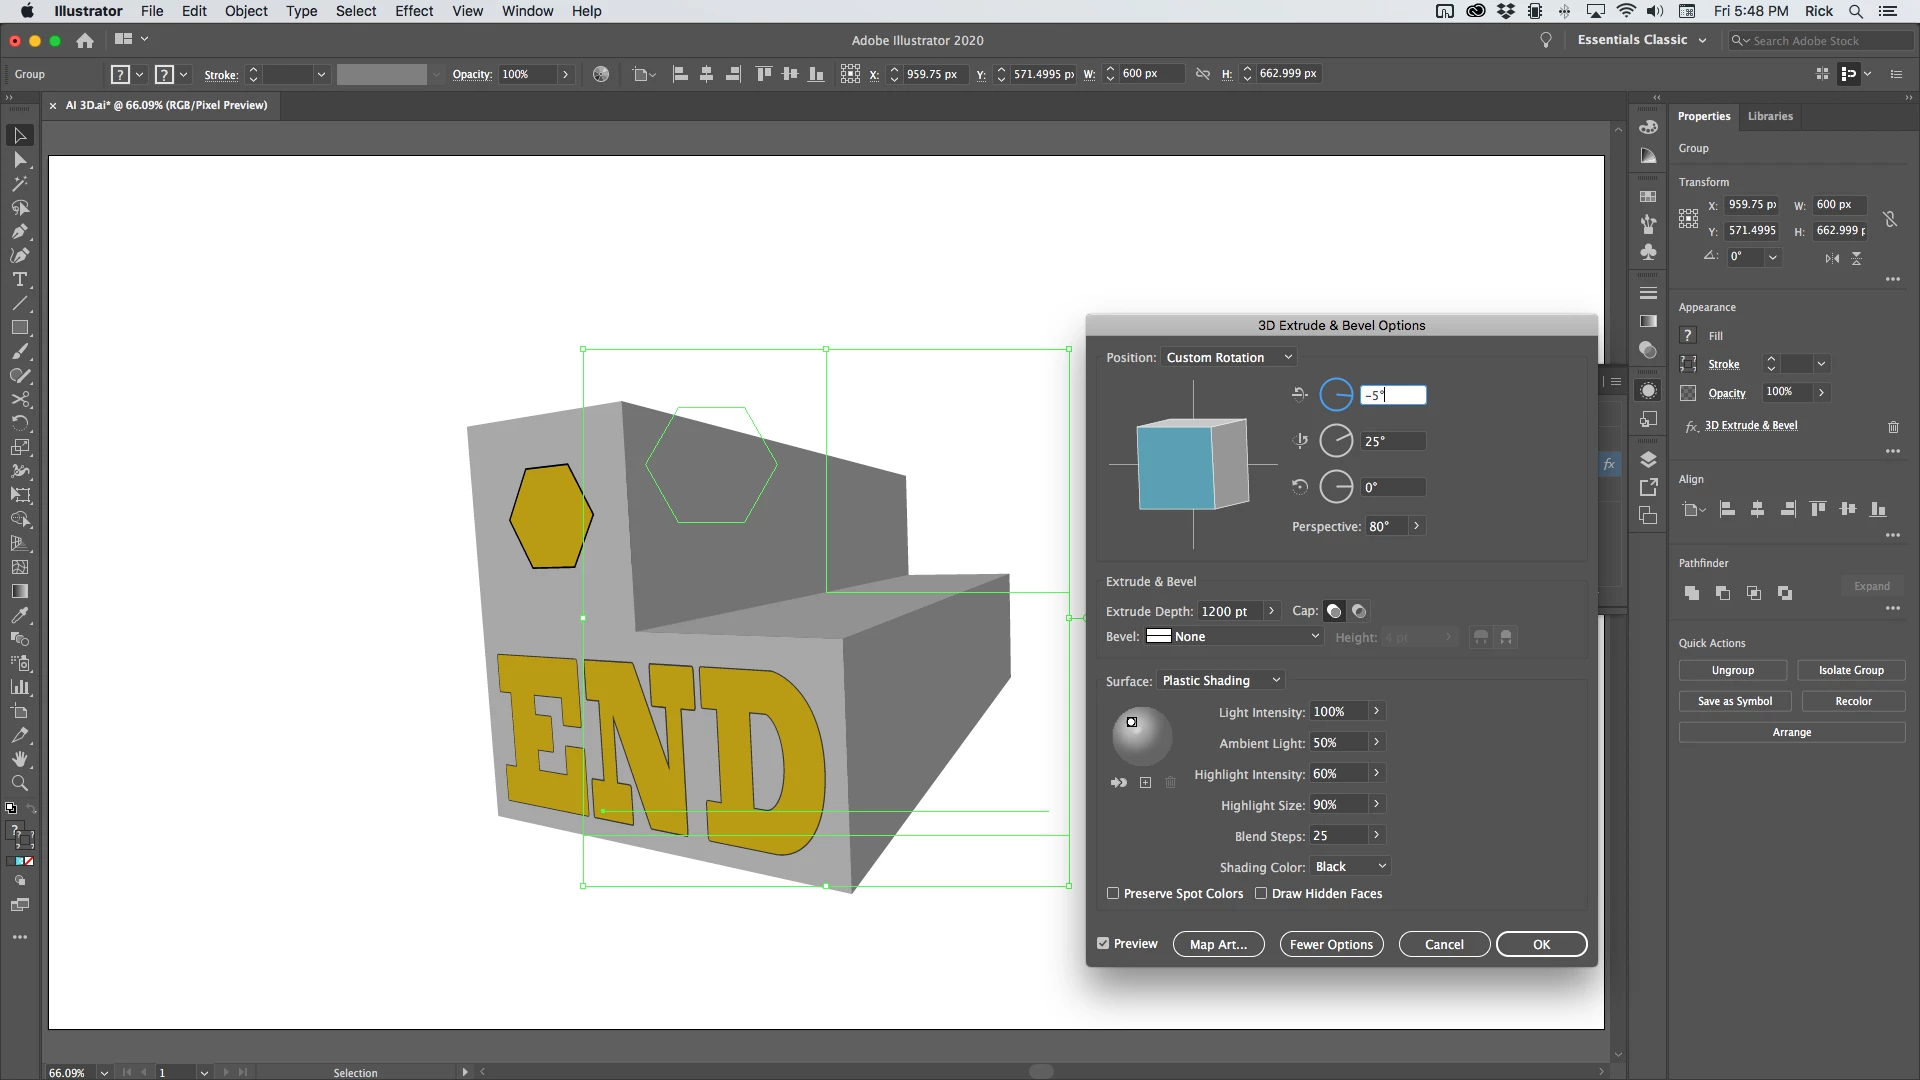
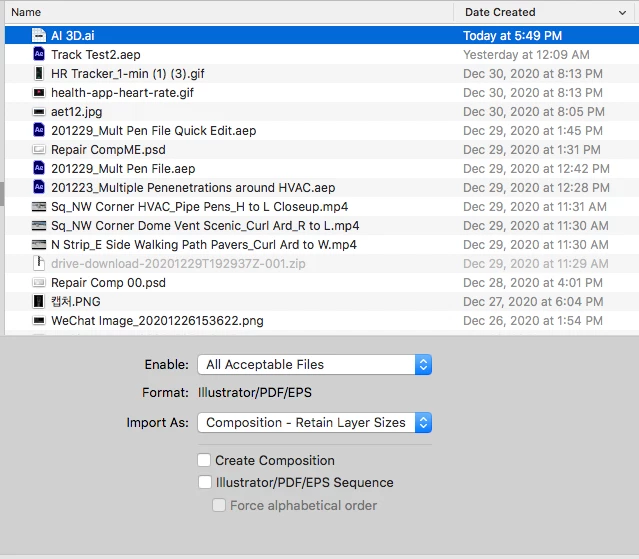
Make note of those settings, save the AI file, and import as a composition retaining layer size.
Inside AE you open up the comp that has been created, hide the 3D layer for later, then start assembling your 3D layers using Rotation and Anchor Point offsets until you get the shape assembled. It's all mathematical so lining up the surfaces accurately is just a matter of typing in the correct rotation and anchor point offsets for each layer. The next step is to add a camera. This kind of looks like the camera is pretty close to the shape so I'll pick a 35MM lens as a starting point. It's probably going to be way off but it's a good starting point. Then I add an Orbit Null to the comp using the Layer/Camera menu. The 3D settings in AI are -5, 25, and zero. You'll have to invert the angle for Y rotation so the Orbit Null should be set to -5 in X and -25 in Y. For this file, Z can stay at 0.
Perspective is controlled by Camera Position and framing is controlled by focal length or Zoom in AE's camera so I would press AA to open up the Camera settings and set a keyframe for Zoom, then press Alt/Option + p to set a keyframe for the position. The next step is to press U so you just have those two values to adjust. I ended up with something like this right after making a couple of adjustments to Zoom and just the Z position. That's the only value I want to adjust because the Orbit null is at the comp center and X and Y are controlled by the orbit null.
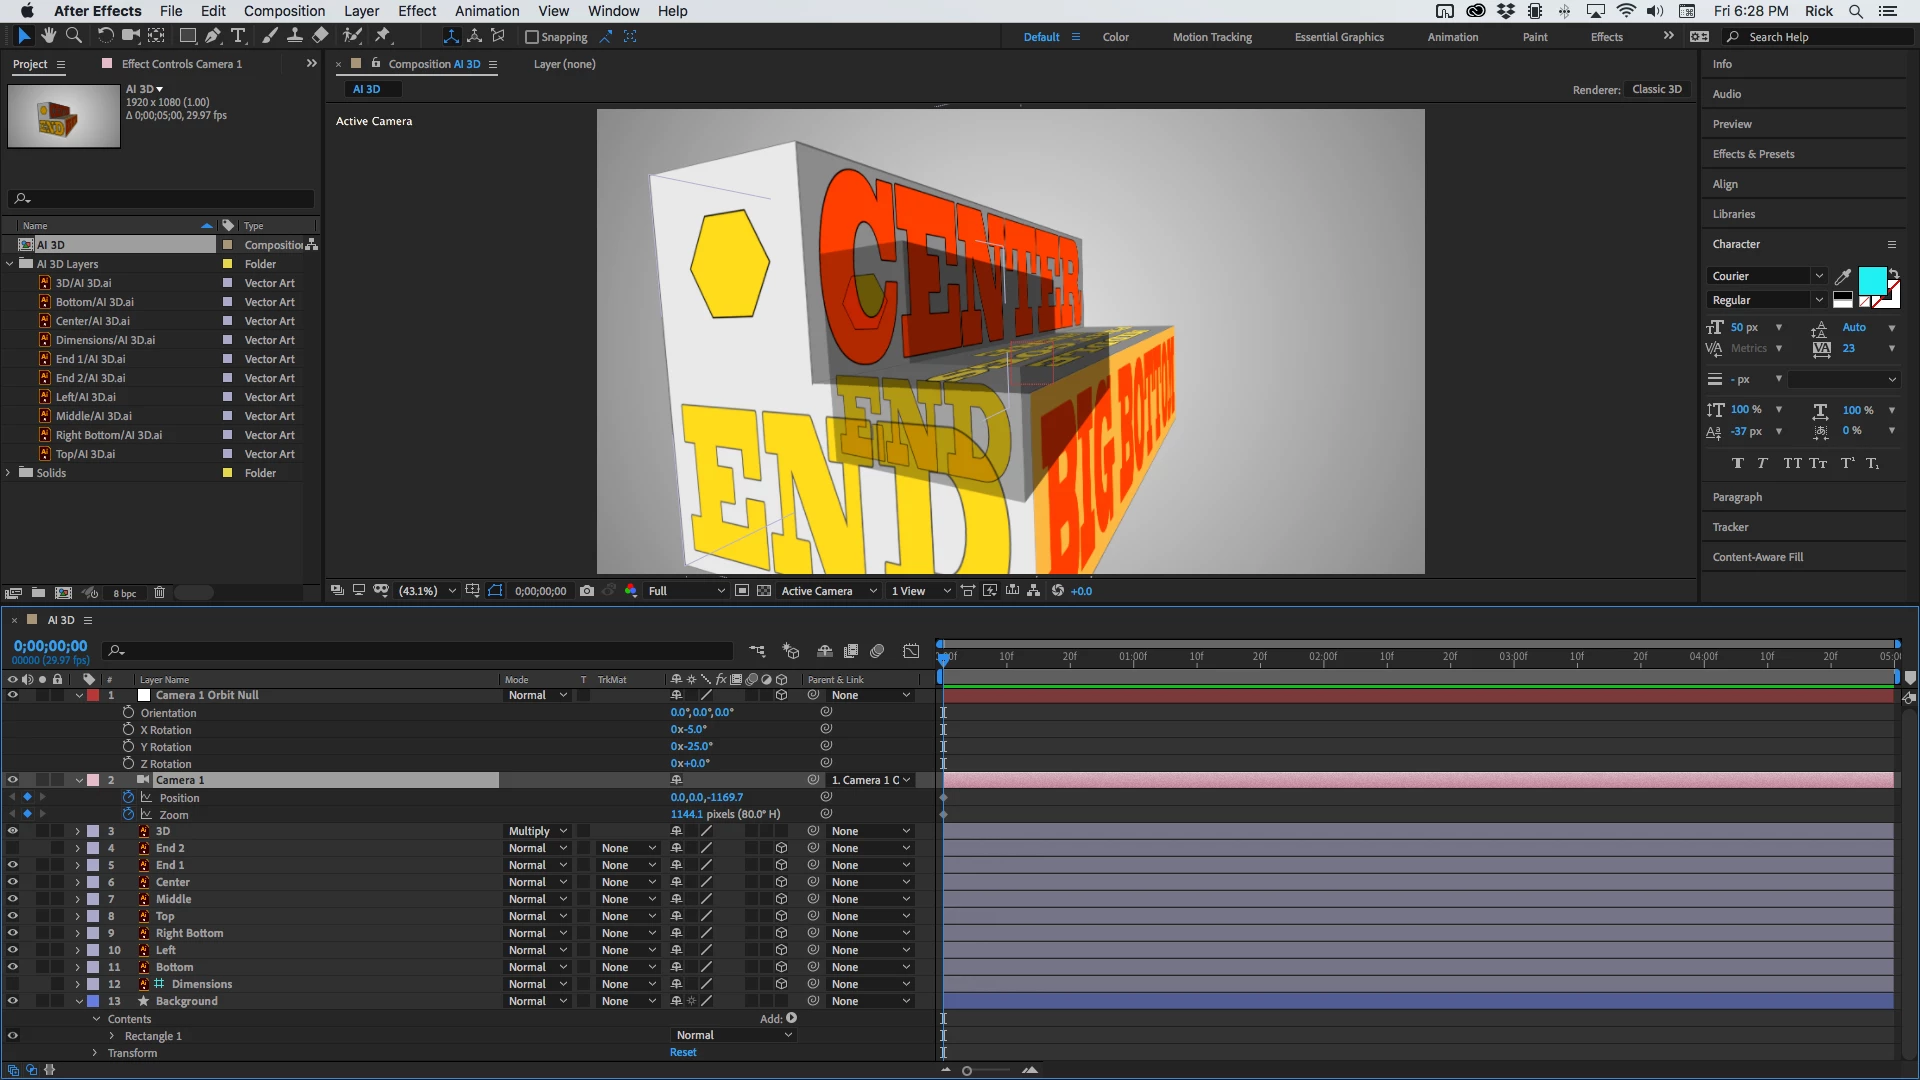
I can tell that the camera is too far away because the angles are not steep enough and the zoom value is too big because the size of the 3D model is larger than the 3D AI layer. Forgot to mention that the 3D layer is only a placeholder, should be a guide layer so that it won't render, and I set the Blend mode to Multiply so I could easily see through it. A couple more tweaks of Zoom and Position and I've got things lined up. The keyframes at frame zero set the resting place so I can now animate the camera the way I like and get back to the right home position without any problems. Here's the comp with things set up and ready for animation:
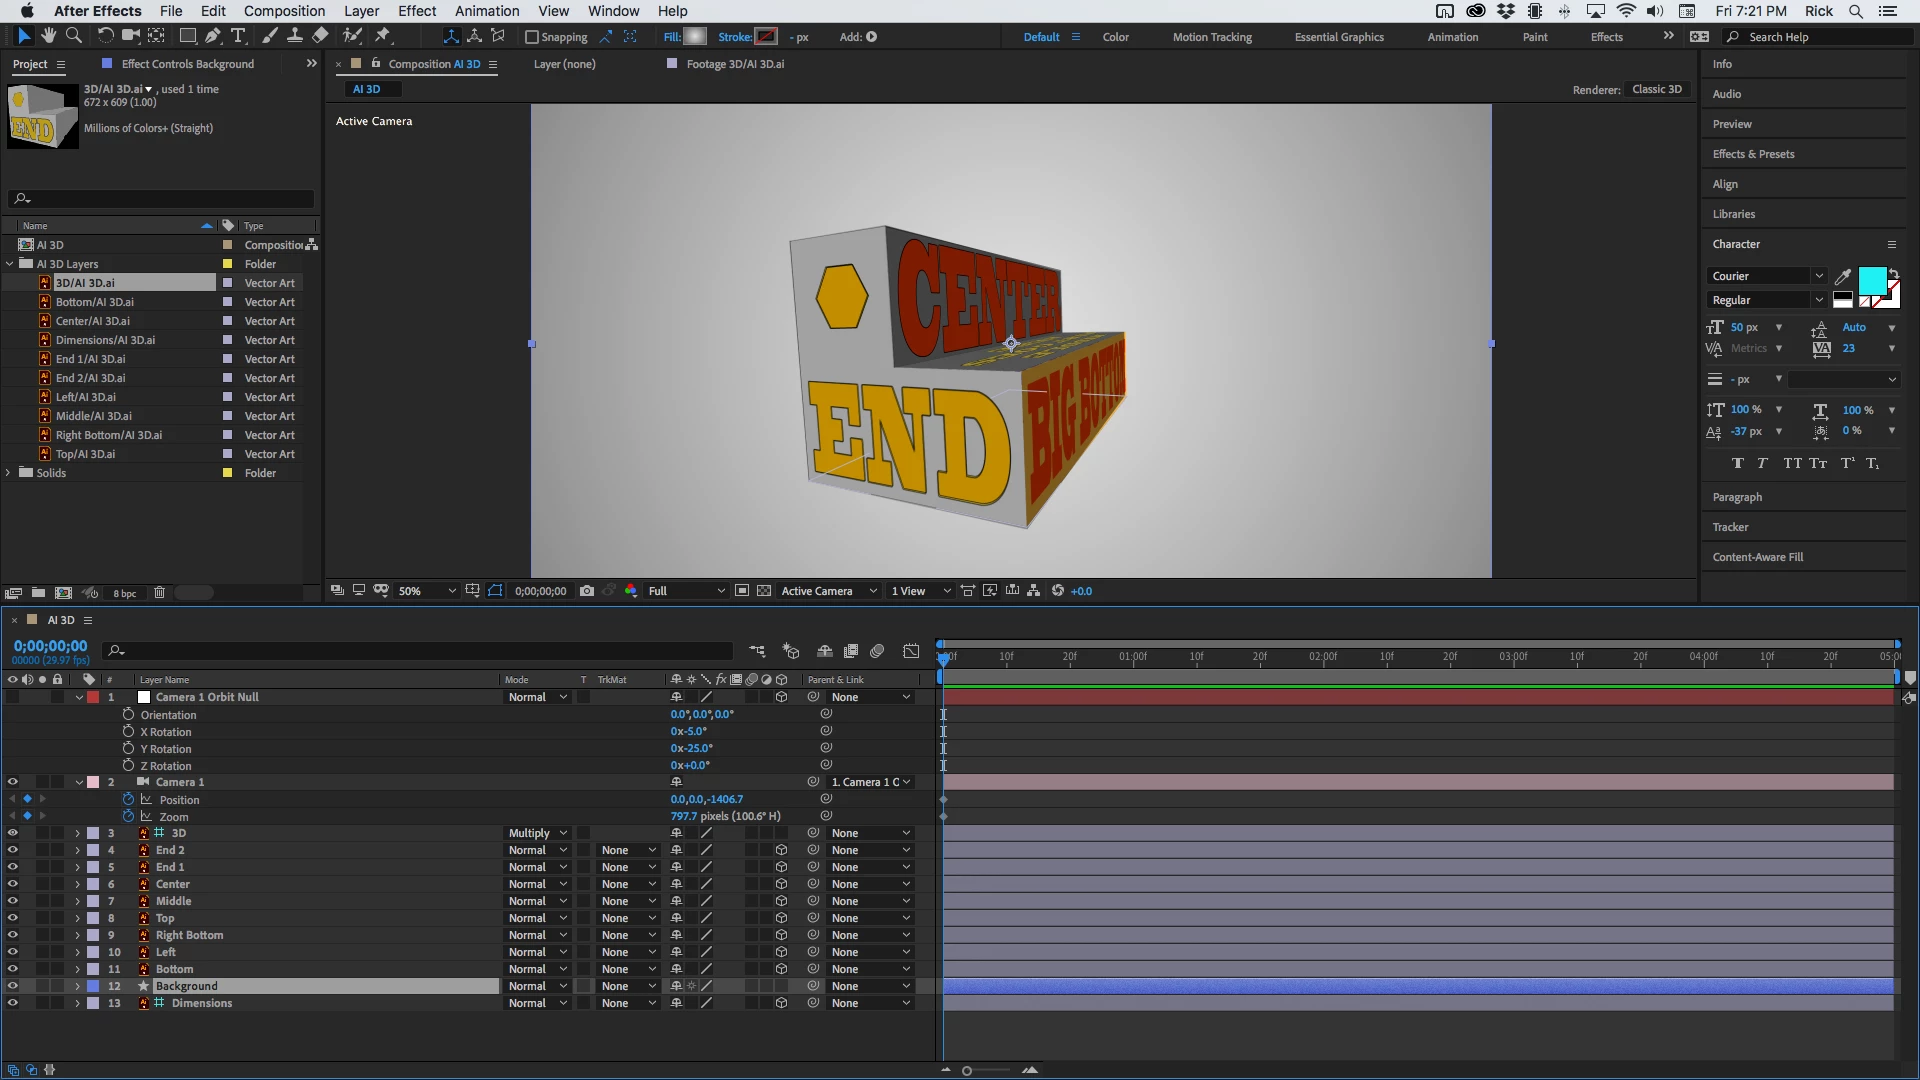
Here's a preview after adding a couple of keyframes with the original 3D Guide layer from AI showing the accuracy of the move:

And if you want to take a deeper look here's the Project file.
Unfortunately, I cannot find a mathematical relationship between the Zoom value in Illustrator's 3D effect and focal length and zoom in After Effects. As long as you fully understand that framing is controlled by focal length (zoom) and perspective is camera position, you should be able to match up any 3D model created in AI with a 3D shape in After Effects or an extruded shape.
