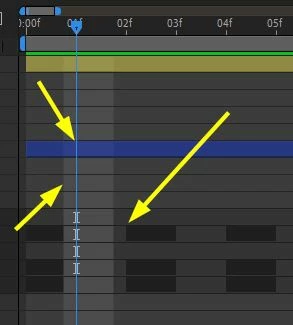
When you zoom into the timeline far enough, you can view the shutter angle of the virtual comp camera. Your screenshot shows a shutter angle of about 270º and zero offset. This will exaggerate the motion blur on layers.
A shutter angle of 180º and an offset of -90º will closely match the motion blur of a traditional motion picture camera. The frame rate doesn't change the display in the timeline. The highlighted area has nothing to do with timing. It is not a bug.
If you change the frame rate of a composition from 60 fps to 24 fps, the keyframe positions may not line up with the start of a frame after the rate change. This is also not a bug because keyframes are set based on time, not frame number. If a keyframe is set at 0:00:03:33 in a 60 fps comp, the time of the keyframe will be 3.33 seconds. If you change the frame rate to 24 fps, the keyframe will still be at 3.33 seconds, but it will show up just to the right of the start of frame 0:00:03.13. That is also not a bug, and it won't foul up the timing of the animation because it will still move at the nearest frame.