Participant
January 22, 2021
Answered
Fading in distance
- January 22, 2021
- 3 replies
- 1002 views

Your cropped screenshot is useless for diagnosing problems. Here's a flow chart of your comp:
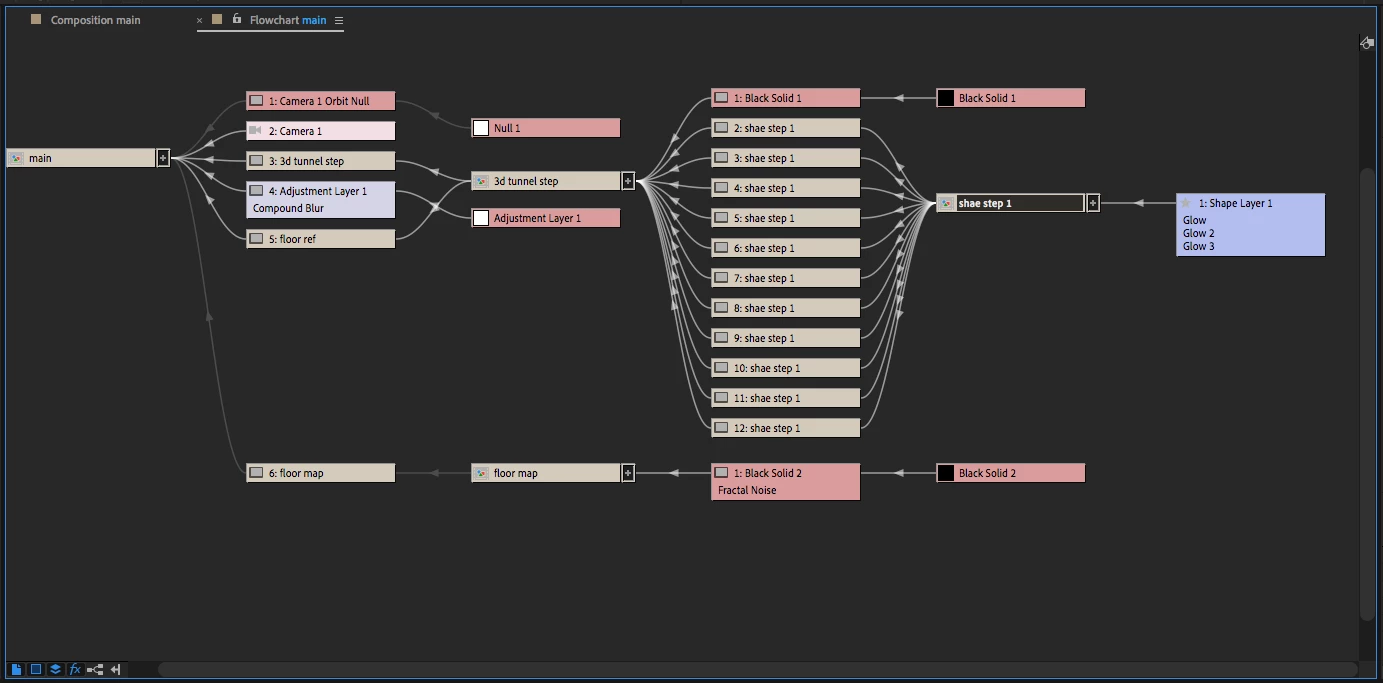
I don't see Set Matte anywhere. I see a black solid with a feathered mask in the 3D tunnel setup comp. If you use Set Matte and choose the Black Solid as the source you will have to put it on an Adjustment layer, choose Black Solid + Mask and Effects and invert the alpha to get it to create an opacity fade that fakes decreasing opacity with distance. It would not work to add Set Matte to every duplicate of the tunnel.
I would not have pre-composed the shape layer, I would have just duplicated it and used an expression to offset each successive layer in Z. I would have then used either the distance from the camera or the distance from the comp center as a multiplier for opacity. Each successive 3D layer would become a little more transparent. You could do the whole thing in one comp and then apply your glow in the main comp. Adding Depth of field to the camera would enhance the effect.
I would set up the 3D tunnel by creating a single rectangle on a shape layer and naming that rectangle Master. I would then duplicate the rectangle and name the duplicate Slave. If I wanted the offset per layer to be 1000 pixels in Z I would add this expression to the position property of the Slave shape layer:
mstr = thisComp.layer("Master");
mstrIndex = mstr.index;
ofst = (mstrIndex - index) * 1000; //offset distance per copy
[mstr.position[0], mstr.position[1], mstr.position[2] + ofst]
If the camera was in the main comp and I wanted to control the opacity of a layer by the distance to the camera I would add this expression to the opacity of both the Master and Slave layer:
cam = comp("main").activeCamera;
ofst = cam.zoom;
dist = length(cam.toWorld([0,0,0]), position);
ratio = linear(dist, ofst, ofst * 6, 100, 0);
The ratio calculation controls how far it is between the layer with 100% opacity and the layer with 0% opacity. Now all you have to do to create your 3D tunnel is duplicate the Slave layer as many times as you want.
So to review, if you just want to use Set Matte then make sure that the layer and the effects masks have been selected and the layer used for the matte needs to be turned off. If you want to give the expressions a try, this is what the comp looks like:
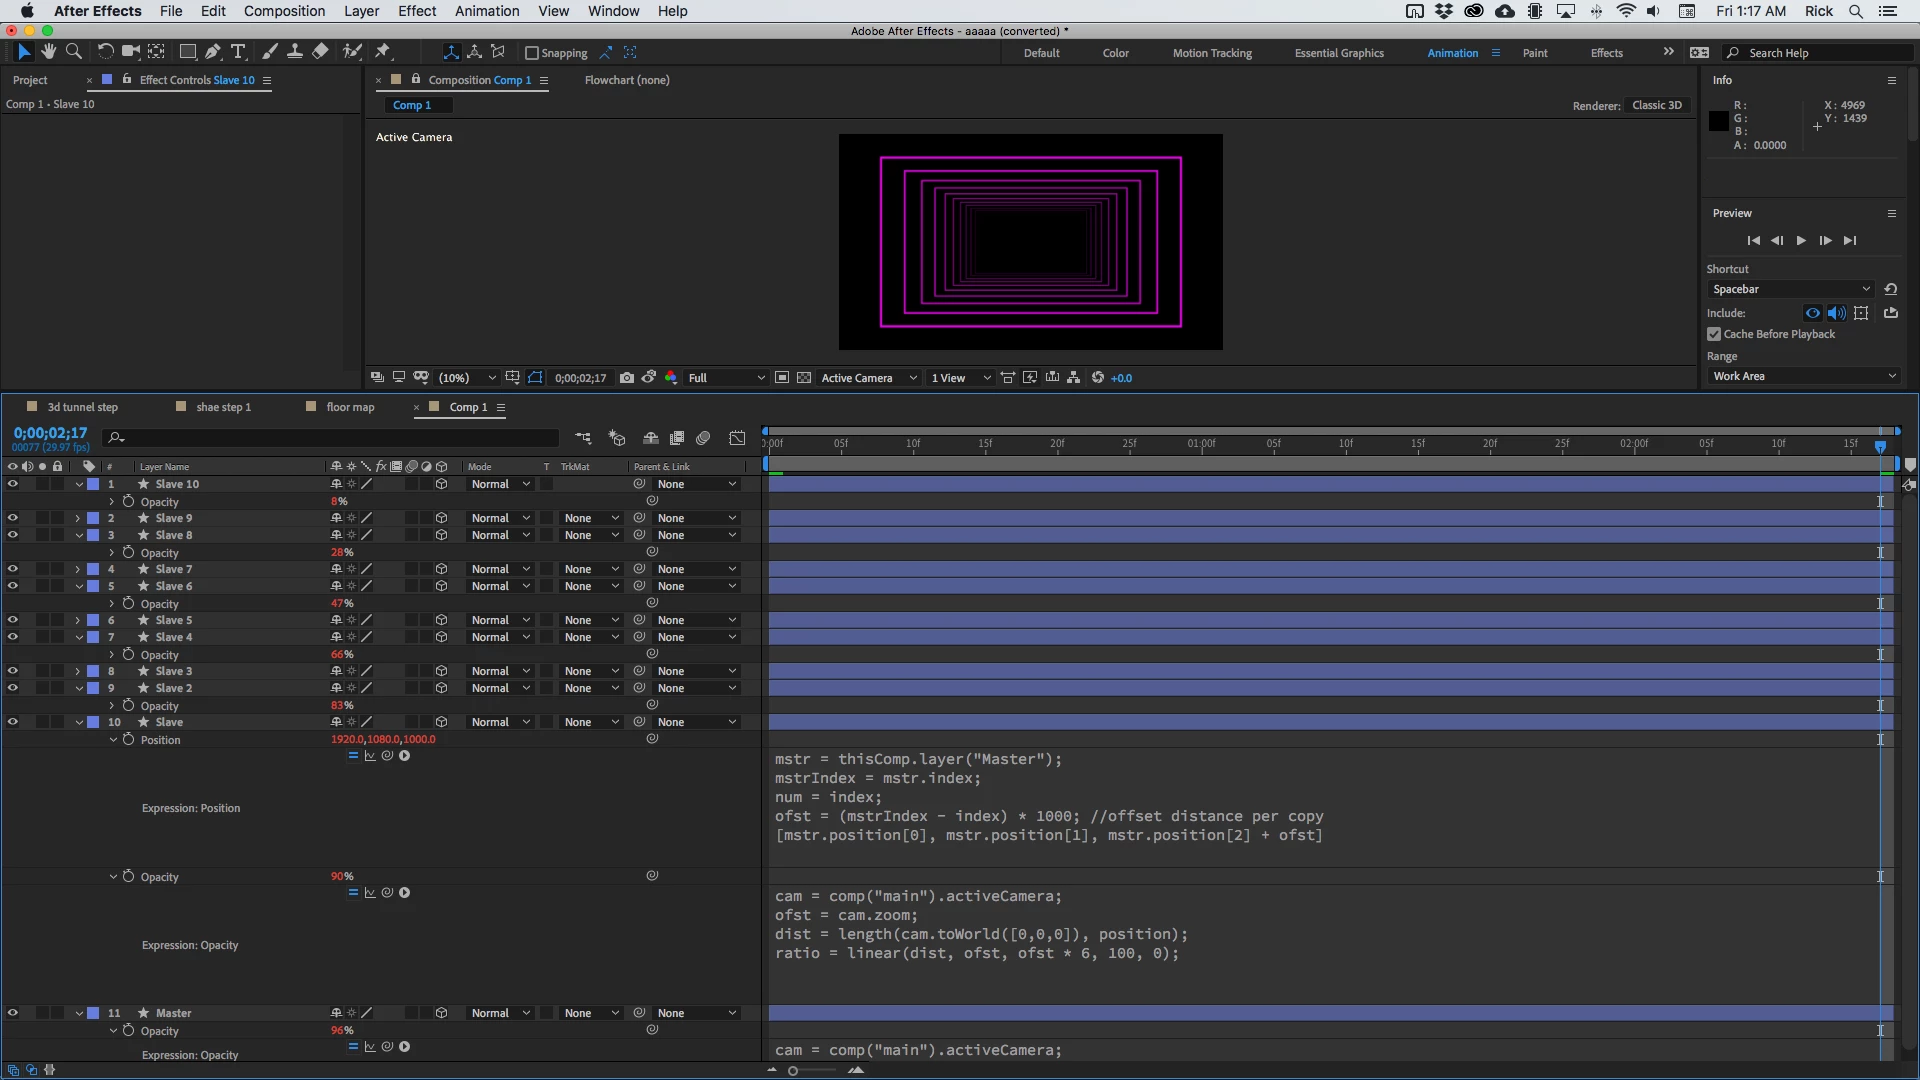
I'm showing you the expressions (slave layer) and the resulting opacity as the camera in the main comp starts moving through the tunnel.
I hope this helps.
You could add an adjustment layer on top of everything in the 3D tunnel comp or you could just add your glow effect in the Main comp.
Already have an account? Login
Enter your E-mail address. We'll send you an e-mail with instructions to reset your password.