S_ A
Inspiring
June 17, 2022
Answered

Follow along path not working

  • June 17, 2022
  • 3 replies
  • 4325 views

Hi,

I am using After Effects 2020.

So I wanna make a planet move around its orbit. Googled some youtube videos, But I can’t achieve the same effect.

I copied the path of orbit, and then pasted it on planet’s position property. Instead of rotating the planet it kept pasted in a different place!

Why?  What am doing wrong?

Even I tried ctrl+shift+v , it makes the black!

Thank you.

This topic has been closed for replies.
Correct answer Rick Gerard

Hello Gerard,

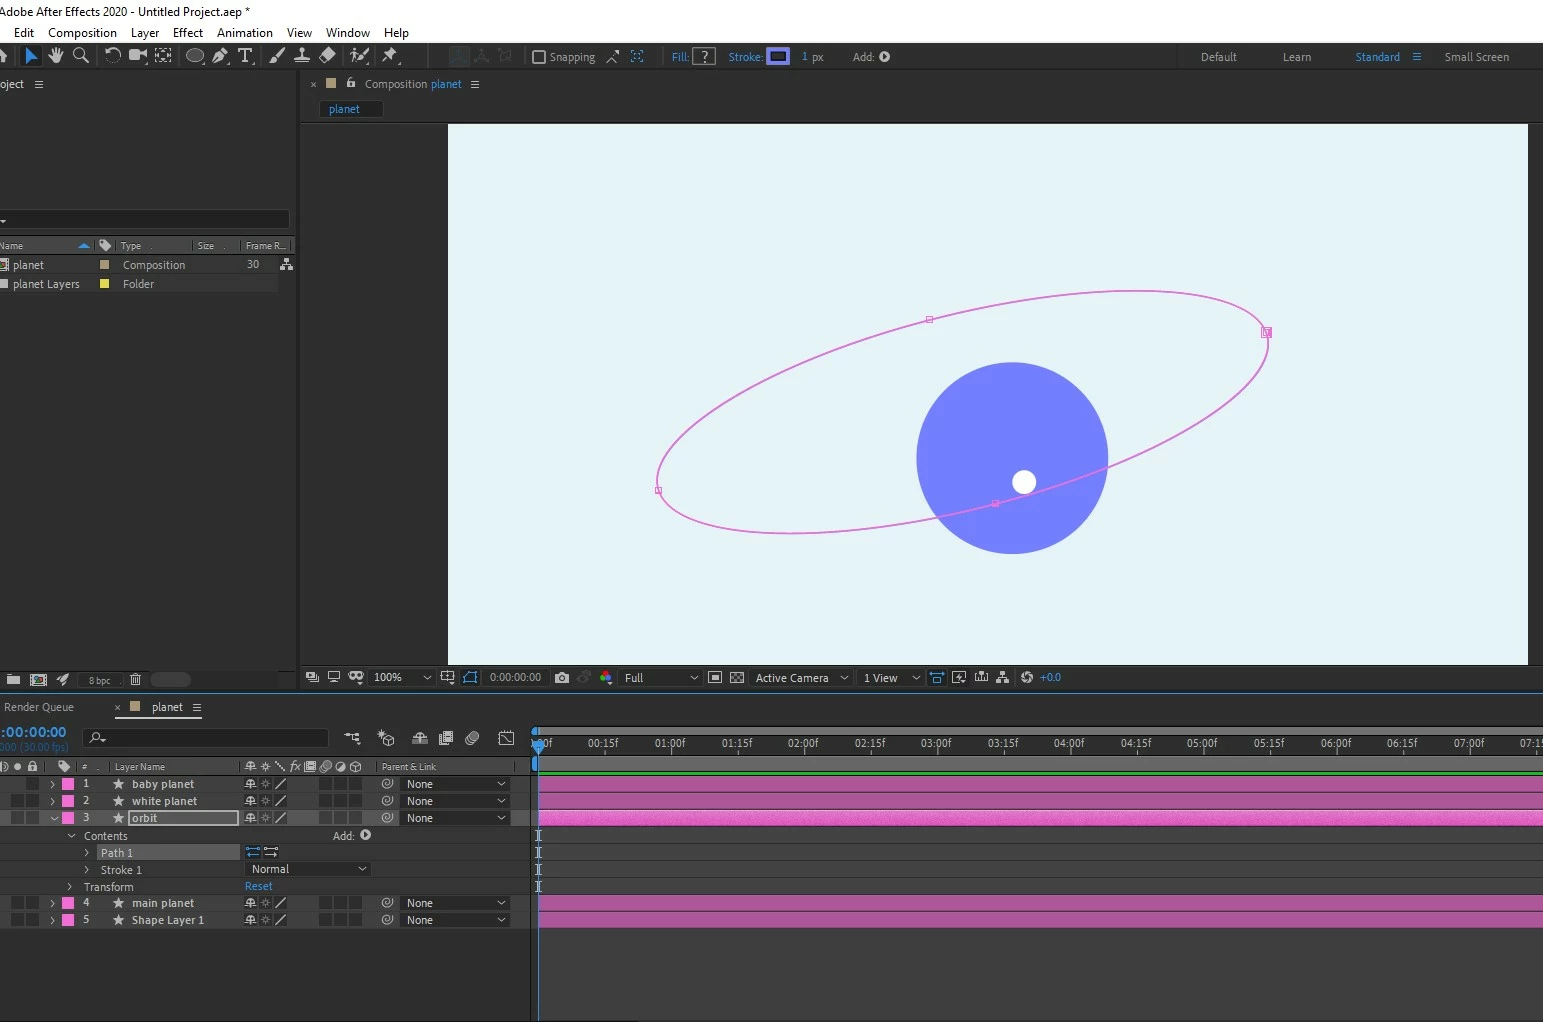
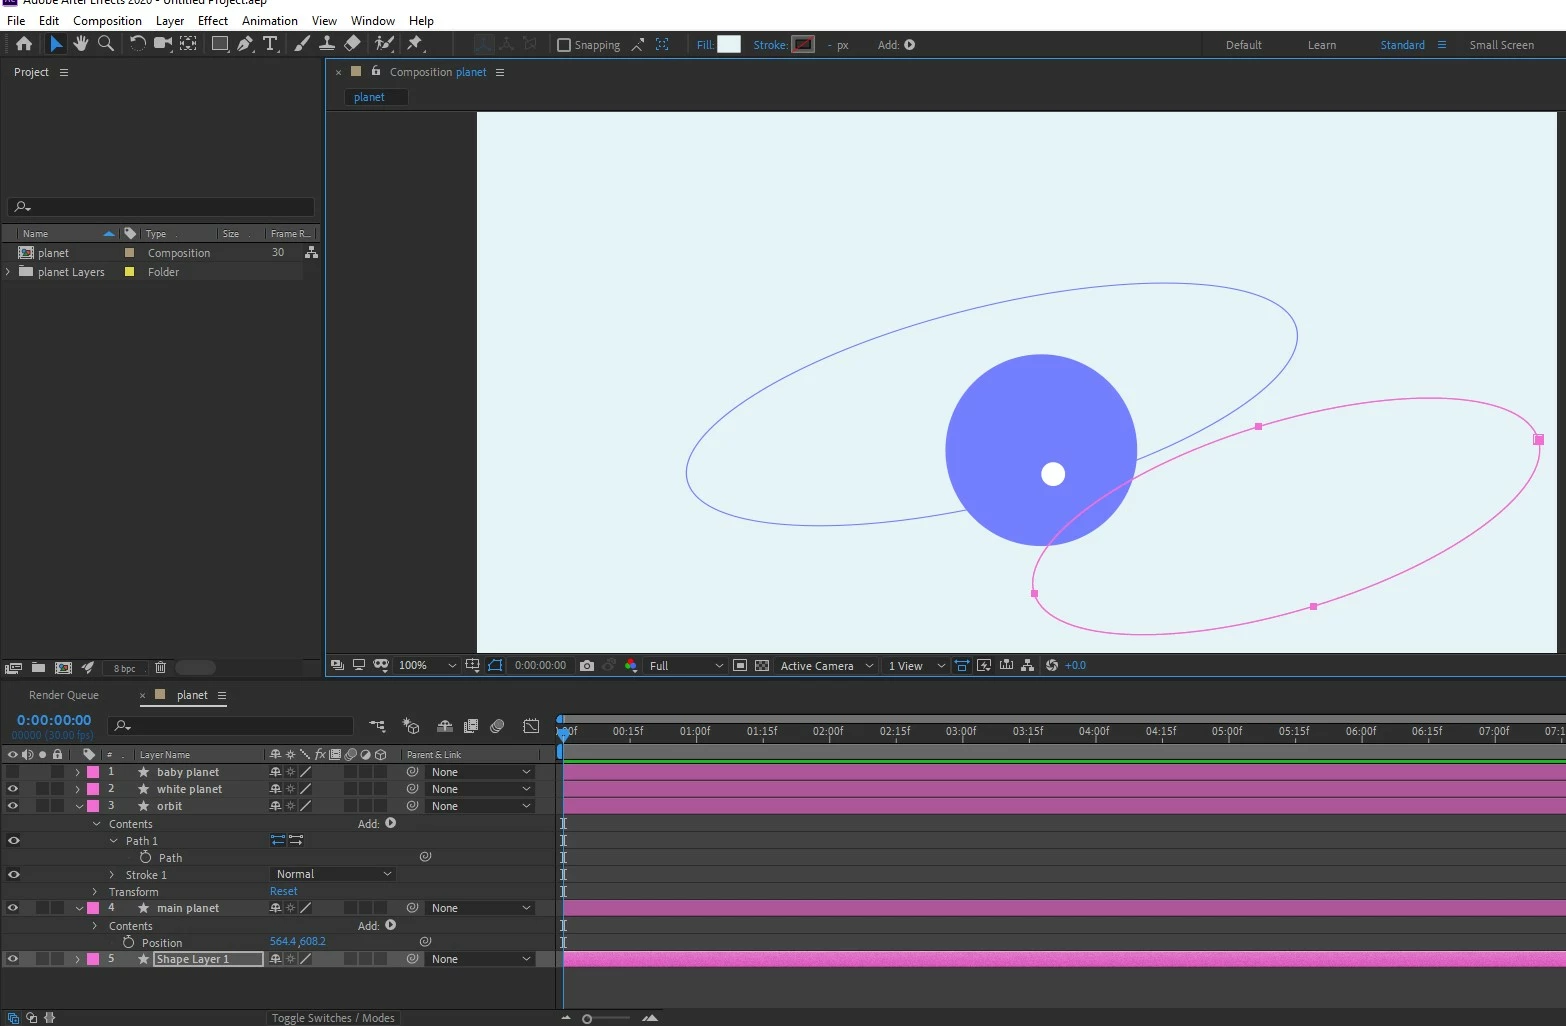
I tried the rectangle as a fill, as a stroke with same composition WxH

I tried putting the ellipse and rectangle in same layer and in separate layer.

Nothing works L :’(

I am providing all the scrrenshots of what you wanted to see.

Eagerly waiting for your guidance.

Thank you.


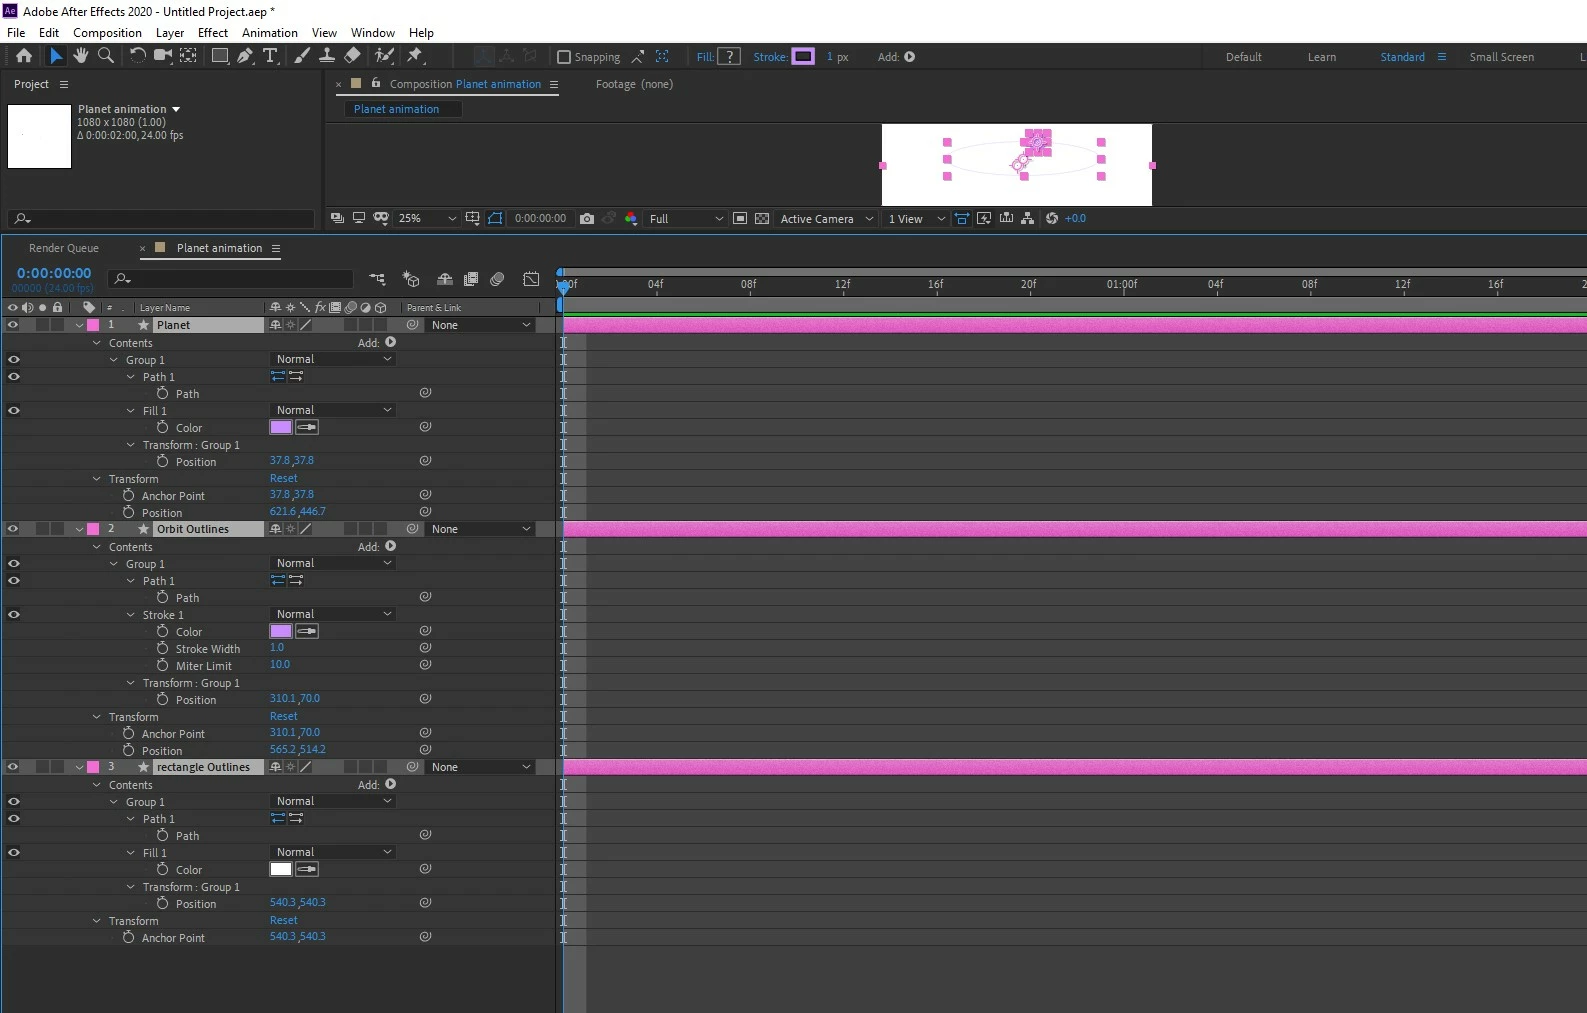
The Comp-sized solid needs to be in the same layer as the motion path you want to turn into a motion path. Here is how I would layout and setup the Illustrator file for the animation you are planning:

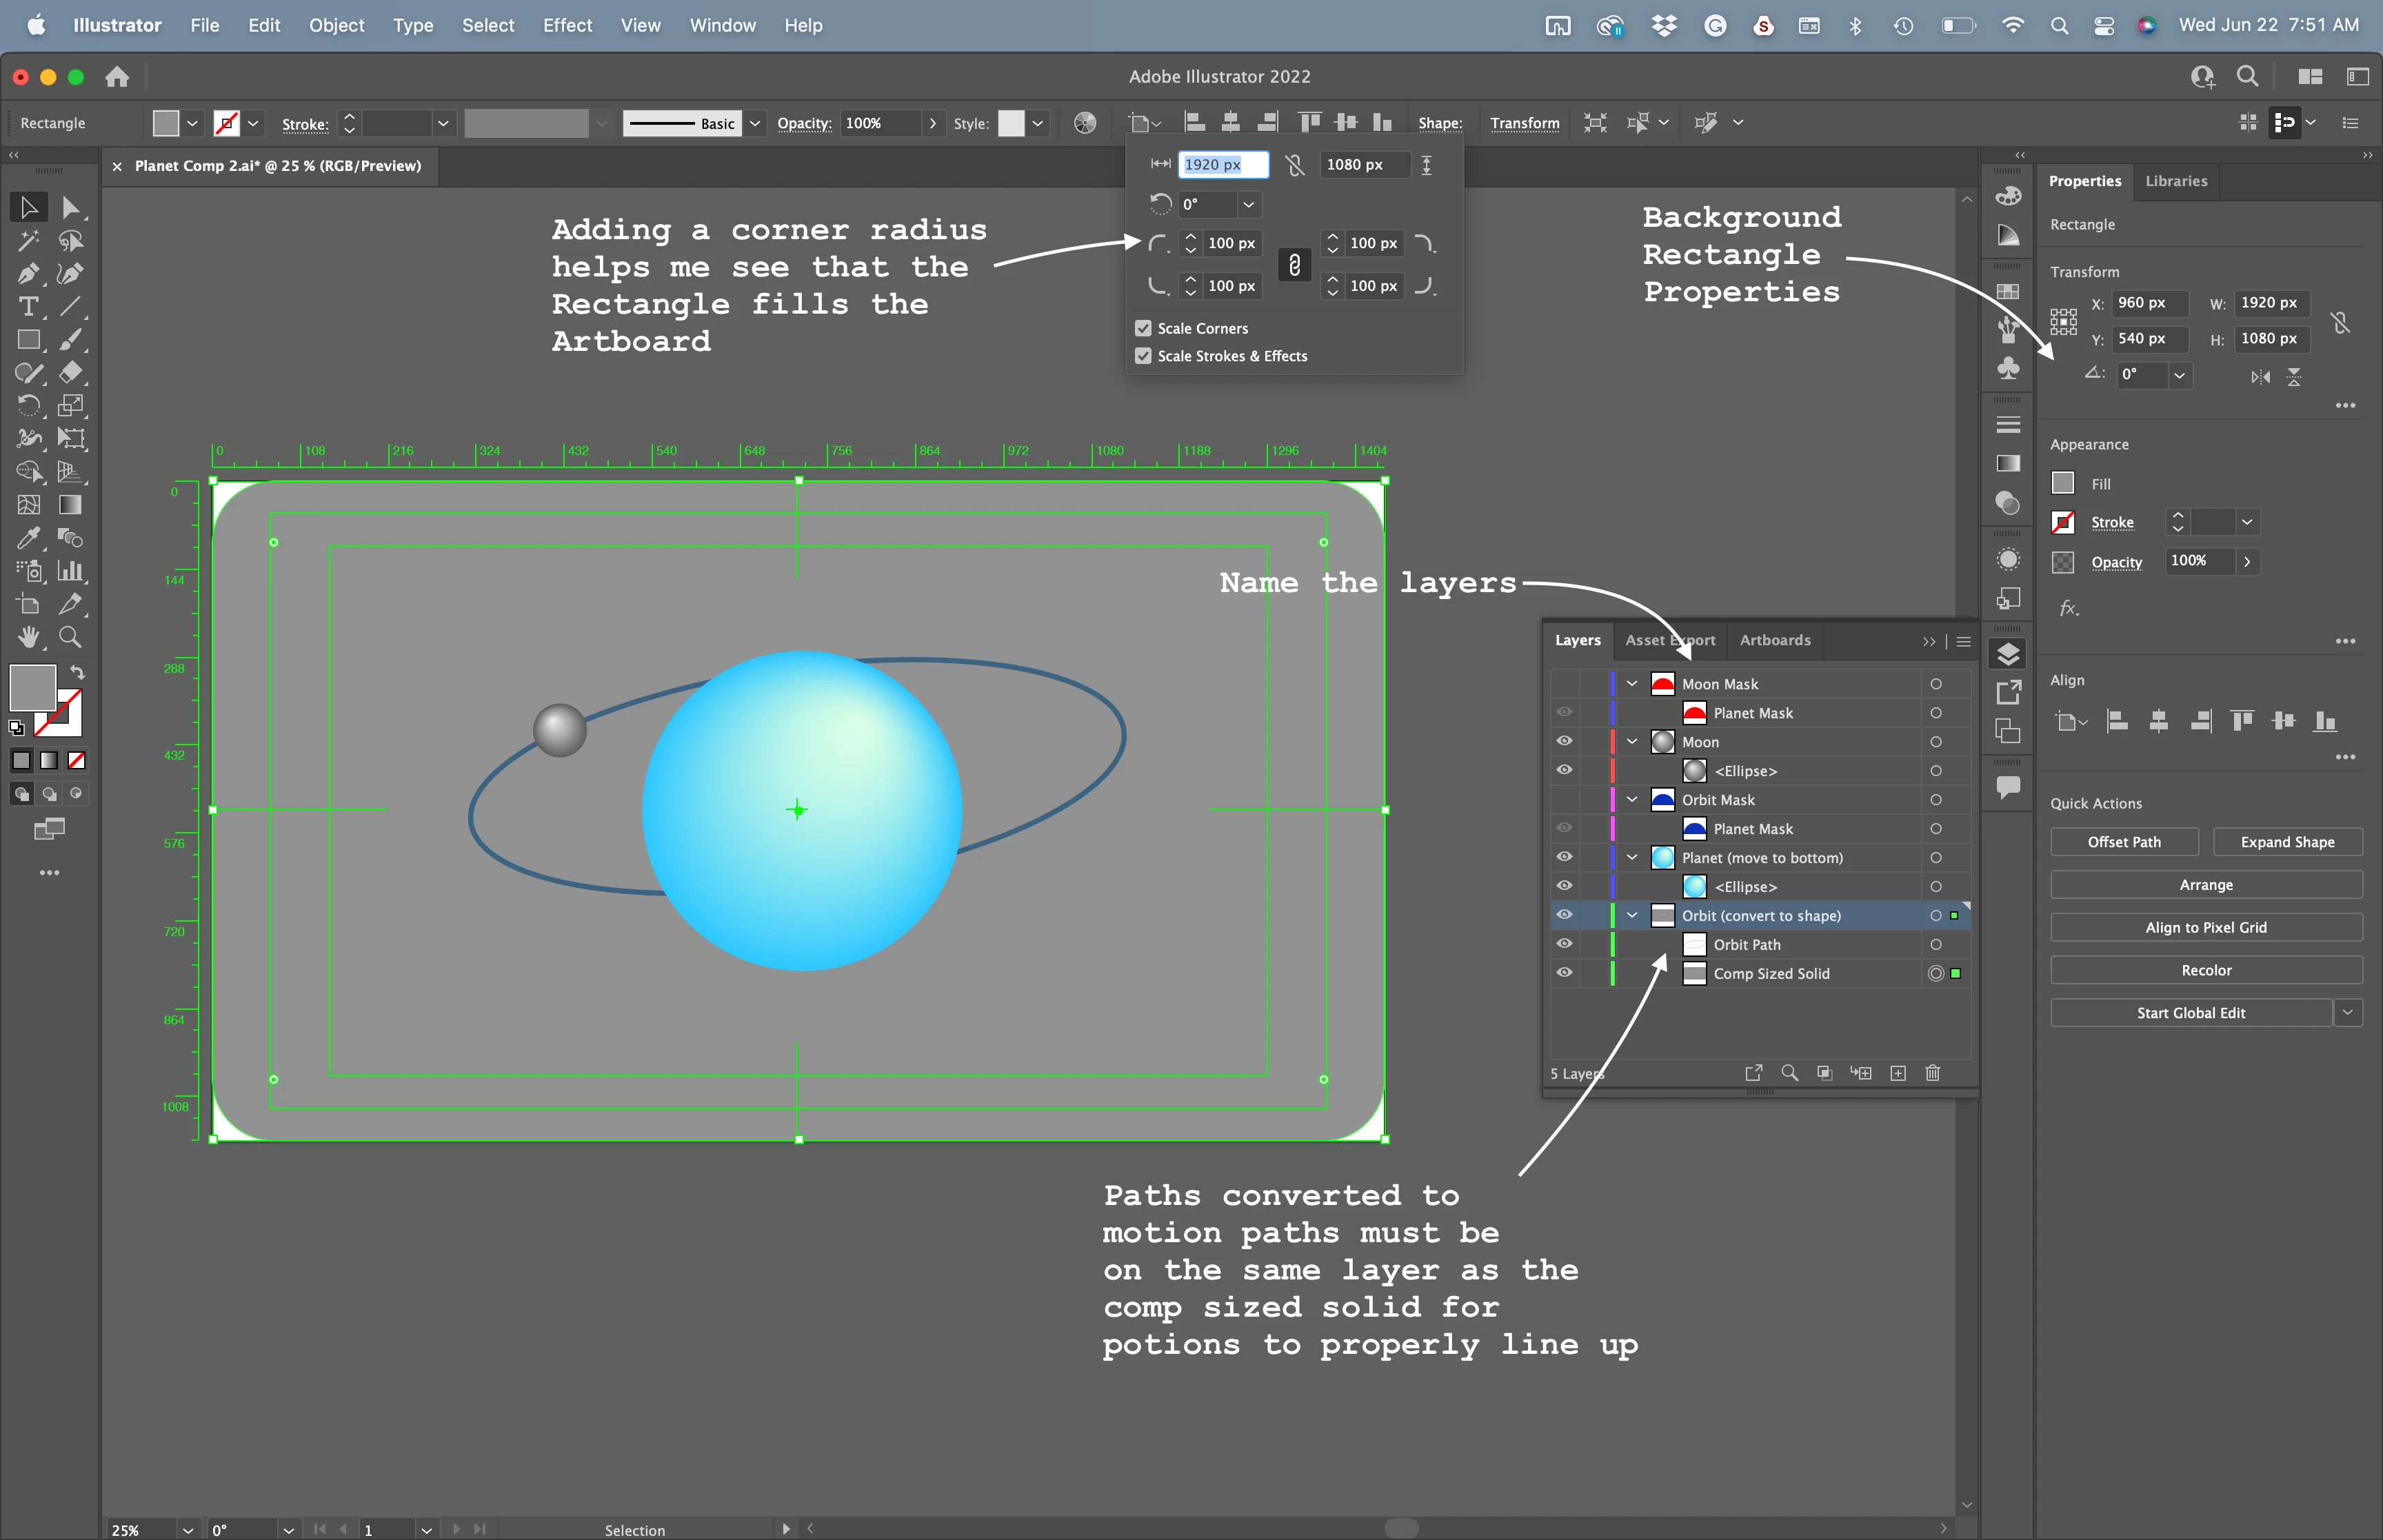
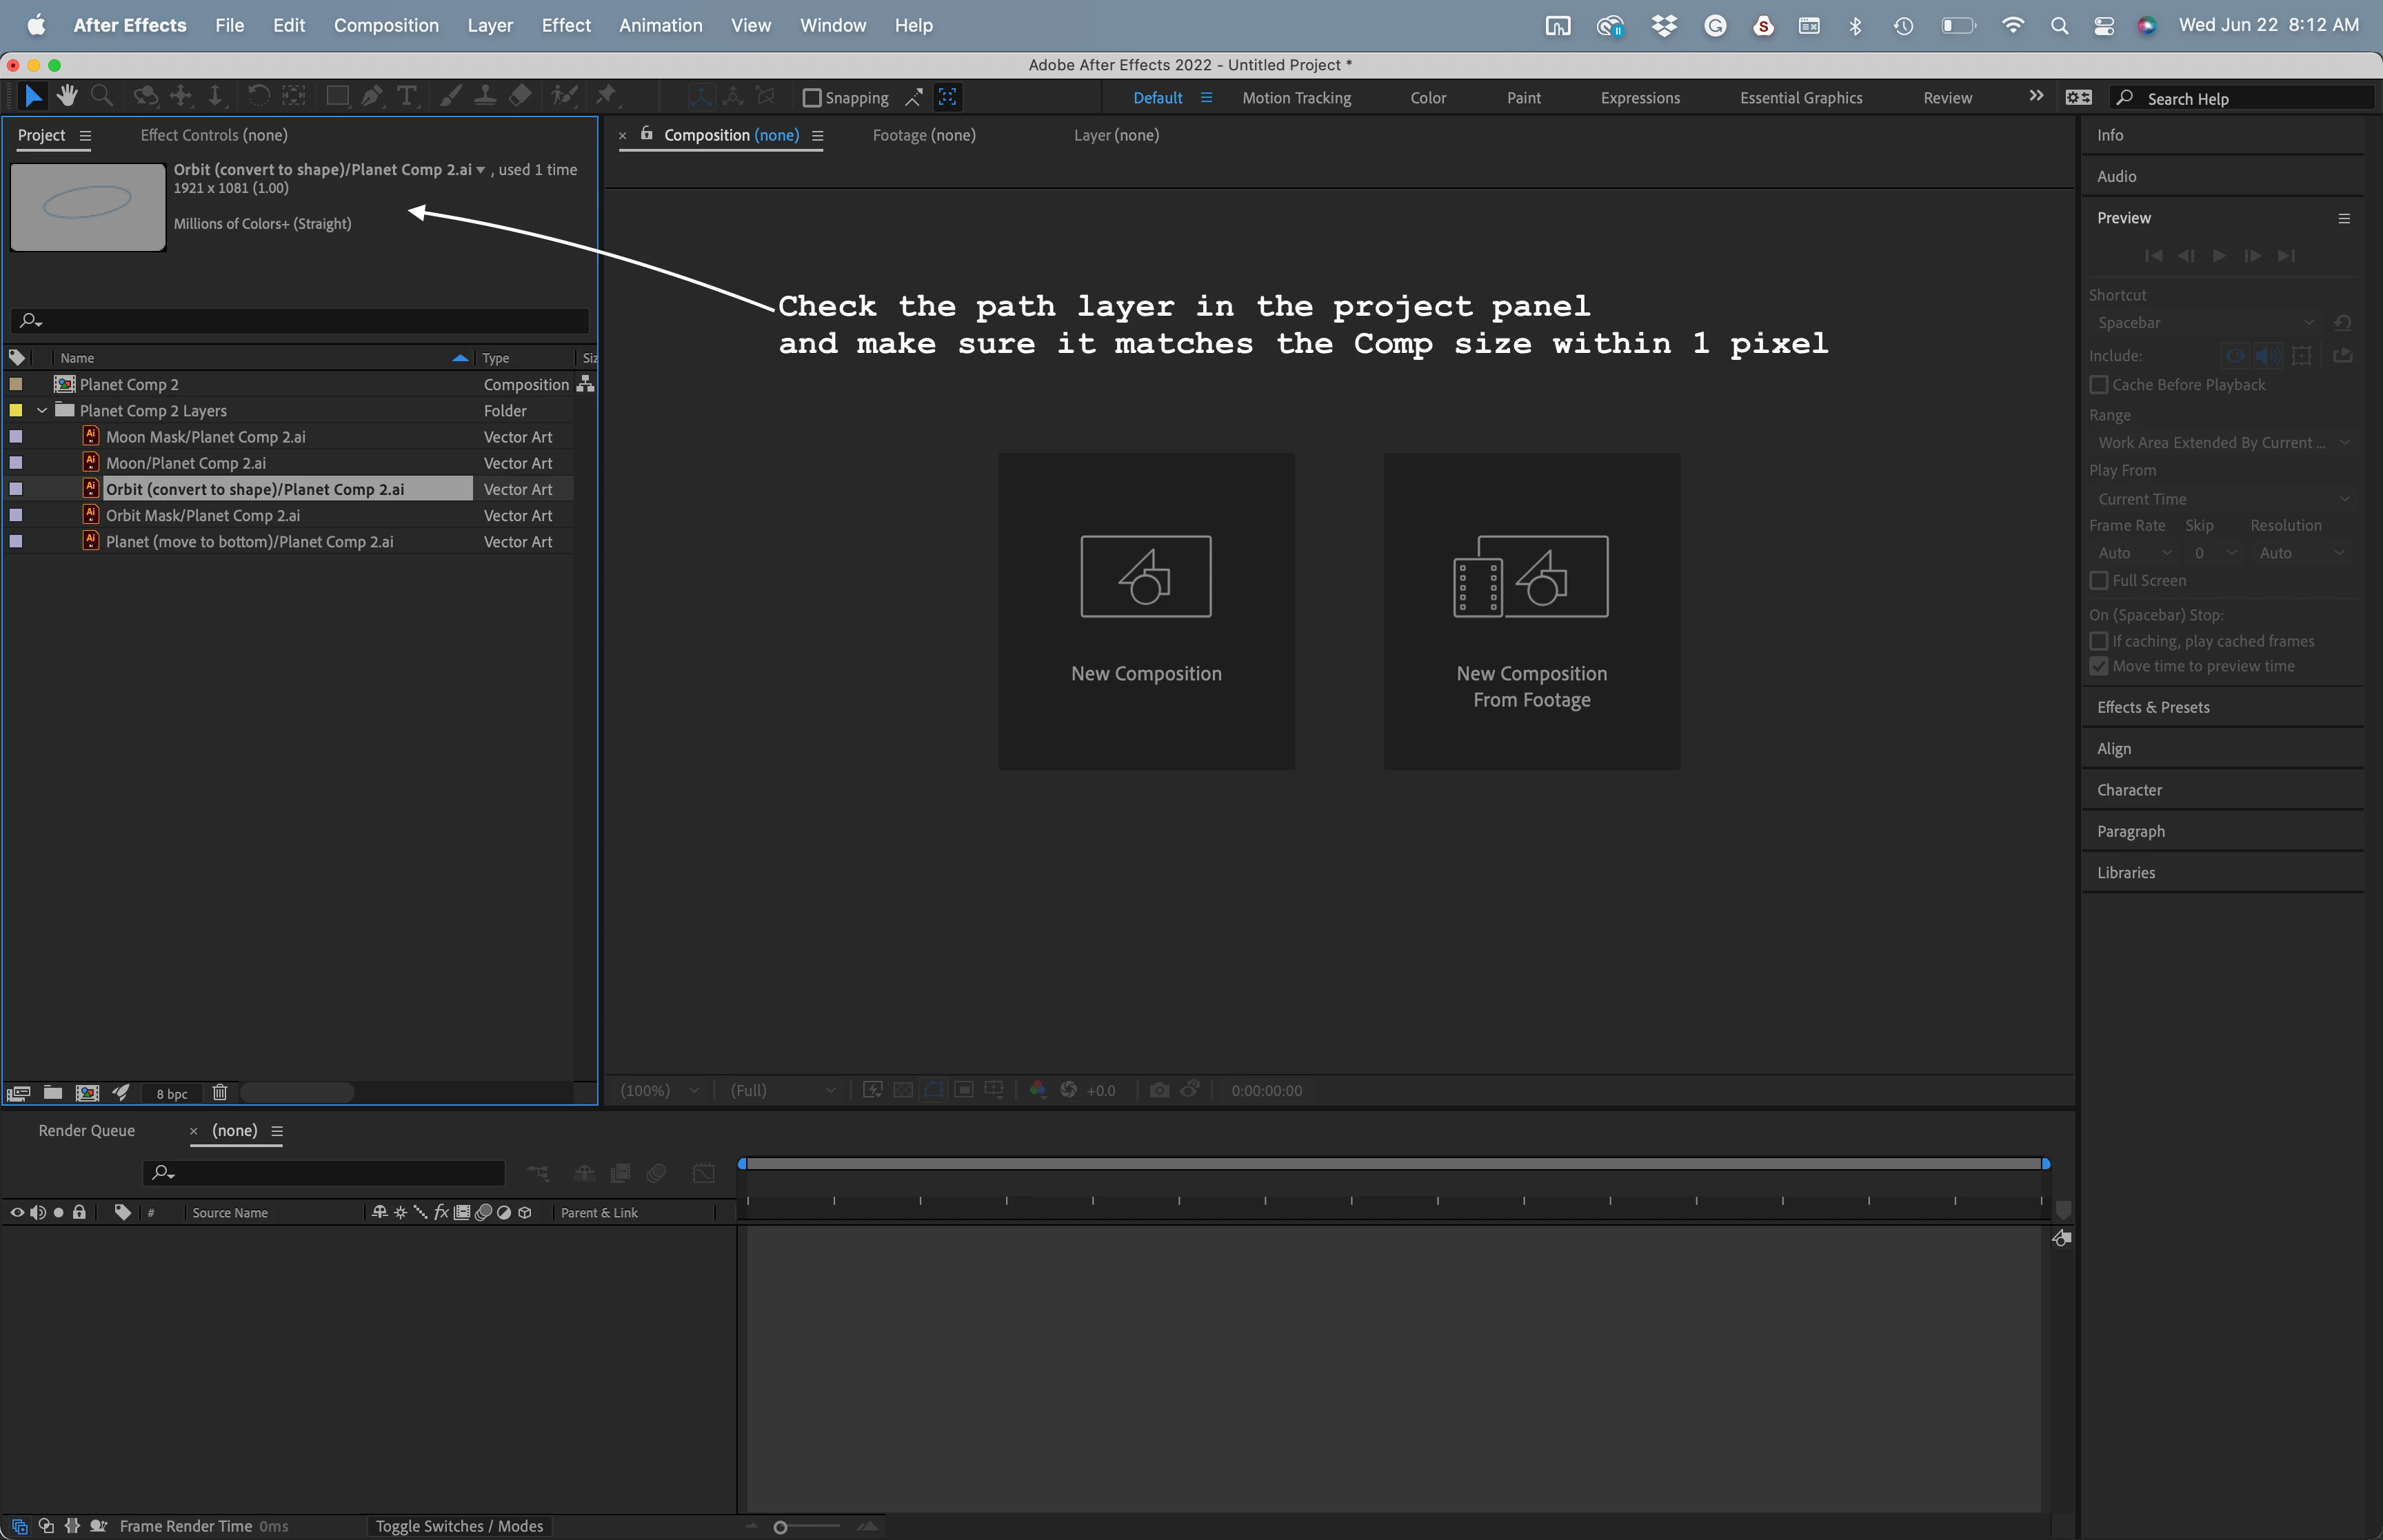
When you import the AI file as a composition retaining layer size, check the layers in the Project Panel. The layer with the motion path or paths you want to copy should be within one pixel of the frame size of the composition. Sometimes the background layer comes out perfect. Most of the time, it is one pixel off, but it is only by less than a 10th of a percent, so you should not be able to see the difference.

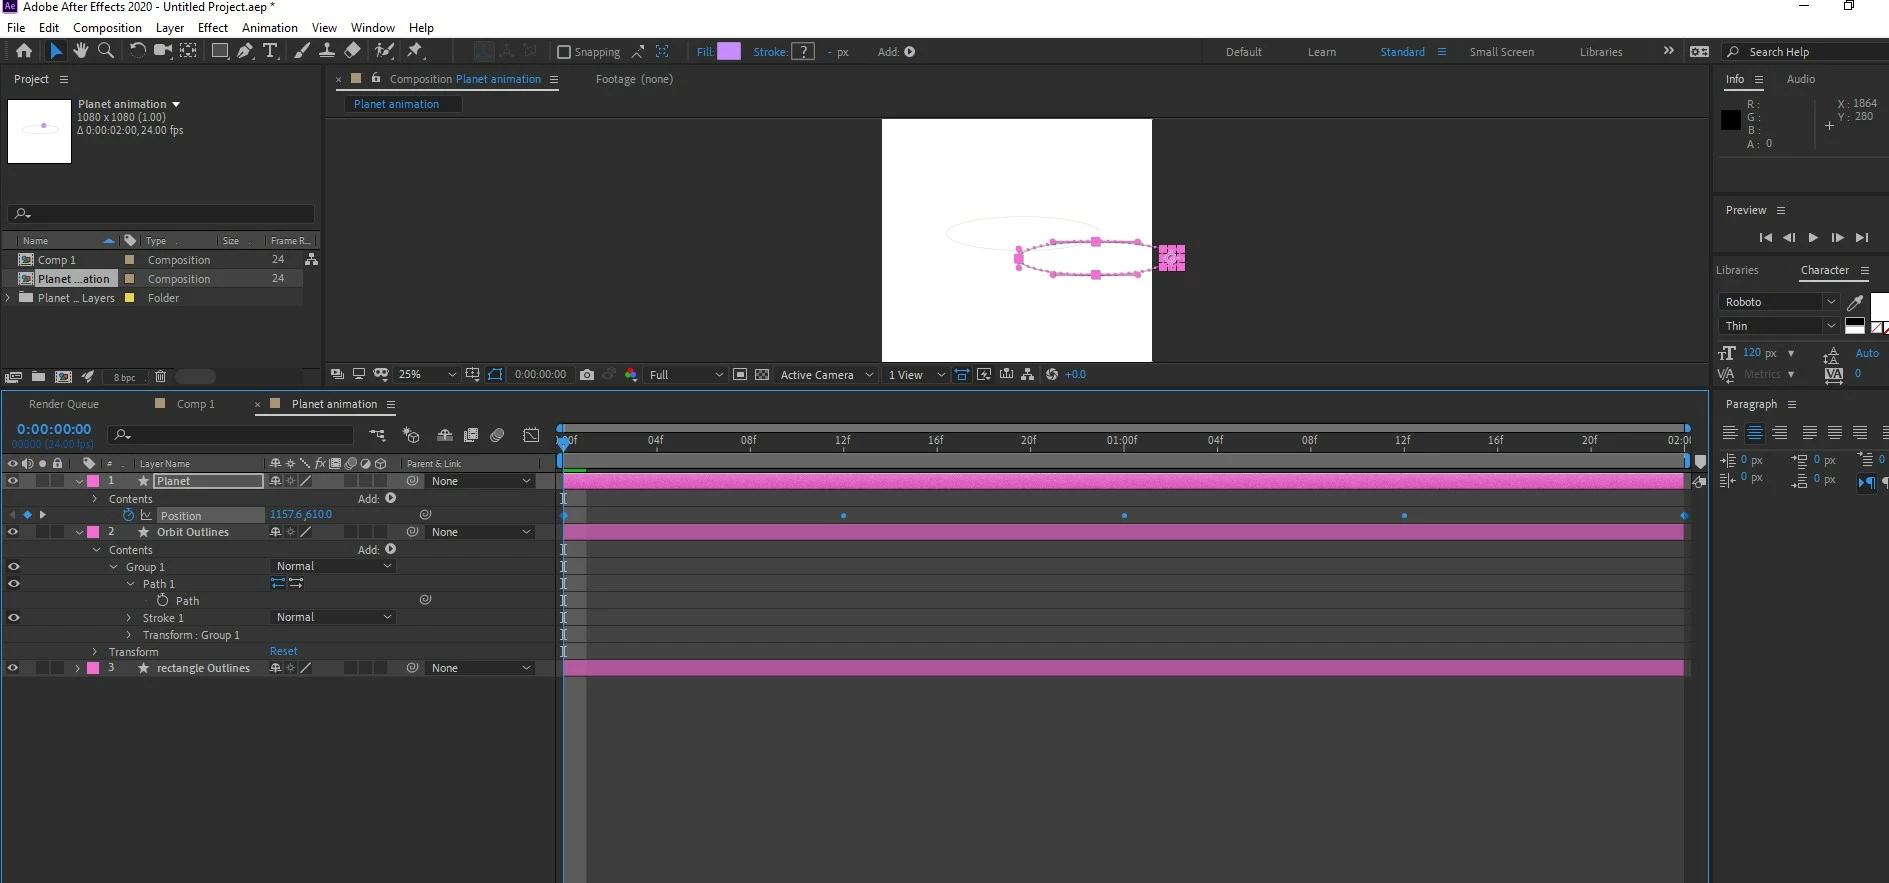
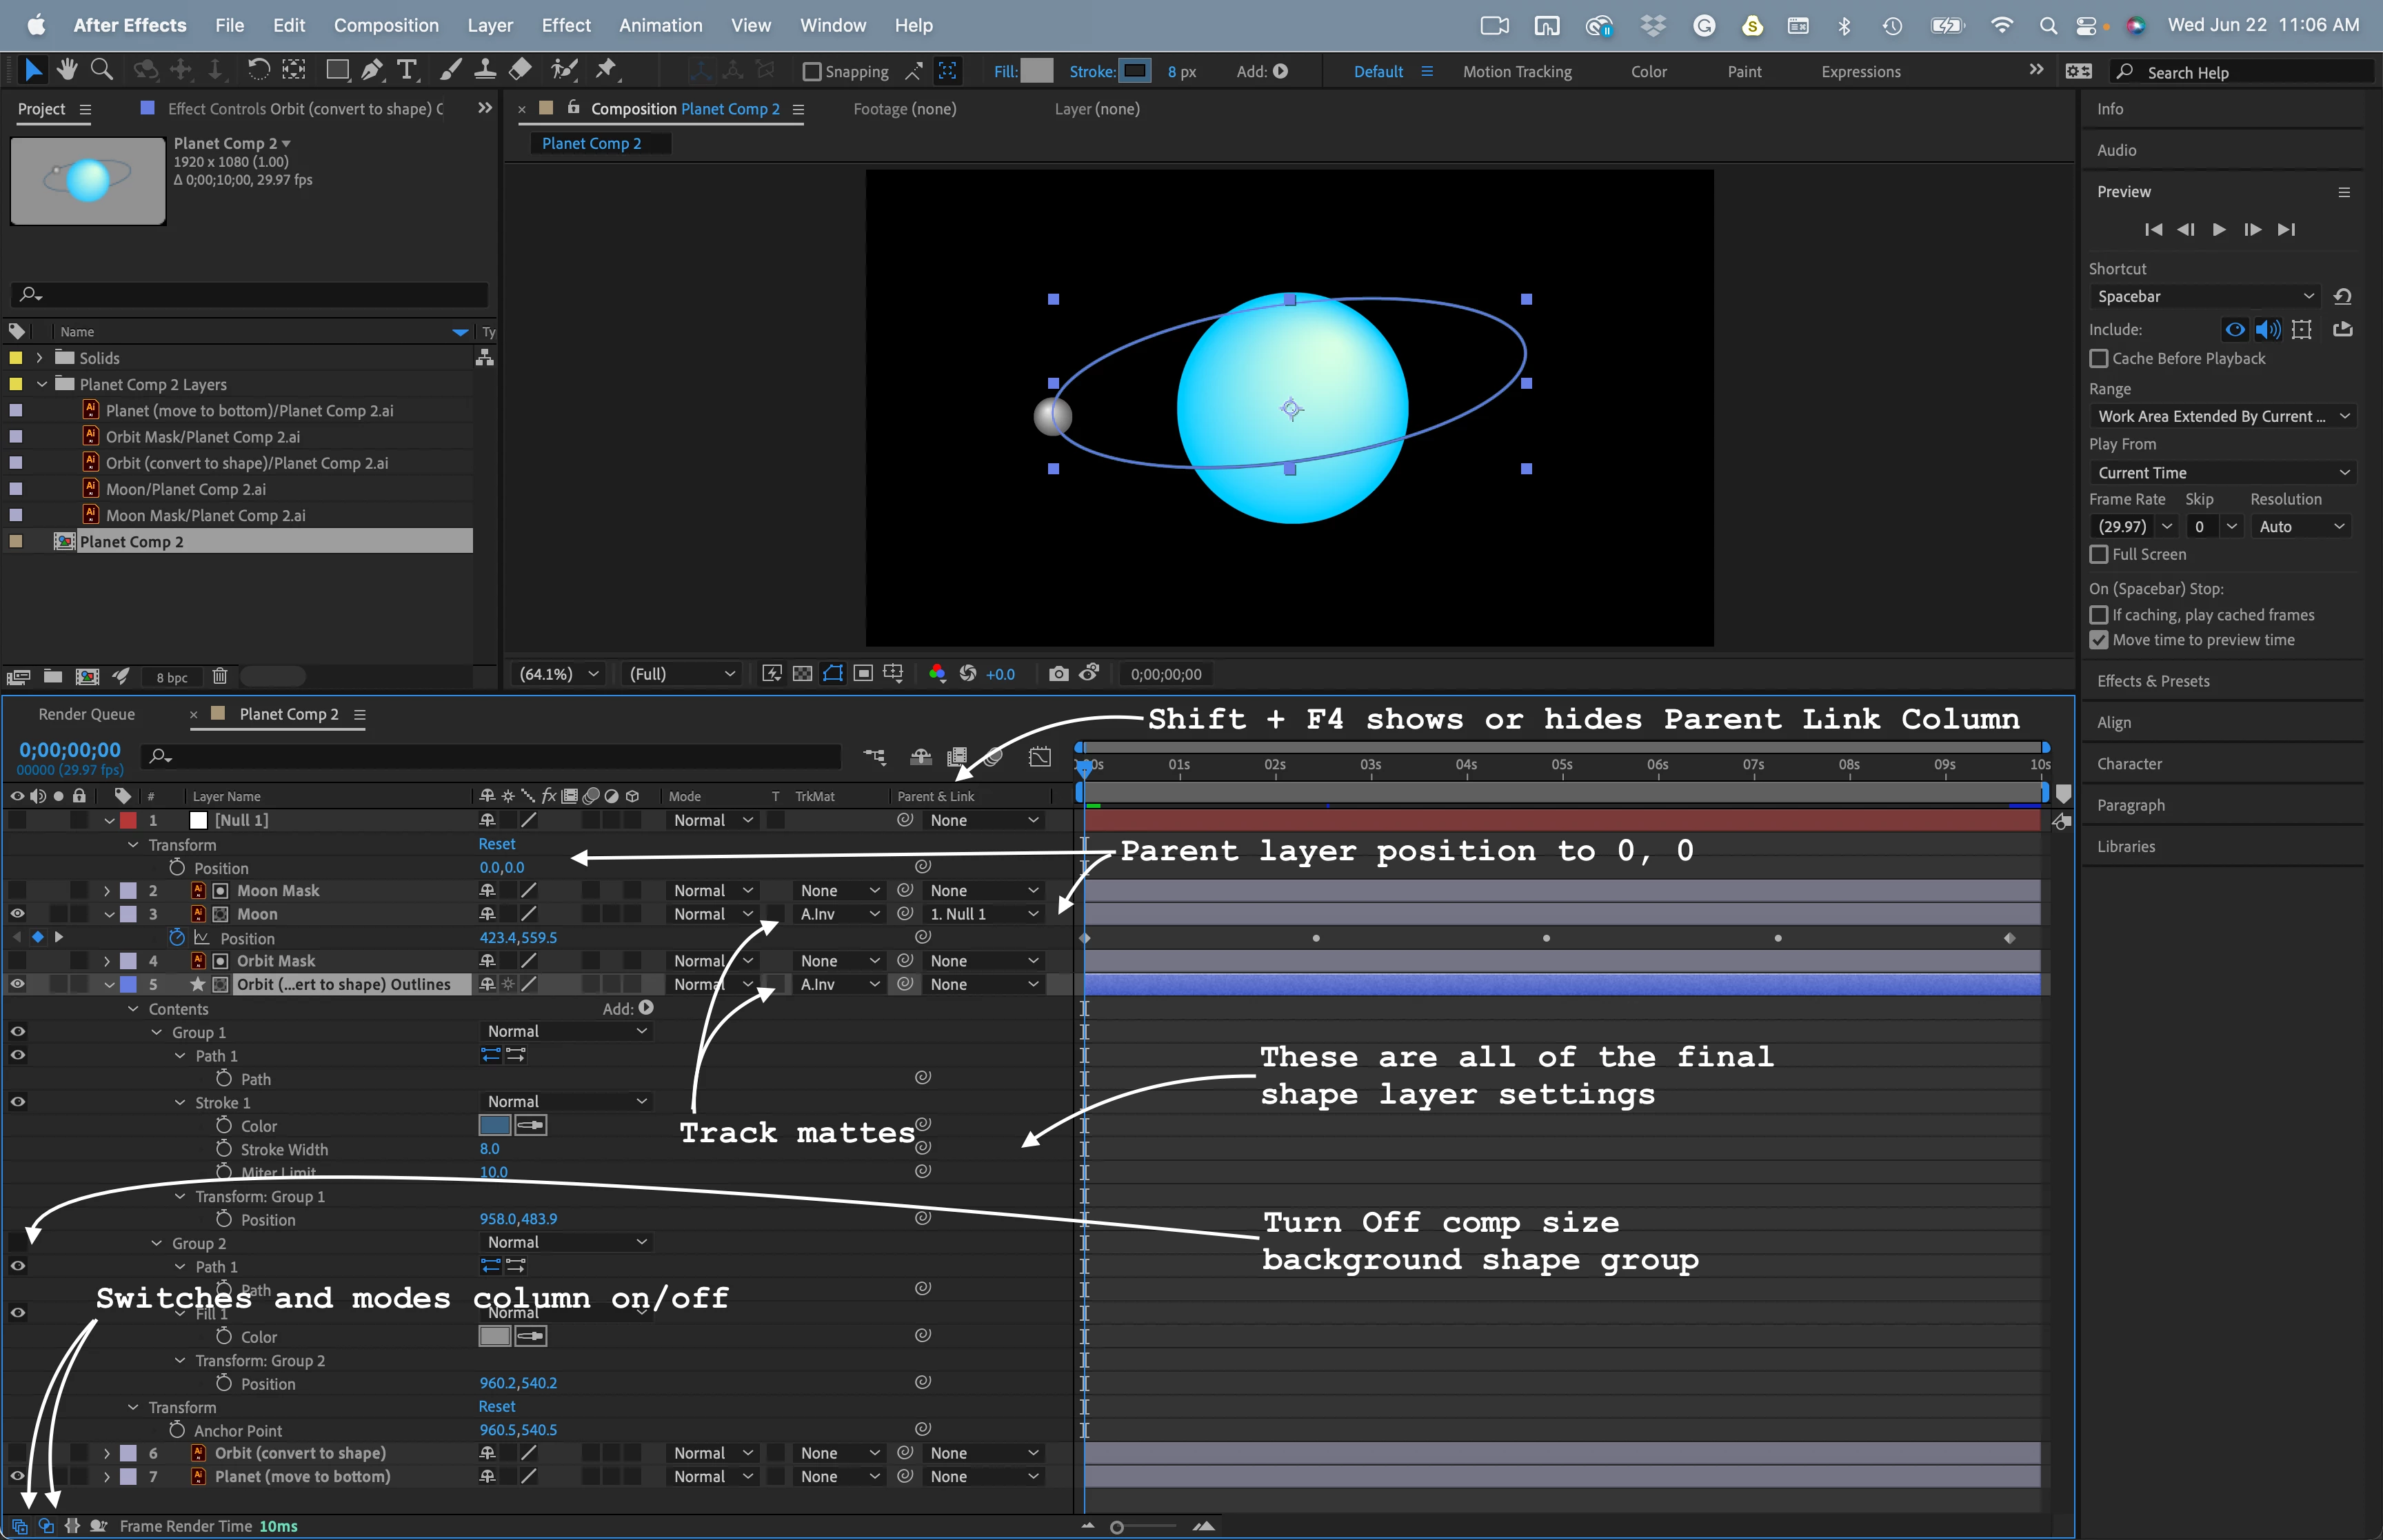
After you convert the Orbit layer to a shape layer, set a keyframe for the Orbit path, copy it, or cut it, you can turn off the bottom Group in the shape layer, so you don't have to look at the background layer anymore. 


The next step is to select the Moon layer, press Alt/Option + p to set a new position keyframe where you want the animation to start, then paste your copied Orbit path keyframe. 


The motion path will be offset by half the comp width and half the comp height and end up in the bottom left corner of the comp. Let me explain why.


Importing an Illustrator file as a Composition places the anchor point in the center of the AI layers (Vector Layers).  The default anchor point for a shape layer is at 0, 0 because there is no initial size for a shape layer, and the paths you add can be anywhere.  When you convert a Vector layer to a shape original anchor point of the Vector Layer is not changed. The new paths from each object in the layer get organized into Groups,  and the Contents/Group Transform Gropu position for each object is modified to keep everything lined up. To keep the motion path lined up with the shape layer path, you must get all the transform group properties back to zero. Don't worry. There is an easy fix.


Add a new null to the timeline (Shift + Alt/Option + Ctrl/Cmnd + y) to the top of the timeline. Parent the Moon layer to the null, then reset the position of the null to 0, 0. That is all there is to it. 


I organized the Illustrator file with matte layers and Placed the Planet layer above the Orbit layer so I could easily see everything.  The last steps are to move the Planet layer to the bottom of the comp and set the mask layers as inverted Alpha track mattes for the Orbit and Moon layers. The whole process should take you about 5 minutes. The comp will look like this:

I'm preparing a new intensive convert a vector path to a motion path tutorial. Look for it soon. In the meantime, play with the two files I uploaded. They should help you figure things out.

3 replies

Community Expert
June 17, 2022

It looks like you have moved the layer with the path and maybe scaled it a bit and rotated it a little. For a motion path to follow a vector path, you must not change the layer's transform properties, or the position of the motion path will change. 


Did you follow that?


S_ A
S_ AAuthor
Inspiring
June 18, 2022

Hi,

Yes I Follow that. I didnt move anything. I designed it in Illustrator, then imported as 'Composition -retain layer size', then applied 'Creat shapes from vector layers;.

But it still keeps doing that. I created another new AI file. same thing happening.


Thank you. 😞 

nishu_kush
Community Manager
Community Manager
June 17, 2022

Hi Suraiya A,


Thanks for writing in.

Make sure that you copy "Path" (that has a stopwatch) and not the "Path 1".

Ctrl+Shift+V is the shortcut to hide other layers. That might explain the composition going black.

Let us know how it goes.


Thanks,

Nishu

S_ A
S_ AAuthor
Inspiring
June 18, 2022

Hi,

I do not see any 'Path' there. what I see is.

Orbit> Contens> Group1> Path 1>Stroke 1> Transform: Group 1.

And If I click path1 then I get 'path'. You mean this path? 

Anyway why it is a group? 

and Thank you so much for teaching me what that ctrl+shift+v does! usually It works as paste in place, so I tried that 🙂 


Community Expert
June 18, 2022

If you retained layer size when you imported an AI file as a composition, then the position of each layer is different. The position values are retained when you convert the Vector layers to a shape layer. That is why when you copy a path on a shape layer and paste it as a motion path, you end up with a problem.


Unless you need actual path data, animate a path, or use shape layer animators, there is no advantage in converting all of the vector layers (Illustrator files) to shape layers. Doing so can also slow down rendering.


If you need motion paths from AI paths, the best workflow is to create a layer in Illustrator with two paths. The first is a rectangle that is the size of the Artboard (which should be the same size as the comp frame), and another path, just the motion path with a simple stroke applied. Everything will line up perfectly when you convert that layer to a shape layer in After Effects.


I hope this helps.

S_ A
S_ AAuthor
Inspiring
June 17, 2022

it makes the composition panel black*