I think you are way overcomplicating things.
Here's my suggestion:
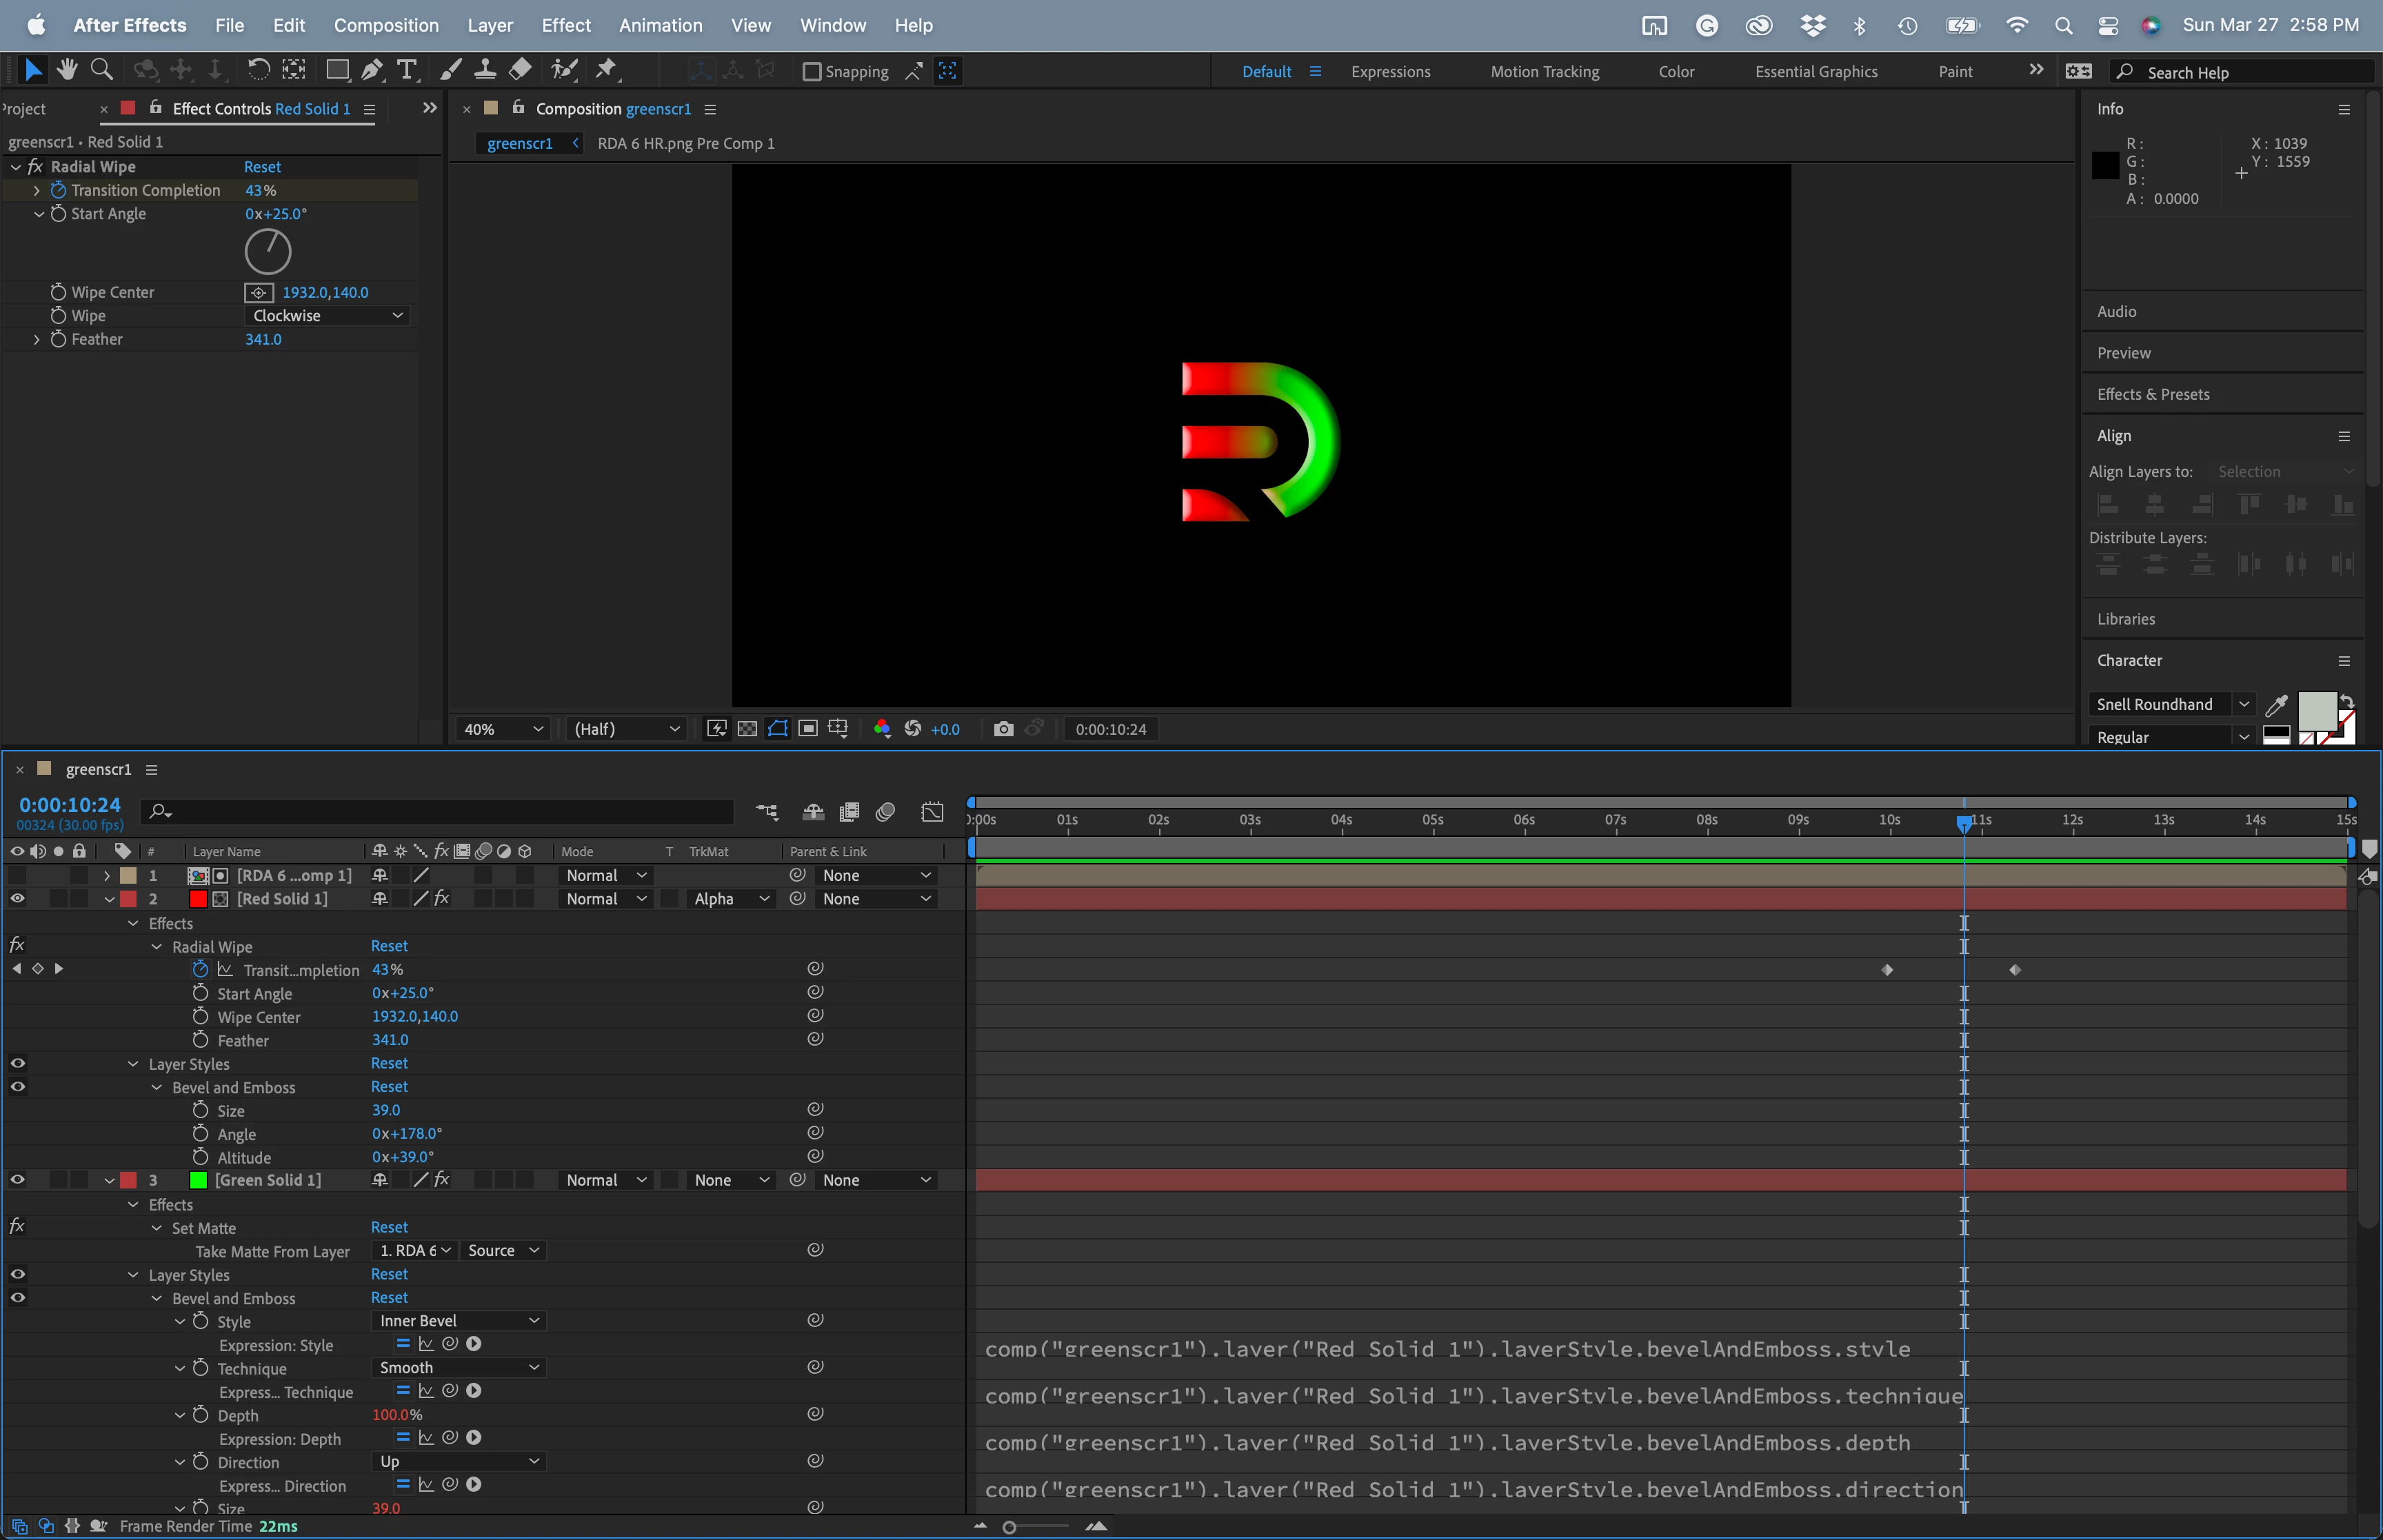
- Get rid of the green JPG and replace it with a green solid
- Pre-compose layer 1 (the animated PNG), moving all attributes to the new comp
- Delete the Black Solid (Layer 2)
- Set the Alpha Track matte for the Red Solid (now layer 2)
- Select the Bevil Alpha layer styles on the Red Solid and use the edit menu to Copy with Property links
- Reveal layer styles on the bottom layer (Green Solid) and delete Bevil Alpha
- Add the Set Matte effect to the bottom layer and choose the nested comp top layer as the source (your pre-comp)
- With the bottom layer selected (Green Solid) Ctrl/Cmnd + V to paste the Bevil and Emboss layer style and link all properties to the Red Solid layer (layer 2) so any adjustments you make on the Layer Styles settings in Layer 2 will show up in layer 3
That should do it. I have uploaded the comp.
I would also suggest that you work on the timing. An 8-second move on a motion graphic is an eternity, and you should use some easing to give the animation some life.
One more thing. The Bevil Alpha Effect has limited controls, so I would not use it unless you want limited control over the edges.
I just had another thought. You could also pre-compose the Red and Green layer with the wipe, use the animated PNG as a track matte, and apply the Bevil Alpha layer style to the pre-comp.
I hope this helps.

