Exit
  • Global community
    • Language:
      • Deutsch
      • English
      • Español
      • Français
      • Português
  • 日本語コミュニティ
  • 한국 커뮤니티
0

How to Animate shapes along a path

New Here ,
Apr 28, 2025 Apr 28, 2025

Hi All, 

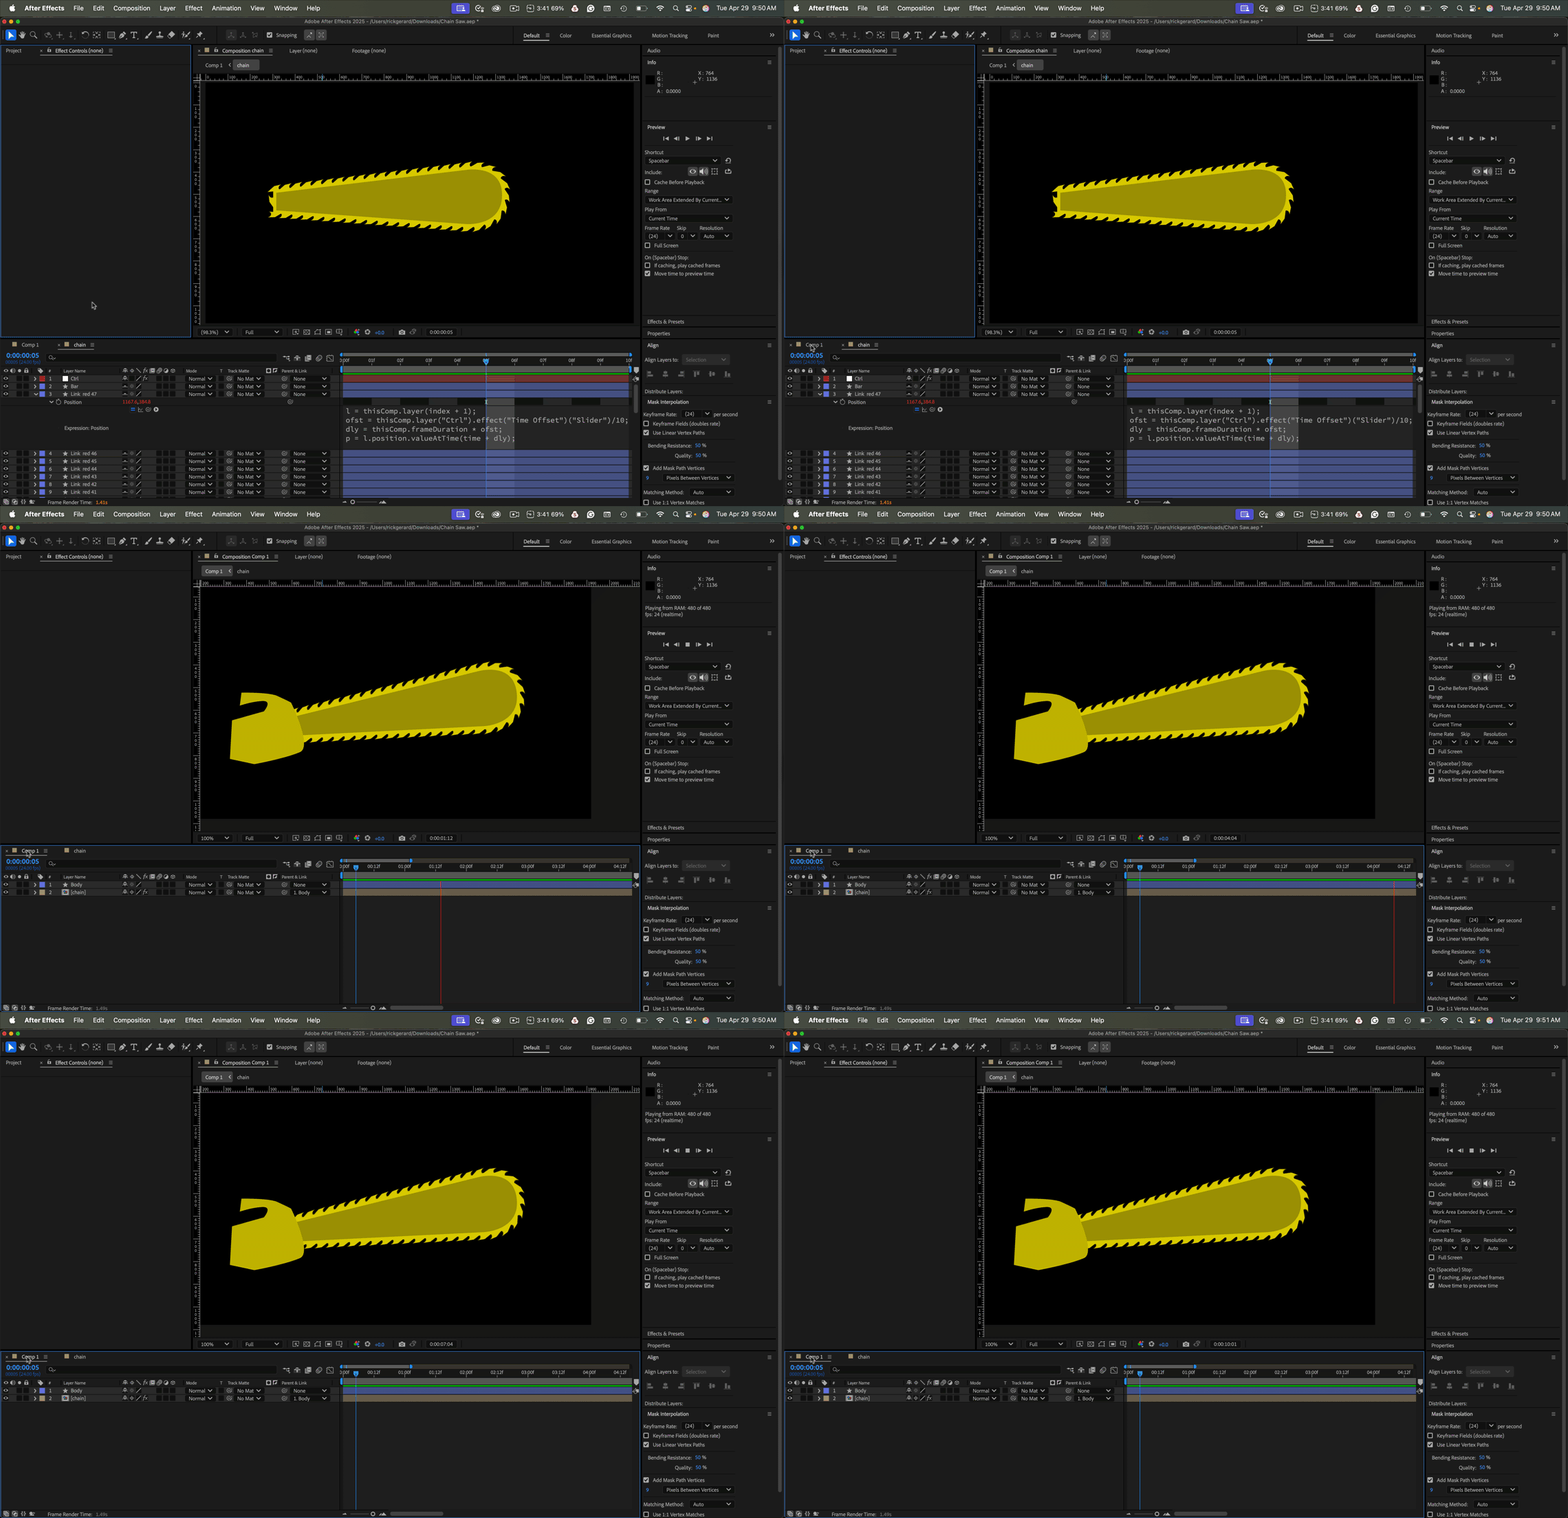
Having some trouble animating "teeth" on a chainsaw along the path of the chainsaw (Image for reference). I tried to copy the path of the chainsaw to the position of one of the "teeth" then auto-orient the shape, but it didnt seem to work, might it be I have the anchor point in the wrong position? I had the anchor point of the shape in the middle, then had it on the path of the shape itself, both did work. Any ideas? Defo missing something here. Let me know if more info is needed

TOPICS
FAQ , How to
428
Translate
Report
Community guidelines
Be kind and respectful, give credit to the original source of content, and search for duplicates before posting. Learn more
community guidelines
Community Expert ,
Apr 28, 2025 Apr 28, 2025

Are you selecting the word "Position" (by the stopwatch) before you paste?

Translate
Report
Community guidelines
Be kind and respectful, give credit to the original source of content, and search for duplicates before posting. Learn more
community guidelines
New Here ,
Apr 28, 2025 Apr 28, 2025

Heres a vid of what I mean/done, I think its to do with the anchor points?

Translate
Report
Community guidelines
Be kind and respectful, give credit to the original source of content, and search for duplicates before posting. Learn more
community guidelines
Community Expert ,
Apr 29, 2025 Apr 29, 2025
  1. Create your comp and one Link layer along the chain bar, with the anchor point at the bottom of the link layer
  2. Create your Bar layer in its hero position
  3. Position the Link layer below the bar layer
  4. Reveal the path of the Bar layer by pressing UU with the top bar layer selected to reveal the path, change to the Selection Tool (v) and select the path, draw a selection around the vertex on the Bar Path you want to use as the starting point, then right click or use the Layer Menu/Mask and Shape Path Menu to set the First Vertex
  5. With the Bar Path selected in the timeline set a single keyframe for Path, then cut it Ctrl/Cmnd + x
  6. Select the Link layer, press Alt/Option + p to set a keyframe for position and then Paste (Ctrl/Cmnd + v)
  7. Turn on Auto Orient to Path on the Link layer. 
  8. If needed, select all Position keyframes and use the Keyframe Assistant to Time Reverse the keyframes so the Link layer moves in the right direction
  9. Check to make sure that the link rotates around the path and adjust the position of the last Position keyframe to set the maximum speed that you want to use for the moving link
  10. Duplicate your link layer (Should now be Link 2)
  11. Add a Null to the timeline, name it Ctrl, then add a Slider Control to the Null and name it "Time Offset"
  12. Go to the Link 2 lyer, press "p" to reveal the position and delete the eyframes then press Alt/Option and click on the Posiition property to add an expression
  13. Copy and paste this expression to Link 2's position property
    l = thisComp.layer(index + 1);
    ofst = thisComp.layer("Ctrl").effect("Time Offset")("Slider")/10;
    dly = thisComp.frameDuration * ofst;
    p = l.position.valueAtTime(time + dly);​
  14. Adjust the Time offset slider to move Link 2 down the path until it is in the perfect position relative to the the first Link layer
  15. Duplicate the Link 2 layer as many times as needed to fill the bar with links
  16. Fine tune the Time Offset Controls on the Ctrl layer to make sure the first Link and the last link lineup properly
  17. Check to make sure that the complete chain moves around the bar correctly
  18. Select all layers and Pre-compose the entire comp and give it a suitable name
  19. Open the Pre-comp, set a guide or take a screenshot so that you can tell when one or two links have move to the exact position as they were at the start of the timeline and then press N to set and out point for the work area
  20. Trim the comp to the work are using the Composition Menu/Trim To Work Area
  21. Return to the main comp, select the Pre-comp and enable Time Remapping using the Layer Menu or the keyboard shortcut Alt/Option + Ctrl/Cmnd + t
  22. Move to the last Time Remapping keyframe, then go back one frame (Ctrl/Cmnd + <) and set a new keyframe, then remove the last keyframe
  23. Alt/Option click the Time Remapping effect in the timeline and add a simple loopOut() expression
  24. You are done. You can control the speed of the chain links by moving the last Time Remapping keyframe up or down the timeline


I have attached a AE-23 and an AE-25 sample comp. This is what it looks like:

RickGerard_0-1745942033122.gif

The low frame rate of the GIF makes the movement look jerky, but it's fine in the sample compositions.

Translate
Report
Community guidelines
Be kind and respectful, give credit to the original source of content, and search for duplicates before posting. Learn more
community guidelines
New Here ,
Apr 29, 2025 Apr 29, 2025

Wow! Thanks Rick so much for this! Still having some weird issues though. One of which is when I auto-orient the link it roatates it incorrectly, I then have to apply a 90 degree rotation to the link. This then causes the first duplicated link to finsih its short animation out of shape (View screenshot & Video for what I mean). I'm also having trouble once I have duplicated the link once, to create "Link 2" and added the expression and with the Null moved it behind the original link. When I duplicate it again it doesnt react to the Null slider. 

Translate
Report
Community guidelines
Be kind and respectful, give credit to the original source of content, and search for duplicates before posting. Learn more
community guidelines
Community Expert ,
Apr 29, 2025 Apr 29, 2025

Did you look at my sample comps?

Press the U key twice to check the modified properties of your "Link" layer. I think your link layer was rotated by 90º somewhere before you started.


Share the project file for your screen recording, and I'll take a look.

Translate
Report
Community guidelines
Be kind and respectful, give credit to the original source of content, and search for duplicates before posting. Learn more
community guidelines
New Here ,
Apr 29, 2025 Apr 29, 2025

Hi. Rick,


Absolutely I did, but I think I am clearing missing something.... All layers had their transform settings reset to negate this, but please feel free to have a look via the project. Thanks again for taking time to look at this.

Translate
Report
Community guidelines
Be kind and respectful, give credit to the original source of content, and search for duplicates before posting. Learn more
community guidelines
Community Expert ,
Apr 29, 2025 Apr 29, 2025

I should have noticed that you created your link as a vertical piece of art. It looks like it is climbing the left side of the Bar layer.


You need to create your Link artwork to look right when it is at the highest point of the motion path. It needs to be horizontal, not vertical. You could fix the artwork by rotating it 90º so that the anchor point is at the bottom and looks the way you want it to look when it would be at the highest point on the motion path.


Your time offset is also way too big, which is causing the Link 2 layer to stop moving. You want the Link 2 layer in front of the Link layer, not behind it. A value around 29 should be pretty close.


Hope this helps.

Translate
Report
Community guidelines
Be kind and respectful, give credit to the original source of content, and search for duplicates before posting. Learn more
community guidelines
New Here ,
Apr 30, 2025 Apr 30, 2025

You can use Pen tool to draw the path you want the teeth to follow. Once done, select the path and copy it (Ctrl+C or Cmd+C), then select the layer of the tooth, press P to reveal its Position property, and paste the path (Ctrl+V or Cmd+V). This action creates position keyframes that move the tooth along the path. Next, go to Layer > Transform > Auto-Orient and choose Orient Along Path to ensure the tooth rotates naturally as it moves. It’s also important to adjust the anchor point using the Pan Behind tool (shortcut Y); positioning it at the base of the tooth instead of the center often helps with proper rotation. If the movement looks abrupt, refine the path by smoothing out any sharp corners for more fluid motion.

Translate
Report
Community guidelines
Be kind and respectful, give credit to the original source of content, and search for duplicates before posting. Learn more
community guidelines
Community Expert ,
Apr 30, 2025 Apr 30, 2025
LATEST

Another way to do this is using text.

You could use either a dingbat font you download (dafont.com has a lot) or make one yourself using sites like fontstruct.com.

This is an example where the triangle dingbat is animated along a path using the text layers text on path option. The first pargin is then animated to move the teeth.

https://youtube.com/shorts/NisjHsglbGg?feature=share

The attached aep is my project file for that example.

Translate
Report
Community guidelines
Be kind and respectful, give credit to the original source of content, and search for duplicates before posting. Learn more
community guidelines