RonaldCz
Inspiring
December 11, 2017
Answered

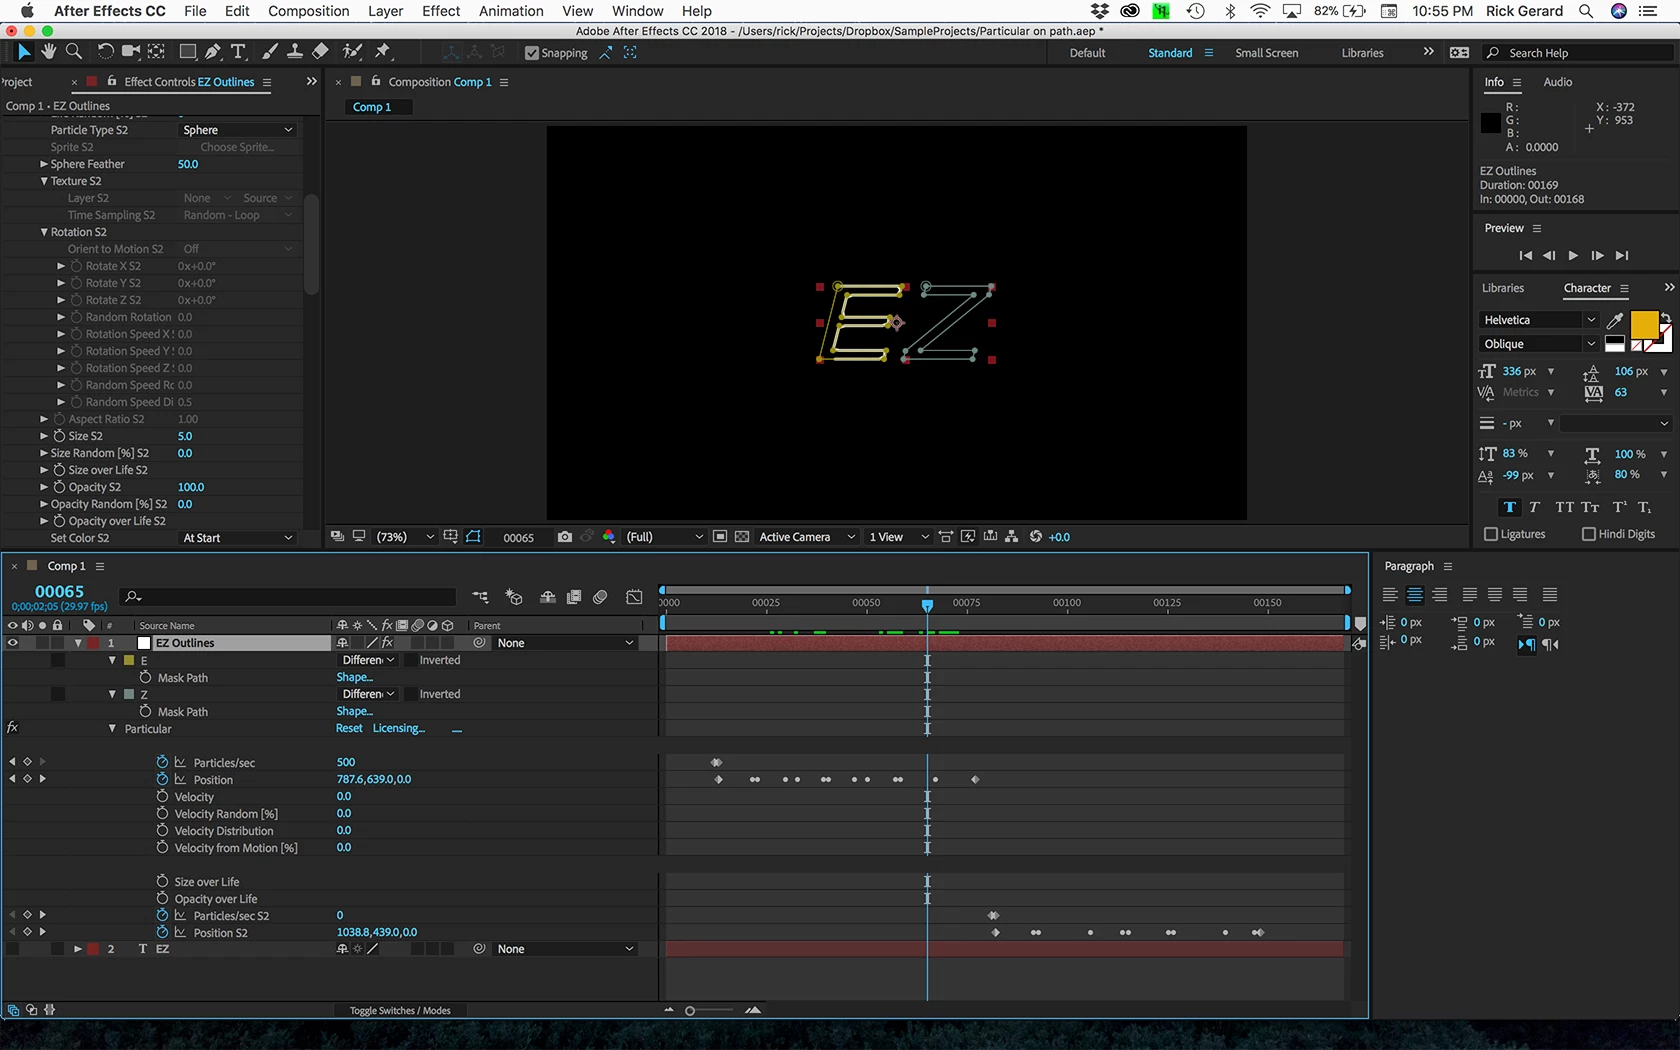
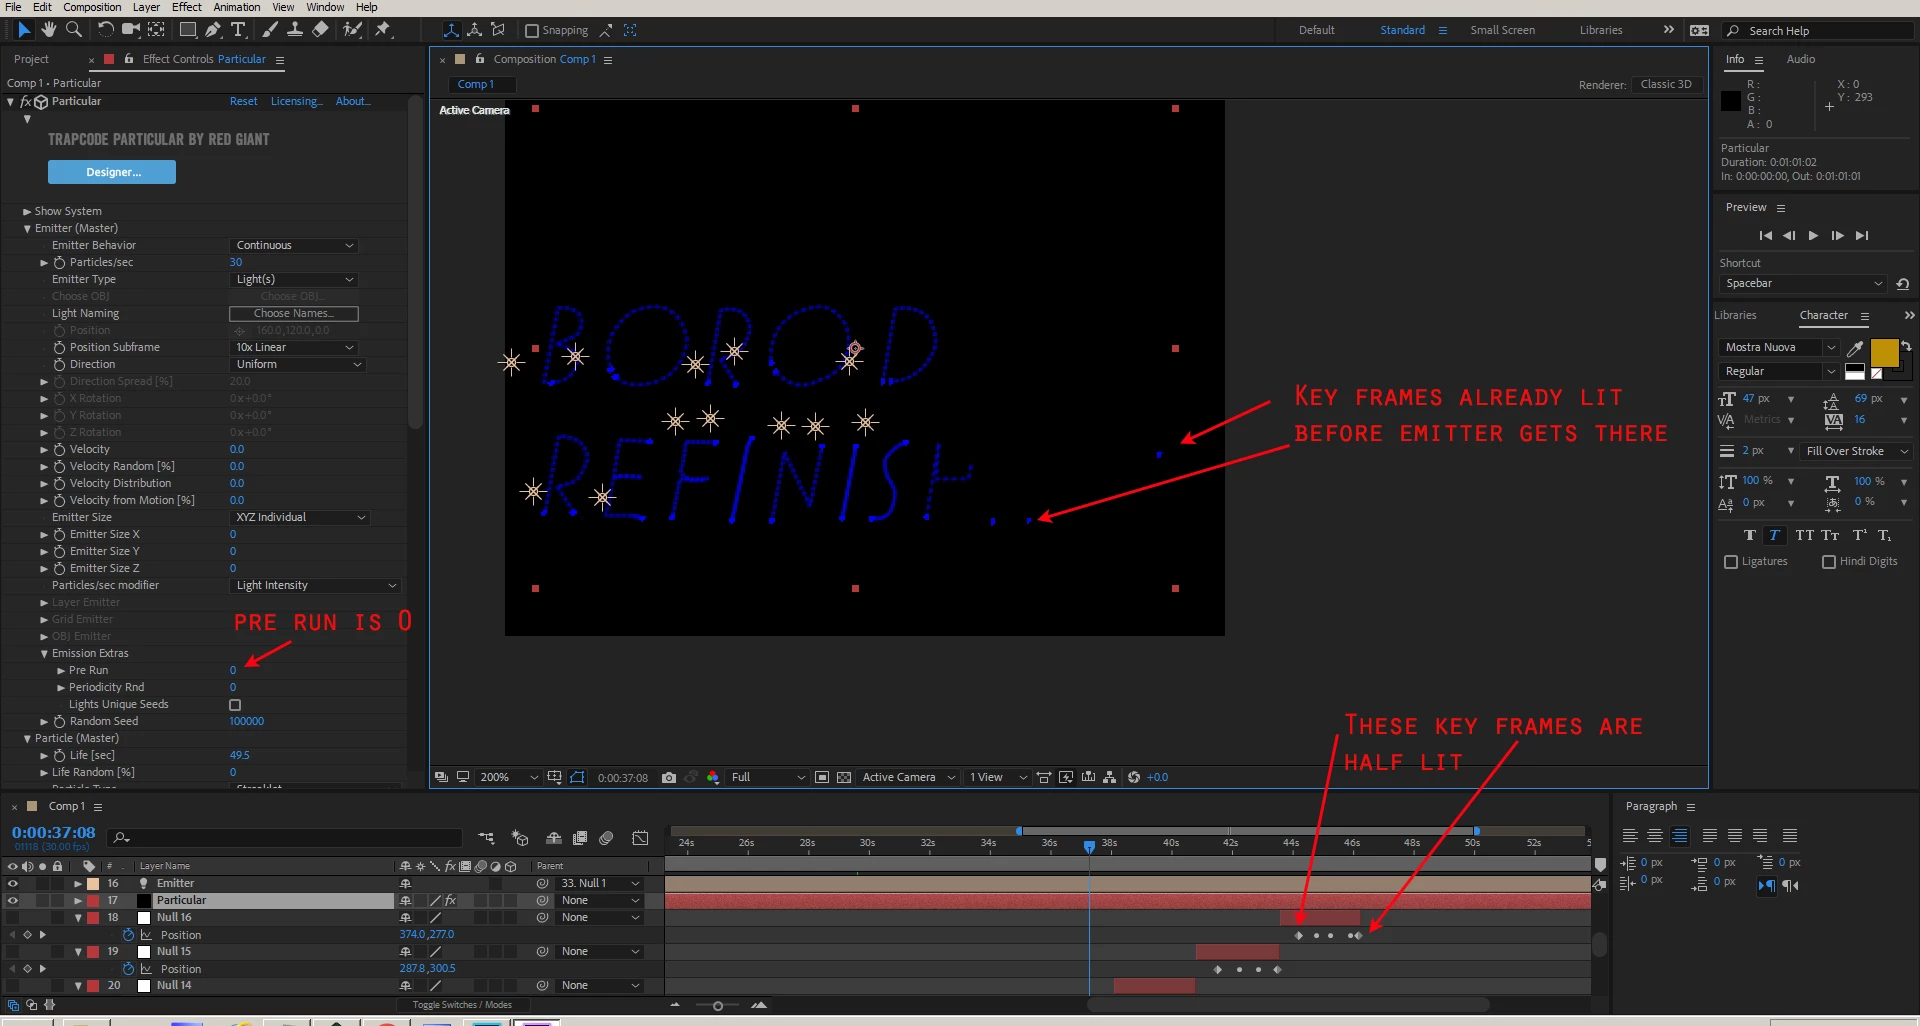
Keyframes pre-lit before particular light emitter gets there

  • December 11, 2017
  • 2 replies
  • 779 views

I was trying to get particular to streaklet individual letters one at a time. I used a pen tool to outline all the letters and then copied the key frames to a null object. I broke apart the Null timeline by using  (ctrl shift D) and I duplicated each Emitter  and parented it to that null object with its own letter.

The particular layer was using the Emitter which was following the key frames on the null object.

Everything look like it's working except it seems for each letter the first key frame is showing up.

I turned off even thing in particular but I can not find out what is pre lighting the letters.

when I play it out there are these dots for each letter.

What can I turn off to stop these letters from starting to show? (see attached picture)


Some of my notes for starting the project:

  • Start AE and create a text comp
  • Type out a word
  • Draw a mask around each letter, use cntr click to start new letter
  • After Effects Tutorial: Get Light To Follow A Path https://www.youtube.com/watch?v=PEkuuf0MEFQ
  • Create a null layer  and type "Y" to open center tool
  • Hold ctrl and center axis
  • Then open position on Null object
  • Open up text mask path and copy Mask path to Null position
  • To move entire keyframes open Null and position, click on position. click on a keyframe to move all keyframes.
  • Create solid layer and put effect particular on it.
  • Create a light layer and call it "Emitter" with capital.
  • Particular follows layer Emitter, Emitter is parented to Null object
  • take down to zero velocity, velocity random, velocity from motion.
  • Take down emitter size X,Y,Z down to zero.
  • increase life per second
  • In order to not have line in between letters. use ctrl Shift D to make new null layer for each letter.
  • Duplicate Emitter 1, to Emitter 2, then Emitter 3.
This topic has been closed for replies.
Correct answer Rick Gerard

First, on the tutorial, OK basics but left out some important things about creating compositions and some other details about creating, editing and using vector paths as motion paths. The tutorial is a perfect example of a workflow that will work but is very inefficient.

Your adaptation of the principal is only partially thought out and not very efficient. First, you don't need to parent the motion path to a null unless you really need to for some other reason. You can paste a motion path directly to the light position or even the emitter center. There is absolutely no reason to move the anchor point to the center of a null and there can be some disadvantages. In your project, it does not make any difference. You don't even need a separate layer for the mask path and for Parcticular.

The problem with your workflow is that there is no separate pre-un for particles and there is no post-run, all of the emitters will start generating particles at the same time. to keep particles from starting until you get to the last letter you'll need to animate the number of particles per second or the lifetime or any of the other properties that control the visibility of the particles so they don't start appearing until you get to the next layer. Because you are tying the emitters you can control the particles using light intensity also.

You could actually create the project you are trying to do by simply:

  1. creating a text layer
  2. use the Layer Menu to create masks from text
  3. visit each mask and select the starting point of your motion then right click choose Mask and Shape Path>Set First Vertex
  4. set mask keyframes for each path you want to turn into a motion path
  5. add Particular to the same layer
  6. set up the Master System in particular to generate the kind of particle you want
  7. cut the first mask keyframe (Ctrl/Cmnd + x)
  8. set a keyframe for Master System>Emitter>Position and paste (Ctrl/Cmnd + v)
    note: Setting a mask keyframe makes it incredibly easy and 100% accurate to select the entire path you want to use as a motion path then setting the first position keyframe for any position property you want to turn int a motion path and pasting always puts the start of the motion path with a start at the current time
  9. add additional systems and repeat the procedure with the CTI in the right spot to start each new letter
  10. start with the Master system and animate the particles per second (for faster rendering than any other method) so each system starts creating particles when you want it to

I did this in about 2 minutes using one text layer and Two letters.

If the paths are inaccurate you may have to increase the number of particles per second. Other than that, there's not much required to fix your problem.

2 replies

Rick GerardCommunity ExpertCorrect answer
Community Expert
December 11, 2017

First, on the tutorial, OK basics but left out some important things about creating compositions and some other details about creating, editing and using vector paths as motion paths. The tutorial is a perfect example of a workflow that will work but is very inefficient.

Your adaptation of the principal is only partially thought out and not very efficient. First, you don't need to parent the motion path to a null unless you really need to for some other reason. You can paste a motion path directly to the light position or even the emitter center. There is absolutely no reason to move the anchor point to the center of a null and there can be some disadvantages. In your project, it does not make any difference. You don't even need a separate layer for the mask path and for Parcticular.

The problem with your workflow is that there is no separate pre-un for particles and there is no post-run, all of the emitters will start generating particles at the same time. to keep particles from starting until you get to the last letter you'll need to animate the number of particles per second or the lifetime or any of the other properties that control the visibility of the particles so they don't start appearing until you get to the next layer. Because you are tying the emitters you can control the particles using light intensity also.

You could actually create the project you are trying to do by simply:

  1. creating a text layer
  2. use the Layer Menu to create masks from text
  3. visit each mask and select the starting point of your motion then right click choose Mask and Shape Path>Set First Vertex
  4. set mask keyframes for each path you want to turn into a motion path
  5. add Particular to the same layer
  6. set up the Master System in particular to generate the kind of particle you want
  7. cut the first mask keyframe (Ctrl/Cmnd + x)
  8. set a keyframe for Master System>Emitter>Position and paste (Ctrl/Cmnd + v)
    note: Setting a mask keyframe makes it incredibly easy and 100% accurate to select the entire path you want to use as a motion path then setting the first position keyframe for any position property you want to turn int a motion path and pasting always puts the start of the motion path with a start at the current time
  9. add additional systems and repeat the procedure with the CTI in the right spot to start each new letter
  10. start with the Master system and animate the particles per second (for faster rendering than any other method) so each system starts creating particles when you want it to

I did this in about 2 minutes using one text layer and Two letters.

If the paths are inaccurate you may have to increase the number of particles per second. Other than that, there's not much required to fix your problem.

RonaldCz
RonaldCzAuthor
Inspiring
December 23, 2017

Thanks, with a little work I got it figured out. Just bought Trapcode so a little slow. I think for others remember to cut or just copy the keyframes from the outline layers/mask path and paste them into the particular layer position.

In order to get it to jump to the next letter, I keyframed life/sec.

This is not quite what I was after I wanted to use the pen tool to make a path and trace the letter from the inside in the middle of the letter, however, this procedure would work the same way for a motion path of a pen line.

You can see a same of what I learned here. Thanks to Gerard!

https://vimeo.com/248547651/a6ab08ba45

Windows 10 64-bitGigabyte Z490 AORUS Ultra IntelLGA 1200 ATX MotherboardIntel I9-10900K CPU@3.70GHzRAM 16GBNVIDIA GeForce RTX 2070 Super& NVIDIA GeForce GTX 1650
Mylenium
Legend
December 11, 2017

Well, your emitters are always on, are they not? so you would have to animate the lights' intensities as the emission rates and set the options in Particular accordingly. and that's where it gets tricky, so I would suggest you simply pre-compose and mask the result to remove those artifacts. Much quicker and more controllable.

Mylenium

RonaldCz
RonaldCzAuthor
Inspiring
December 23, 2017

I have 16 layers of null objects and 16 layers of Emitters and one particular layer. when I pre-comp the effects won't work. The Emitters cannot find the null objects.

Windows 10 64-bitGigabyte Z490 AORUS Ultra IntelLGA 1200 ATX MotherboardIntel I9-10900K CPU@3.70GHzRAM 16GBNVIDIA GeForce RTX 2070 Super& NVIDIA GeForce GTX 1650