The procedural matte + Roto is the way to go, and, trust me, you will be done in less time if you edit the footage in Premiere Pro and then use Dynamic Link to create comps that are just the shots you need to be worked on. Even if you end up using every frame, you won't get as tired, the likelihood of fouling up a couple of frames, and having to re-render the entire thing is lowered.
My workflow for this kind of thing is always, cut in Premiere Pro, select the clip I am working on, right-click and select Replace with After Effects composition, Save the AEP, but keep AE open, Return to Premiere Pro and UNDO the last action so the original footage is back in place, Change the color of the clip in the timeline to identify it, then do the work in AE, render to a lossless format, and import into a bin in Premiere Pro I name VFX. The last step is to just drop the clips right on top of the original clips in the Premiere Pro sequence. If the work I have to do in AE is extremely simple and renders very quickly I will keep the dynamic link, but for most of my work, probably more than 90% of it, I render in AE and replace the shot in Premiere Pro.
I've been on a VFX project for a feature film since February. A couple of weeks ago the Producer wanted me to make some changes in a shot. There are only about 50 frames that need fixing. Here is a screenshot of the Project panel.
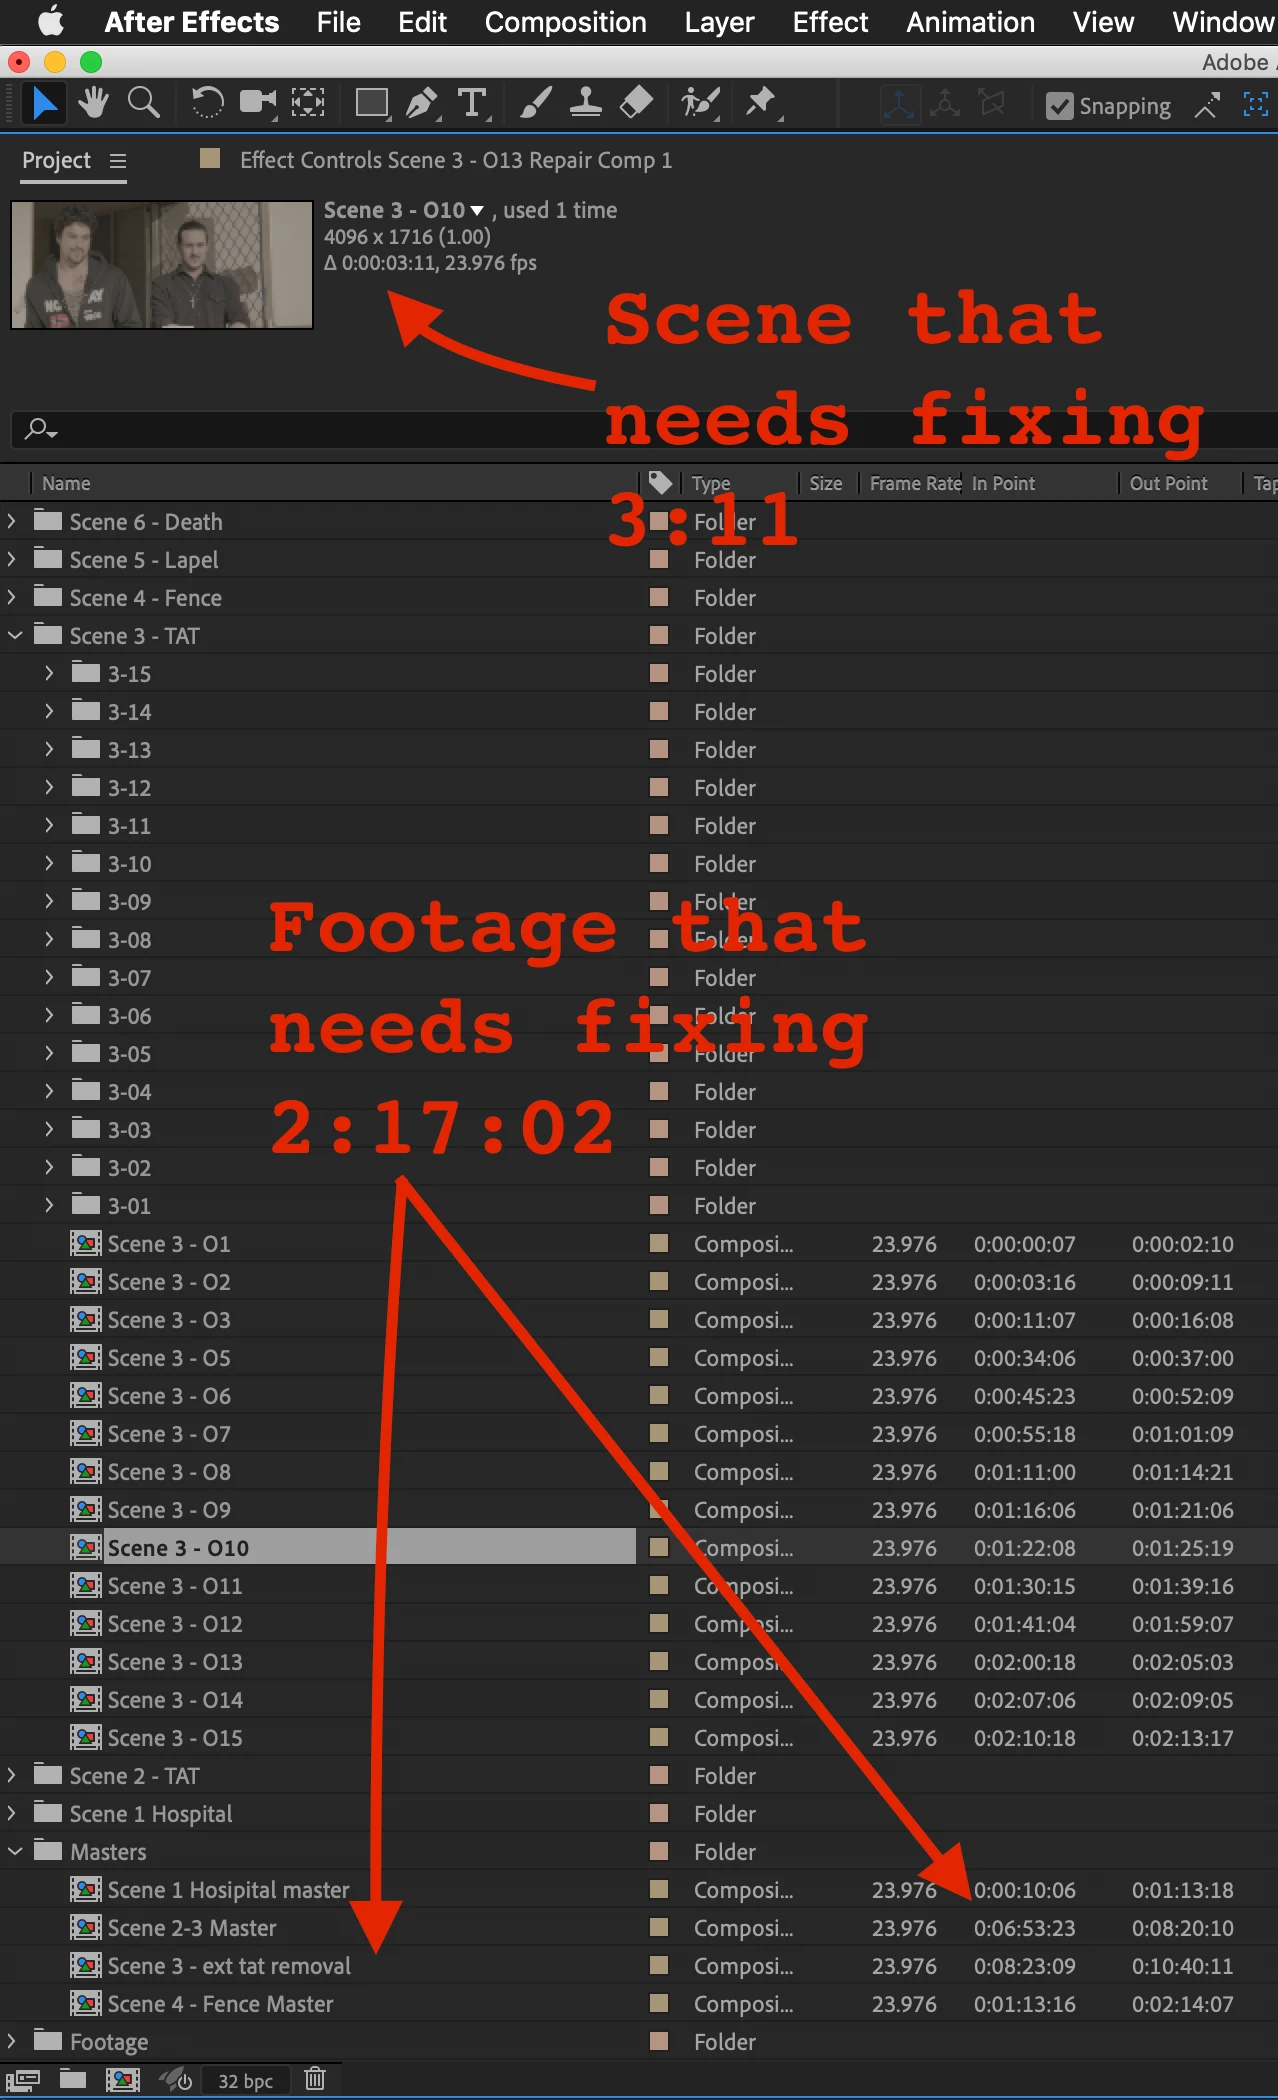
The shot (Scene 3-10) that needs fixing is 0:03:11 - just over 3 seconds. The shot that it comes from is 2:17:02 - just over 2 minutes seventeen seconds. If I take a look at the whole shot the editor sent me this is how complicated the comp is and I have only expanded half of the nested comps that make up just Scene 3 in this 6 scene project.
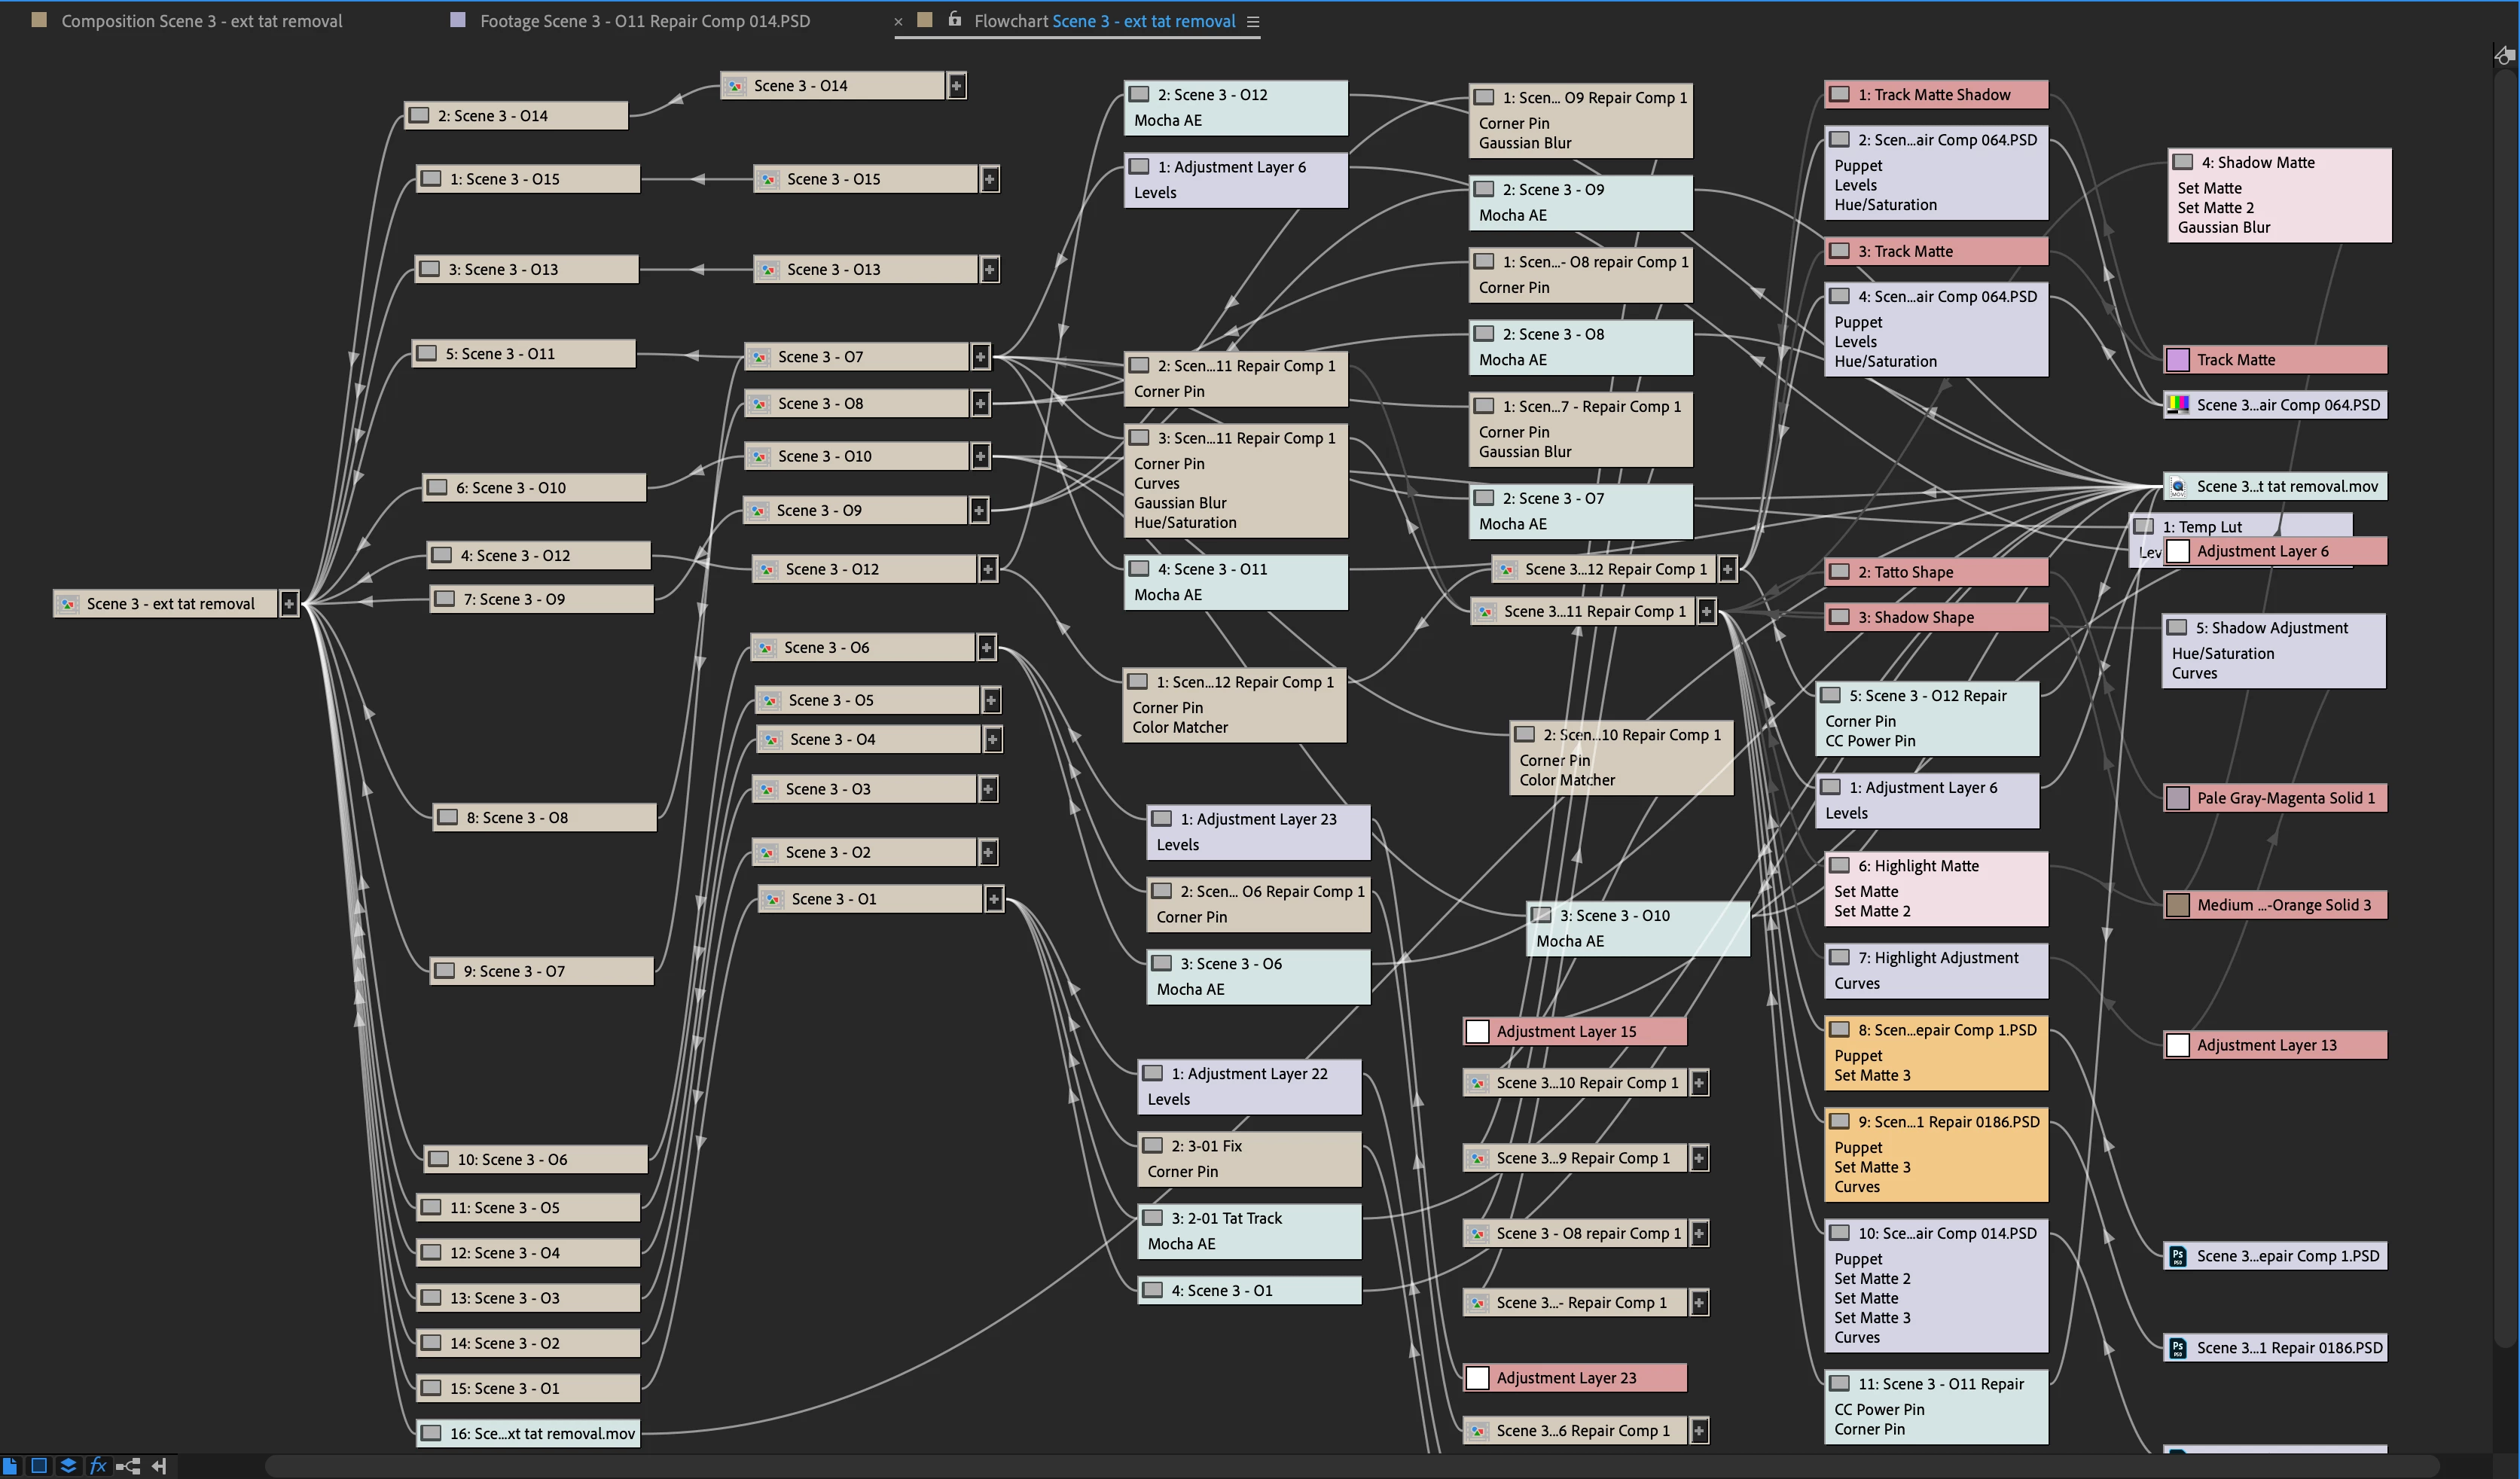
Doing the repair only required me to dive into this array of layers and effects:
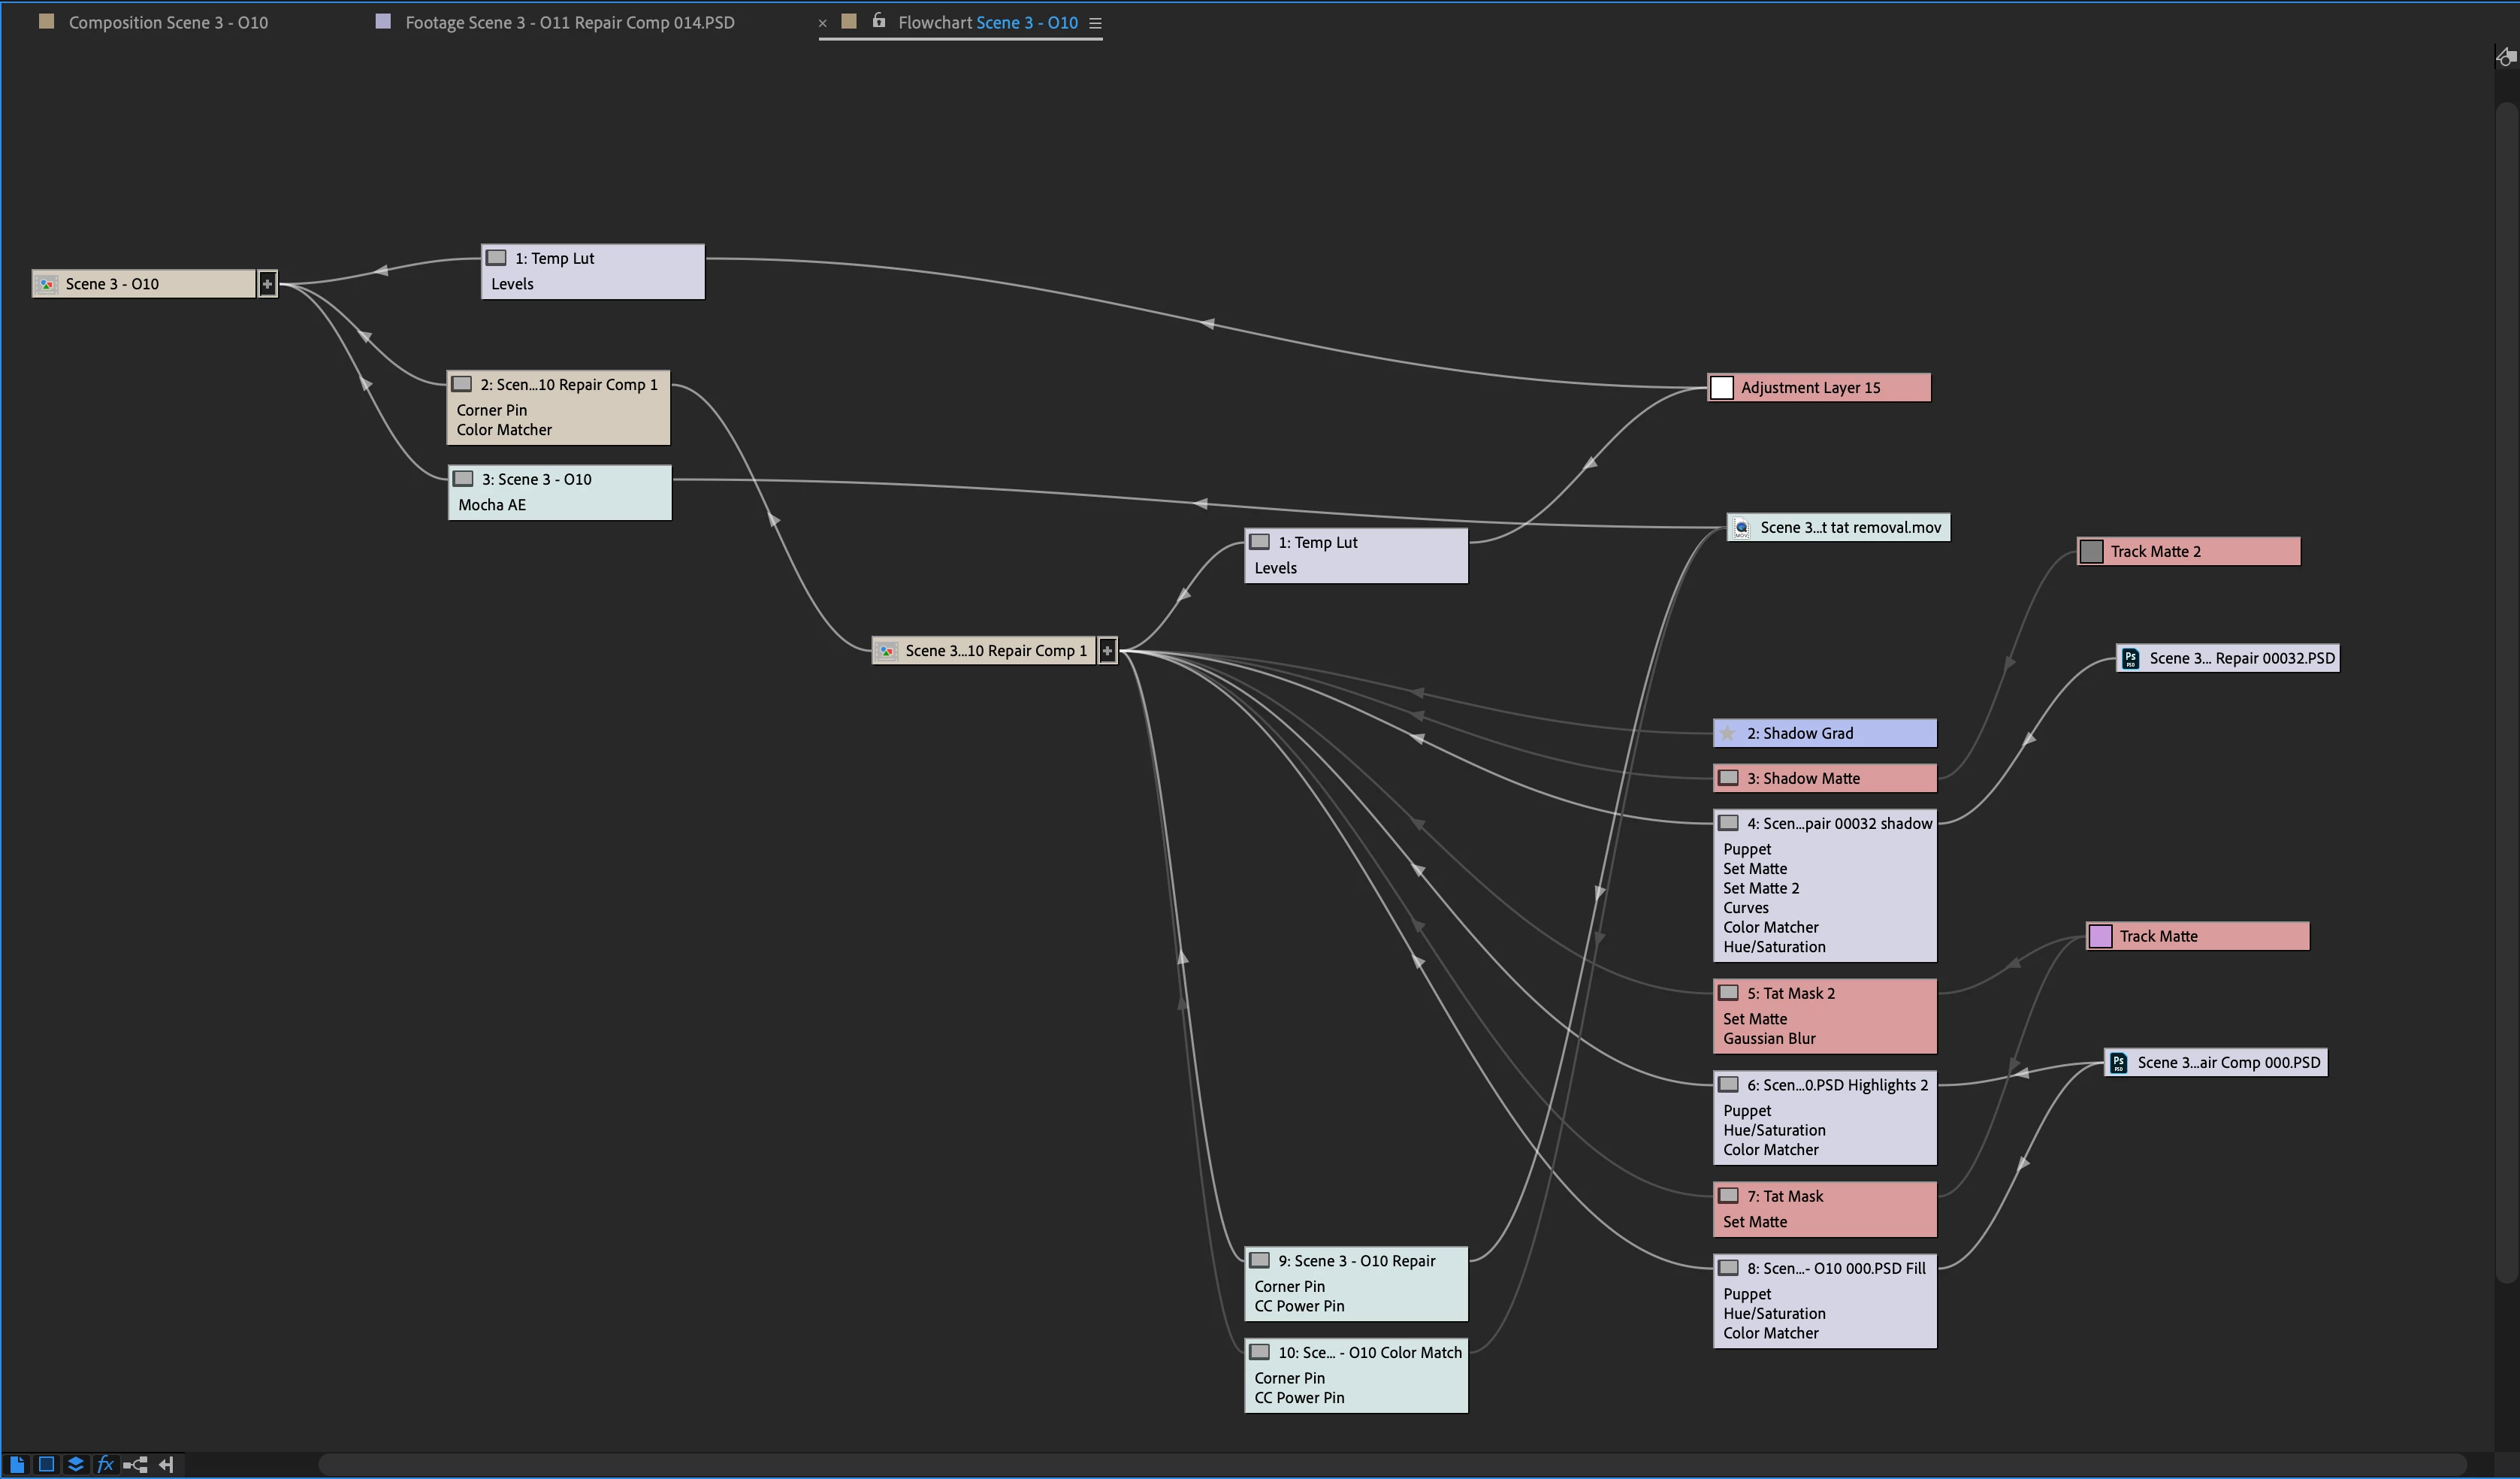
All I had to do was open up 3_10 Repair Comp, go to the Track Matte 2 layer and adjust a half dozen hand rotoscoped mask keyframes on two masks, move back to Layer 4 - adjust the settings and add some keyframes to curves, then open up the Scene 3 00032.psd and do some more clone and healing brushwork, then return to Layer 4 and fine-tune a half dozen puppet pin keyframes and adjust the timing of opacity keyframes to fix the glitch in the roto.
The repair took about 20 minutes to render. If the editor could use an image sequence instead of a Pro-rez file I could have just sent the 50 frames and the render would have taken about 4 minutes. If I had everything in one comp the render could have easily taken several hours and the likelihood of a render failure goes way up.
That project is a moderately complex completely technical job that required a lot of hand roto, a lot of procedural mattes, and a bunch of keyframes, and yes, I could have everything in Scene 3 in one main comp, but it was far simpler to break each shot down into a separate comp.
