Known Participant
December 14, 2019
Answered

Problem to apply project mapping

  • December 14, 2019
  • 2 replies
  • 4208 views

Hi,

I'm studing After Effects, I need someone help me about project mapping.

I made the layer map and use shadow but the layer is not clear (white circle remark as photo). It always blur like focus and not clear so how can I solve. Please help. Thanks

This topic has been closed for replies.
Correct answer Rick Gerard

Hi, Here the link of my project:

https://drive.google.com/open?id=1vgqxXQ7VR_zZ4dVCluC2wDMzYBw0rbNP

Now I'm using CC2018

Thanks


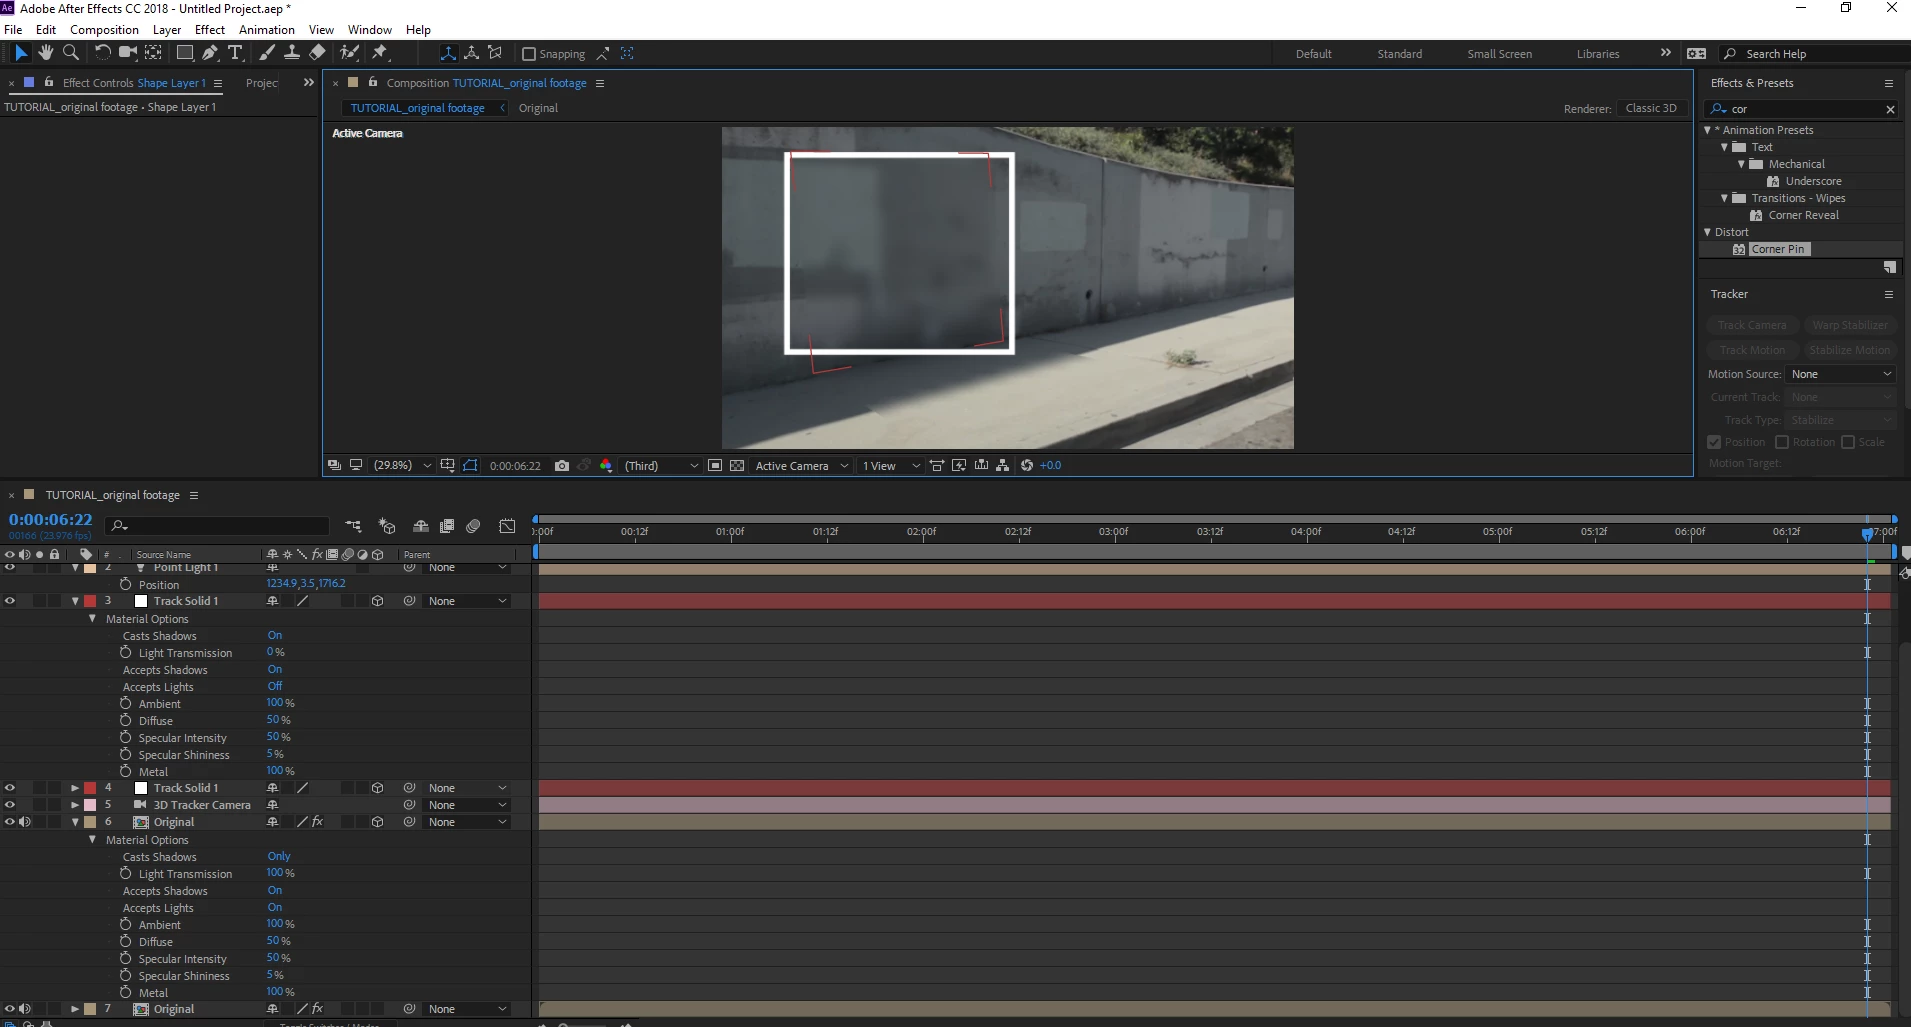
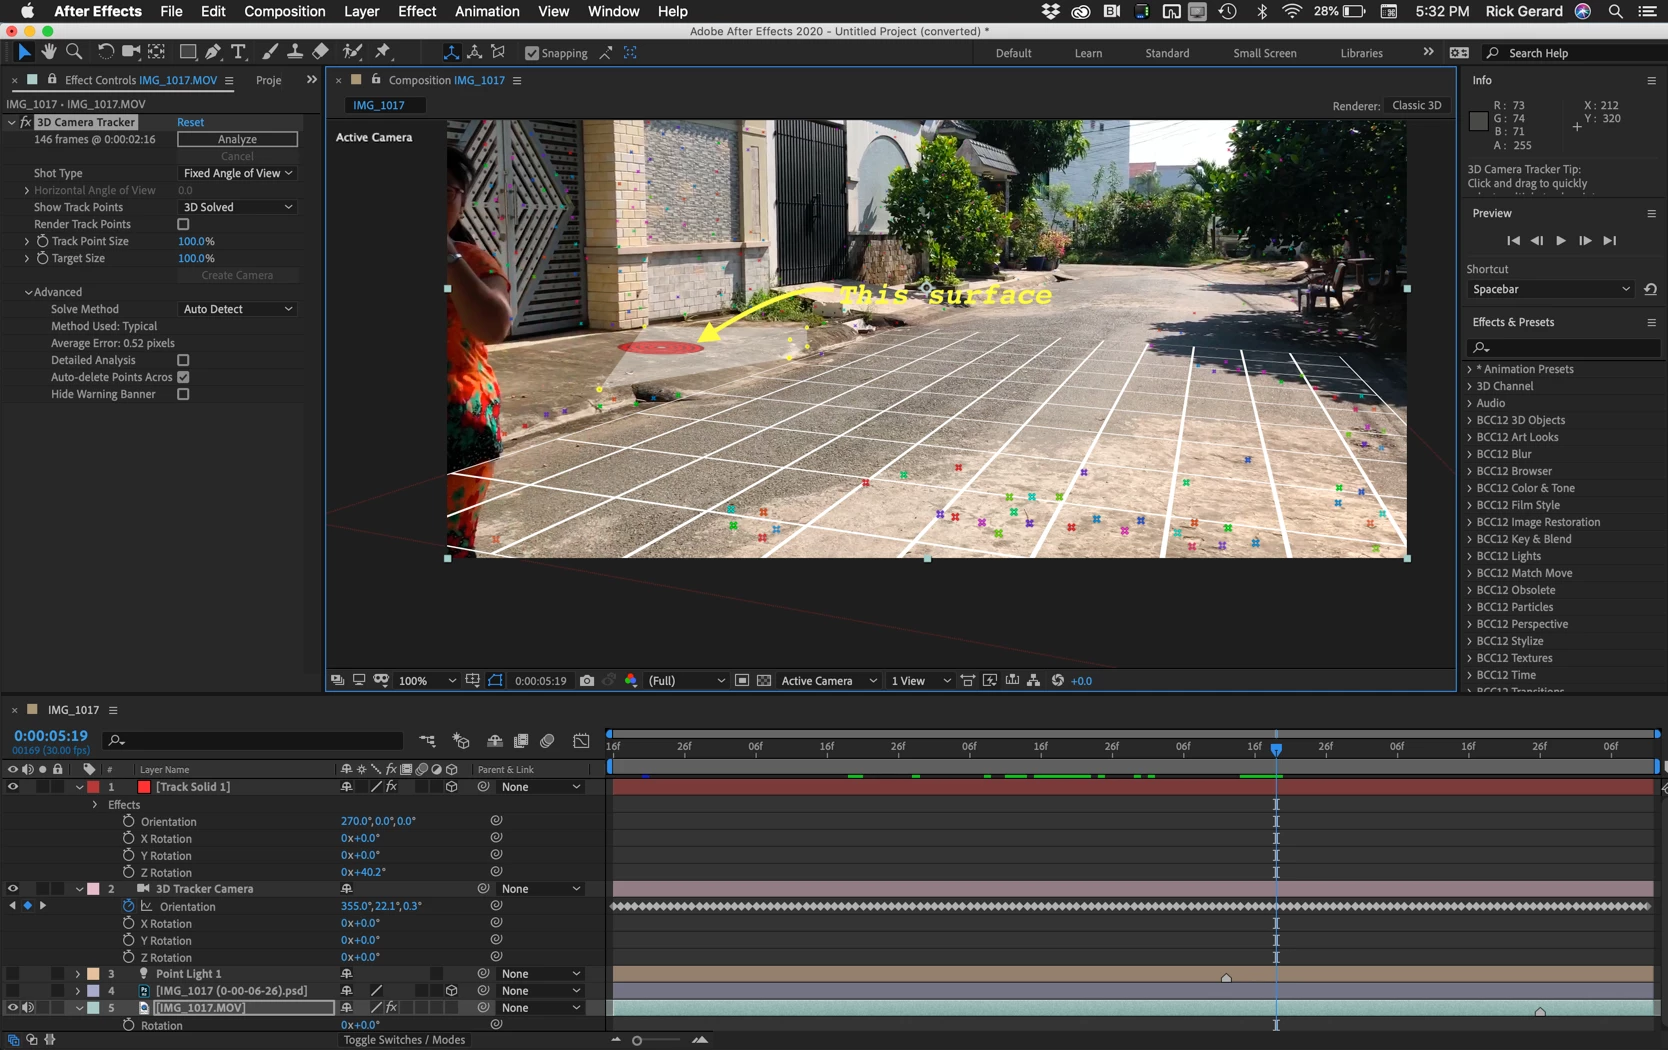
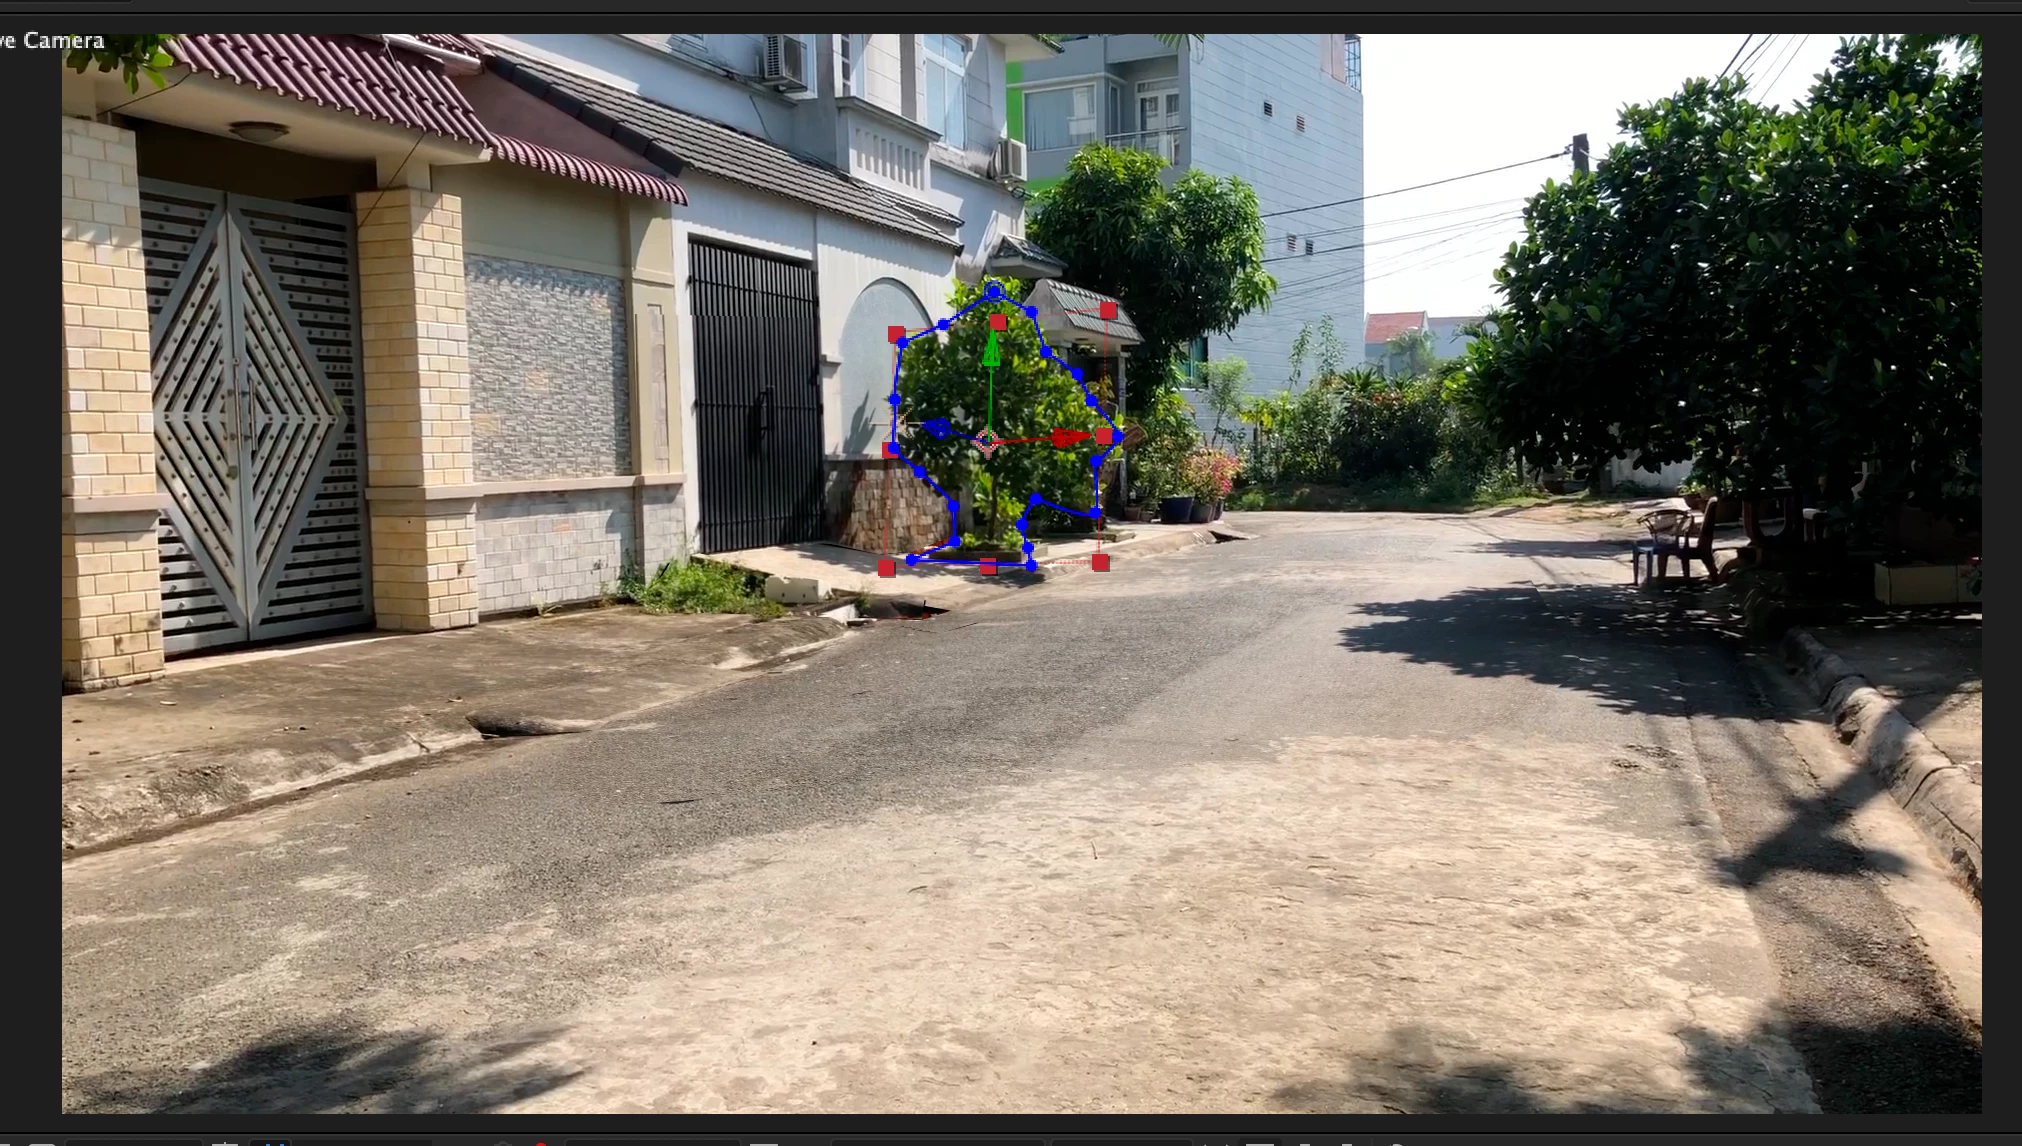
The biggest problem you are having is that you do not understand that the tracking solids you add to the comp must match the surfaces that you are trying to replace. Your 3D layers are not at all where they need to be.

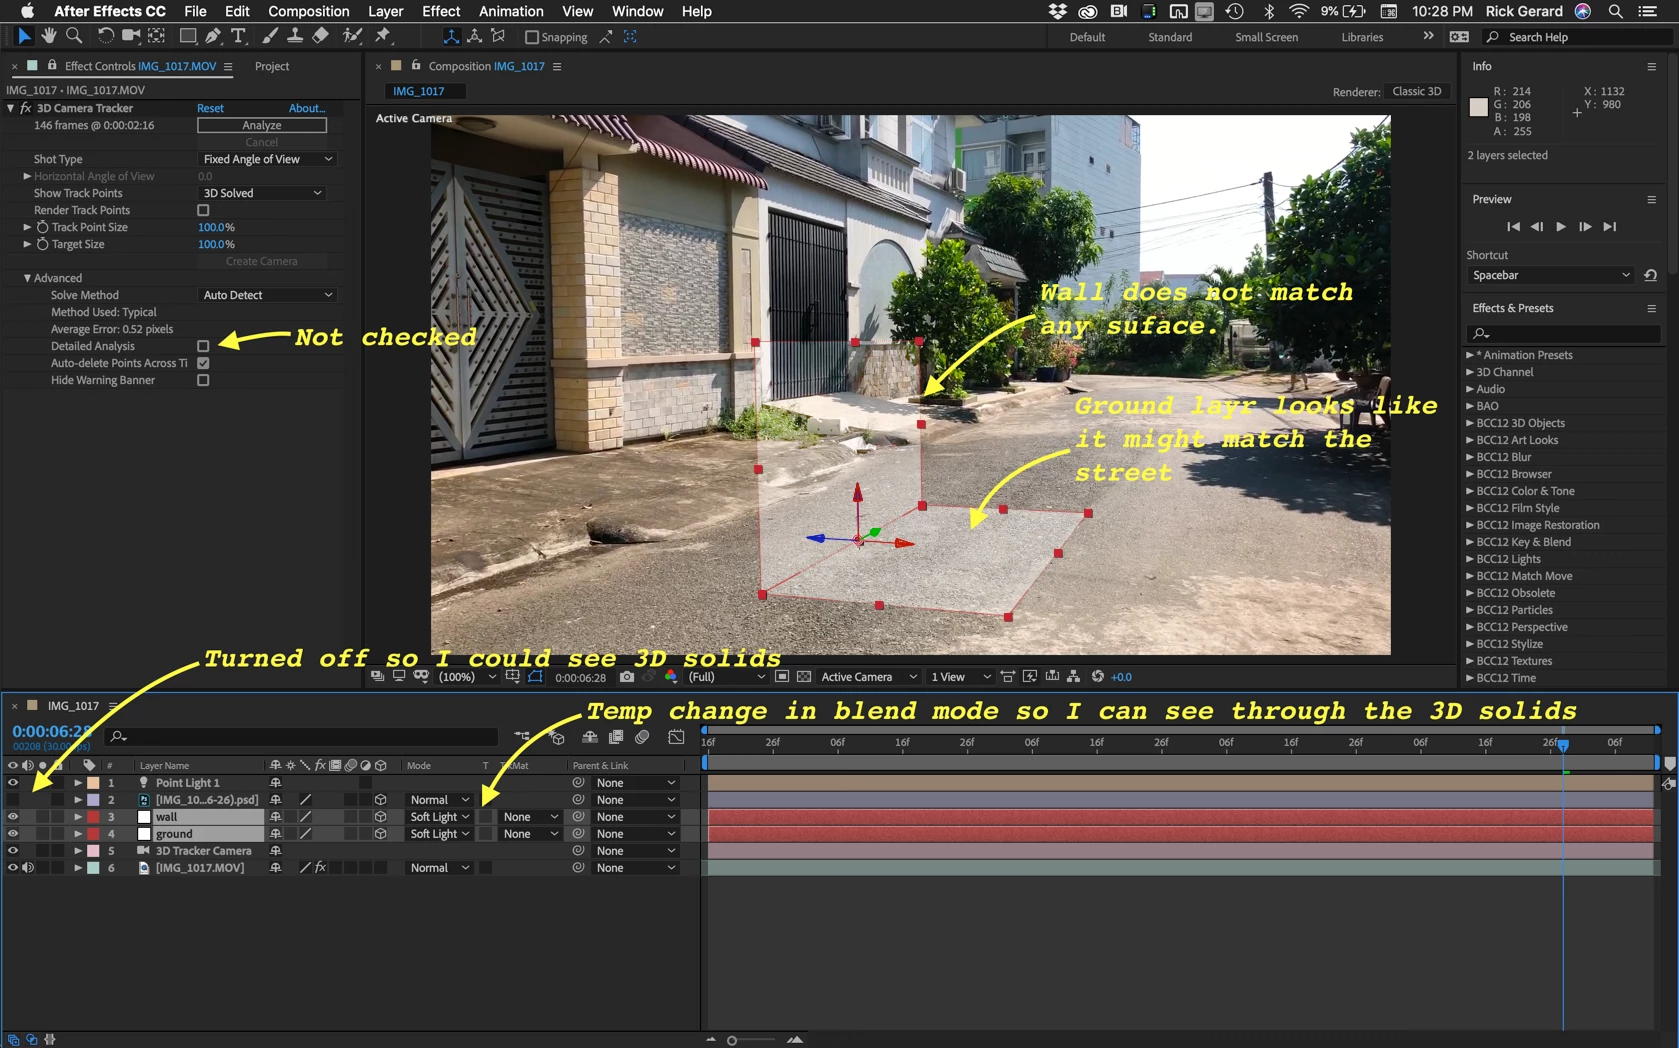
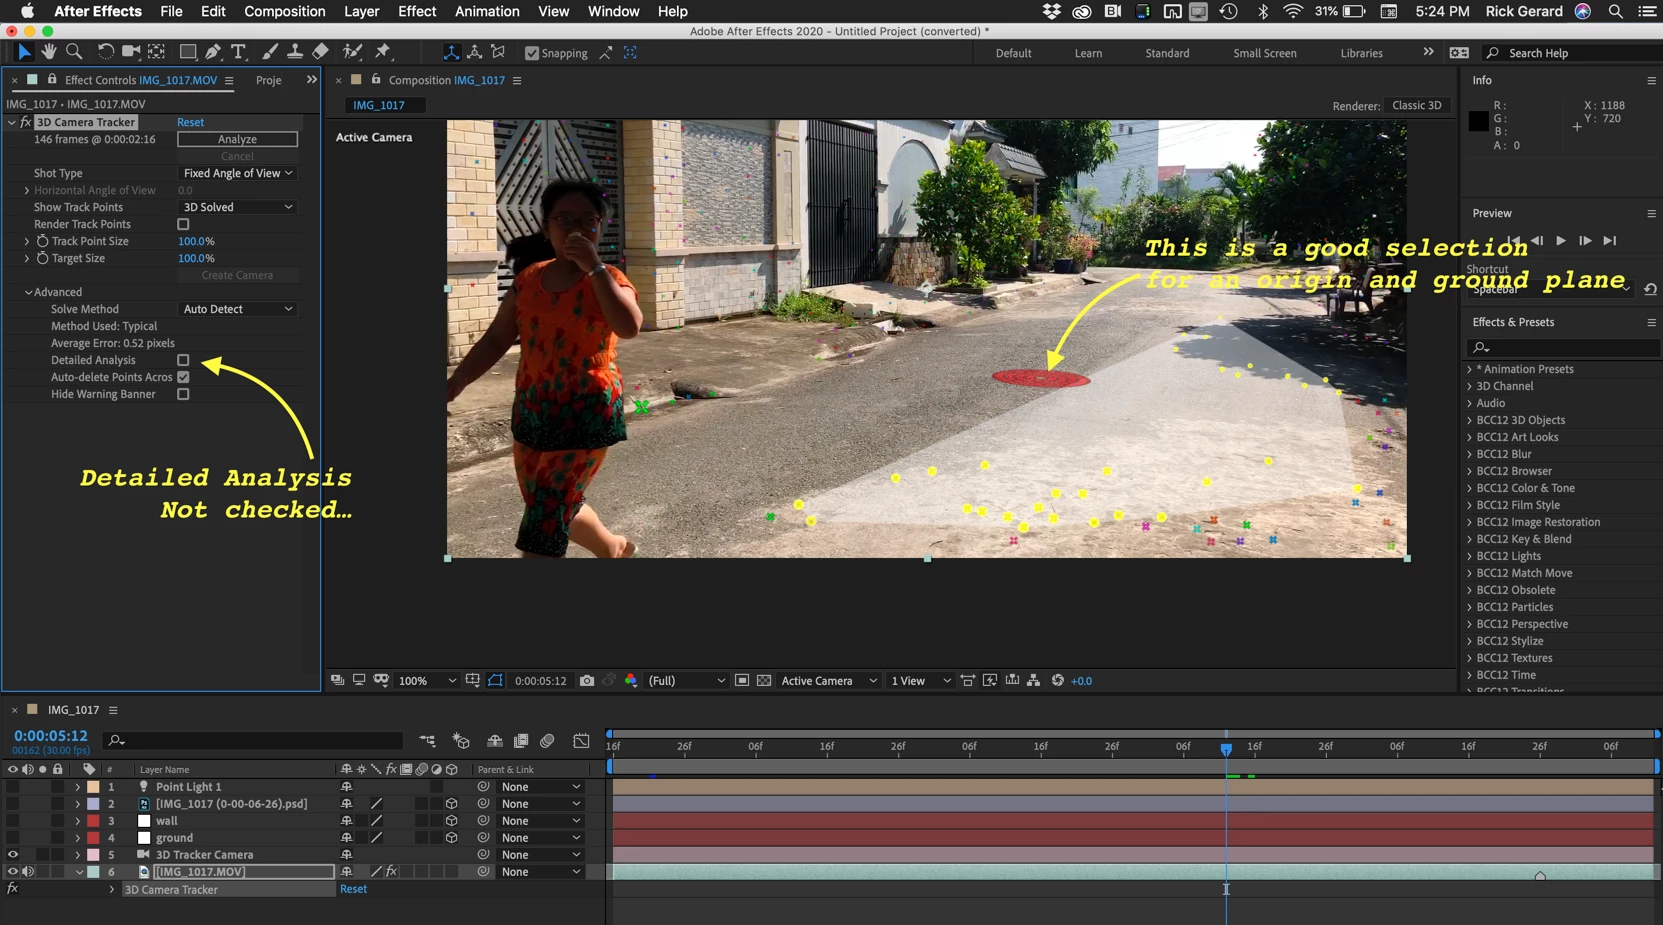
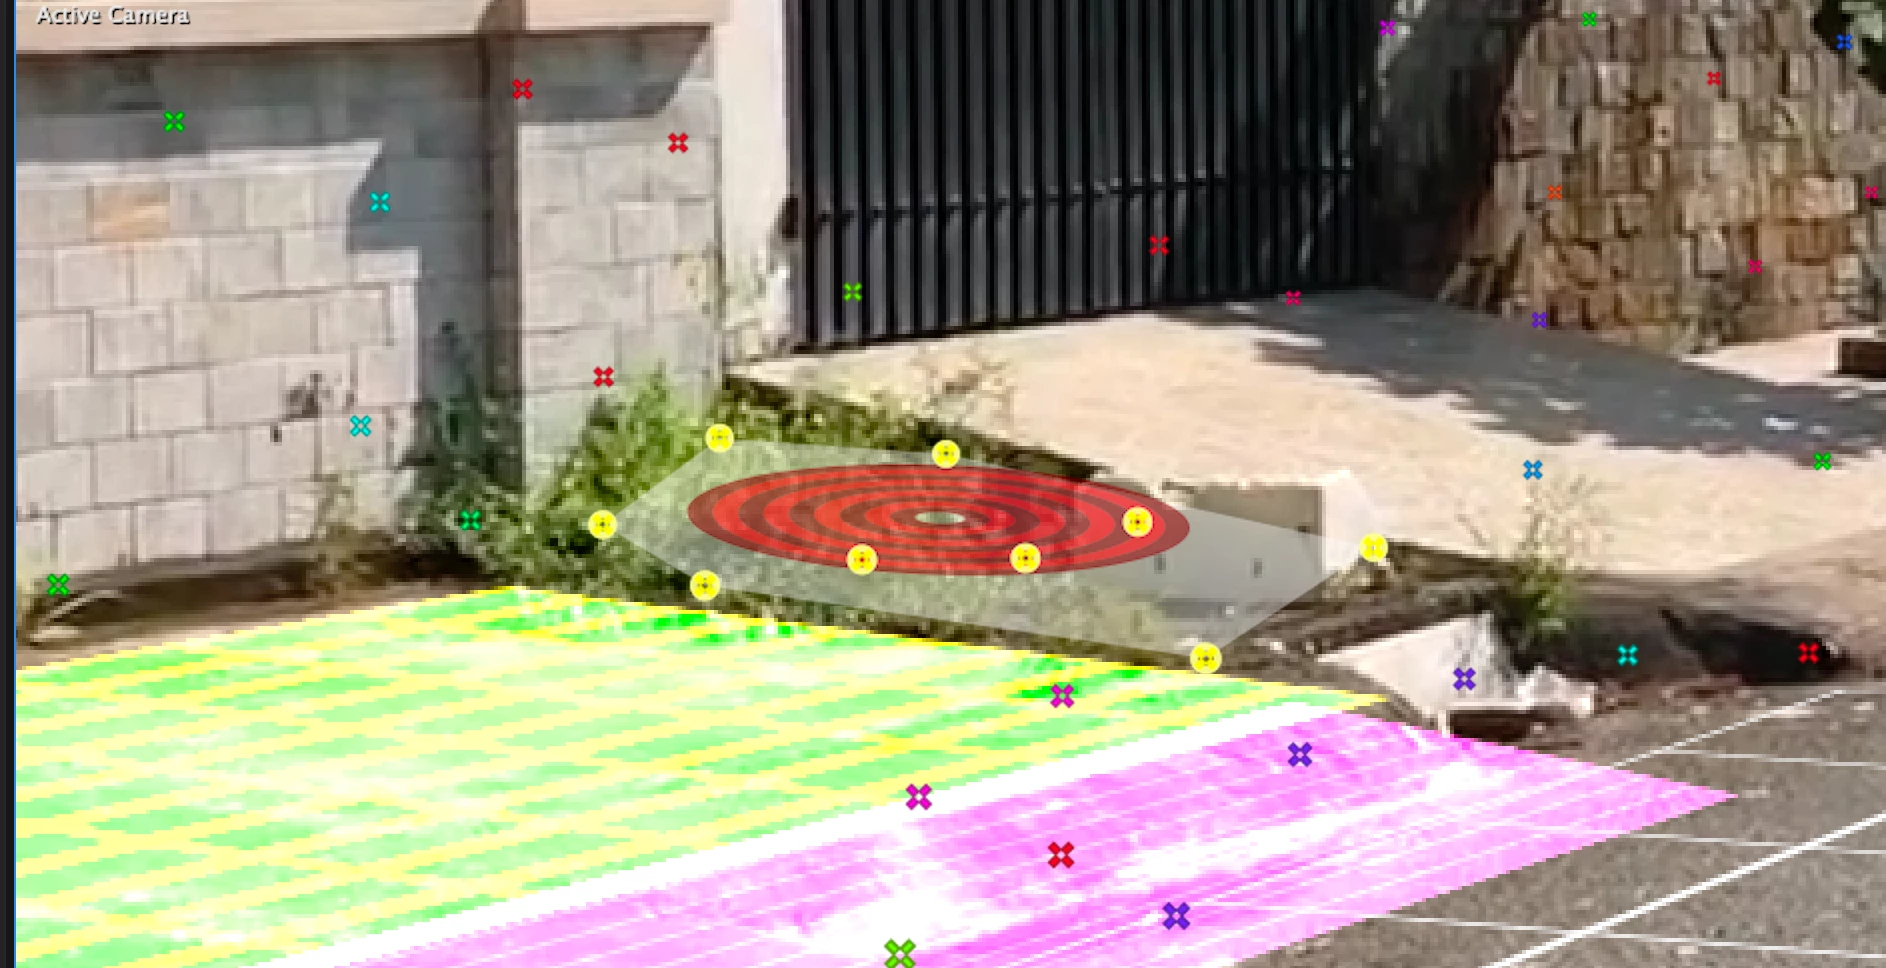
Start over choosing the following options and points:

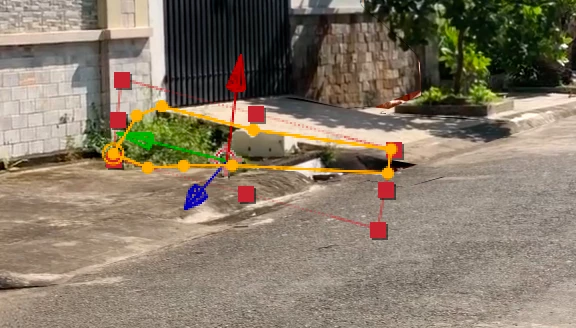
Then you have to add a new solid for every surface that has to be covered and add masks to fix the overlaps.

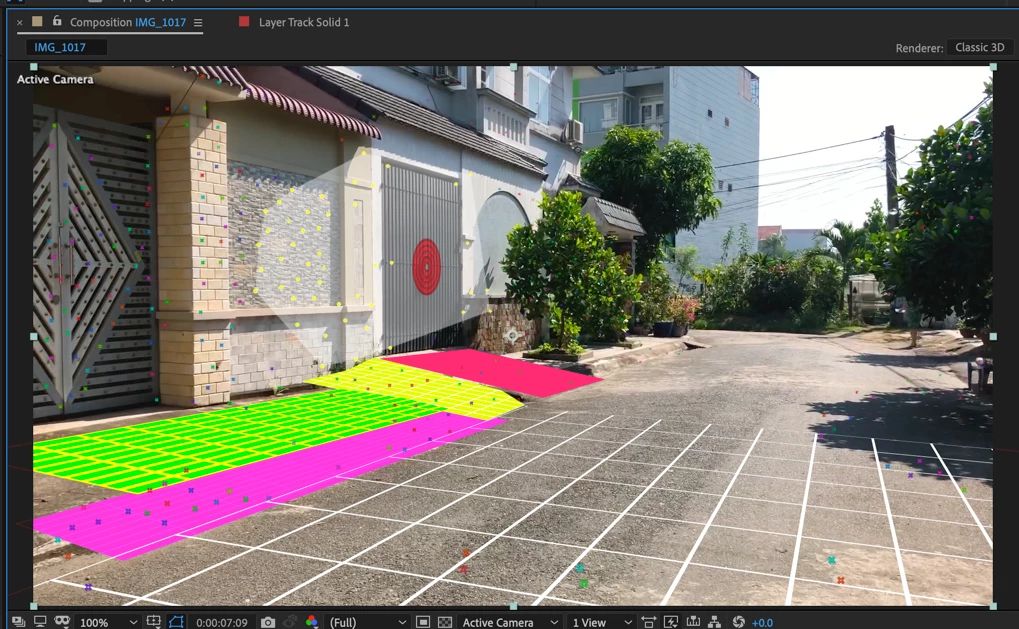
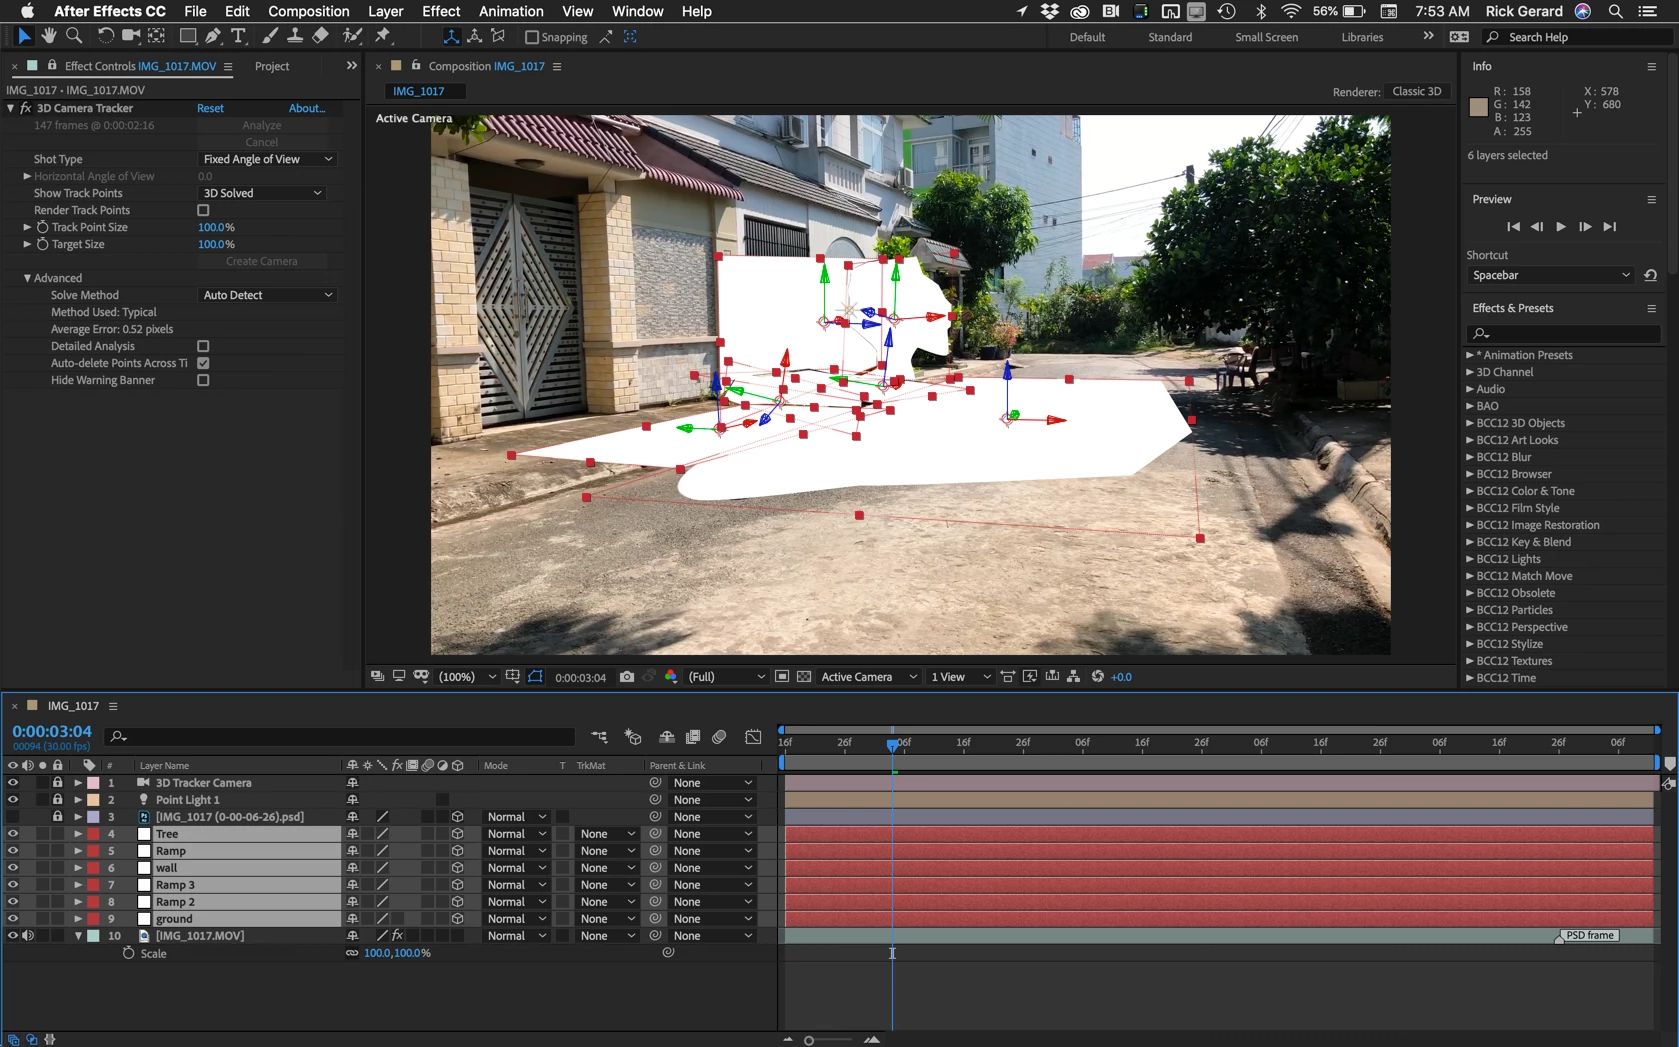
When you have all the layers in place you have to start on the masking:

When all of the masks are good, add an expression to opacity for all of the 3D layers that points to the opacity of the top layer, animate the opacity to reveal the actor and then as the last step trim all of the 3D layers from the camera and light to the layers so you don't have to wait for rendering on any of the complex 3D layers when you don't need them anymore:

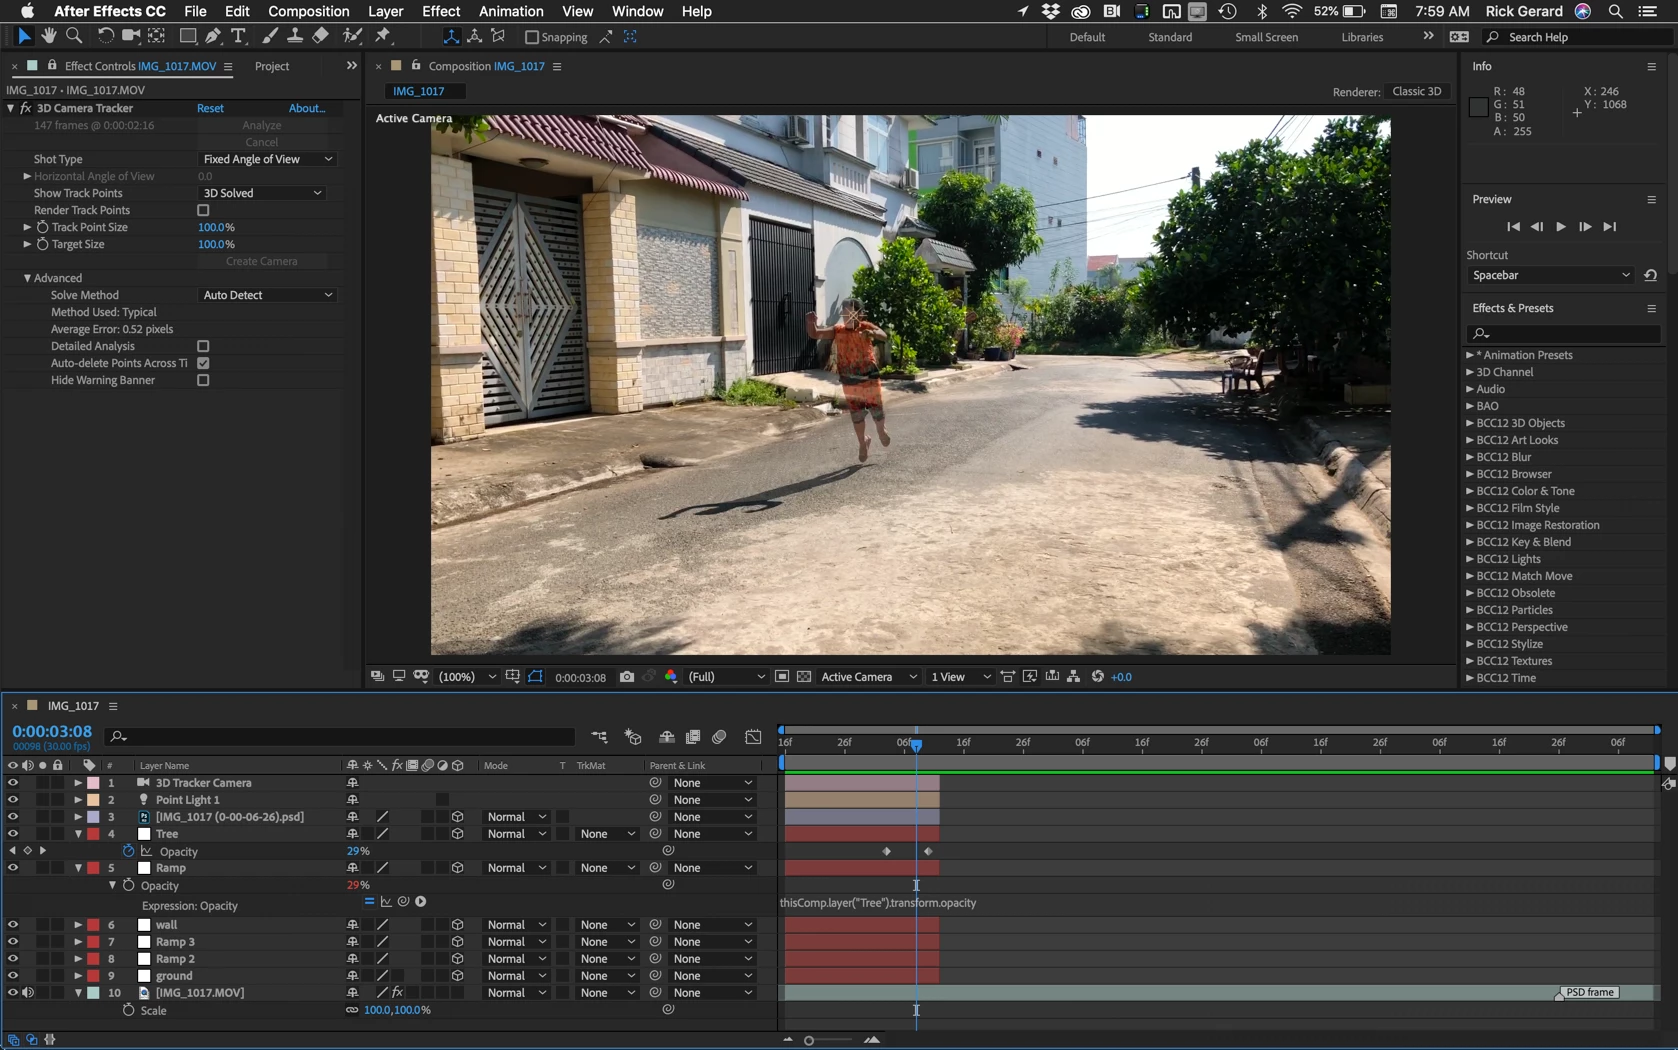
This location and camera angle caused all of the problems you have. When you understand what you have to do to pull off this kind of an effect you can make a better plan for your shot. All you had to do to make this a very simple project with one layer replacing the actor is to move your actor to the right far enough so that no part of the actor was in front of a complex surface. 


I hope this helps. You can pull off this shot but you will need to do a lot of careful lining up and masking.

2 replies

Known Participant
August 4, 2021

Just increase the Shadow Map Resolution to 4000 under Comp Setting> 3D Renderer> Option

Community Expert
December 14, 2019

I'm not sure what is going on in your composition but if you have one 3D layer that is out of focus then you have probably enabled Depth of Field on the camera. Check that by selecting the camera and pressing the "a" twice. When you look at the camera wireframe in another view (like the top view) the wireframe is brighter when the depth of field is enabled. If the Zoom value is different than the focus distance you will also see an additional line parallel to the front of the camera.

If that does not help select the out of focus layer, press the "u" key twice to reveal every modified property of the layer and start turning off effects. 


When you submit screenshots, make sure that the layer that is giving you problems is selected and you are showing us all modified properties (uu). It looks like you are following a tutorial and I think I recognize the shot. It would also be helpful if we had a link to the tutorial. A better workflow description would also help. I'm not sure what you mean when you say "I made the layer map and use shadow..." 


If turning off Depth of Field in the camera settings does not help then we need:

  • a link to the tutorial you are following
  • a screenshot with the layer that is giving you problems selected and all modified properties revealed (uu)
  • to see the modified properties of the camera (select and press uu)
  • A screenshot with at least 2 views showing the location of the camera in relation to the problem layer and
cuhieu83Author
Known Participant
December 15, 2019

Hi,


Really thanks for spending time to help me.


Yes, I'm following the tutorial as the link but that tutorial has been maken for long time so I don't want to comment there.

Anyway, I attached the photo for your reference, I have maken serveral time but it still same problem. so please help me to get more experience.


Thanks too much!!!


cuhieu83Author
Known Participant
December 17, 2019

Open the composition settings, go to the advanced tab and select 3D rendering, then check the options for Shadow Map: 

It doesn't look like your 3D solids are in the right place either. 


If you would like to check my version of the tutorial with their footage and my PSD here is a link to a zip file that should have everything you need: https://www.dropbox.com/s/3irr3rb7845on2g/Projection%20Tutorial.zip?dl=0


(note: if your browser adds a .txt extension to the zip file you can just delete it)


Hi,

1. Your file is error because i'm using windows but your file is for Mac.

2. I changed shadow map to max. 4000, it got the better but it still a little blur (not clear).

3. As you see the photo, if i move the timeline, the map is not match.