stefanocps
Inspiring
May 12, 2020
Question

rebuild a foot

  • May 12, 2020
  • 3 replies
  • 1859 views

hello i have this clip where the foot of a dancer get cut (it is shot like this)


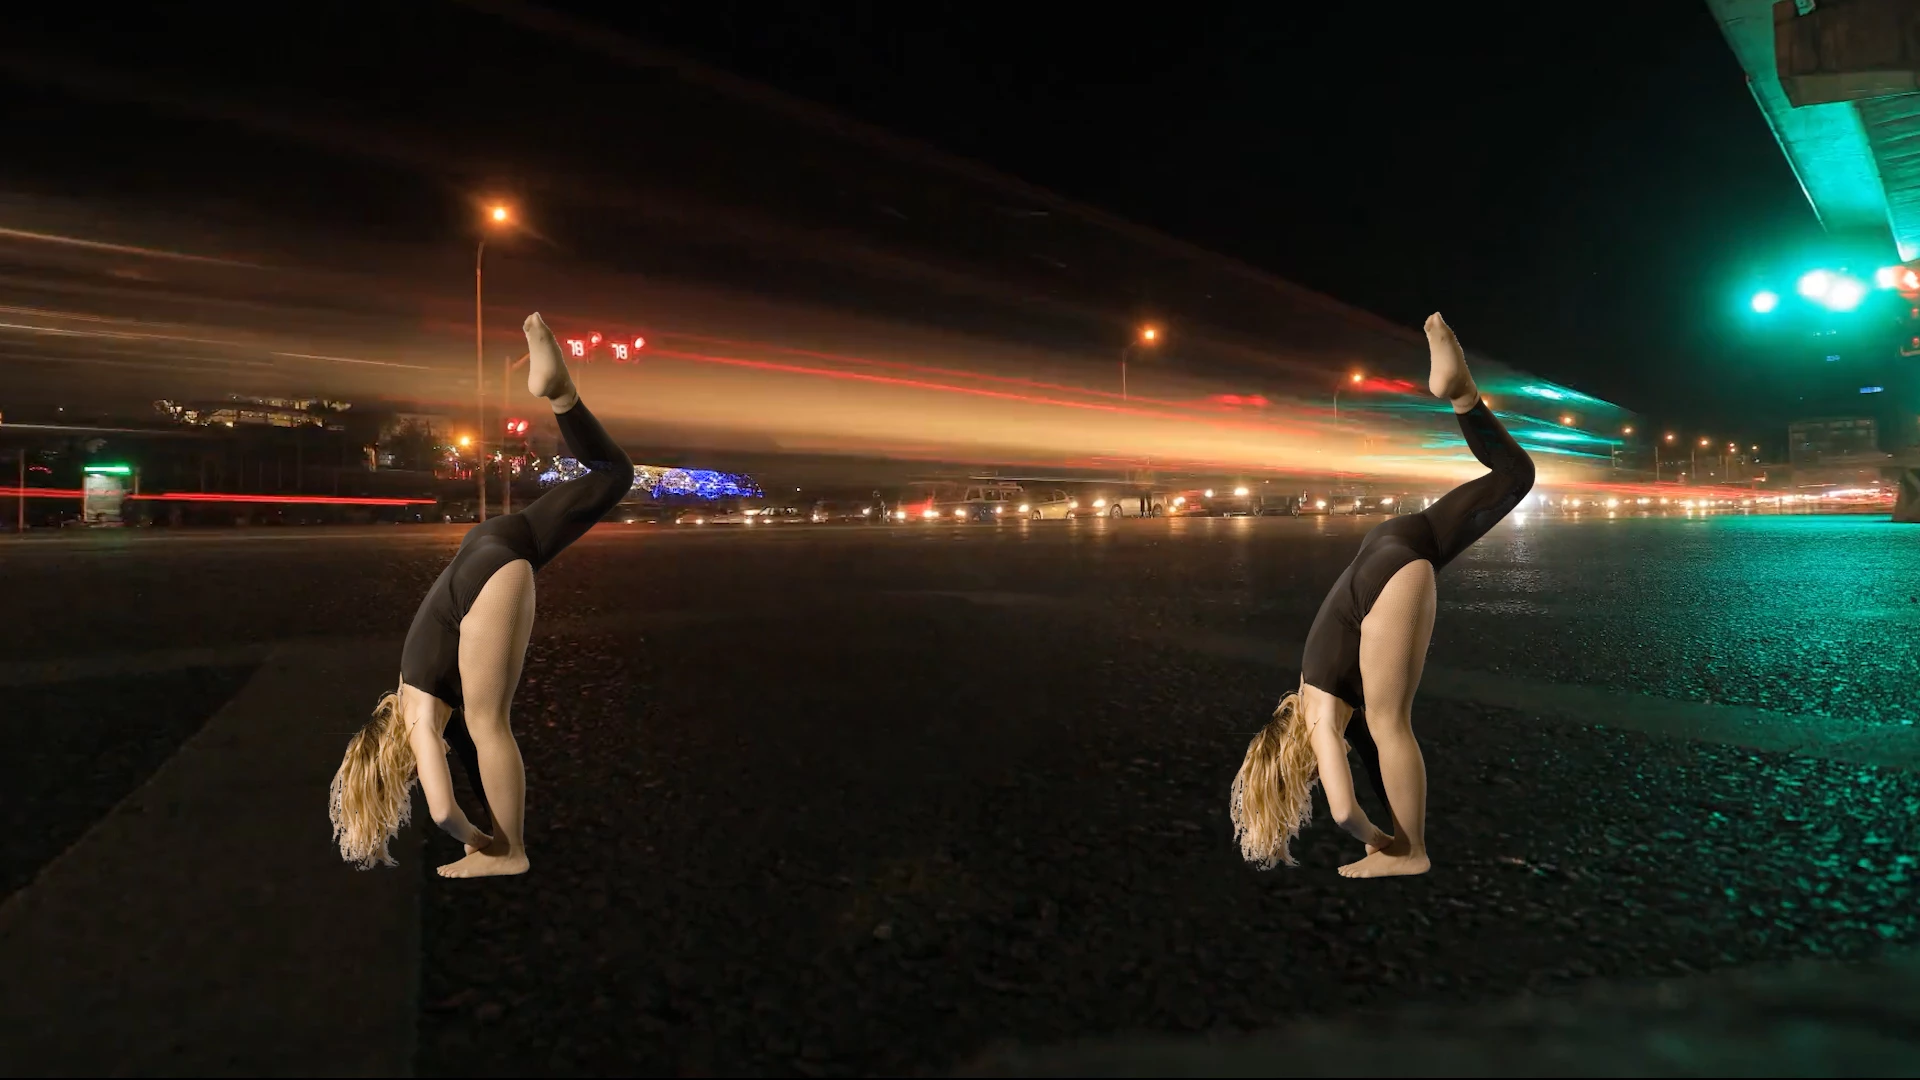
the right foot is stille there, dancer is lifting the lef

after few frames i have this

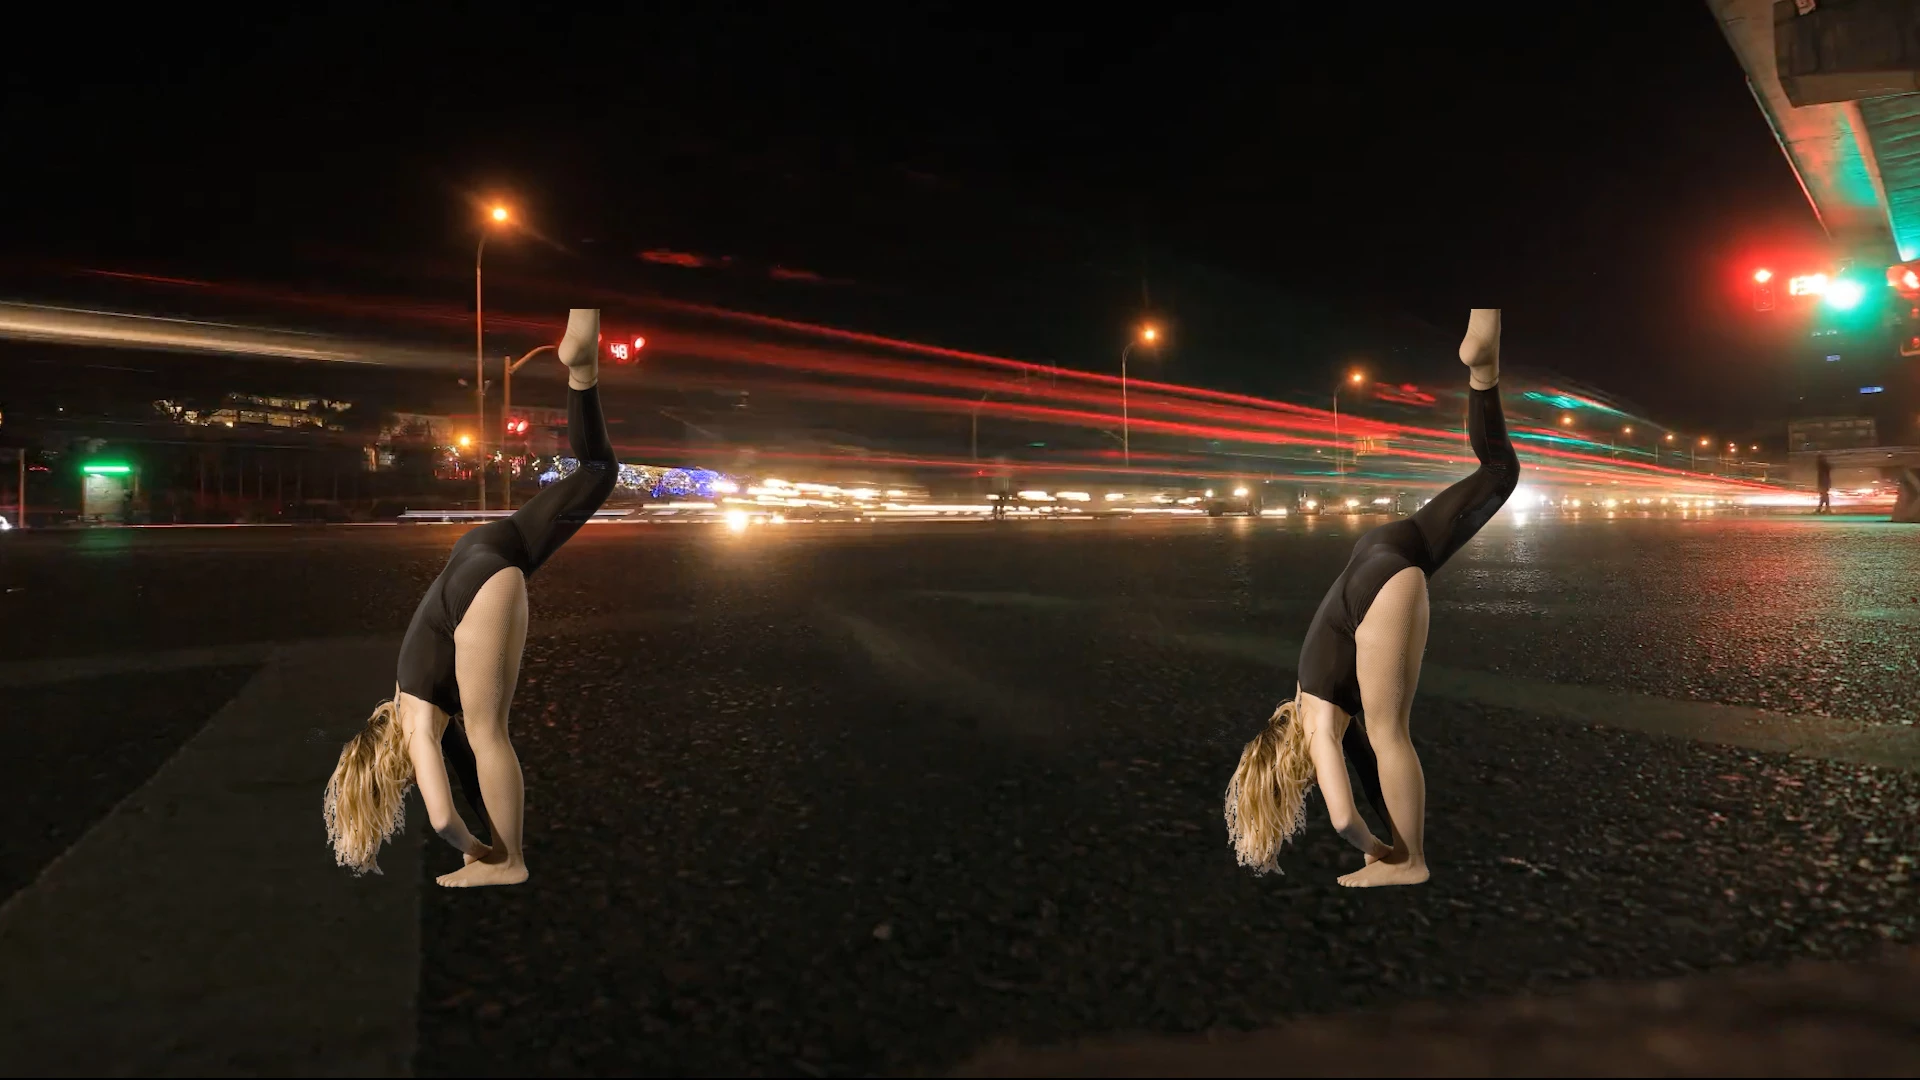
she finish to lift the leg and still the foot is missing..then back the leg down and foot reappear

Do you think is possible to create the foot form the one is there..or what can i do?

thank you

This topic has been closed for replies.

3 replies

Community Expert
May 13, 2020

It's going to take some time. The workflow is pretty much as I described. Here's a project file that gives you the basic steps. All that is left is to finish the puppet pin morph in the nested comp, animate the mask in the main comp, then finalize with some color correction. It would probably take me two or three hours to finish the project. When you do the work you need to be working with the original files. You want as much detail as you can possibly get.


Step 1: Trim the footage, create a new comp, resize the comp, duplicate the footage, set markers for the last good frame and the first good frame, freeze-frame the layers, mask the foot.

Step 2: in the Morphed comp start with the last good frame and animate the puppet pin moving the repaired foot as close as you can to the guide layer original footage. When the first frame layer has gone about as far as you can go because of the shape of the foot and the lighting changes turn off the layer and start on the first good frame layer beginning at the out point. When the layers meet, overlap, and do a crossfade. You won't get perfect edges and blends yet, but get as close as you can to a realistic-looking foot.

Step 3: back in the main comp animate a soft edge mask to hide as many imperfections as you can, then apply color correction.

Like I said, this is going to take a while but you should be able to get something that is usable. 

stefanocps
Inspiring
May 16, 2020

hello 

at least i have some time to try working on  it

First thing one question

In your aep file i see that tha first part and the òast part of the comp the foot you build it is just stacked somewhere

Did you  mean that or there is somehting worng?

Just to make sure i' will work on the proper thing

thank you

Community Expert
May 16, 2020

I created a pre-comp that just contains the frames that I want to work on. Open up the pre-comp (Morphed Foot), select both layers and press the U key to reveal the keyframes. I see that I forgot to delete the motion tracker from the First Good Frame comp, so you can delete those keyframes.


The bottom layer is just a guide layer so you can see the original foot. You don't do anything with that but it would be a good idea to lock the layer so it doesn't move.  Layer 2 is the Last Good frame shot and it has a time remapping keyframe and some puppet pin keyframes. Your job is to animate the position of those puppet pins so that the foot follows the guide layer as close as possible. When you have gone as far as you can you turn off that layer and turn on the Layer 1, then add puppet pins and start keyframing from the last frame where the foot matches up again.


I should be fairly straight forward, but it is going to take some time and you may have to animate the masks a bit. 

Community Expert
May 12, 2020

This should get you started. 

Put the original footage on the bottom layer, duplicate the footage layer and move to the last frame where the dancer's foot goes out of frame. At that point either use the Composition/Save Frame As/Photoshop Layers menu or use Layer/Time/Freeze Frame (if the foot only moves out of the frame once). Now you are set to start the masking process. If you have multiple times when the foot moves out of the frame you need a new PSD of the last good frame each time. If the foot only goes out of frame once you can use a freeze-frame. 


The next step is to create a mask for the foot. It is easy in Photoshop, and fairly easy in After Effects. You will want to add some feathering around the heel. If you set the anchor point of the layer on the center of the heel it is going to be easier to match things up. 


Trim the layer so that it is only long enough to cover the part where the foot is out of the frame. Mask the foot as shown and add some feathering below the heel. Animate the position and rotation to match up the movement as close as possible. You will probably need to add Puppet Pin to deform the foot slightly as it moves up and then back down. If needed fade out the last two frames when the toes come back into the frame. You want the replacement foot as small as necessary yet big enough to give you something to match up with the rest of the foot. In this screenshot, taken from your sample images it took 6 puppet pins to match up the foot so there was no visible shift in the size or look of the foot. 

I hope this gets you started.


stefanocps
Inspiring
May 12, 2020

the foot goes out of frame for several frames, around 75

will this method work anyway?

stefanocps
Inspiring
May 12, 2020

also i am realizing that there is another problem 

the original clip has the foot out, there is no space to add more

what you see in that screenshot is the orginal footage reduced to 30% with another clip underneath

so how shall i proceed?


Community Expert
May 12, 2020

You'll need to duplicate the dancer footage, motion stabilized the so it doesn't move when it is in the frame, probably freeze-frame, then generate or draw a mask for the foot, then motion track the original and whenever the foot goes out of frame, you will use the duplicate layer. 


Are you new to AE? Do you need more explanation that that?

stefanocps
Inspiring
May 12, 2020

yes i am new 😞