Participant
May 7, 2018
Answered

Rotobrush:Frame rate mismatch

  • May 7, 2018
  • 6 replies
  • 56931 views

hey, guys so today I filmed a footage using my phone (Samsung Galaxy S7 edge), the resolution is 3840x2160 29.706fps.

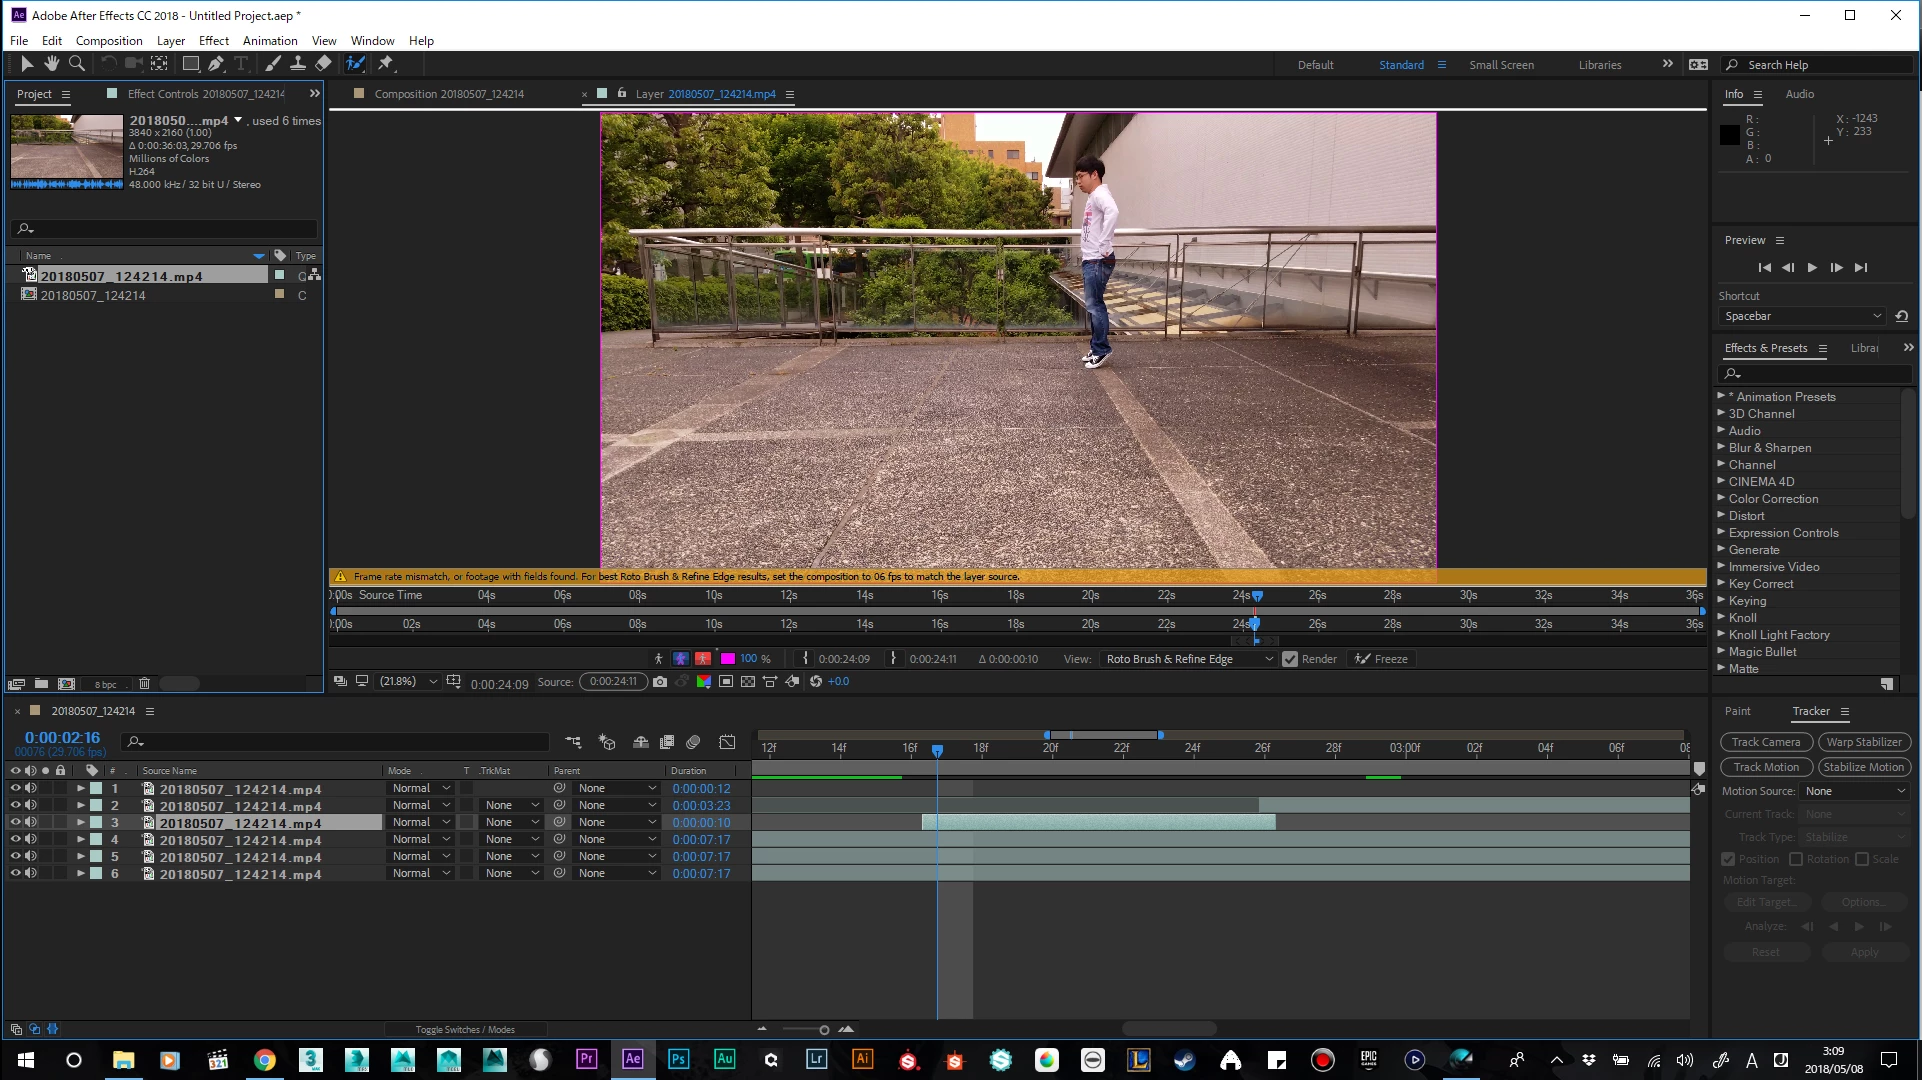
so I imported this footage into after effects and tried rotobrush on it only to have an error message telling me frame rate mismatched, or footage with fields found. set the composition to 06 fps to match the layer source.

the values in this project are weird in the first place and the rotobrush would just mask out the whole scene and wouldn't function at all.

I am using AE cc 2018.

I have also tried interpreting the footage to 59.94FPS,60FPS, changing the composition FPS to 59.94,60, but all does not fix this error at all.

someone, please help me

P.S. I know I can just use the rotobezier tool but I want to be able to fix this for future reference too when it's much easier to use rotobrush instead.

Correct answer www.TeamRichTV.com

Ok. I think I found a work around. It's kinda buggy but it works. Go up to composition and click composition settings. Change the frame rate to whatever the error told you to change it to. Then delete the rotobrush effect from your clip. Now go back to the layer panel and start trying to rotobrush again. It won't give you the error message but it also won't properly mask anything. Now go over 2 or 3 frames in your timeline. Note go to the rotobrush in the effect window. Switch it from version 2.0 to version 1.0 and it'll allow you start using the tool. Only problem is those first few frames are still improperly rotobrushed. Only thing I've figured out to fix this is to split those few frames into a separate layer and just use the regular pen tool to mask them. After that render the whole sequence without the background and bring it back into after effects. 

6 replies

Participating Frequently
March 30, 2022

Hello.


I've had similar issues trying to use rotobrush with iPhone footage. After some experimentation, I've arrived at the following process. It seems to work OK for me in the latest AE version as of this writing. I'm on Windows 10.


1.) Create your main AE comp at whatever fixed FPS you desire. I typically do 4K 24 FPS.


2.) Import your variable FPS phone footage. With my iPhone 13 Pro, the FPS usually varies just a tiny amount around 24. In the worst cases, it's usually detected as 23.99X, where the X varies. If you're editing in parallel with Premiere Pro, I do not recommend using the PR dynamic link "Replace With After Effects Composition" feature to create your AE comp. Start with a clean comp created directly in AE.


3.) For each variable FPS clip you'd like to process with roto brush, create a separate precomp containing just that clip. I do this in the project panel by dragging each separate clip onto the comp icon one at a time. These roto comps should only ever contain the single video clip, with no other effects. They should automatically be set to the proper strange frame rate, which they will inherit from the clip.


4.) Do your rotoscoping within those separate comps.


5.) In your main comp, arrange those separate comps however you'd like.


6.) If you want to bring the end result into Premiere Pro, I recommend rendering inside AE to a high quality intermediate format like ProRes. I do not recommend using dynamic link for comps which use rotobrush, because the performance can be really bad, and I've had weird crashes and hangs during rendering.


Hope that helps!

Participant
August 3, 2022

Hi all just had this same issue. I just re-exported my footage to apple pro-res and it worked fine, I lost my sound probs due to settings howver I only required and alpha matt hope this helps anyone with this.

Community Expert
August 3, 2022

The simplest solution to frame rate mismatch is to add a null to the timeline, select the null and your trimmed footage, and pre-compose so that the pre-comp will have the same frame rate as the main comp, then apply Rotobrush to the Pre-comp. 


I almost always pre-compose a layer that I'm going to Rotobrush and trim the Pre-comp to the layer length. This avoids having extra frames visible in the Layer panel when applying Rotobrush. If you add a null to the trimmed layer before you Pre-compose the Main comp frame rate, the frame blending that occurs with different frame rate footage will be maintained. Most importantly, you can open the pre-comp and color correct the source footage to improve contrast and edge detection to pull a better matte. When Roto is finished, you can turn off color correction, or better yet, Pre-render using the Composition Menu so that your project doesn't get bloated, your mattes render faster, and the comp is more stable. 


If I notice an odd but close to standard frame rate in the Info displayed in the Project Panel, like the OP's original 29.076 fps,  I open File/Interpret footage and set the frame rate to the nearest standard frame rate. Changing interpretation will not change the pitch of the audio. It almost always fixes the variable frame rate problems without requiring rendering a copy to a production format.

www.TeamRichTV.com
www.TeamRichTV.comCorrect answer
Participant
August 17, 2021

Ok. I think I found a work around. It's kinda buggy but it works. Go up to composition and click composition settings. Change the frame rate to whatever the error told you to change it to. Then delete the rotobrush effect from your clip. Now go back to the layer panel and start trying to rotobrush again. It won't give you the error message but it also won't properly mask anything. Now go over 2 or 3 frames in your timeline. Note go to the rotobrush in the effect window. Switch it from version 2.0 to version 1.0 and it'll allow you start using the tool. Only problem is those first few frames are still improperly rotobrushed. Only thing I've figured out to fix this is to split those few frames into a separate layer and just use the regular pen tool to mask them. After that render the whole sequence without the background and bring it back into after effects. 

JP-PostMan
Known Participant
August 5, 2021

Convert it to a fixed frame rate using Handbrake or some other tool, although you will lose audio sync

Participant
August 5, 2021

As solution. Convert you video to Apple Prores 422 or 422 LT (or other variants) video format with the correct frame rate. Then in Premiere Pro "Replace footage" with the ProRes files. As a bonus, you get a noticeably faster Premiere Pro with the replacement of h264 with such ProRes format.

samm42286676
Participant
January 16, 2020

I know this is late to the game, I came across this on a Google search. You can run your variable frame rate video through handbrake to convert to a constant frame rate. Not ideal, as it's another step, but you'll be able to use your video. 

Dave_LaRonde
Inspiring
May 7, 2018

Well, you're learning the hard way about using phone video -- Adobe applications hate it.

Phones shoot at VARIABLE frame rates, but Adobe video apps want FIXED frame rates.  You can drag the clip onto the Make Comp icon at the bottom of the project panel, and you'll get a comp that matches the frame rate of the video.  If the rate remains constant, you're good.  If it doesn't, you're hosed.

Fortunately, there are apps for your phone that force it to behave like a real video camera.  Get a good one, and you'll be a lot happier.

Participant
July 3, 2024

Your information is so helpful and I appreciate it.  But it would be great if you didn't preamble with a snarky condesending statement about learning the hard way.  You clearly are game to help people learn, how bout the info without the attitude?