New Participant
October 18, 2017
Answered

Shortcut for scale + dragging?

  • October 18, 2017
  • 4 replies
  • 15681 views

Perhaps this doesn't exist, but here's what I'd like to do.

We all work a lot with scaling assets in After Effects, so I'm looking for a way/shortcut to hold down a key, then click (hold) and drag anywhere in the composition, then drag the mouse up or down to scale the asset (proportionately, hopefully). This is similar to scaling in Cinema 4d, or simply moving the positioning of an asset in After Effects, only applied to scaling instead of positioning.

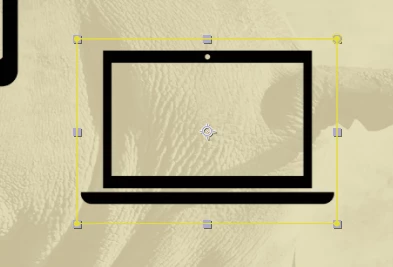
I realize the corners and edges of assets have draggable boxes, but this is complicated when you've masked these objects because the mask overlays the edge of an asset. I've included a photo to demonstrate why this is hard to when you've masked something.

Is there a third-party plugin or something that might be helpful, or am I missing an obvious shortcut?

This topic has been closed for replies.
Correct answer Roei Tzoref

you also have scale short cut which is Ctrl and +/- for increments of 1% and add the shift for increments of 10%

4 replies

P.M.B
Brainiac
October 19, 2017

Yet another option is parent your shapes to nulls which can can easily be grabbed and scaled.  There's a super useful swiss army knife of a plugin called Motion by Mt MoGraph that, among many other things, will instantly create a null on the anchor point of a layer or the averaged anchor points of several layers.  I use this function constantly to add secondary animation.  I would not recommend any of their other plugins but Motion will likely be the best money you ever spend on a plugin.

~Gutterfish
angie_taylor
Brainiac
October 19, 2017

Or, switch off the Toggle Mask/ Shape path visibility button in the comp panel so you can access the handles more easily. You can also make the layer handles bigger in the preferences to make them easier to select. Having said all of this I do agree that it would be nice to ha e some of our C4D modifiers in AE. This being one of them :-)

angie_taylor
Brainiac
October 19, 2017

Scrubbing the Scale value is very quick, particularly if you hold down the Shift key while scrubbing. Just to check you are understanding how to do this. Hover over the Scale value till you see a ha d with arrows on it. Then scrub left or right to scale up or down. Hold down Shift to multiply the Scrib by 10, hold down Command/ Control to divide it by10

Mike_Abbott
Brainiac
October 18, 2017

I think you're easiest solution is just scrubbing the scale number in the timeline.

You could 'toggle mask and shape path visibility' with the button at the base of the comp window - but there is no shortcut for that. Perhaps that might be possible in the next version of Ae that will have improved shortcut management - I don't know.

Why do you need a mask that matches your layer boundary?

New Participant
October 18, 2017

Adjusting the scale number will add time when a shortcut would suffice, so I don't think that's the answer. I might try the 'toggle mask' suggestion you have made.

Masking the comps ended up drawing the layer boundary along the mask, so that's why they were along the same boundary.

I ended up locking each individual mask on the comps and that was a suitable enough solution for the issue. Hitting 'm' and clicking lock seemed faster than manually adjusting the scaling in the timeline, but still not the neat-o shortcut I'd hope for.

Thanks!

Roei Tzoref
Roei TzorefCorrect answer
Brainiac
October 19, 2017

you also have scale short cut which is Ctrl and +/- for increments of 1% and add the shift for increments of 10%