Flare tracking stroke position issue
Hello,
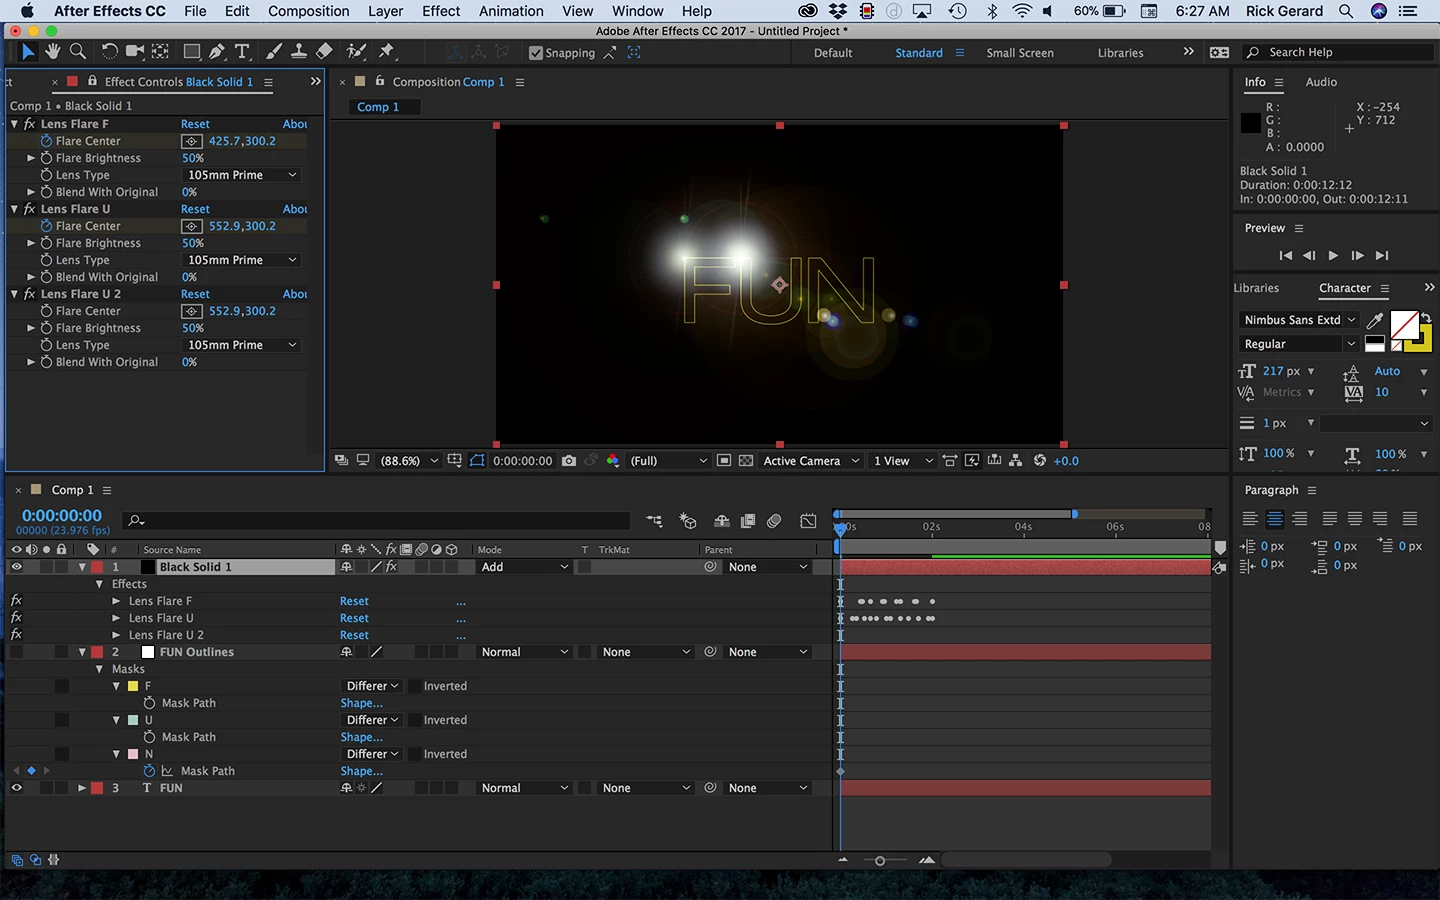
(Screen grab below)
I'm trying to make a flare track the stroke of all the letters in 'FRIDAY' i completed the F successfully, but when it came to the R the flare went way off (as you can see in the photo). I did exactly the same for both objects so I am unsure why this has happened. This is what I'm doing for each letter:
1: Creating a new null layer for each letter.
2: Copying the stroke position from the letter mask and pasting it onto the position of the null layer (so it follows it)
3: Creating a new solid and applying the lens flare effect and adjusting the setting to make it look how I want.
4: Alt-clicking the position on the flare, then dragging the pick whip down to the position on the null layer.
After I've completed all these steps the flare follows along with the stroke (as you can see on the F).
So my issue is why the flare is so off centre on the R? The position seems fine and I haven't changed the anchor point at all?
I really cannot seem to figure out what I'm doing wrong here since it seemed to work fine for the first letter.
Thank you.
![]()