Thanks for your reply. To clear some things up, the clip was shot at 60fps. I would like to play this 60fps clip at 600fps in after effects to speed it up (more fps per second will speed it up, right?). How can I do this?
Your logic is common to folks that don't really understand frame rates. You don't want to play the clip at 600 frames per second, you want to speed up time so that one minute of real-time takes only six seconds to playback. You do that by removing frames. Playback is always set in the timeline. The time it takes a clip to play in any given timeline is independent of the timeline frame rate. one second of footage that was shot at 30 frames per second will still take one second to playback even if the timeline frame rate is 50, or 5, or 15.
If you want to change the time that it takes any given clip to playback you have to change the frame rate of the clip. Interpret the clip at a higher frame rate and it plays back in less time. Interpret it at a lower frame rate and it takes longer to playback.
In current versions of AE you can interpret frame rates up to 999 fps. In earlier versions of AE, the maximum interpretation is 99 fps. If you want to make a one-minute clip playback in six seconds you can either interpret the footage at 10 times the frame rate it was shot at or use time remapping and move the last keyframe of the footage back to one-tenth of the original time.
In most cases, when you are speeding up time, there is little need for frame blending. If the math is accurate you won't have any frames to blend anyway so drop your footage in a comp that is an even multiple of the frame rate of the original footage and multiply the frame rate of the original clip by 10.
Did you follow that?
You can also time stretch. Just click on the {} icon at the bottom of the timeline and type 10% in the time stretch dialogue. As long as the timeline is an even multiple of the original frame rate of the clip you will not have any blended frames and the action will look as smooth as it can look. If there are a lot of things moving in the frame, like cars on a highway, and you want to increase motion blur then just add CC Motion Blur to the project. The default settings will give you approximately the same motion blur you would have if you shot a car going 10 mph but you wanted to make it look like it was going 100. You can't get that with frame blending.
I hope this makes things a little clearer. Try creating a new comp from some footage and then just change the file interpolation by selecting the footage in the Project Panel and pressing Alt/Option + Ctrl/Cmnd + g. Multiply the frame rate by 10 and see what happens to the length of the footage.
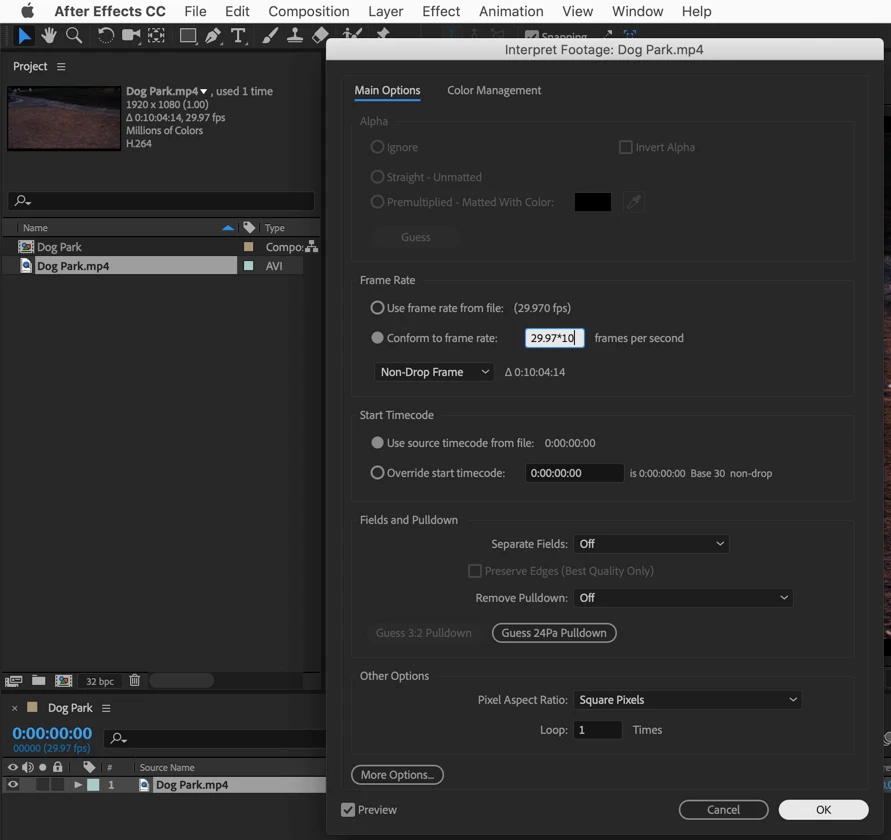
becomes this:
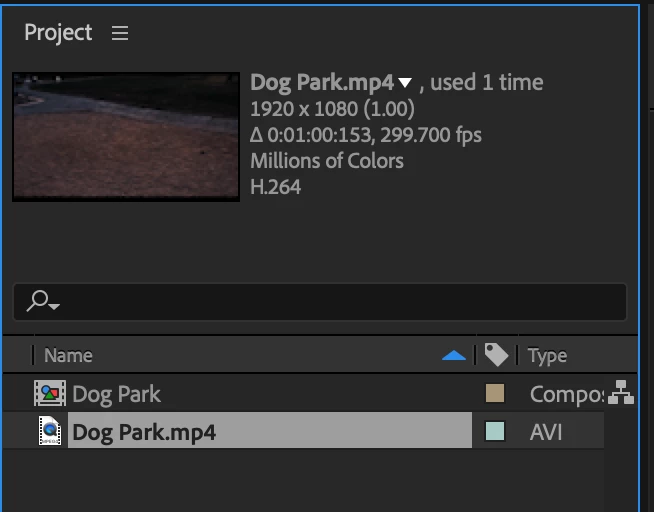
Ten minutes of original footage becomes one minute in the timeline.
