stefanocps
Inspiring
February 23, 2020
Question

remove a background

  • February 23, 2020
  • 2 replies
  • 965 views

Hello i have a 6 minutes clip with with a dancer dancing (the second part 2 dancers) . This is shot from tripod. Then i have a second clip wher i shot closeup

Now this is the set

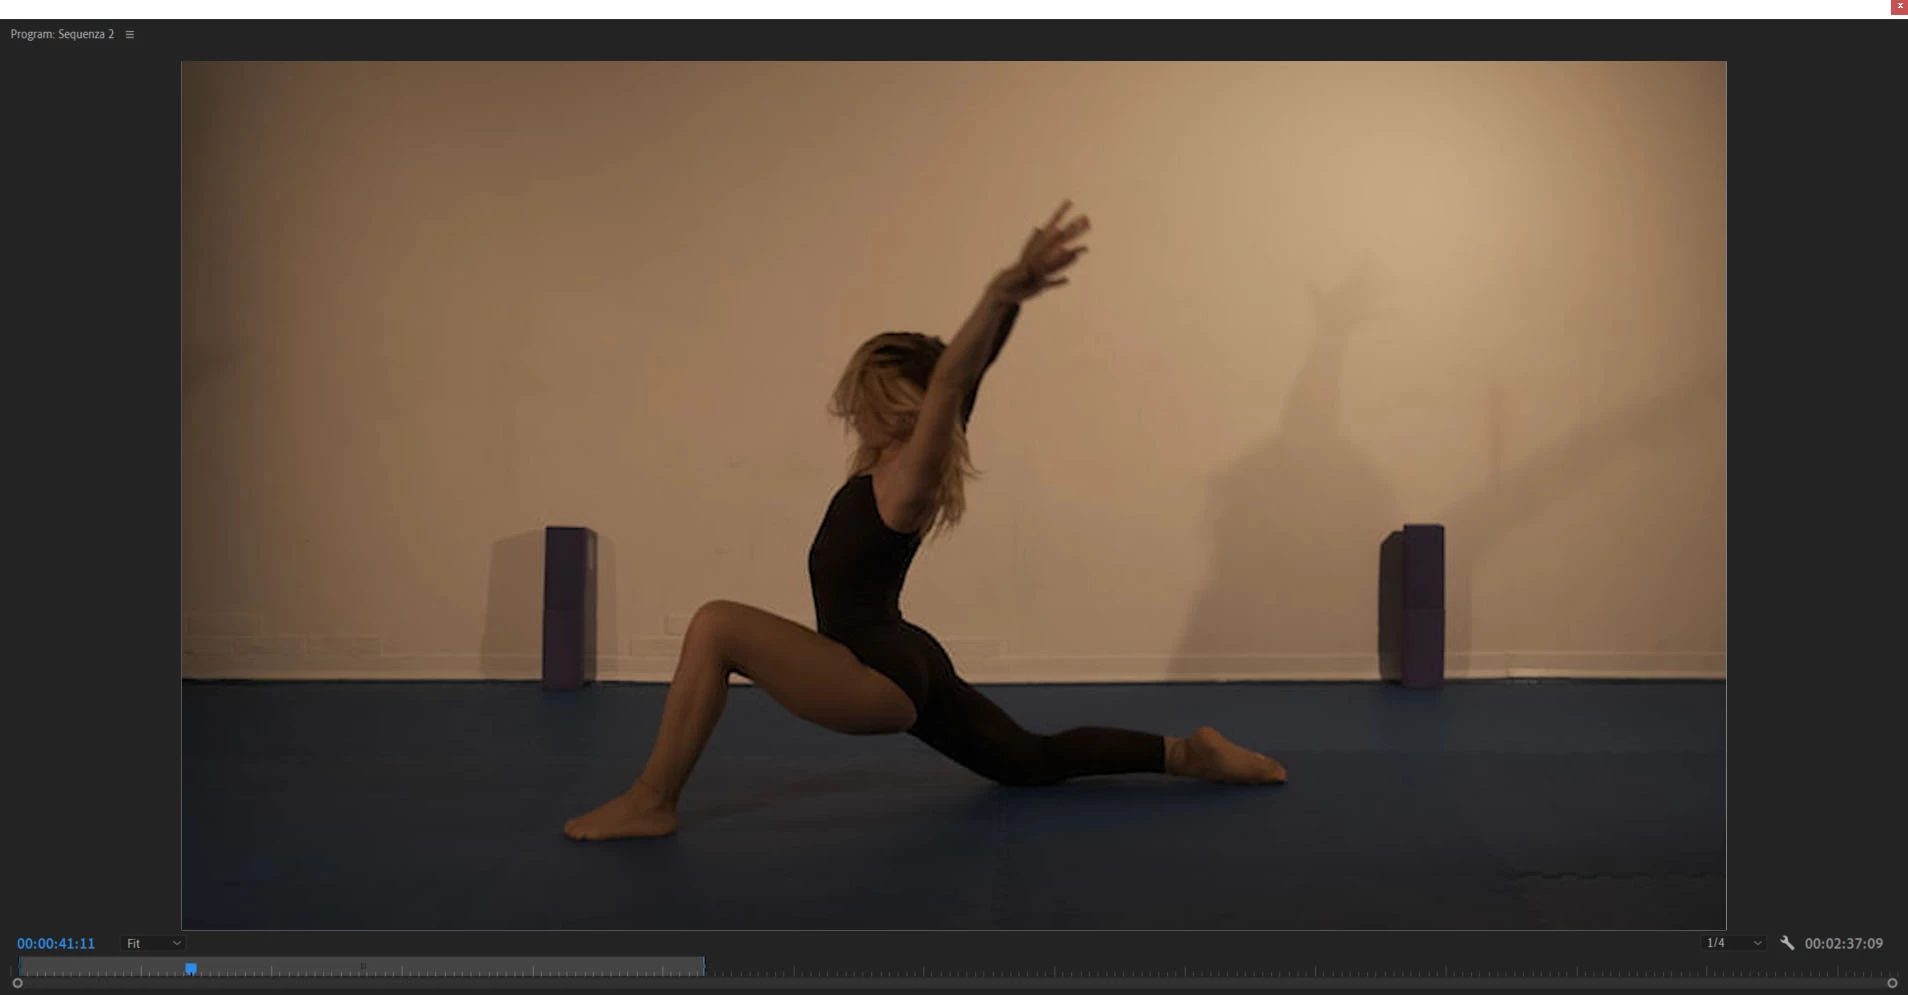
You see is almost horrible ah i want to remove all but the dancer. I thought rotoscoping but it will come with an endless job

And i can say i would rather choose another path...making like a videoart video. That means that i can even loose the perfect view of the dancer and have an overall look of what i called videoart

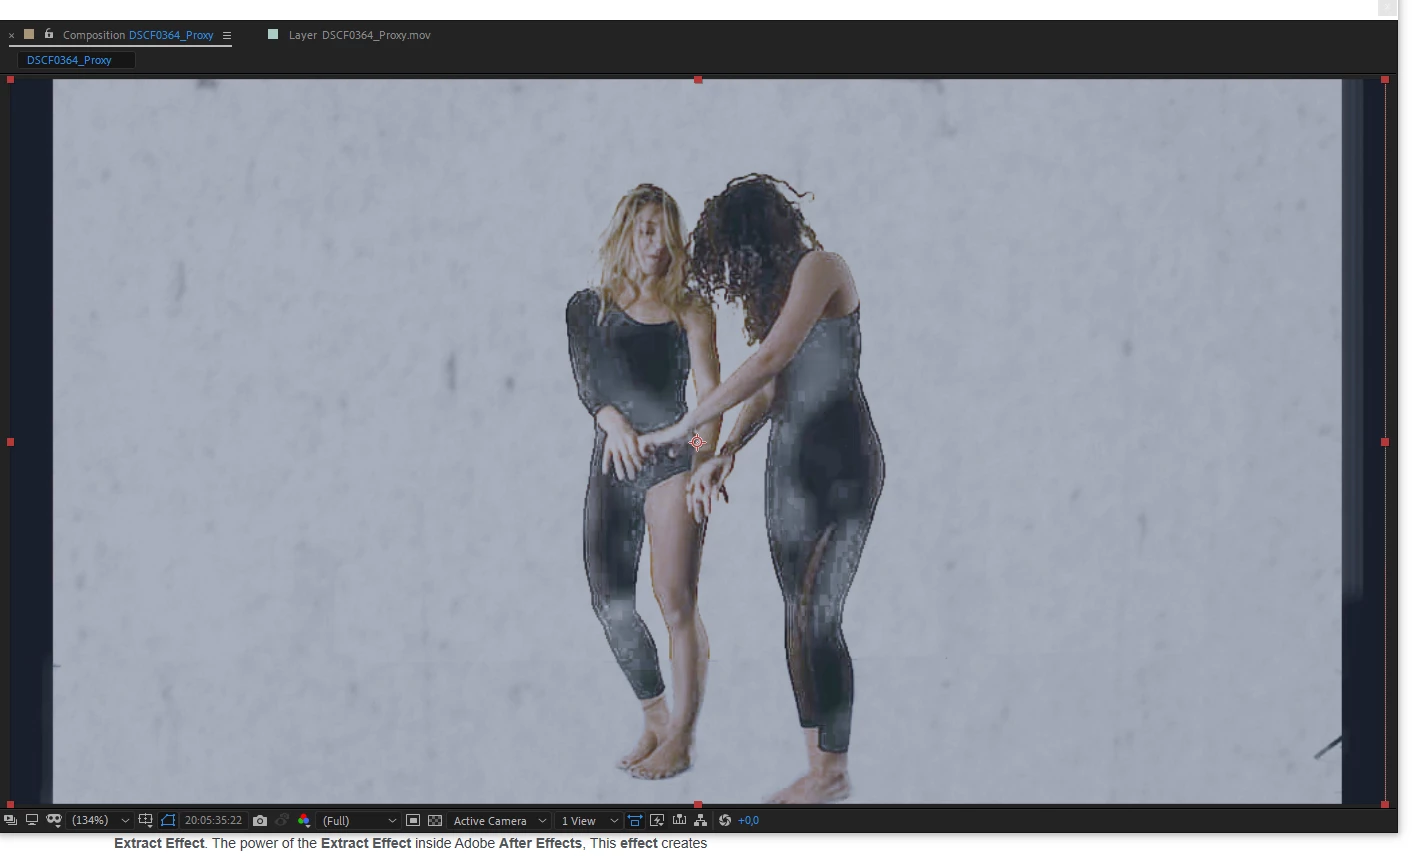
I have tried already with ultrakey and it is not too bad. but some point aren't that good. One of the problem is the wall that has a spot on the right/left side, coming from a lamp, also the 2 objet make difficult. I ask you if you could addrees me to some sort of workflow to be able to process it better. Say again, don't think anymore as a videoclip with a dancer, but as a videoart one.


This could be an example of what i am talking about. What i don't like is that i have to force some parametars to wipe all the backgound, and that s reduce the possibility for me to transform it the way i like more. If i could "spoil "less the video i would have more options!

this is the cleaning i  have achieved without the white scratched background

You can see is not all black, to get all black i loose at times parts of the body of dancers

Any help and suggestions appreciated

Thanks a lot

This topic has been closed for replies.

2 replies

Community Expert
February 24, 2020

I took a look at your footage. Here are my suggestions for that take:

  • Edit the piece first so you do not waste any time working on frames that are not going to be in the final edit.
  • Color correct the footage you are going to use first so you have some kind of a chance to find some edges

Most of that take is unusable if you need to remove the background. Here's a section that I picked where the first few frames are way too difficult to deal with even though the shot is color corrected.

All I did was set the project to 16 bit, add levels, show the Lumetri scopes so I could see things better, adjust the Input Red, Green, and Blue to bring up the levels and color balance the section on a typical frame, then add Curves to bring up the mid-range so I had as much info in the frame as I could get.


I pre-composed and moved down a few frames and tried rotobrush. It took just a few minutes to create a good matte and refine the edge and as you can see by the second screenshot, the composite is pretty good and only a little extra hand roto is required to clean up a little flaw on this frame. That can be easily done with a track matte after the Rotobrush is frozen. There are a few frames here that will be fairly easy to clean up.

I moved down a few more frames and checked to see if some kind of procedural matte was going to work. I often use Colorama to check the color channels for edges. Ramp Green and Solarize Green give you a real good look at the edges you have to work with next to flesh tones because Green is on the other side of the color wheel. You can check all of the colors and gray to see if you can find some edges.

It's a good idea to check Red, Green, Blue, and Gray to see if there is anything you might be able to use or temporarily modify to help you pull a procedural matte. On this frame, the motion blur on the top of the dancer's arm and the highlights on her arm is going to make it extremely difficult to use any technique to a clean matte without some manipulation or some animated hold out masks.


Another section of the clip has a floor that can probably be successfully keyed out by various techniques. You might start by adding Change to Color to ta copy of the color corrected pre-comp to emphasize the blue on the floor and they try keying out the floor. You can then use that layer as a track matte for the original color corrected footage. Some additional masking will be required to clean up the rest of the matte.

I think the most important part of your project is choosing the shots carefully and pre-editing the whole piece before you try and remove the background. No matter what you do, separating the dancers from the BG is going to take a lot of time. 


If the finished piece is going to be six minutes long I can see this project easily taking 10 to 12 days to complete.

Here's a project file that shows just the last step. Maybe it will give you some ideas. At the very least you'll see how to quickly color correct a shot.


https://www.dropbox.com/s/3rq3a9p6y9kn287/background%20removal%20start.aep?dl=0 

February 25, 2020

Thanks

I agree that first i will edit. I just want to make sure that i could get acceptable result before starting the editing, which is more complex, contain other things (no more dancer). So for sure the second clip , the one for closeup, it will be used just for few parts, i have seen the way you processed, and at first i don't understand properly 🙂 will need to study it more.

I have dopwnloaded the ae propject , need to understand the way you used the due files in combination.. :). I find out that ultrtaky from premiere will give me better results than the ae equivalent,  Perhaps i will need to follow this procedure also

February 25, 2020

ok i start to understand the procedure you used in ae composition. The wall i still there though. What procedure should i use for that? Also i see that in some frames the dancer miss pieces of body

stefanocps
Inspiring
February 23, 2020

just one more info

In a previous shot(another day) because something different in lighting and because the 2 little boxes in the background were not there i could achieve a better background removing

That would let me have more choice in processing

this is the previuos shot


Community Expert
February 23, 2020

If those shots are examples of the raw footage it is all seriously underexposed. That is going cause you problems because you have lost data that cannot be put back. You asked in another post how to use the Levels effect to do color correcting. When footage has these kinds of problems Levels is a very easy way to color balance and adjust the exposure in a shot. There are more sophisticated approaches to color correction, but Levels will get you close enough to see if you can save the shot in just a few clicks, and it will show you exactly how much information you have lost.


I would recommend adding the Levels effect to each clip and then select the Red, Green, and Blue channels one at a time and then drag the right edge of the histogram down until it matches the start of the first spike in the pixels. Here's what it looks like when you drag the Red Channel, then the Green, then the Blue. The last screenshot has notes to explain what I did:

You can see where each channel starts and you can also see that this image has only about half of the information you should have if you are going to remove the background.


Matching Red Green and White points then adjusting the gamma on the RGB Chanel to something like this is going to give you the best chance of having enough data in the image to extract a matte or at least do some hand roto. Carefully look at this screenshot:

The footage now has some black pixels and some white pixels, but the subtle difference between color and luminance values is gone so it is a lot more difficult to use any kind of tool to help you create a matte that removes the background.


Your screenshots are so small that they are almost unusable to demonstrate the problem, but I took a shot at your darkest screenshot. Here's my analysis:

At least you can now see the dancer and her body so there is a chance you can do some hand roto or maybe even use Mocha AE to generate some masks but it is going to be very slow going. I just spend the last 3 hours using Mocha to rotoscope a 4K 10 bit perfectly exposed shot that is only 197 frames long. That's just over 8 seconds. I am trying to rotoscope a shadow on a light gray T-shirt that is moving and part of the shirt that is not in shadow so I can fix a flaw in the shot that extends over both the highlights and shadows. If I had to roto the darkest shot of the dancer and it is several minutes long it would take me at least a couple of days. 


If you try the levels approach, then add Extract and drag the white point or you pre-compose moving all attributes to the new comp, then try Ultra Key or some other effects, you might get something from some of the shots, but the darkest shot not going to work at all for isolating anything but the whitest areas of the shot. 


If I had a link to your most problematic shot I could send you a getting started comp, or send me the footage for the best shot and I'll try and do the same. I can't promise when I will get to it, but I'd be glad to try and help.


stefanocps
Inspiring
February 24, 2020

ok

i'wll surely  try all these precious hint by my own to learn

In the meanwhile i have uploaded the proxy version of the footage (original is 10gb), i think it is still good for you to work with, i will only need to replace footage once comp is started..

that is the link wetransfer


here the proxy of the clip wher eri will get some closeup

wetransfer2


about the procedure i will intend to follow, i still think that level fx and or ultrakey will give me an easier workflow, you'll see your own. .thanks


p.s.

the latest shot you work at, was shot in another session and it had better lighting, was easier to isolate the dancer from background, though the image was dark...