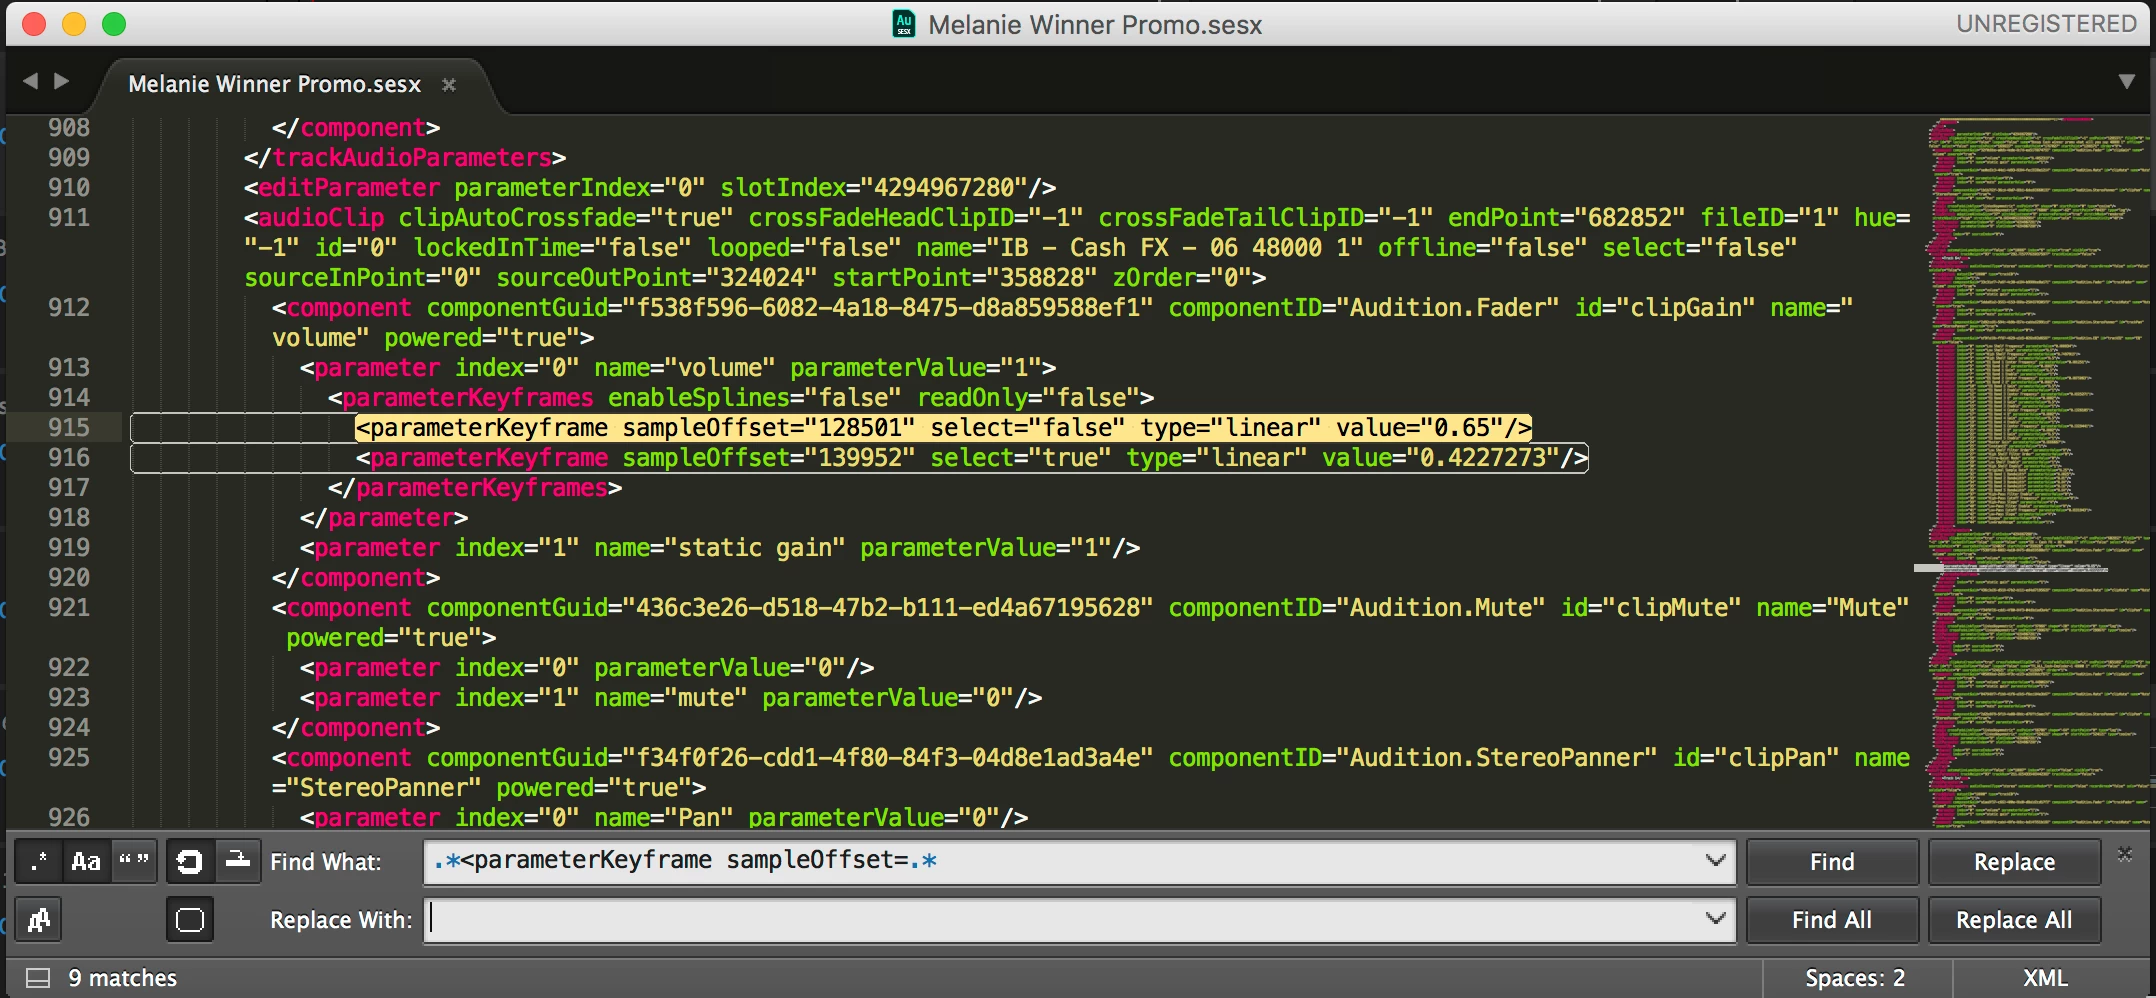
If you don't mind going scorched earth on keyframes, or getting your hands a little dirty with a text editor and Regular Expressions, you should be able to remove all of those quickly and easily.
Save the session .sesx file, then open it in an advanced text editor like Sublime Text. These should offer the ability to perform a Find & Replace using regex which are sort of template-driven searches for text. If you want to wipe out all keyframes on all clips and tracks, this example should work. Audition's .sesx file format is fairly human-readable XML, so searching for:
.*<parameterKeyframe sampleOffset=.*
should find each instance of a keyframe.
However, that doesn't really explain why you'd end up with so many volume keyframes. The Essential Sound panel doesn't generate any keyframe information. The Clip Volume keyframes that show up when sending to Audition would be based on any keyframes in the standard Volume effect for every audio effect in Premiere. I don't think anything else would be translated as clip volume keyframes when importing to Audition.
