- Home
- Bridge
- Discussions
- Bridge thumbnails not showing correct resolution
- Bridge thumbnails not showing correct resolution
Bridge thumbnails not showing correct resolution
Copy link to clipboard
Copied
I have searched the forum and can not find an answer to this. It has been asked by others several times but it seems people dont understand the question as the answers have been incorrect or irrelevant, for example here Change the metadata to display image dimensions at different resolution
Basically what happens is when in Preferences you set Bridge thumbnails to show image dimensions it will show the dpi as well. In the images I have I use both 72dpi and 300dpi versions of the same image as I work on websites and also printed material.
Generally they all show 72dpi even though I know they are 300dpi. The only way I can find to force it to display correctly is to open the image and then save it again, which in the case of jpegs only degrades the image quality further and is a process I dont want to have to apply to thousands of images.
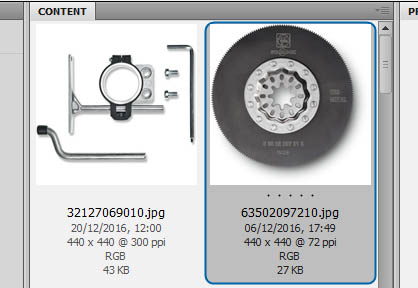
For example I open this folder in Bridge and the selected images says 72dpi.

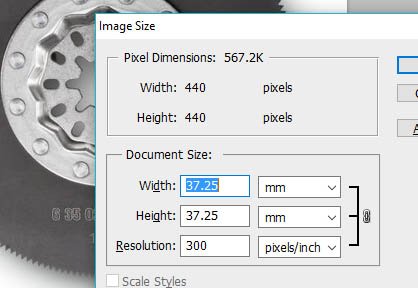
In Indesign and Photoshop it is clearly 300dpi.

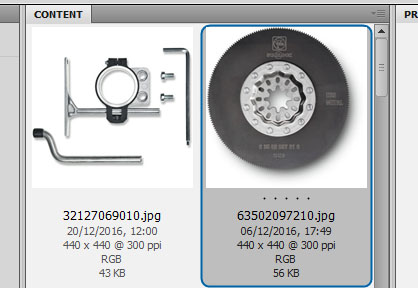
If I then save it without changing anything and go back to bridge the correct dpi is now shown

How do I make Bridge display this information correctly without having to open and resave every image? I have purged the caches and refreshed the views but still displays the wrong dpi.
I am using CS5 on a PC
Thanks in advance!
Copy link to clipboard
Copied
Well I am not convinced that Bridge is at fault yet. Have you checked the RAW data (File Data) and checked what the tiff resolution is showing I.E:
| <tiff:XResolution>402/1</tiff:XResolution> | |
| <tiff:YResolution>402/1</tiff:YResolution> | |
<tiff:ResolutionUnit>2</tiff:ResolutionUnit> |
I think the problem could be on your workflow IF you are using Save For Web, it is buggy (Very)
If you start with a document with a certain PPI, then change it and SFW using ALL metadata inn CS5 it saved as 72PPi, in CS6 it saves as the original PPI.
I would suggest saving as an ordinary JPG with no thumbnail. This can be altered in the Preferances - File Handling - Image Previews.
Just my thoughts...
Copy link to clipboard
Copied
To check what metadata is in a file, use this ExifTool command:
exiftool -a -G1 -s '/Users/currentuser/Desktop/my file.jpg'
If you did wish to change the metadata to a value of 300 without altering the image data, ExifTool would be an option:
exiftool -IFD0:XResolution=300 -IFD0:YResolution=300 -Photoshop:XResolution=300 -Photoshop:YResolution=300 -r '/Users/currentuser/Desktop/top level folder' -overwrite_original_in_place
The code above will -r recursively process all images and images in all subfolders under the top level folder being processed, overwriting the original image – so test thoroughly and with care on duped images (or remove the -code syntax highlighted in orange). It is further possible to restrict processing to specific file types or to exclude specific named sub directories/folders under the top level folder being recursively processed.
This ExifTool command line code sample is from the Mac, on Windows simply change the single straight quote/foot mark ' to straight double quote/inch marks " with the correct platform specific path to the top level folder.
The following JFIF/JPEG specific resolution tags would be optional and likely not required:
-JFIF:XResolution=300 -JFIF:YResolution=300
If the question was 300 what? and there was no unit of measure set in the files, then inches could be set by adding the following four switches to the previous command line code:
-IFD0:ResolutionUnit=inches
-IFD1:ResolutionUnit=inches
-Photoshop:DisplayedUnitsX=inches
-Photoshop:DisplayedUnitsY=inches
Copy link to clipboard
Copied
Hi Dave,
I think the problem you are having is that Bridge does not display images in a print environment. When Bridge displays an image, it will show you the pixel representation that's in the image. That is, if the image is 400 pixels wide, it will display the image at 400 pixels wide. If the image is 1000 pixels wide, the image will display at 4000 pixels. The obvious caveat to this is if there's not enough room for the image to show at 4000 pixels, it will display a percentage of that size. Unfortunately, unlike Photoshop, Bridge will not display the percentage of the original size anywhere. FWIW, this is no difference than displaying images on the web: a 400 pixel image at 72 ppi will be larger or smaller than an image that is 400 pixels wide that is set at 3000 ppi.
Even in Photoshop, if you open an image that is 2000 pixels wide (at 72 ppi) and display the ruler, then change the resolution (in Image size) to 300 pixels wide (and turn Resample off), the image will not change in size but the ruler representation will change.
If you move an image into InDesign, than the image will display it's size based on its resolution setting. That is, if you take the same image and set the dimensions to 400 at 72dpi and a copy of that image at 200 dpi, and drag both versions of the image into InDesign, the 2nd one will display significantly larger than the first.
But in Bridge, an image cannot appear larger than its original size in pixels (based on the resolution of the pixels in your monitor.
Does that answer your question?
Copy link to clipboard
Copied
Thanks for the replies. It seems the problem is Bridge reads a property known as Tiff Xresolution which seems to be a different propety than the one PS and Indesign read. The bit in red and underlined below is probably why different apps can see it as 300dpi and bridge doesnt. Which means really that Bridge is not particulary useful for telling you the working resolution of an image. I'll just have to drag it into Indesign to see its actual resolution and then either fix it in Photoshop or bin it. It would have been useful and time saving not to have to do that with every image.
When you get images supplied by manufacturers etc for use in printed material it probably depends on how or what they were created in I guess. Any image I create in PS or Illustrator always shows the resolution I intended but ones I get from unknown sources seem to be the problem.
TIFF Tag XResolution
| IFD | Image | |
|---|---|---|
| Code | 282 (hex 0x011A) | |
| Name | XResolution | |
| LibTiff name | TIFFTAG_XRESOLUTION | |
| Type | RATIONAL | |
| Count | 1 | |
| Default | None |
Description
The number of pixels per ResolutionUnit in the ImageWidth direction.
It is not mandatory that the image be actually displayed or printed at the size implied by this parameter. It is up to the application to use this information as it wishes.
Copy link to clipboard
Copied
I believe that InDesign simply assumes that an image is 72ppi if there is no resolution metadata in the file and scales the image’s print/output “physical” size to suit the actual PPI. Bridge does not assume and does not report a PPI value if this metadata is missing.
1000 pixel wide image @ 72ppi:
1000 / 72 = 13.888 inches wide
1000 / 72 = 13.888 x 25.4 = 352.778 mm wide
1000 pixel wide image @ 222ppi:
1000 / 222 = 4.504 inches wide
1000 / 222 = 4.504 inches wide x 25.4 = 114.414 mm wide
I have confirmed these findings with an image with and without metadata and the results in InDesign match. This makes sense, InDesign is “outputcentric” and images need a print/output size, while Bridge is “filecentric” and simply reports on what data is in the file.
Copy link to clipboard
Copied
https://forums.adobe.com/people/Dave+McBride wrote
Generally they all show 72dpi even though I know they are 300dpi.
The basic premise here has still not been acknowledged by the OP: why would it matter? These files are all 440 x 440 pixels, so you can use either one for print or web and they will/can all reproduce at the same size anyway.
The fact is that the ppi setting very rarely has any significance for output size. On screen (web) it's completely irrelevant and can be anything or nothing at all. But even in print, the effective ppi is usually set independently from the file's metadata.
In InDesign, for instance - almost everything in commercial print goes through ID these days - you scale to fit the required print size, and that's it. What the ppi setting originally was in the file is long forgotten. All you're interested in is whether the effective ppi at that size is sufficient.
That effective ppi, BTW, doesn't have to be 300. That's a myth. That number is just a theoretical upper limit, for printing with a 150 lpi screen frequency. Anything higher than that will not improve anything and just be wasted. But in reality you can go a lot lower before you can actually see any pixelation or softness (loss of sharpness). How the file is prepared for the effective ppi is a lot more important (mainly output sharpening at actual size).
When I work in InDesign, I usually don't even care about the file's ppi setting. I just look at the total pixel count and effective ppi, and size accordingly.
Copy link to clipboard
Copied
The reason it matters to the OP is the same reason it matters to me. When I export images for a client in JPG for, the client doesn't necessarily see the pixel dimensions, the client sees a thumbnail that shows it as 72 ppi. We have several clients who explicitly state that they want the files to be 5" x 5" in RGB at 300 ppi. I am not interested in trying to make the client understand that there's no difference in the file whether it says 72 ppi or 300 ppi. I just want Bridge to display the ppi the way I saved it. Many times Bridge won't even show the size or the ppi. Here's a screenshot of a JPG I created minutes ago.
.
I know that YOU don't care about the file's ppi setting, but you're a professional. My clients are not professionals and they conclude that we didn't not follow their instructions and deliver an image with their specs. And I don't want to constantly have to reopen JPGs, change the displayed ppi as 300, and resave.
Copy link to clipboard
Copied
And I don't want to constantly have to reopen JPGs, change the displayed ppi as 300, and resave.
By @jime90533359
Good news is that you don't have to:
