

Border Around Text

Copy link to clipboard
Copied
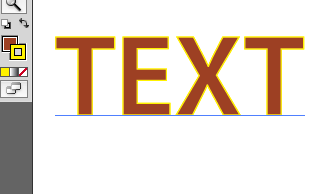
I know very little about illustrator. I have one word of text to be used for a logo. The font is Ravie, 16pt, color is dark cranberry. I want a thin border around each text character using a light yellow.
I created this in photoshop using the stroke effect but couldn't duplicate it in inDesign so thought I might try illustrator.
Would appreciate some direction here.


Explore related tutorials & articles
 9
Replies
9
9
Replies
9

Copy link to clipboard
Copied
s,
In the Appearance palette/panel flyout, you may select Add New Fill and set the colour as desired (cranberry), and you may Add New Stroke and set the colour as desired (light yellow) and the Stroke Weight as desired; afterwards, you may drag the Stroke down below the Fill if you want the Fill to appear as the full size of the letters and the Stroke to be the addition (otherwise, the visible Stroke will extend both inside and outside the original letter shapes); you may adjust the Stroke Weight.
Copy link to clipboard
Copied
I have an old, old version of illustrator - version 10 and all I've done so far is type the text in. Do I need to convert to a shape or points before I can produce a border around each letter?
Copy link to clipboard
Copied
s,
I have an old, old version of illustrator - version 10
So have I. The instructions in the first post apply. And she looks younger than ever.
Edit: to elaborate slightly:
When you have created the (live) Type (no need to outline or anything, and you may select the Type afterwards and type on/edit/delete/whatever, keeping the appearance), and with it still selected:
In the Appearance palette/panel flyout, you may select Add New Fill and set the colour as desired (cranberry), and you may Add New Stroke and set the colour as desired (light yellow) and the Stroke Weight as desired; afterwards, you may drag the Stroke down below the Fill if you want the Fill to appear as the full size of the letters and the Stroke to be the addition (otherwise, the visible Stroke will extend both inside and outside the original letter shapes); you may adjust the Stroke Weight.

Copy link to clipboard
Copied
Jacob,
There's no need to Add a New Fill in this situation. Just add the new stroke and drag it below the character line in the Appearance panel. It sounds like the OP already has his color for the text fill.
Copy link to clipboard
Copied
Right you are, Larry, thank you.
Some of us are getting too old and forgetful (or too used to apply gradients to Type).

Copy link to clipboard
Copied
...couldn't duplicate it in inDesign...
Where are you having difficulty with this in InDesign? Simply apply a stroke to the selected text. InDesign properly sets the stroke of live text behind the fill, so as not to choke the glyphs. No need to muck with additional "Appearances" as in AI.
JET
Copy link to clipboard
Copied
Thank you. I couldn't get it figured out in illustrator and went back
to inDesign. I figured it out just before your email came. A much
easier fix.
Thanks again.

Copy link to clipboard
Copied
I don't see why he could not just select in AI the stroke proxy and ad a color of yellow?
Copy link to clipboard
Copied
If you don't want to change the visible size of the text you have to get the stroke behind the text.

Find more inspiration, events, and resources on the new Adobe Community
Explore Now
 AdChoices