

- Home
- Illustrator
- Discussions
- Create negative space in an object for a logo to b...
- Create negative space in an object for a logo to b...

Copy link to clipboard
Copied
Hello : )
Seeking advice on the following ;
The image below is made up of three elements
- Background brick work which is a series of paths grouped together
- Clipping mask to shape the brickwork into a circle
- Vector Logo
What I am trying to do is create negative/blank space in the brickwork roughly the shape of the logo plus 5mm or so (or where the logo is positioned) so that the logo can be placed on the blank space and is easier to read. As opposed to the bricks being behind the logo.
Can anyone tell me how to do this?


 1 Correct answer

Mel,
"Can anyone tell me how to do this?"
One way to do it is to:
1) For each part of the vector logo:
1a) Create outlines if not already and turn it into a Compound Path if not already, restore fill colour if needed (just click the Fill box), see first image below;
1b) Offset Path by the desired amount (5 mm or whichever value suitable) and turn the new offset path black, see second image below;
1c) Pathfinder>Divide, then Pathfinder>Unite to remove inner holes in the offset path, see thi
...Explore related tutorials & articles
 7
Replies
7
7
Replies
7

Copy link to clipboard
Copied
You would do an Offset Path on the writing and combine that with your clipping paths or on a knockout group.
Mylenium
Copy link to clipboard
Copied
Hello Mylenium,
Thanks for your answer : )
Where I'm getting stuck is the grouped writing (offset path) does not work with the clipping mask - everything simply dissapears when I apply the mask. Is there a different way I should be doing this?

Copy link to clipboard
Copied
When something does not work,we need a screenshot of how far you got PLUS how this looks in the Layers panel. We need to see the objects inside the layers.

Copy link to clipboard
Copied
You may try to use opacity masks to create transparency.
https://helpx.adobe.com/illustrator/using/transparency-blending-modes.html
Copy link to clipboard
Copied
Mel,
"Can anyone tell me how to do this?"
One way to do it is to:
1) For each part of the vector logo:
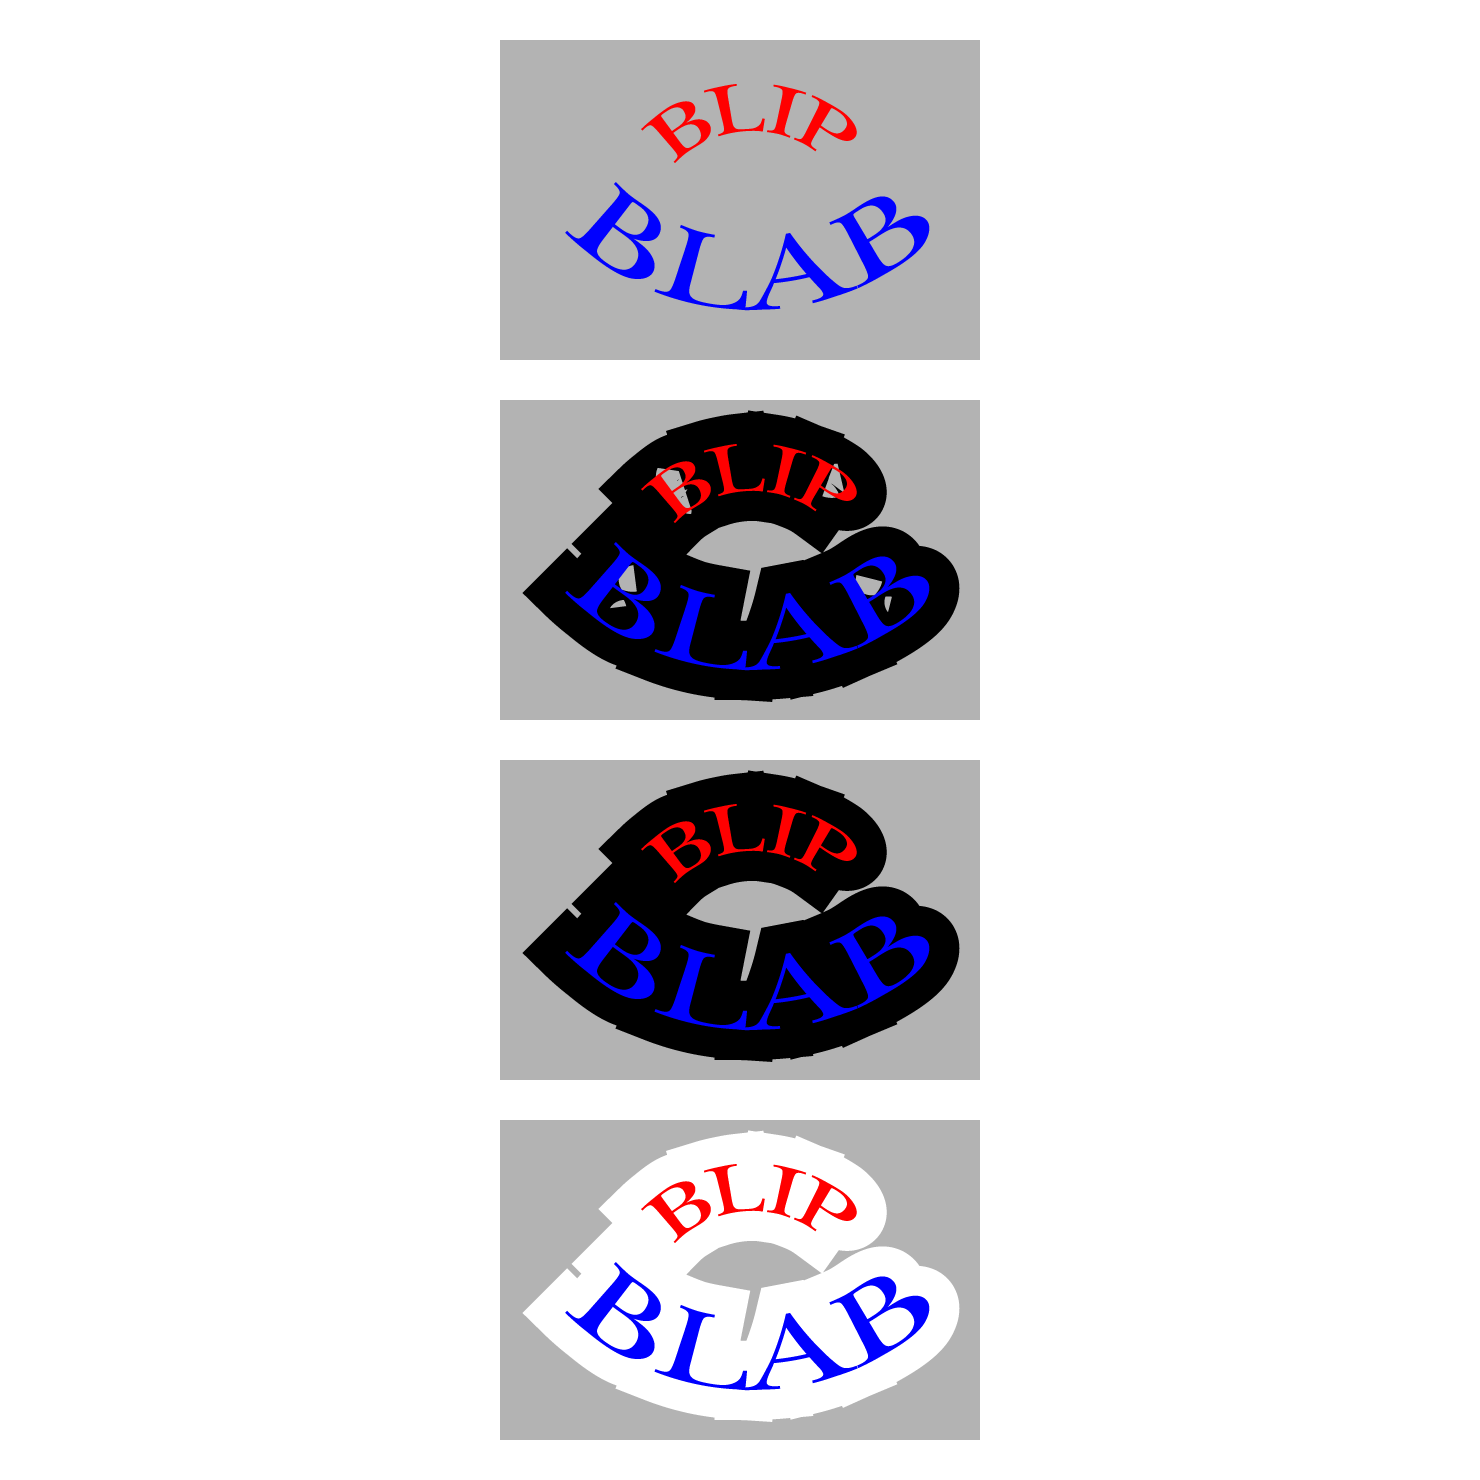
1a) Create outlines if not already and turn it into a Compound Path if not already, restore fill colour if needed (just click the Fill box), see first image below;
1b) Offset Path by the desired amount (5 mm or whichever value suitable) and turn the new offset path black, see second image below;
1c) Pathfinder>Divide, then Pathfinder>Unite to remove inner holes in the offset path, see third image below;
2) Group the parts of the logo, and Group the two offset paths;
3) Select the offset path Group and the background (the clipping set), then in the Transparency panel click Make (Opacity) Mask, see fourth image below.
You can (go back and forth to) adapt the appearance to get rid of strange appearances and develop the logo further, Ctrl/Cmd+Z being your friend.
The rather silly images illustrate some possible strangenesses, such as the two remaining gaps/dents into the final BLAB part in the fourth image. This can be avoided by applying a larger positive offset value to close the gaps followed by a smaller negative offset value to end with the desired offset value without the gaps (setting the smaller negative offset value to the difference between the desired offset value and the larger offset value used to close the gaps/dents).
Click/RightClick and Click again, to get closer
Copy link to clipboard
Copied
Thank you : )
This worked.
Copy link to clipboard
Copied
You are welcome, Mel.

Find more inspiration, events, and resources on the new Adobe Community
Explore Now
 AdChoices