Exit
  • Global community
    • Language:
      • Deutsch
      • English
      • Español
      • Français
      • Português
  • 日本語コミュニティ
  • 한국 커뮤니티
0

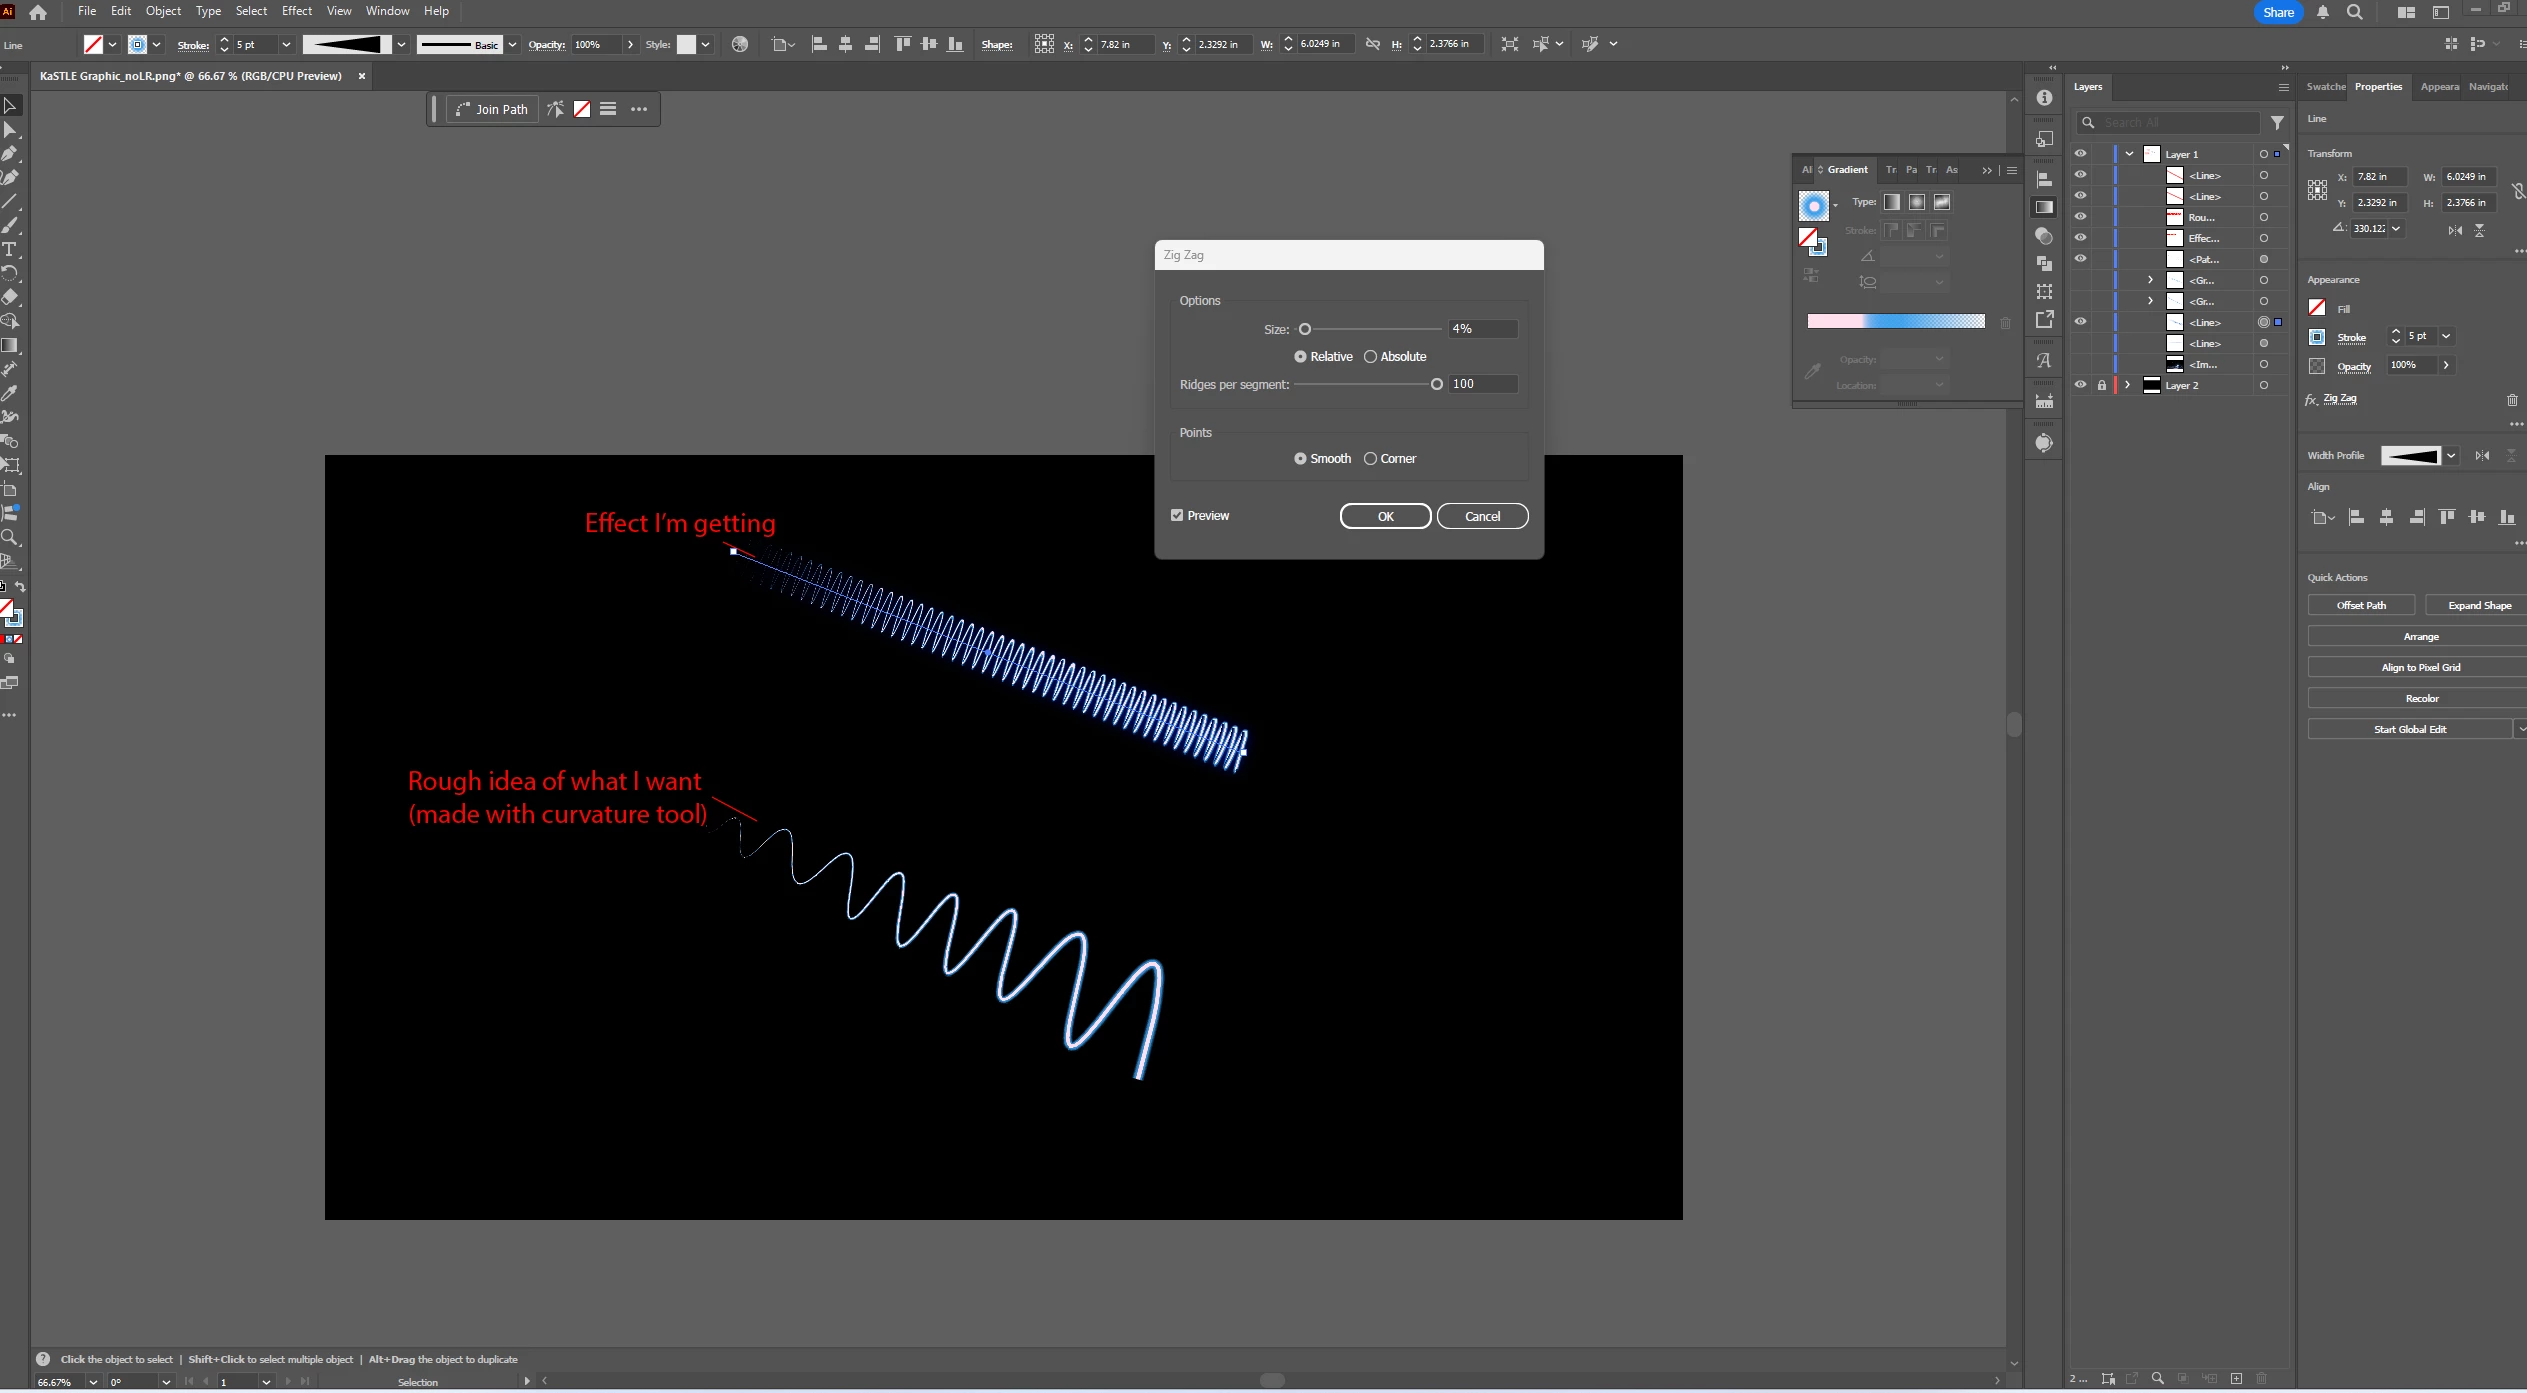
Creating Zig zag line with larger size on one end than the other

New Here ,
Feb 25, 2025 Feb 25, 2025

I am trying to create a stroked line with a zig zag that tapers on one end, meaning larger size zig zags on the right side that gradually get smaller on the left. I know I could edit individual points to make them smaller, but this is tedious and would not be easily editable if I need to make changes. I have also played with transforming the outlined stroke, but it heavily distorts the zig zags and removes its editability. 


Does anyone know of any tricks to make the zig zags gradually change in "amplitude" from left to right while preserving the editability of the line (so I can just move the two end points, rather than rotate the whole thing or change individual points)?


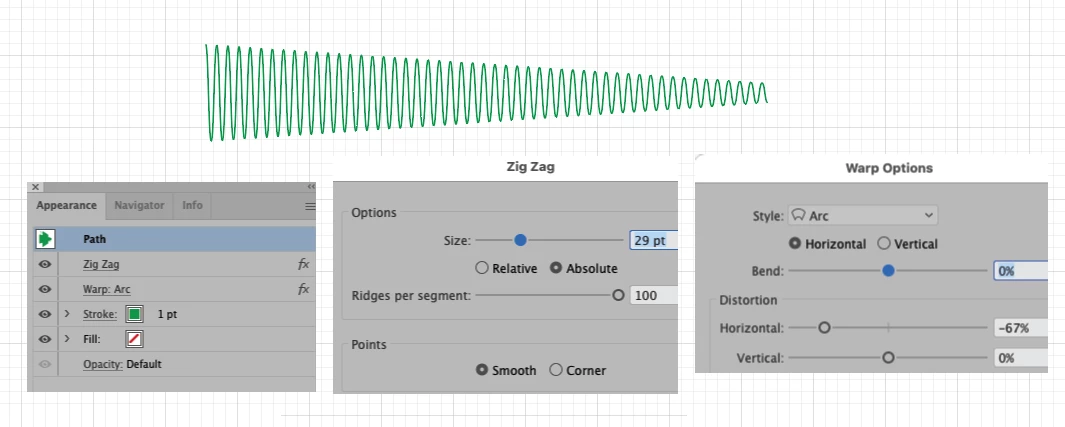
The rough idea of what I want, shown in the picture below, was made with the curvature tool, but I'd prefer to use a tighter, more consistent, effect--like the one shown above it created with the zig zag effect. Thanks in advance!Screenshot 2025-02-25 115029.png

TOPICS
Draw and design , How-to , Tools
1.2K
Translate
Report
Community guidelines
Be kind and respectful, give credit to the original source of content, and search for duplicates before posting. Learn more
community guidelines

correct answers 2 Correct answers

Community Expert , Feb 25, 2025 Feb 25, 2025

You can create a line, apply the zigzag effect and then expand the appearance. Once you do that, activate the perspective grid, use the grid selection tool and drag the expanded line onto the grid.

Translate
Advocate , Feb 26, 2025 Feb 26, 2025

Morgan, hi.

Here is yet another way.

These effects are all live. Easy edits to adjust to fit your needs.

KZig and Warp.png

Translate
Adobe
Community Expert ,
Feb 25, 2025 Feb 25, 2025

This is one way you could do it.

Draw a straight horizontal line (stroke color, no fill).

Effect > Transform > ZigZag. Select Smooth and adjust Ridges and Size.

Object > Expand Appearance.

Effect > Transform > Free Distort. Manipulate the points as needed

Object > Expand Appearance

You can then rotate to the angle you wish.


Translate
Report
Community guidelines
Be kind and respectful, give credit to the original source of content, and search for duplicates before posting. Learn more
community guidelines
New Here ,
Feb 25, 2025 Feb 25, 2025

Thanks for your response. The only issue with this is that it heavily distorts the line width (shown below) with how much I need to compress the left side for the desired effect. I would ideally like to keep the width of the line relatively consistent with the original look (like the version of the line on the left side).Screenshot 2025-02-25 152133.png

Translate
Report
Community guidelines
Be kind and respectful, give credit to the original source of content, and search for duplicates before posting. Learn more
community guidelines
Community Expert ,
Feb 25, 2025 Feb 25, 2025

You can create a line, apply the zigzag effect and then expand the appearance. Once you do that, activate the perspective grid, use the grid selection tool and drag the expanded line onto the grid.

Translate
Report
Community guidelines
Be kind and respectful, give credit to the original source of content, and search for duplicates before posting. Learn more
community guidelines
Advocate ,
Feb 26, 2025 Feb 26, 2025
LATEST

Morgan, hi.

Here is yet another way.

These effects are all live. Easy edits to adjust to fit your needs.

KZig and Warp.png

Translate
Report
Community guidelines
Be kind and respectful, give credit to the original source of content, and search for duplicates before posting. Learn more
community guidelines