Inspiring
August 6, 2019
Question

Cutting a pizza

  • August 6, 2019
  • 8 replies
  • 4923 views

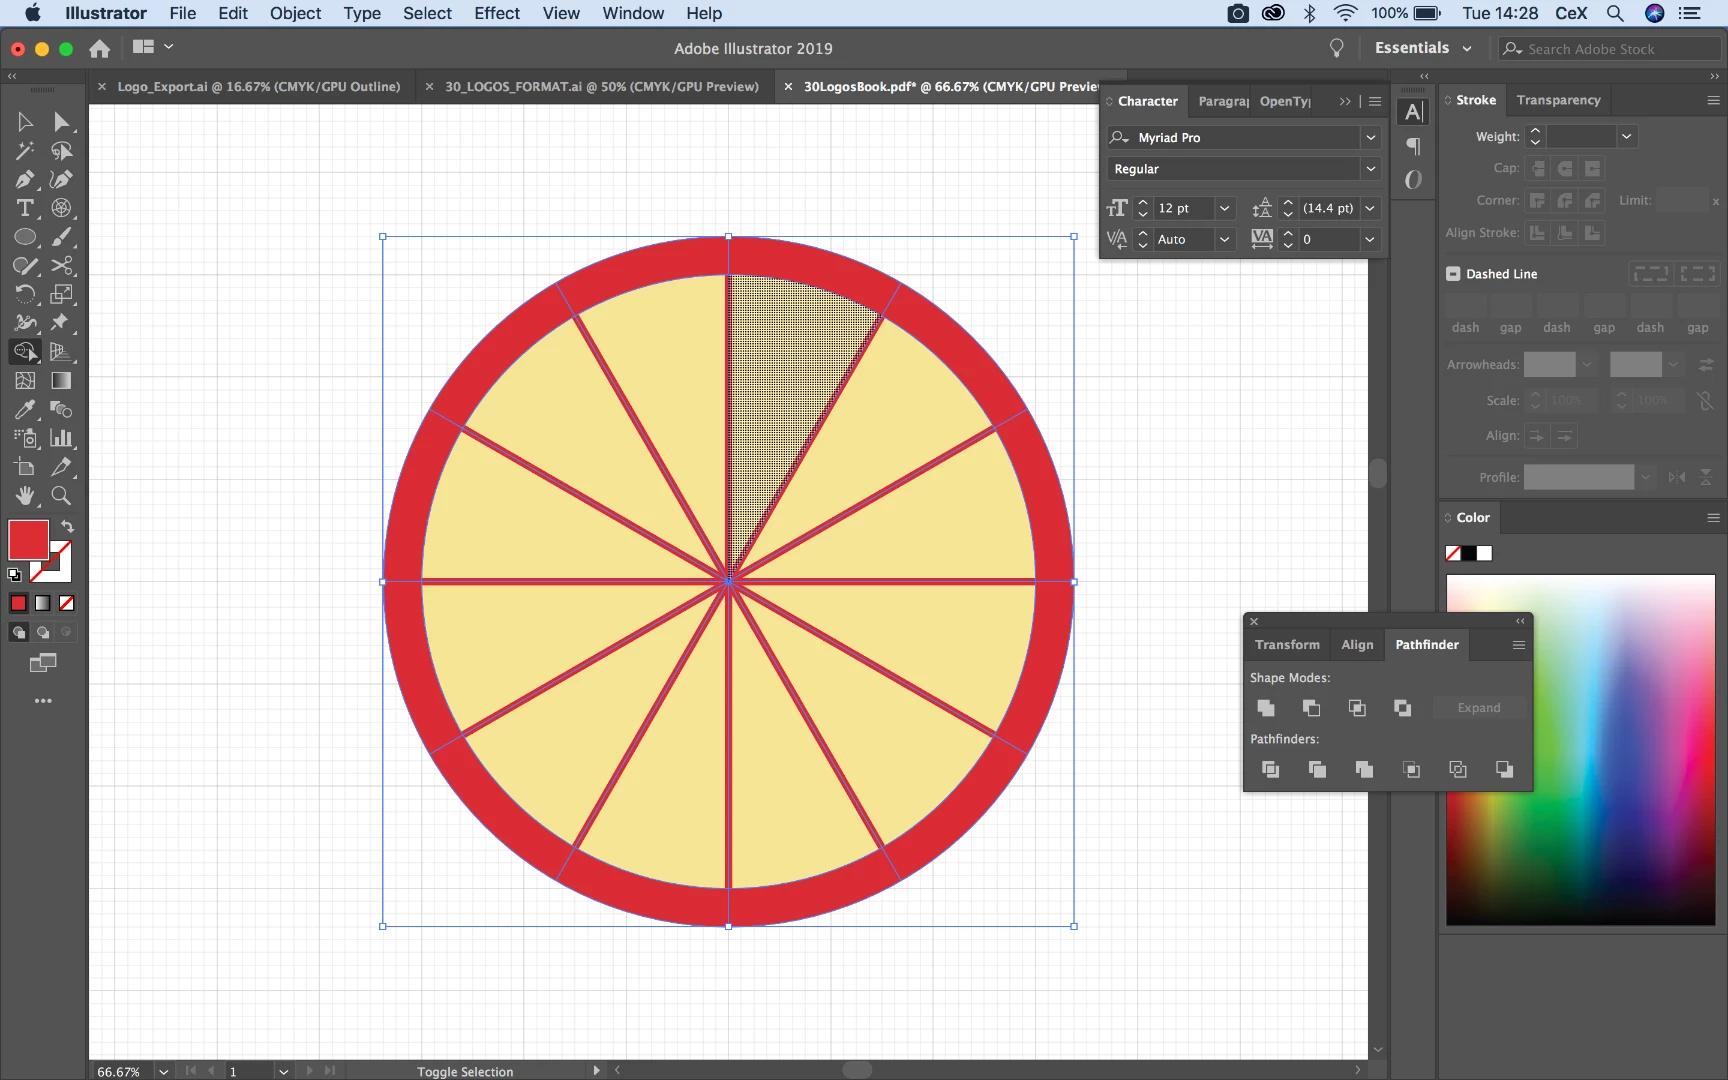
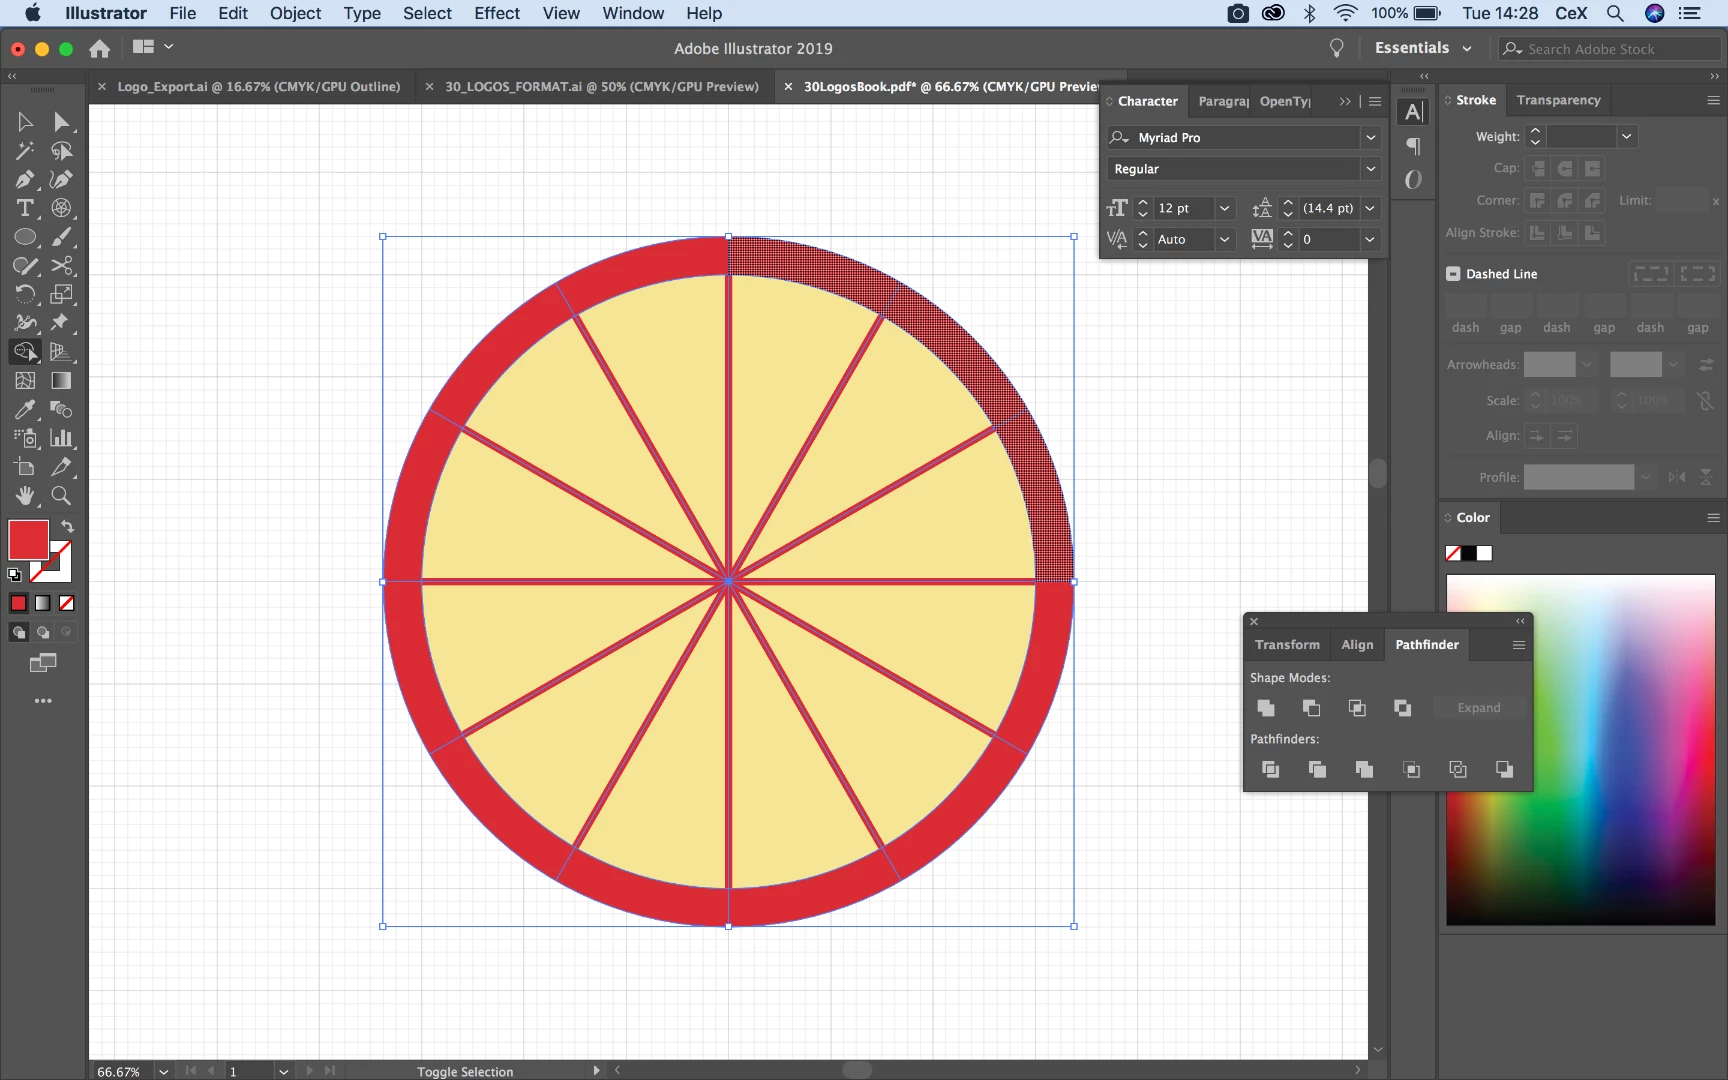
Hello, basically i'm trying to draw a pizza, and divide it into twelve slices, i'm just wondering why the shape builder tool can divide the triangular yellow parts individually (shown in first picture, but the red crust part can only be divided into 4 parts (shown in picture 2). Any help much appreciated.

    This topic has been closed for replies.

    8 replies

    Jacob Bugge
    Community Expert
    Community Expert
    August 6, 2019

    nadrojxinnam,

    If you wish it to work when you move one or more of the pizza slices, you will need double dividers each at half the width, to go with the fill and the crust, preferably as Groups or something. Only in that way can you cut and divide into identical slices.

    jane-e
    Community Expert
    Community Expert
    August 7, 2019

    https://forums.adobe.com/people/Jacob+Bugge  wrote

    Only in that way can you cut and divide into identical slices.

    Reading through this thread, I just have to add that the guys who cut our delivery pizza don't even come close to identical slices! If you want realistic, just use the knife tool and slash away!

    Jacob Bugge
    Community Expert
    Community Expert
    August 7, 2019

    Indeed, Jane.

    meganchi
    Legend
    August 6, 2019

    Another technique I wanted to share was using your ellipse properties beneath the transform palette.

    - Draw a Circle

    - Under the ellipse angle field, type 360/12 (to get the angle of your 12 pizza slices)

    - Next, hit the invert pie icon located beneath the ellipse angle field.

    - Finally, use your rotate tool, hold down option and click and drag to move your sliced piece around its center. Then hit Command or Control +D to duplicate the shape and angle to create a full pizza.

    - The slices are individual shapes that can be moved out away from the circular shape, too.

    Inspiring
    August 6, 2019

    Yep. So many ways to get to the same conclusion!

    Kurt Gold
    Community Expert
    Community Expert
    August 6, 2019

    A long time ago there was a sportful pizza thread in this forum. I contributed with some graphic styles to cut like industrial machines. You can download a sample file here:

    https://drive.google.com/open?id=1p7sJKVxKvTcDSfw9AzrL2r-O9bREg3qr

    I think it is an .ai file in AI-10-format, but it should also work in recent versions of Illustrator.

    Inspiring
    August 6, 2019
    1. Use the Polar Grid Tool. Either click one time  on the artboard and type the Width & Height of choice. In the Concentric Dividers: Number=1, Skew=500%. In the Radial Dividers: Number=0, Skew=0%.

      Or click down and drag do not let go until the grid is drawn. Hold the shift key to constrain to a circle. Use the up arrow to add Radial Dividers until you have the number you want. Use the down arrow to subtract Concentric Dividers. Use the letter C to Skew the divider to where you want the crust to be positioned.

    2. Get ready to Divide. Ungroup the grid. There will be 2 groups within the group the concentric circles and the radial lines. Choose the lines and scale up. Just double-click on the scale tool and scale up.  Uniform should be above 100%. It needs to intersect the outer circle.

    3. Divide. Select the grid and choose Divide from the Pathfinder.

    4. Color. Ungroup and color as needed.

    5. Add Pepperoni. Add a circle. Position it then selected the Rotation tool. Clicked to in the center of the pizza to move the  anchor point. Then Clicked and drag the pepperoni while holding the Option/Alt key. Once in the new position, let go of the mouse then let go of the modifier.  Use  Object> Transform> Transform Again (Command +D/ Control+D) to create a copy with the same rotation value. Do this until you have a pepperoni on every slice. 
    6. Done

    Monika Gause
    Community Expert
    Community Expert
    August 6, 2019

    Double click the shapebuilder tool and turn on the gap detection.

    But if you want this to be more exact, you might need to scale the otuer circle slightly smaller. Often the polar grid tool just isn't precise enough and gap detection will only connect via the shortest distance.

    Mike_Gondek10189183
    Community Expert
    Community Expert
    August 6, 2019

    The polar grid tool has always proven been very precise even zooming in to 64000%. All the distances in transform palette are exact to the last decimal point.

    Monika Gause
    Community Expert
    Community Expert
    August 6, 2019

    MikeGondek  schrieb

    The polar grid tool has always proven been very precise even zooming in to 64000%. All the distances in transform palette are exact to the last decimal point.

    I have experienced the same issues as the thread opener with dividers not exatly meeting the outer circle.

    manal shanableh
    Legend
    August 6, 2019

    try, pathfinder panel> divide.

    manal shanableh
    Legend
    August 6, 2019

    are you sure that lines to the edge, please check my image.

    Mike_Gondek10189183
    Community Expert
    Community Expert
    August 6, 2019

    This is an alternate way to draw this that leaves better editability, you can increase stroke weights as needed. You could also make the out line a stroke red line instead.

    You will find the polar grid tool under the line tool in CC2019.