

- Home
- Illustrator
- Discussions
- Re: exporting seamless pattern tile for output?
- Re: exporting seamless pattern tile for output?

Copy link to clipboard
Copied
Hi,
The new Pattern Maker is great in Illustrator CS6 but can it be of any use for textile design? Once the pattern is created I just need the actual pattern tile which I can send for output as seamless pattern. There does not seem to be any export option for the actual tile? Hope this makes sense. Tried creating an artboard to match the size of the pattern tile and fill that with that pattern but that does not work and the pattern is not seamless afterwards


 1 Correct answer

I think it can be even simpler to save the pattern tile only. No need to delete paths (that can indeed be tricky).
I created a new Web document. Dragged the pattern named Jive to the artboard.
This is a complex pattern. To see the rectangle that defines the pattern it's easier to go to Outline View.
Select all and Ungroup.
Select the rectangle.
Select the Artboard tool (zoom in enough to be able to only click the rectangle) and double click the selected rectangle.
Or go to Object/Artboards/Fit to Se
...Explore related tutorials & articles
 67
Replies
67
67
Replies
67

Copy link to clipboard
Copied
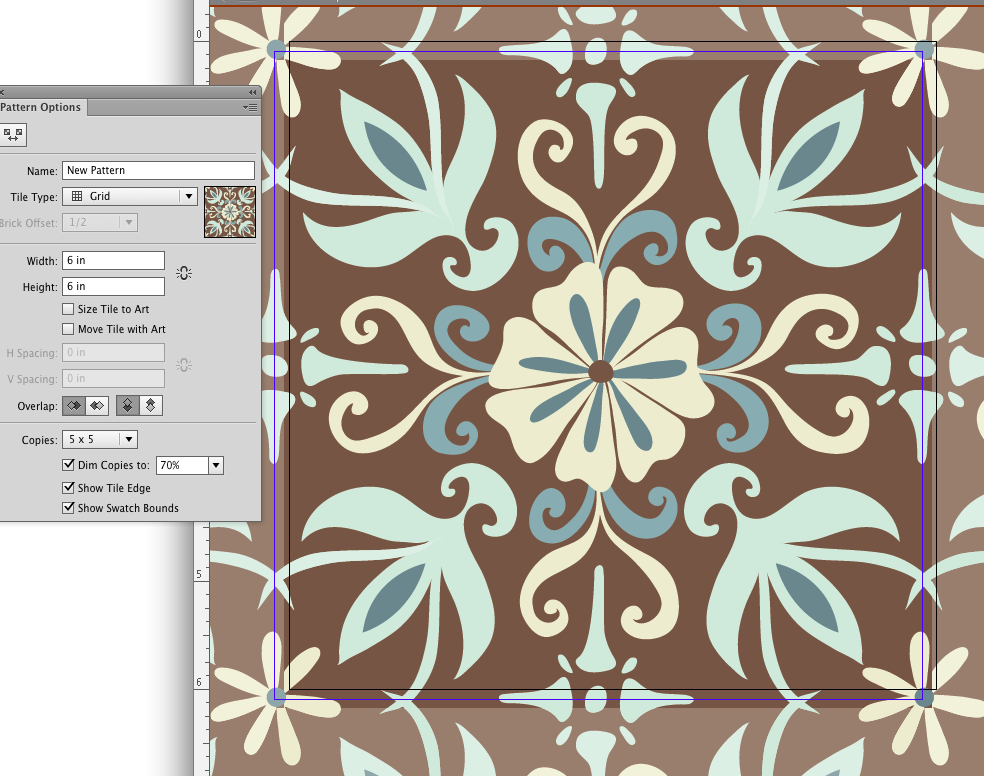
Thanks for your help. OK, here is the same repeat pattern block, artboard is 6x6. See how the blue line (which is the tile boundary) is offset from the actual repeat block edge (not the artboard; I don't know why it jogs the whole block off the artboard). The second image shows a close up of how the repeat block no longer lines up in the new pattern fill because of this offset... And I have tried jacking around with all the different settings within the Pattern Options window shown to no avail. Am I missing something?

Copy link to clipboard
Copied
"Anti-Alias" let you get rid of it only inside of the Ai Workflow on screen but if you print it or exported or draged the patterns into PS you will see this lines as gabs which ruin everything if you have any suggestions please let me know

Copy link to clipboard
Copied
Yasser, in my experience, if your pattern is showing those tiling artifacts in Ai, then they will travel over to PS too. I avoid smart objects or anything that brings the Ai file into PS when I'm working with pattern fills.
You can export the pattern (as a field of pattern or a single tile) from Illustrator with "anti-aliasing" checked at whatever resolution you want - this gets rid of the lines in the exported jpeg or png, or tiff. Then work with the pixel based image of the pattern in PS - sans lines!

Copy link to clipboard
Copied
This is a confirmed bug with the pattern tool.
I've provided Adobe with some source files that demonstrate it. Doesn't matter what you do it the line will always show up whether you use it in Ai or try to export it out as a raster image.
I've had some people on the forum tell me you need to align your art to pixel grid to fix this. First off, know that if you do this with your art it will mess it up. So make a copy first. That said, this didn't resolve the line problem either so it's not a fix. A fix is having the digital tool work period.
The line issue really makes the pattern tool problematic to use. You simply cannot trust it. The other limitations Adobe needs to fix (because they should have been in the initial release) with the pattern tool is the lack of layering in the tool itself and the lack of the ability to export out a single tile from the pattern tool. The tool was released half-baked. Why release a tool that is only good for print only and even at that you will run into problems? Makes no sense.
Hopefully they'll fix this sooner rather than later.
PPLLUVProcess.com
Copy link to clipboard
Copied
I got a solution for it but its somehow stupid but it gives me what i want, the solution is after creating the pattern using the pattern tool expand the apperances of it and then go to layers panel u will find a Squares or Rectangels as a cliping mask repeated as much as the dimensions of your patterns fram go delete all those Squares\Rectangles masks and you will get rid of these tiles but you will be no longer able to edit your pattern using the the pattern tool after expanding its apperances, hope its helpful until adobe developes this time saving tool
Copy link to clipboard
Copied
About the offset ( if this is what you mean):
1. All works fine (for me) in the basic 'grid' pattern making mode. You just need to make sure the tile in pattern maker is set exactly to the same dimensions like your artboard. When you finish designing in the Pattern Maker and return to the main view, create your rectangle first to sit exactly on the artboard ( use the coordinates in the right corner to make sure it is not off by some 0.01 mm) and then apply the pattern from the swatch palette. I found that if there was even a minimal difference in position in the recrangle you created ( and filled with pattern and then manualy adjusted position) then it creates the offset. If this is what you mean.
2. All the other pattern modes like brick etc, you need to drag pattern swatch to the artboard, select the path and fit artboard to the selected path, as per instruction in this thread above- this will be your seamless tile. It works for me! You have to of course make sure you don't have a stroke applied to the rectangle filled with pattern swatch when you then export the artboard.
Overall I am very pleased with the Pattern maker tool. I find it saves a lot of time in creating seamless repeats. I hope it will support layers soon and we will be able to use it with objects already filled with pattern.
A question here: what would be the best workaround to be able to use Pattern Maker with objects already filled with a pattern? Rasterizing perhaps is an option but sometimes the onjects rasterize too much creating jagged outlines. Is there a better way?

Copy link to clipboard
Copied
You could expand the object.
Copy link to clipboard
Copied
yesss.. but then it becomes very memory intensive and just no doable in practice...
Copy link to clipboard
Copied
expanding could work with one object, not several or one repeated one: it becomes so memory intensive to the point it all crashes, any other ideas?
Copy link to clipboard
Copied
kociara7, my bounding box is exactly in the artboard. And, the tile measurement is exactly the same as my artboard. Doesn't seem to be a reason that the tile jumps so far offset from it. Or am I missing something still....?
Copy link to clipboard
Copied
if you designed the piece in the 'grid mode' in pattern maker just make sure that you apply the pattern to the bounding box (which is set exactly to your tile measurement and aligned perfectly to the artboard) AFTER you have set your coordinates etc to align properly to the artboard. Make sure there are no strokes applied. Then when you are exporting please make sure you tick the little 'export artboard only' box in the menu. Does this help?
Copy link to clipboard
Copied
Um..not really (but I do appreciate your response).
As I said, I have tons of patterns that were created before Adobe added this pattern maker feature. I am taking about creating patterns from existing files. Guess the only (?) way to do that is to drag the art to the swatch panel and that this pattern maker feature is only good for creating new patterns (which it would seem if it can do that, it should be able to do it from existing files - that are already in repeat, I might add - as well).
That being said, I do not see anywhere that says "export artboard only" in the pattern maker or if I go to "File>export".
Copy link to clipboard
Copied
yes, I meant File export to make a new tile
perhaps it in not working with your existng files? but if they are already patterns why would you use the Pattern maker? I would expect you can export the pattern swatches from previous versions and they would work with cs6 anyway? if you are bringing this into a Pattern maker perhaps you need to zoom right in to make sure they tile seamlesly?
Copy link to clipboard
Copied
>>but if they are already patterns why would you use the Pattern maker?<<
Because I need to make pattern fills to work with in AI sometimes. And sometimes I need to change colors, scale, add/remove an element, etc, make new pattern fill, etc.... Guess I started this conversation when I was trying to figure out how this thing worked since "define pattern" had disappeared. Now I am just dragging the existing pattern block onto the swatch palette.

Copy link to clipboard
Copied
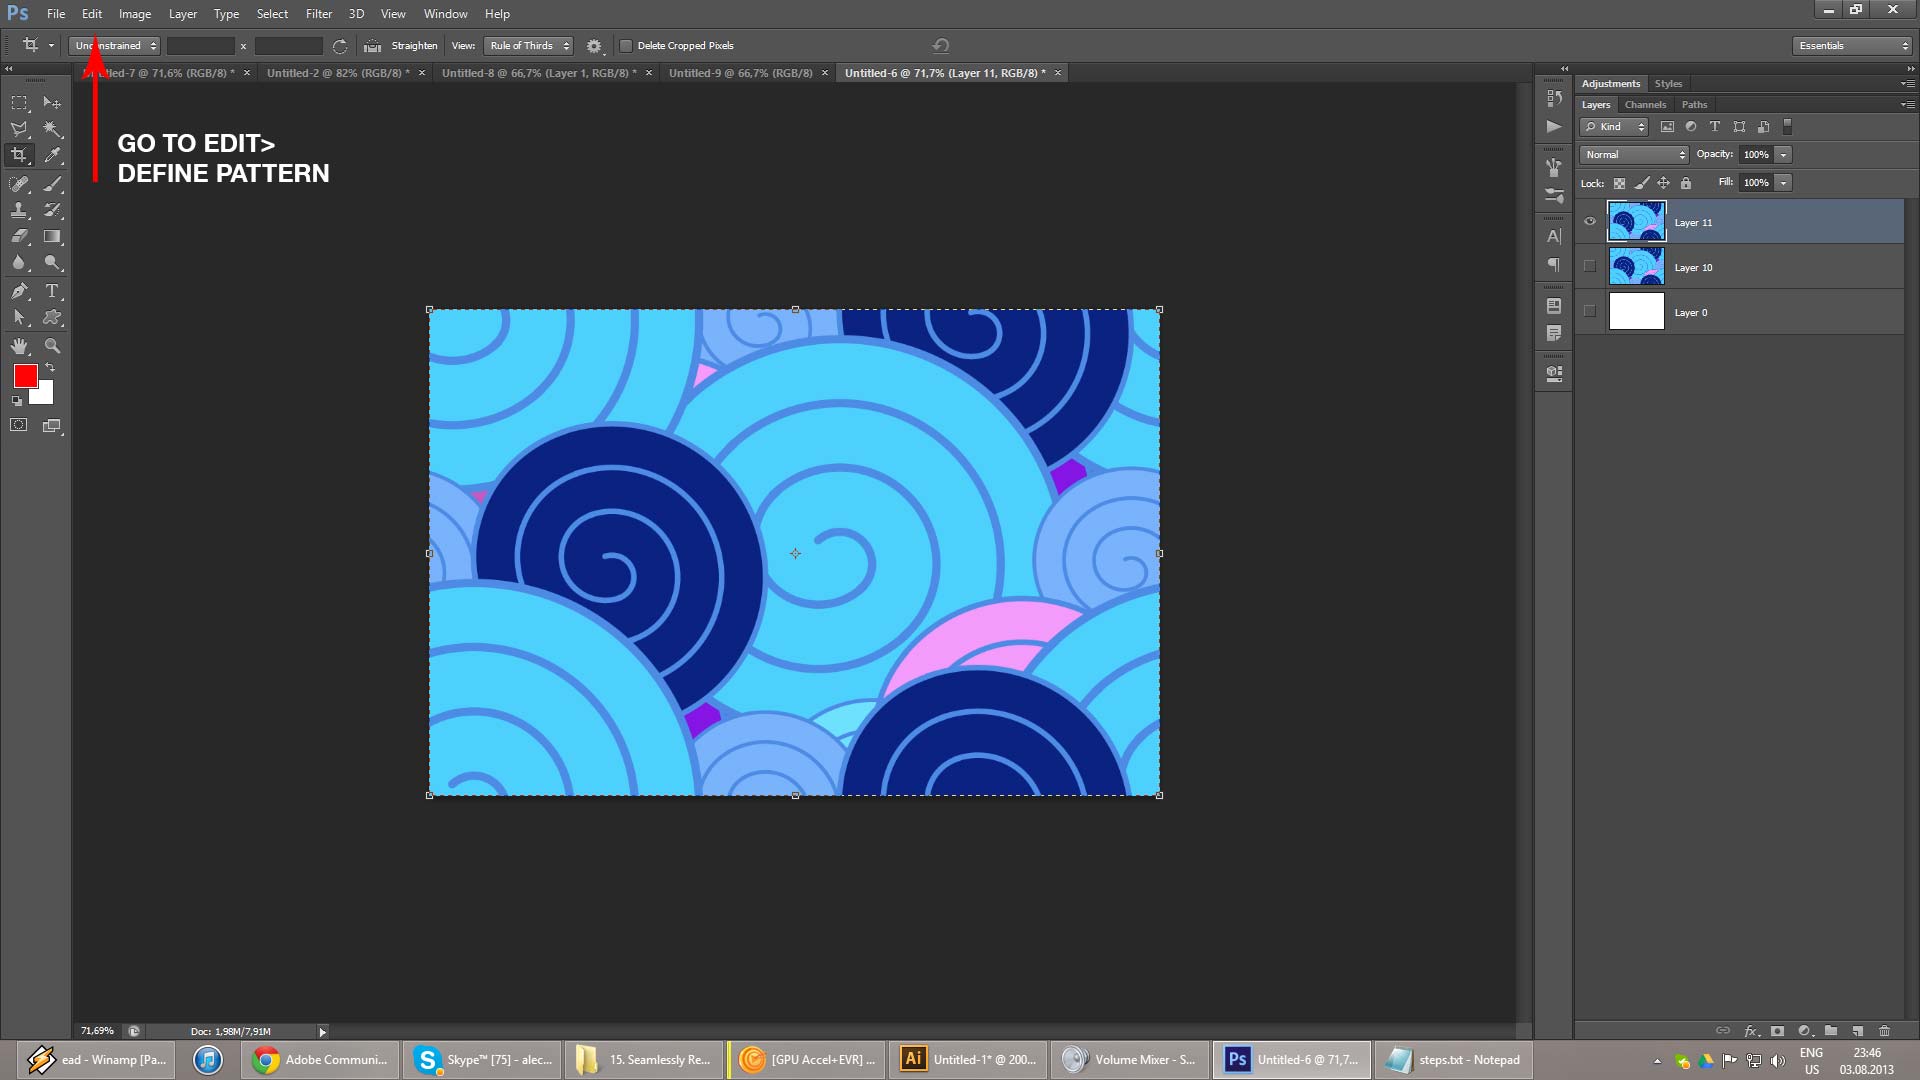
THIS IS MY METHOD
You need to use IL and PS
Basically you make the pattern in IL then paste it in PS and define the pattern.
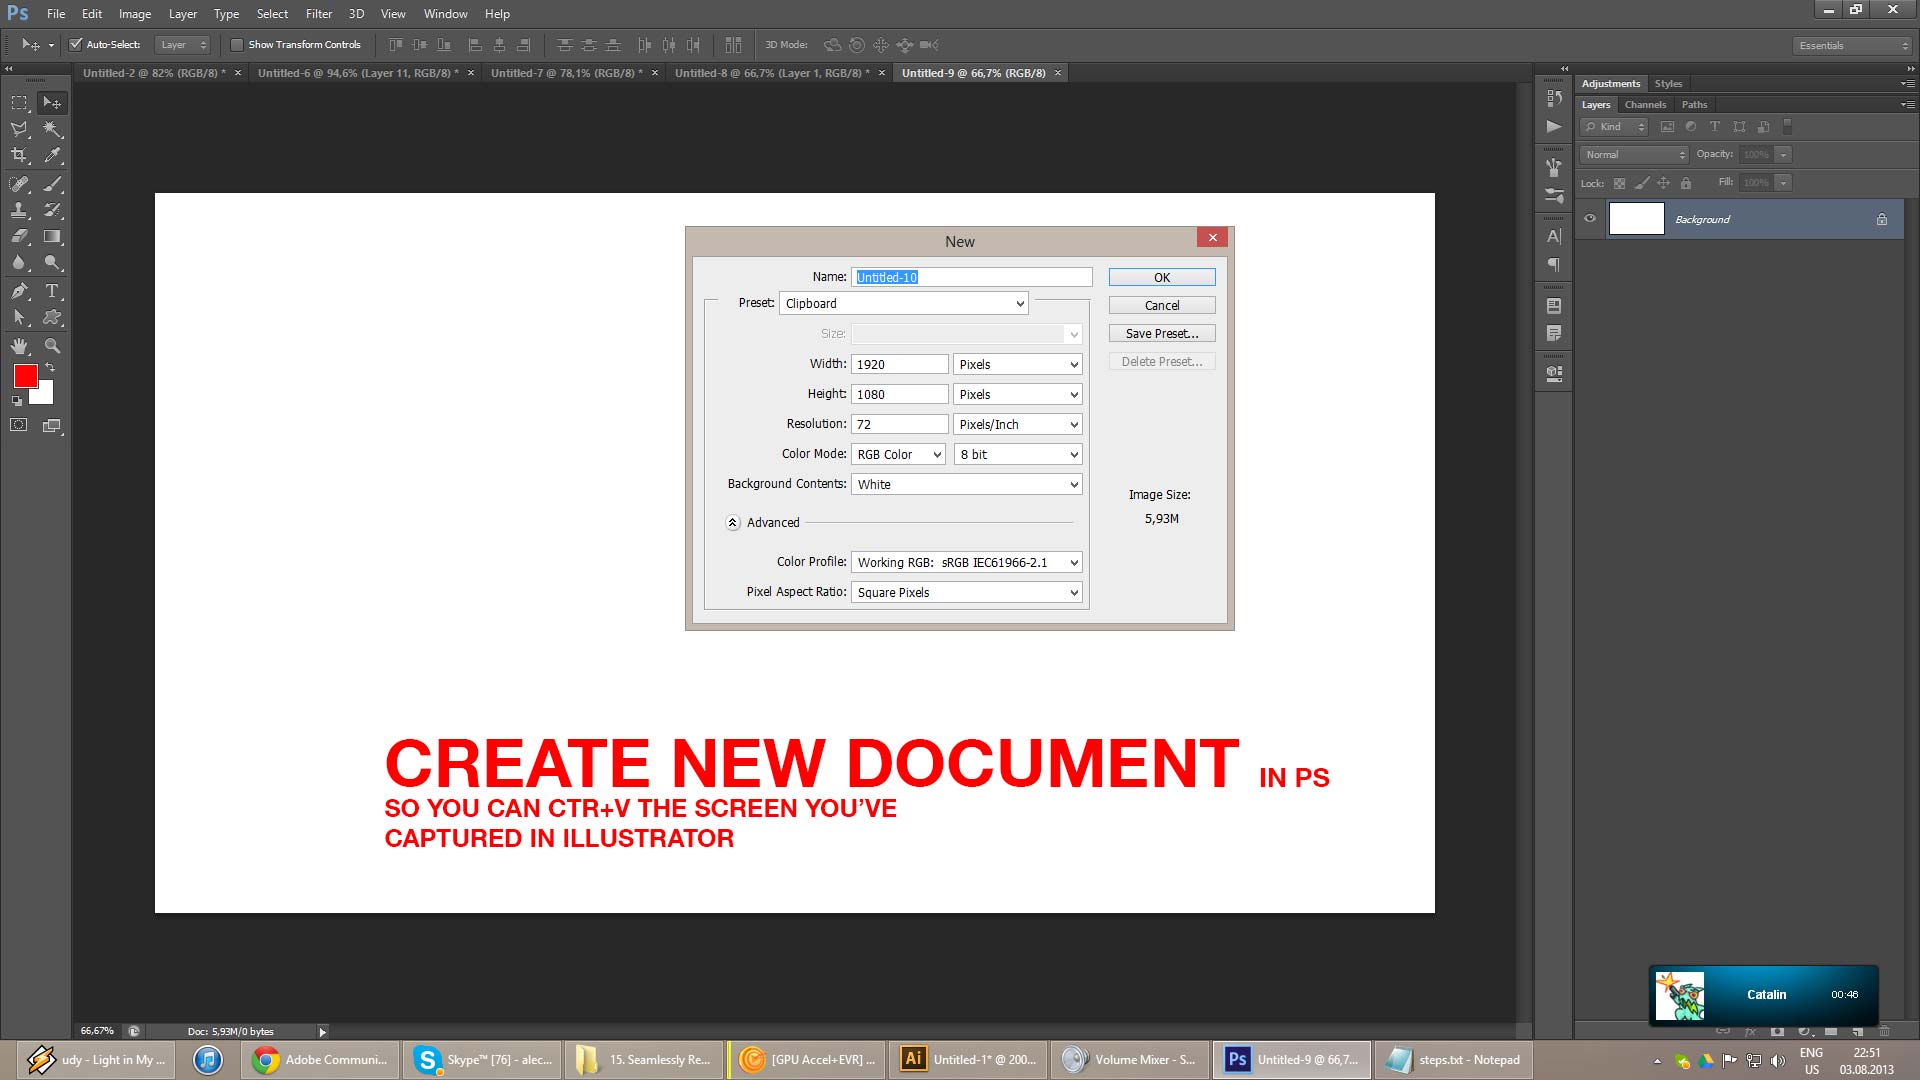
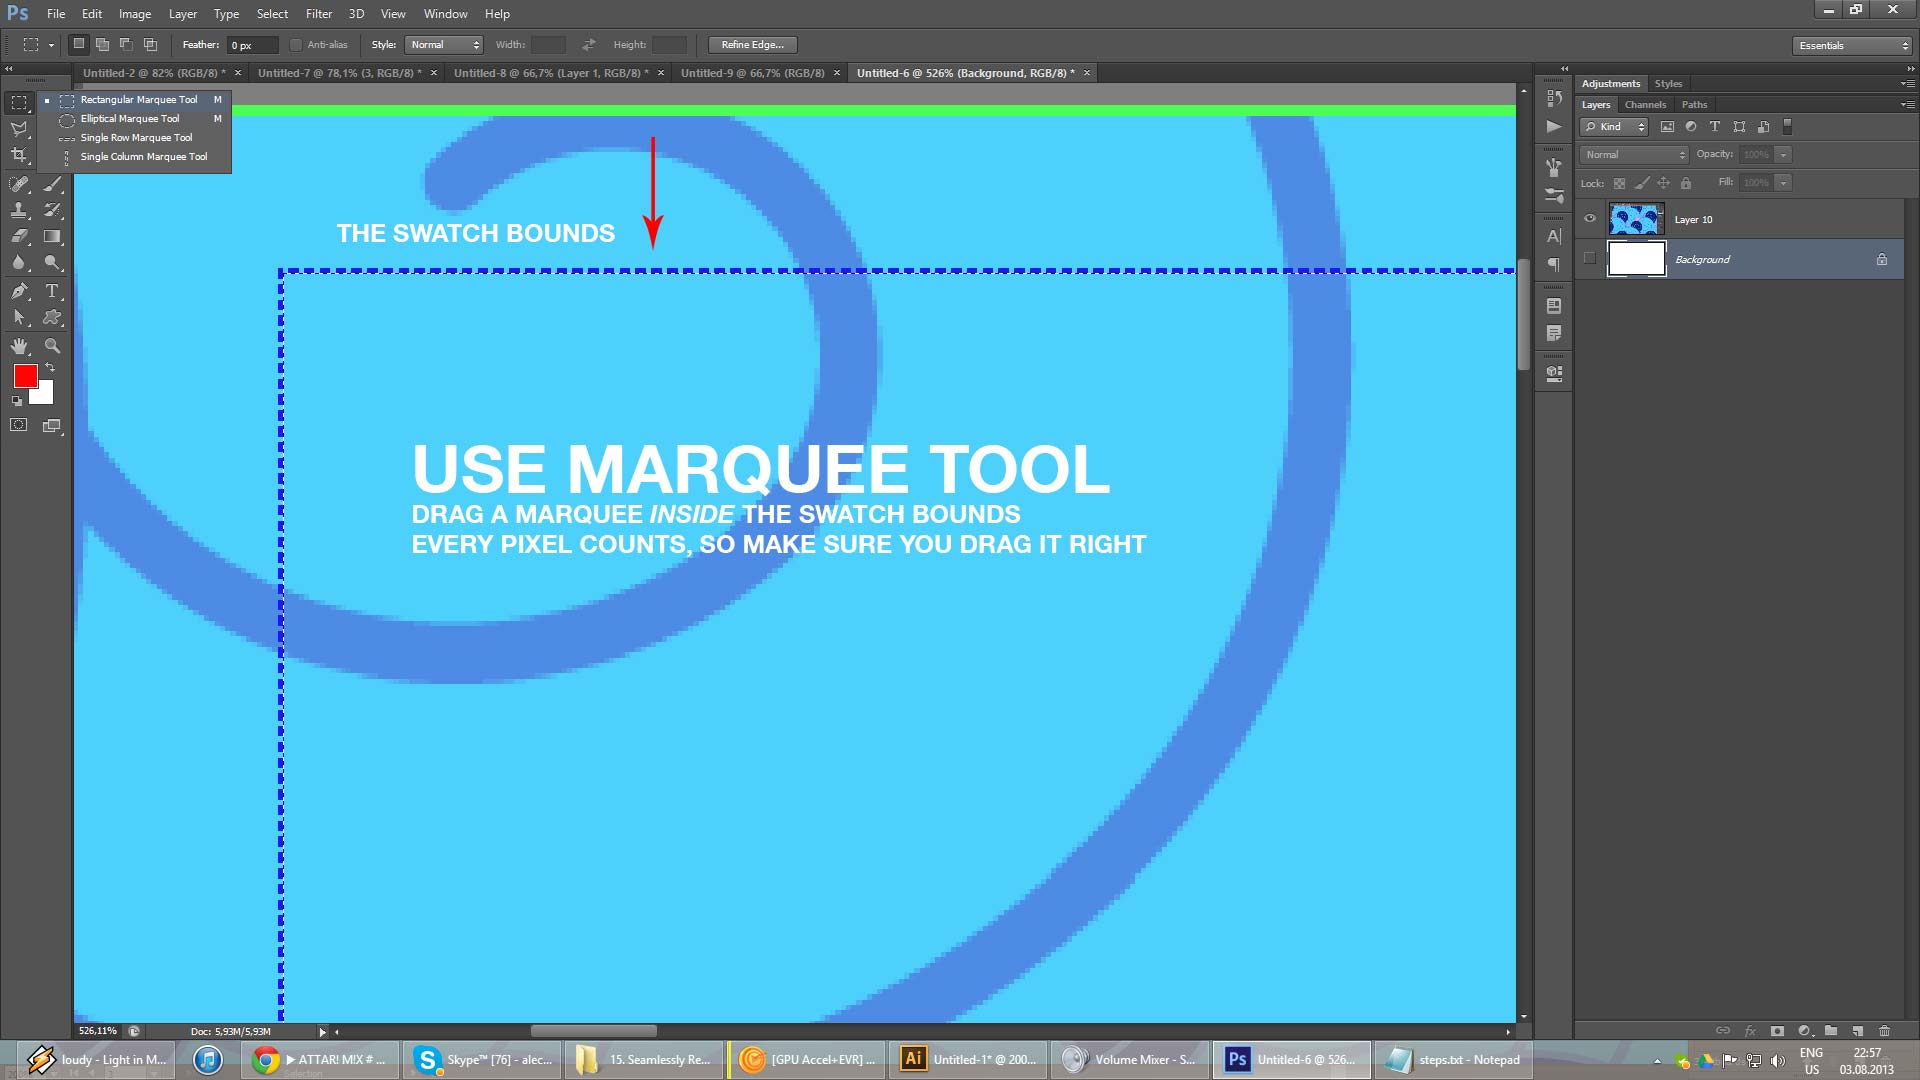
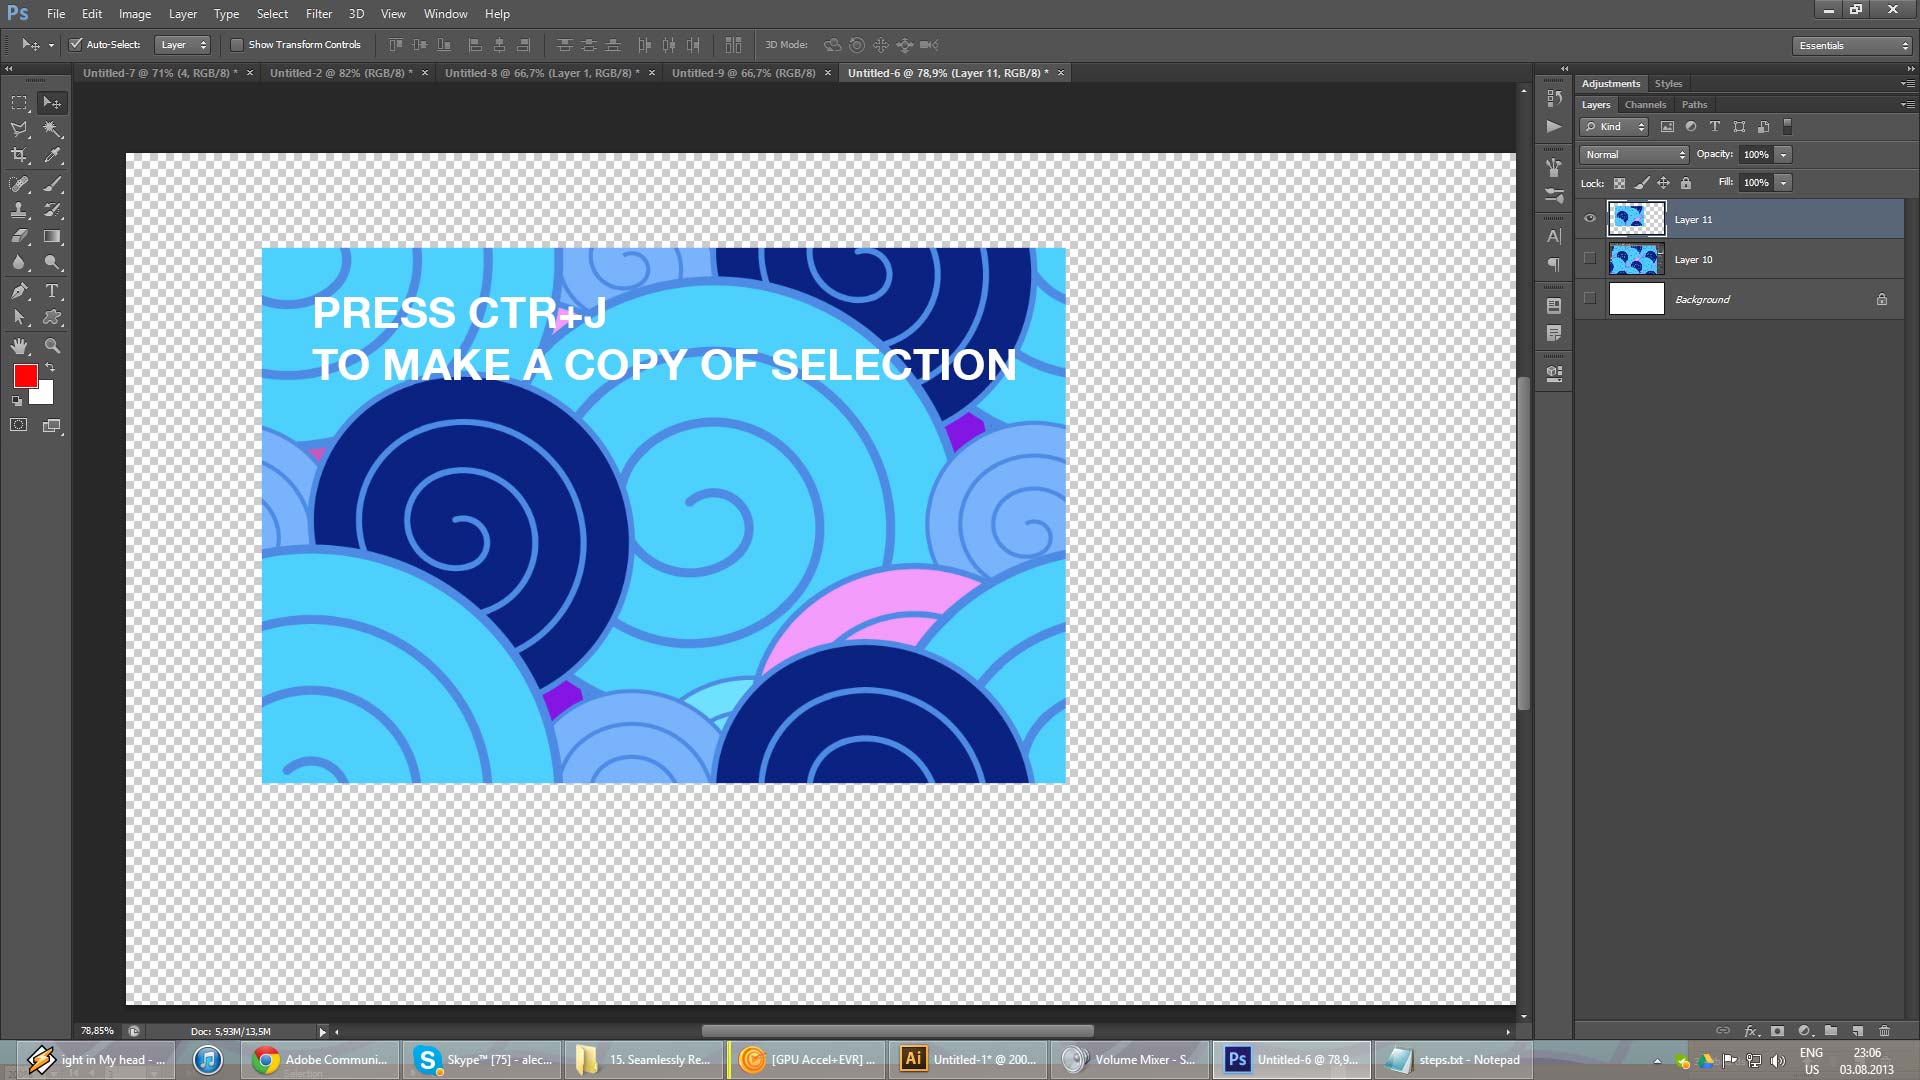
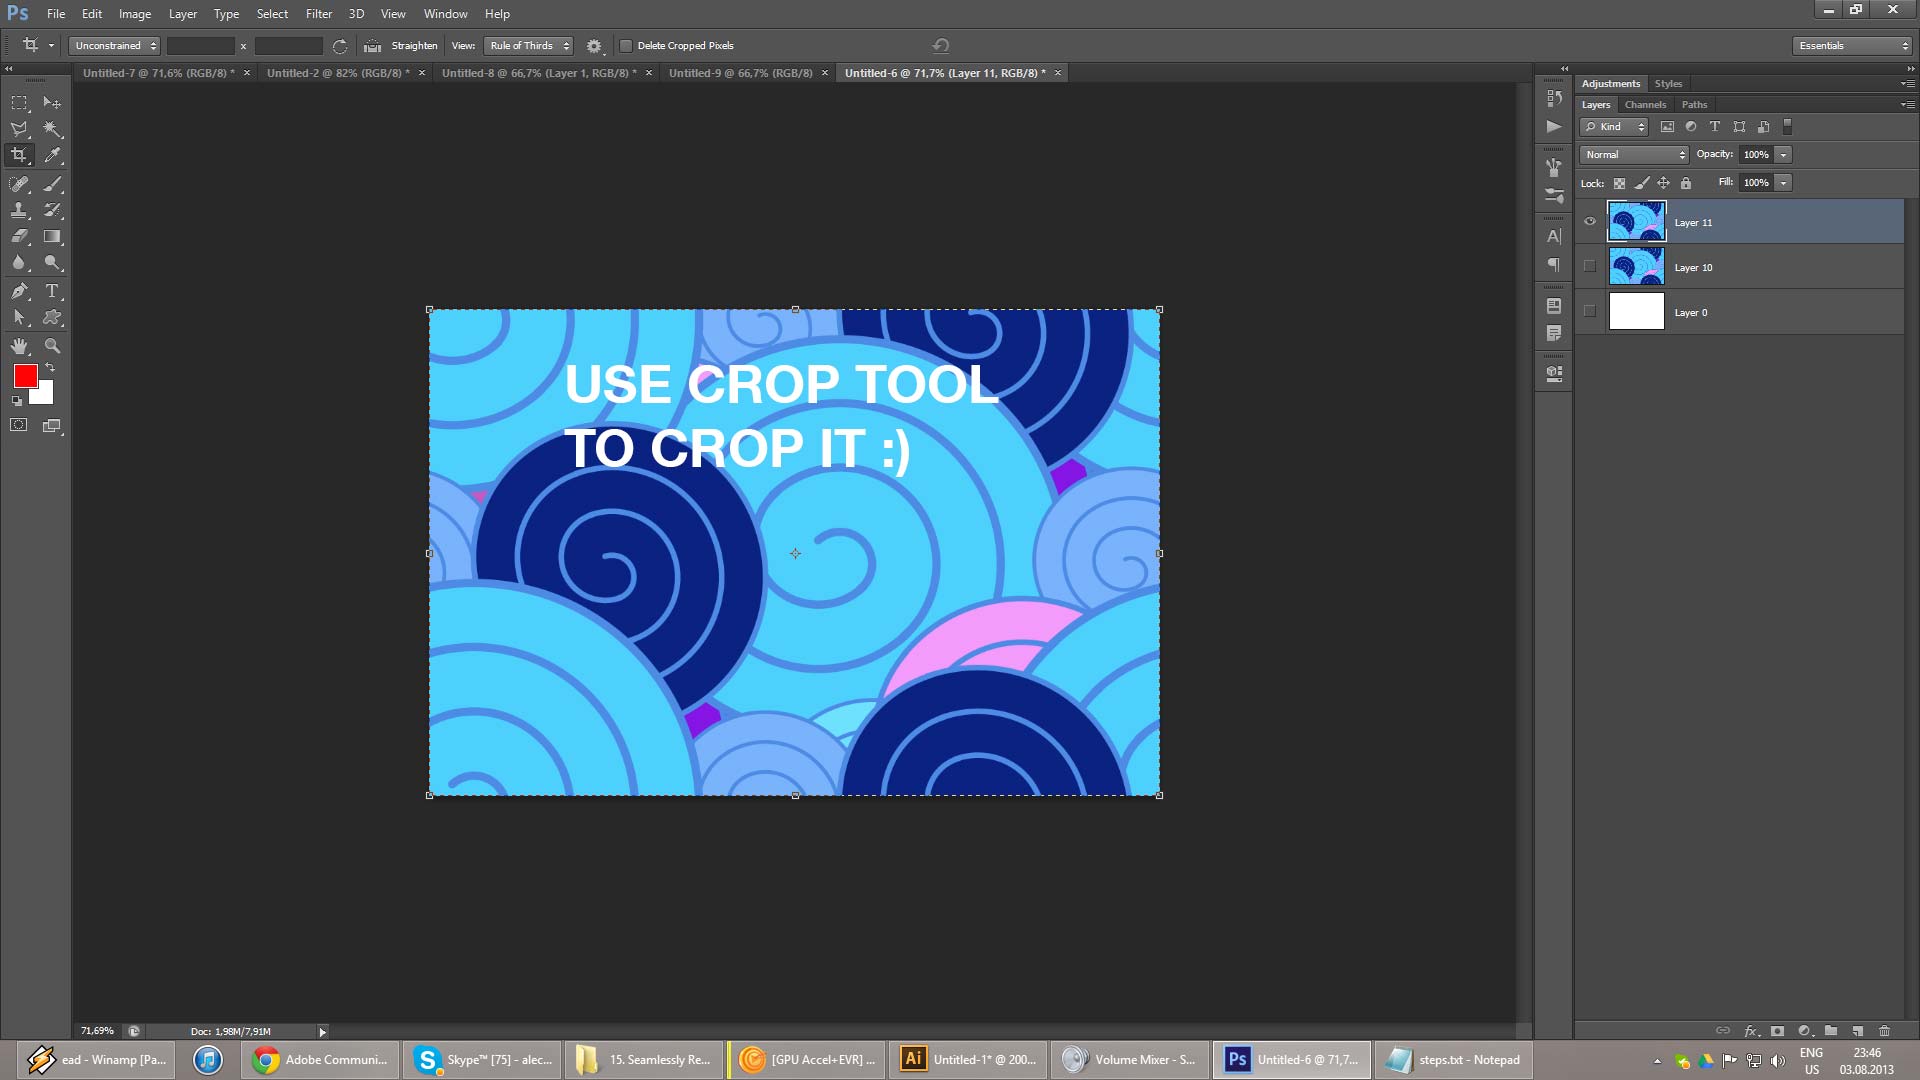
 .
.
Copy link to clipboard
Copied
Someone may have said this already but this works for me:
Once the pattern swatch is made, drag the swatch out into an empty part of your canvas. what appears will not be seamless YET. if you select it you will see that there is a box with no fill and no stroke in the back of the art. Make an artboard in the exact place of that box. If you export that artboard, it will be seamless. I know its a bit tedious and I wish there was an easy export pattern option or something, but hey it works for now.
side note: to those saying things like, "why would you want to do this? just apply the pattern to objects" your responses are just cluttering up the forum. If you don't have an answer why write in?

Copy link to clipboard
Copied
Using Illustrator CC, I have been trying to create a seamless pattern tile for use with spoonflower.com who unfortunately do not accept .AI files. So a .PNG was necessary. I ran dozens of tests in .AI: tried different dpi, tried adding a fill color (black) when creating the tile, when exporting, etc. Got the pattern to tile seamlessly *within* AI, but upon Exporting, a white line would appear at the base of my tile.
Realizing the issue lay with Illustrator's Export settings options, I tested a variety of tiles —very methodically, notes and all—using different export as .PNG settings in .AI. The *only* one that worked (i.e. no white lines) was when I Exported using Optimization: "None" (versus Type Optimized, Art Optimized) BUT... that meant that my line art looked jagged ('cuz there was zero anti-aliasing or optimizing happening).
I do not want jagged-looking artwork. So I am giving up and starting from scratch in Photoshop (as advised by spoonflower tech support).

Copy link to clipboard
Copied
Thank you so much! I was totally stuck till I found your share!

Find more inspiration, events, and resources on the new Adobe Community
Explore Now
 AdChoices