- Home
- Illustrator
- Discussions
- Re: Getting Sketch Look in Fill Color of Shape
- Re: Getting Sketch Look in Fill Color of Shape
Copy link to clipboard
Copied
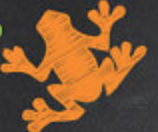
Can someone help me or point me in the direction of a tutorial for how to get this look in a shape? I want it to look like it wasn't colored all the way. I tried the scrible effect and the sketch effect and neather got this look for me.
Thank you.
 1 Correct answer
Here's a step-by-step tutorial.
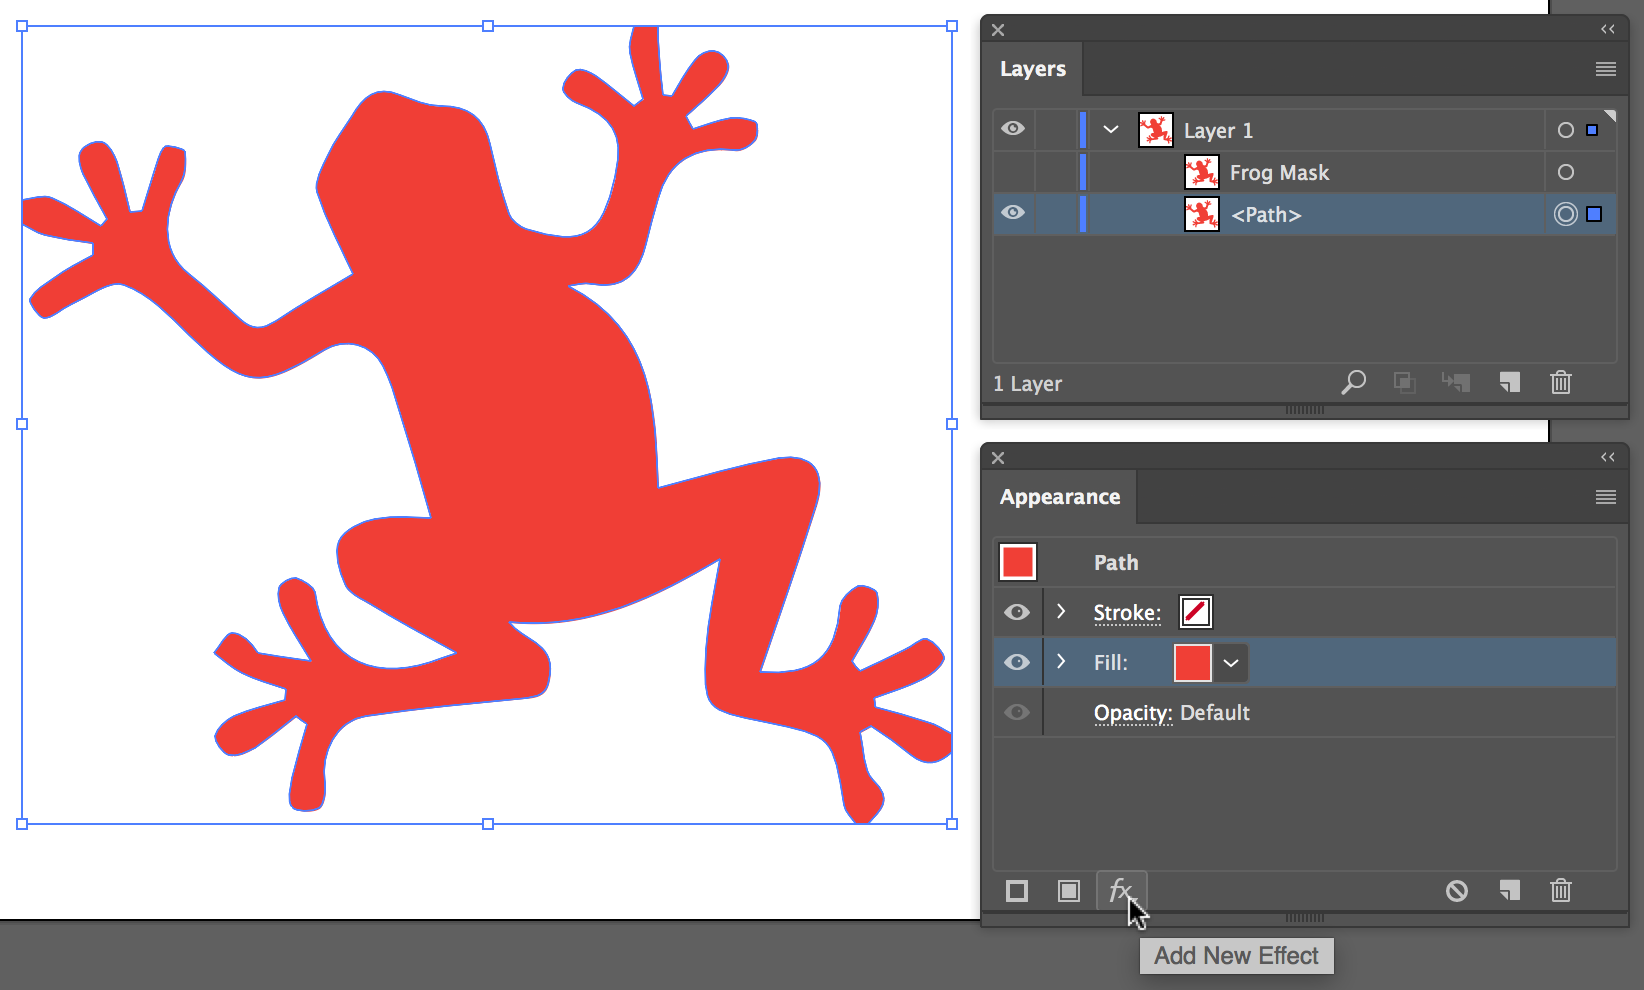
- Expand the Layers panel, and target (click the circle on right) the <Path> of the frog shape.
- Select Duplicate <Path> from the Layers panel menu.

- Rename the duplicate path Frog Mask.
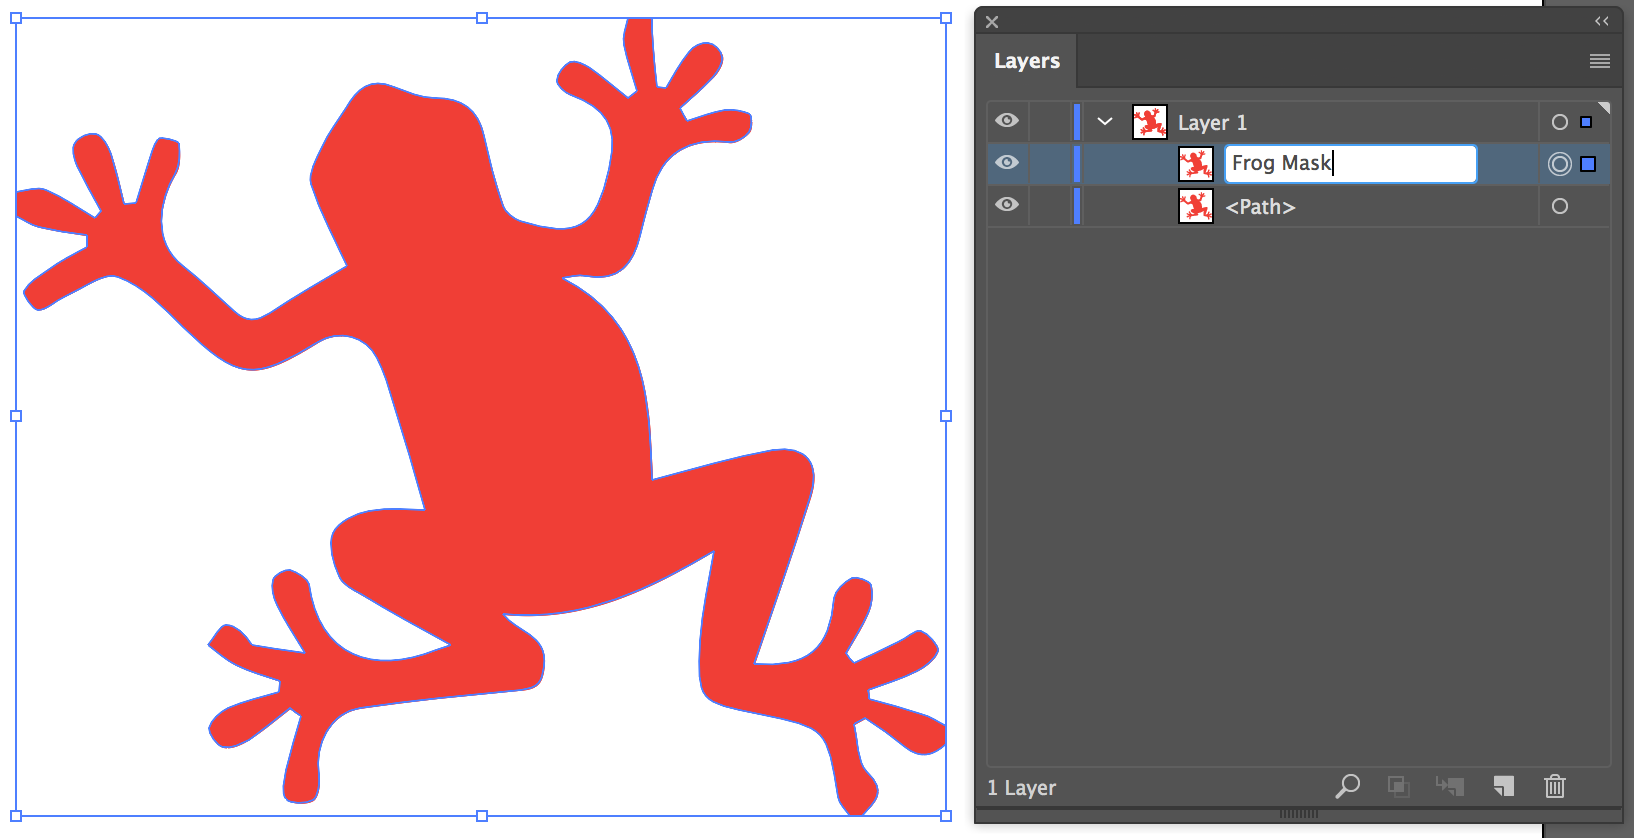
- Hide the Frog Mask layer (click the eyeball).
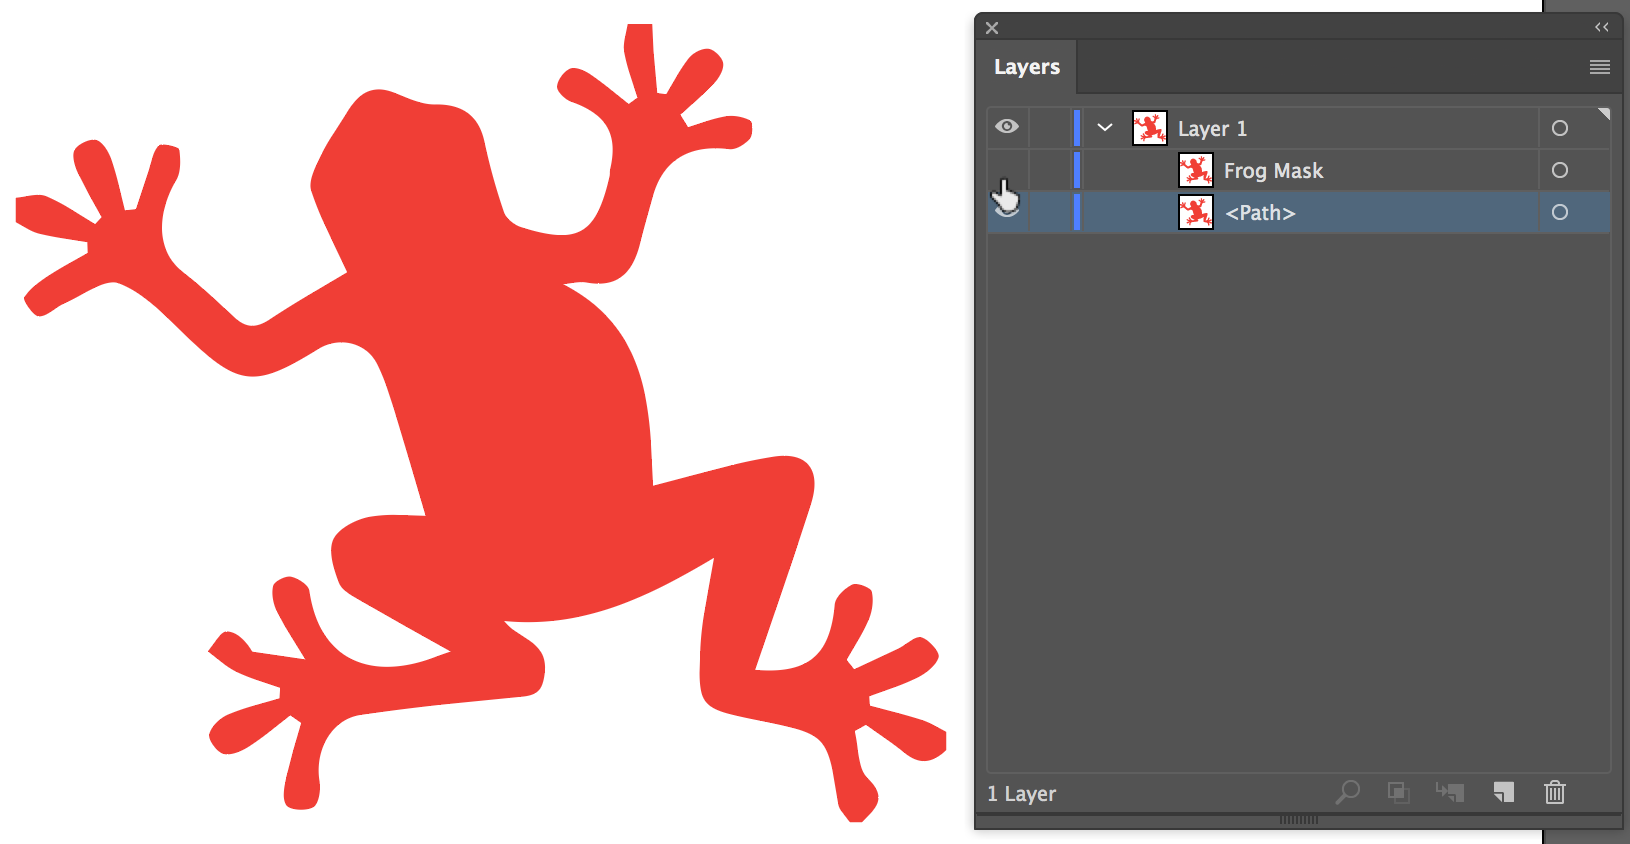
- Target the <Path> layer of the frog shape (click circle on right of layer name).
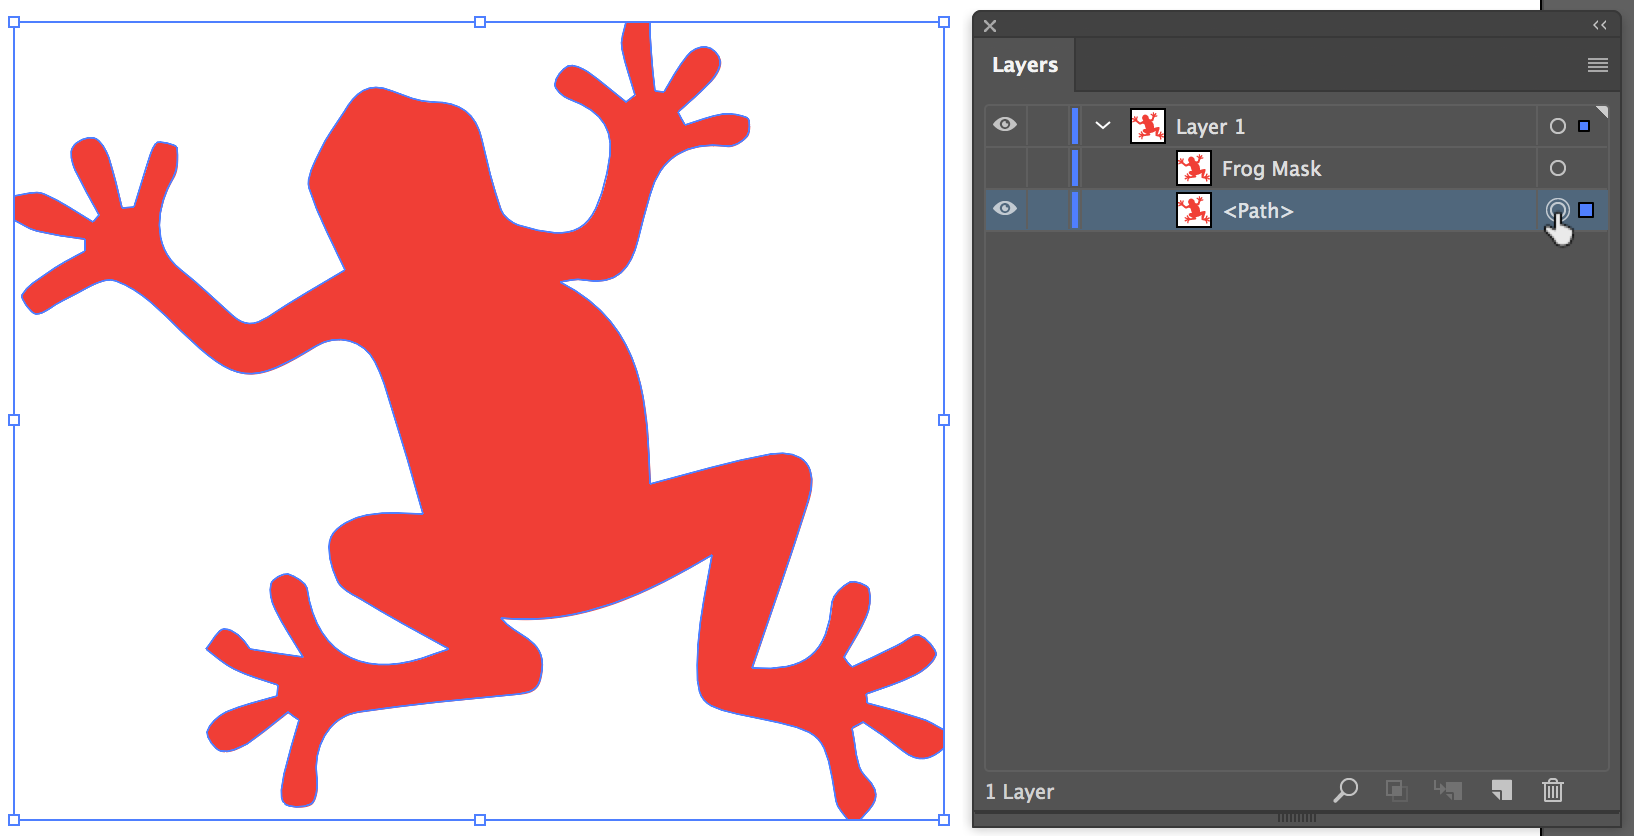
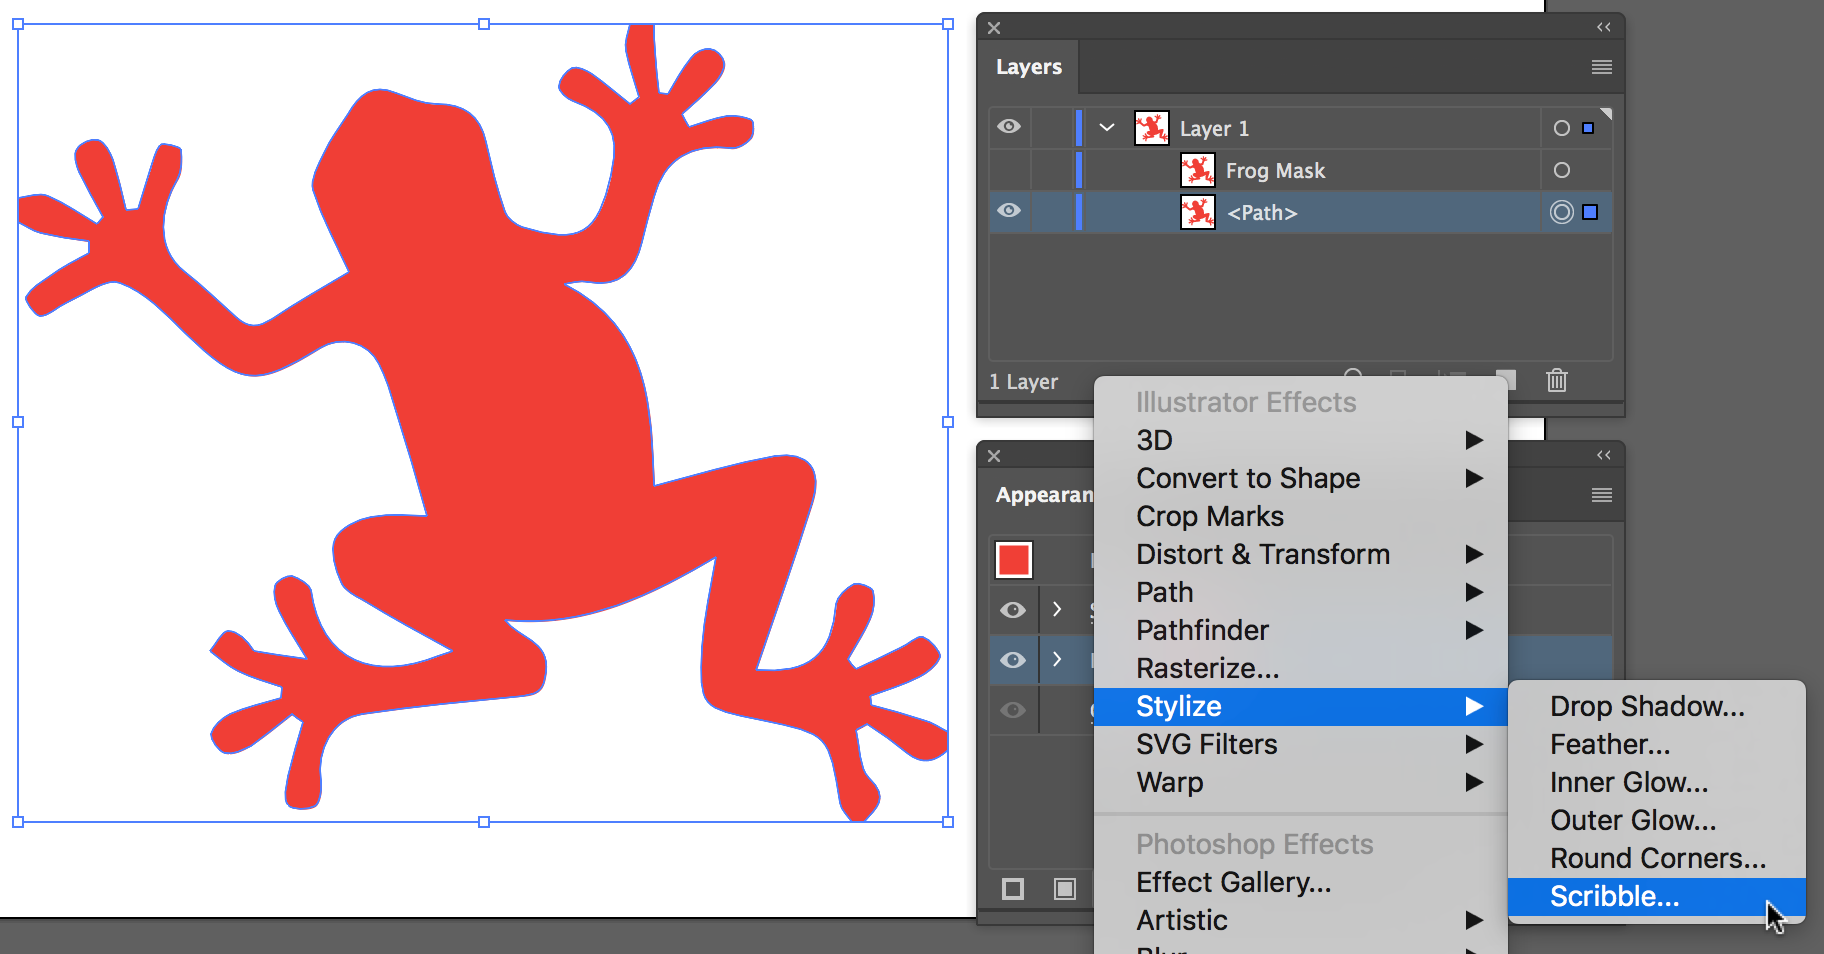
- Choose Window > Appearance to display the Appearance panel. At the bottom of the panel click on the Add New Effect Icon, and select Stylize > Scribble.
- Apply the pre
Explore related tutorials & articles
Copy link to clipboard
Copied
I would use a brush that has transparent or ragged edges of some sort to create a number of brush strokes on a layer. Then, put the shape (in this case, a frog) on that layer, make sure it's in front (arrange -> bring to front), and make a clipping mask (Object -> Clipping Mask -> Make). I would paste that frog shape again on a new layer and apply a brush stroke to (1) define the outline and (2) allow you to give it a softer edge, if you desire that (it's hard to tell from the small attachment).
Copy link to clipboard
Copied
Here's a step-by-step tutorial.
- Expand the Layers panel, and target (click the circle on right) the <Path> of the frog shape.
- Select Duplicate <Path> from the Layers panel menu.

- Rename the duplicate path Frog Mask.

- Hide the Frog Mask layer (click the eyeball).

- Target the <Path> layer of the frog shape (click circle on right of layer name).

- Choose Window > Appearance to display the Appearance panel. At the bottom of the panel click on the Add New Effect Icon, and select Stylize > Scribble.


- Apply the preferred scribble settings in the Scribble Options dialog box. Select Preview to see the changes on the fly on screen as you make them. Click OK.

- Shift click the Frog Mask target in the Layers panel (this ensures <Path> and Frog Mask are selected).
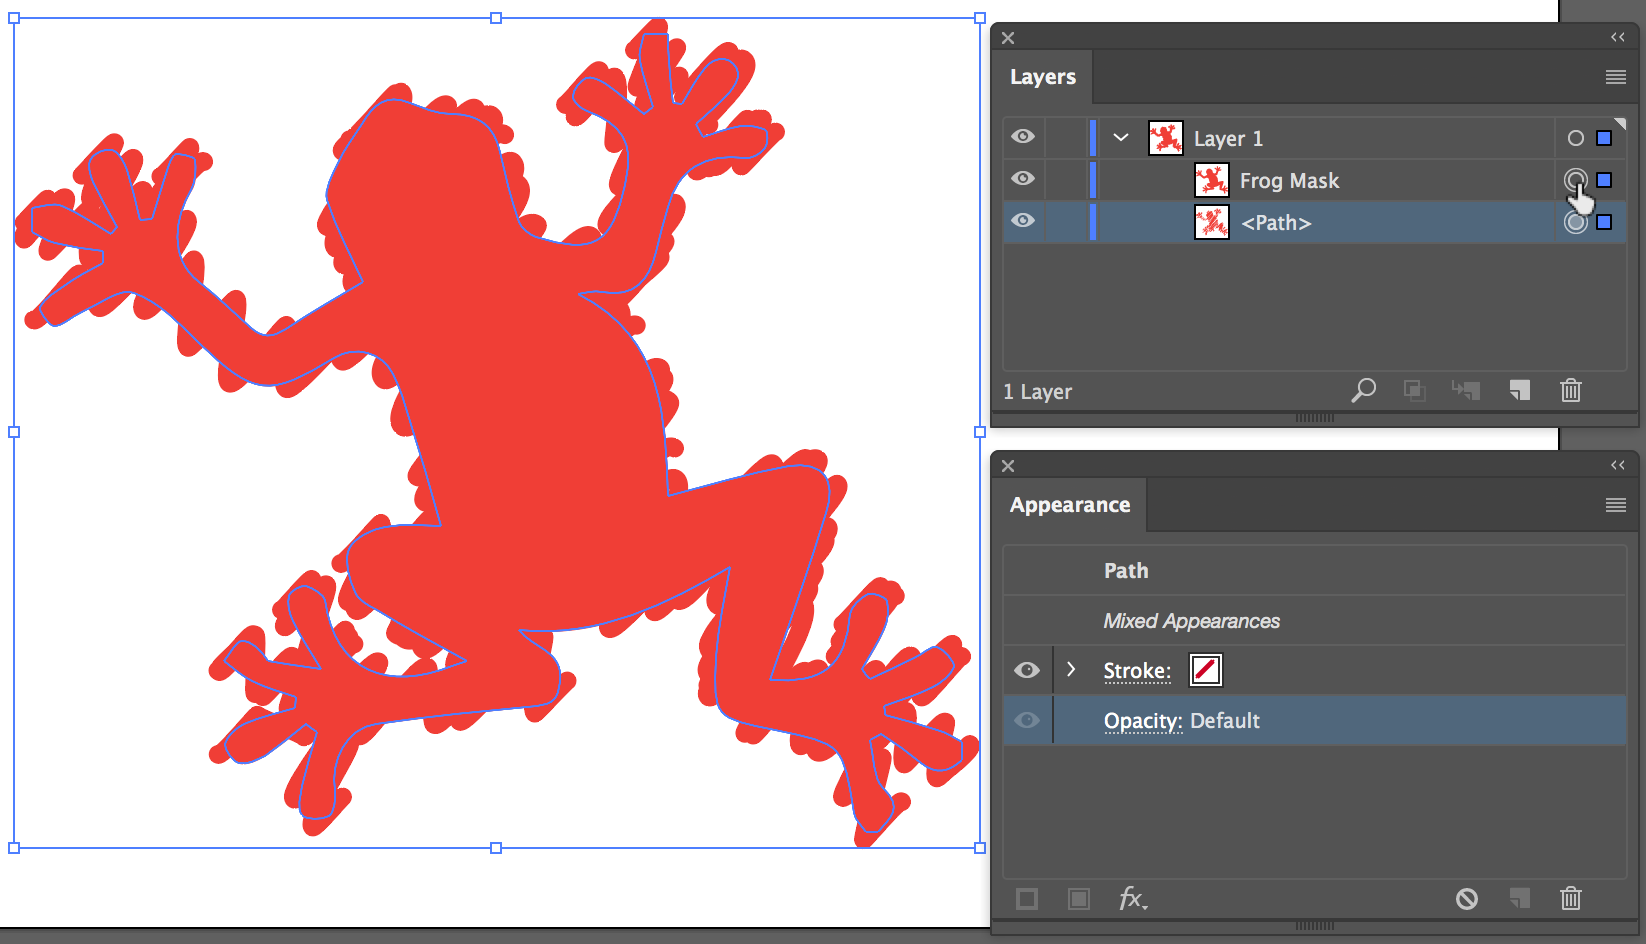
- Choose Object > Clipping Mask > Make

- You've now masked the scribbled frog with the Frog Mask path.
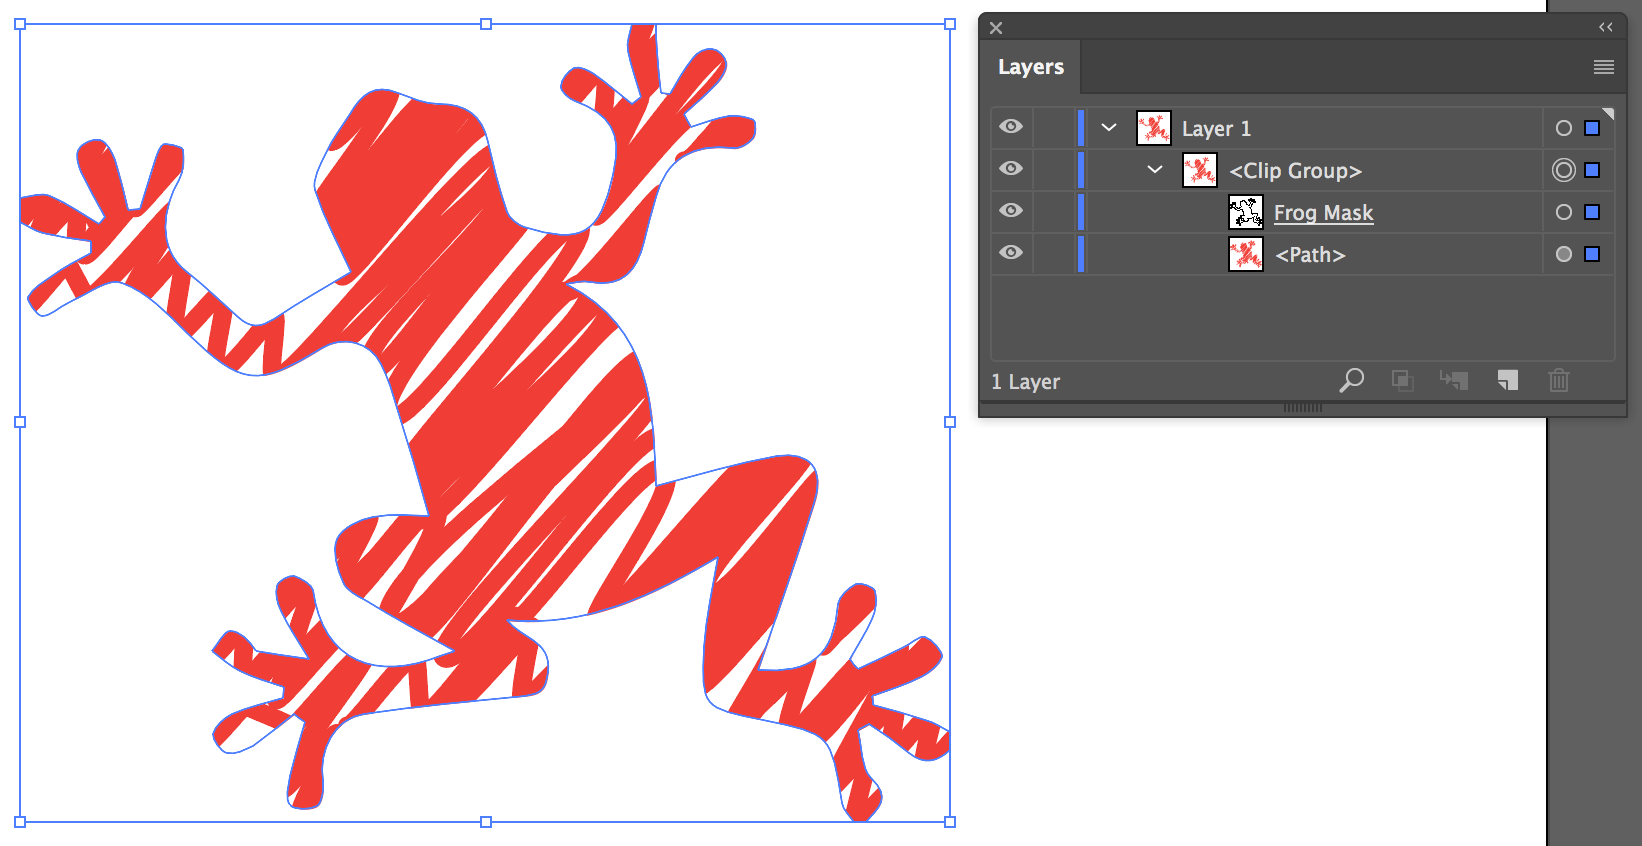
- To make further adjustments to the scribble effect you applied at this stage. Target the <Path> in the Layers panel, and in the Appearance panel expand the Fill (click on the arrow to the left of 'Fill') to see the effects you applied. Click on Scribble to reopen the Scribble Options dialog box and make further changes.

Find more inspiration, events, and resources on the new Adobe Community
Explore Now