- Home
- Illustrator
- Discussions
- Re: How do you create a one color halftone vector?
- Re: How do you create a one color halftone vector?
Copy link to clipboard
Copied
I've been creating them in black and white in CS6, then converting to vector via image trace since that's the only way to make them a perfect circular vector that I've found, but how do you convert it to a color afterward? It won't let me simply change the fill color, nor will it let me select the black dots with the white arrow. I had also selected "ignore white" while image tracing so it had a transparent background. Help! I'd really like an orange halftone vector, and when I make it a color from the start it creates it out of multiple colors. I want it to be a solid color without any circles overlapping. Thanks in advance!
 1 Correct answer
Maybe this solution will work for you. I created a halftone pattern on an object with a white to black gradient using the Effects>Pixelate>Color Halftone option. I copied that halftone to the clipboard,replaced the fill of the object with a spot orange color, and added an opacity mask in the transparency panel. Selecting the mask, I pasted the clipboard contents (paste in place) into the opacity mask and checked the invert mask option.
It's a little convoluted, but it works! If you need to impro
...Explore related tutorials & articles
Copy link to clipboard
Copied
Can't you just make it black, then trace it, and then color it orange? Don't start with orange.
Copy link to clipboard
Copied
Nope, tried that. I wish it was that easy. It's traced, I just can't get it to change color!
Copy link to clipboard
Copied
Did you click the Expand button after tracing? There's no reason you shouldn't be able to change color after tracing.
Copy link to clipboard
Copied
Maybe this solution will work for you. I created a halftone pattern on an object with a white to black gradient using the Effects>Pixelate>Color Halftone option. I copied that halftone to the clipboard,replaced the fill of the object with a spot orange color, and added an opacity mask in the transparency panel. Selecting the mask, I pasted the clipboard contents (paste in place) into the opacity mask and checked the invert mask option.
It's a little convoluted, but it works! If you need to improve the quality of the halftone edges, increase the resolution used via the raster effects settings under the effects menu.

Hope that helps,
Michael Riordan
Adobe Certified Instructor
Digital DesignLab
Message was edited by: Michael Riordan image added to post
[link deleted by moderator]
Copy link to clipboard
Copied
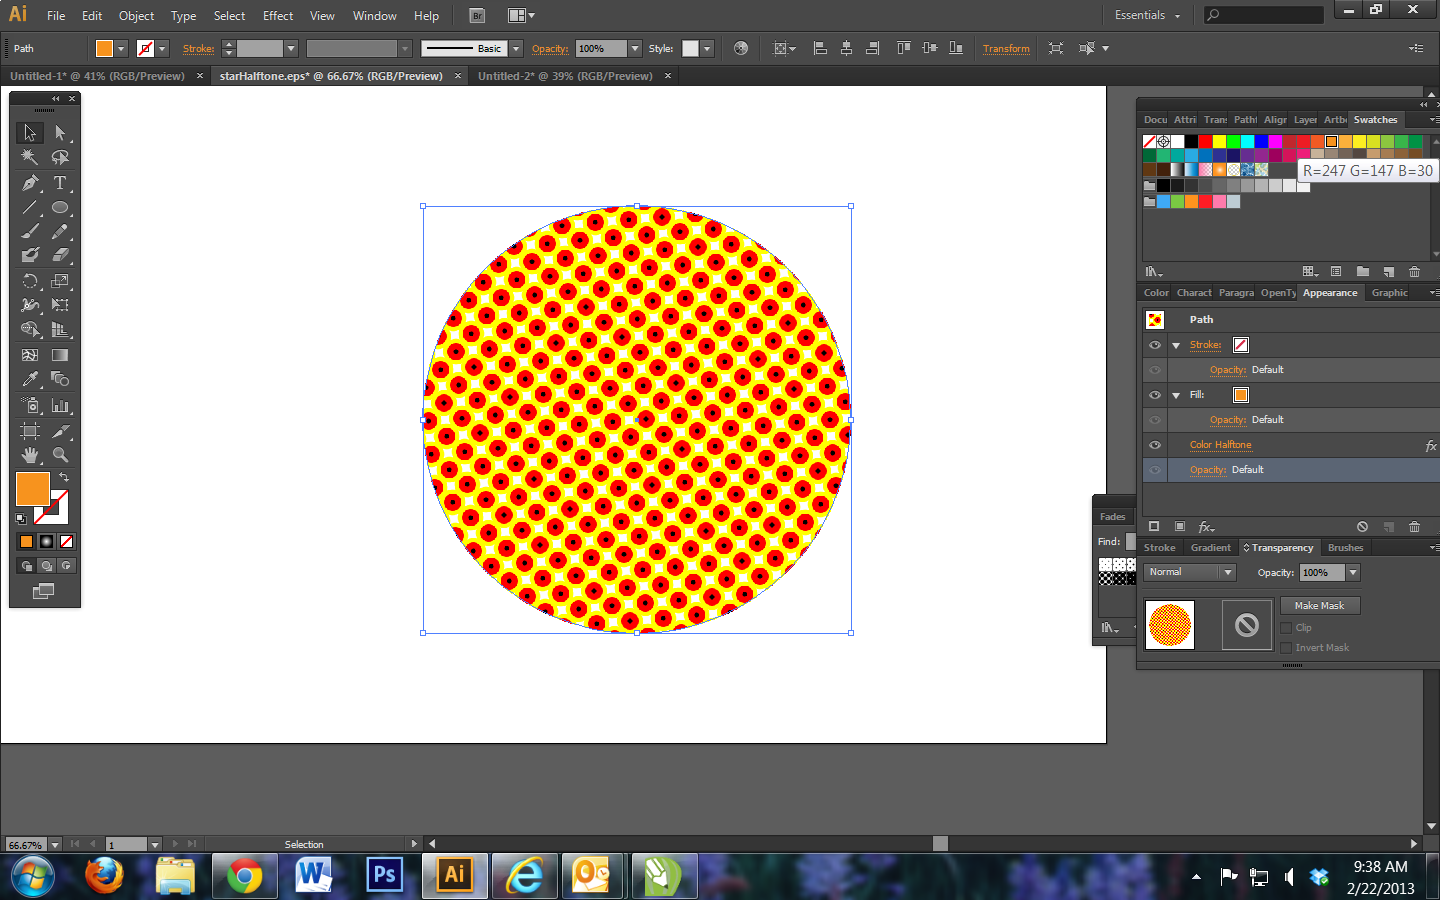
Thank you for your response, Michael, however I'm having a tough time following what you did. I created the halftone in black and white, copied it, then as soon as I go to change the color to orange it creates it out of multiple colors again? Did you trace the black and white halftone first?
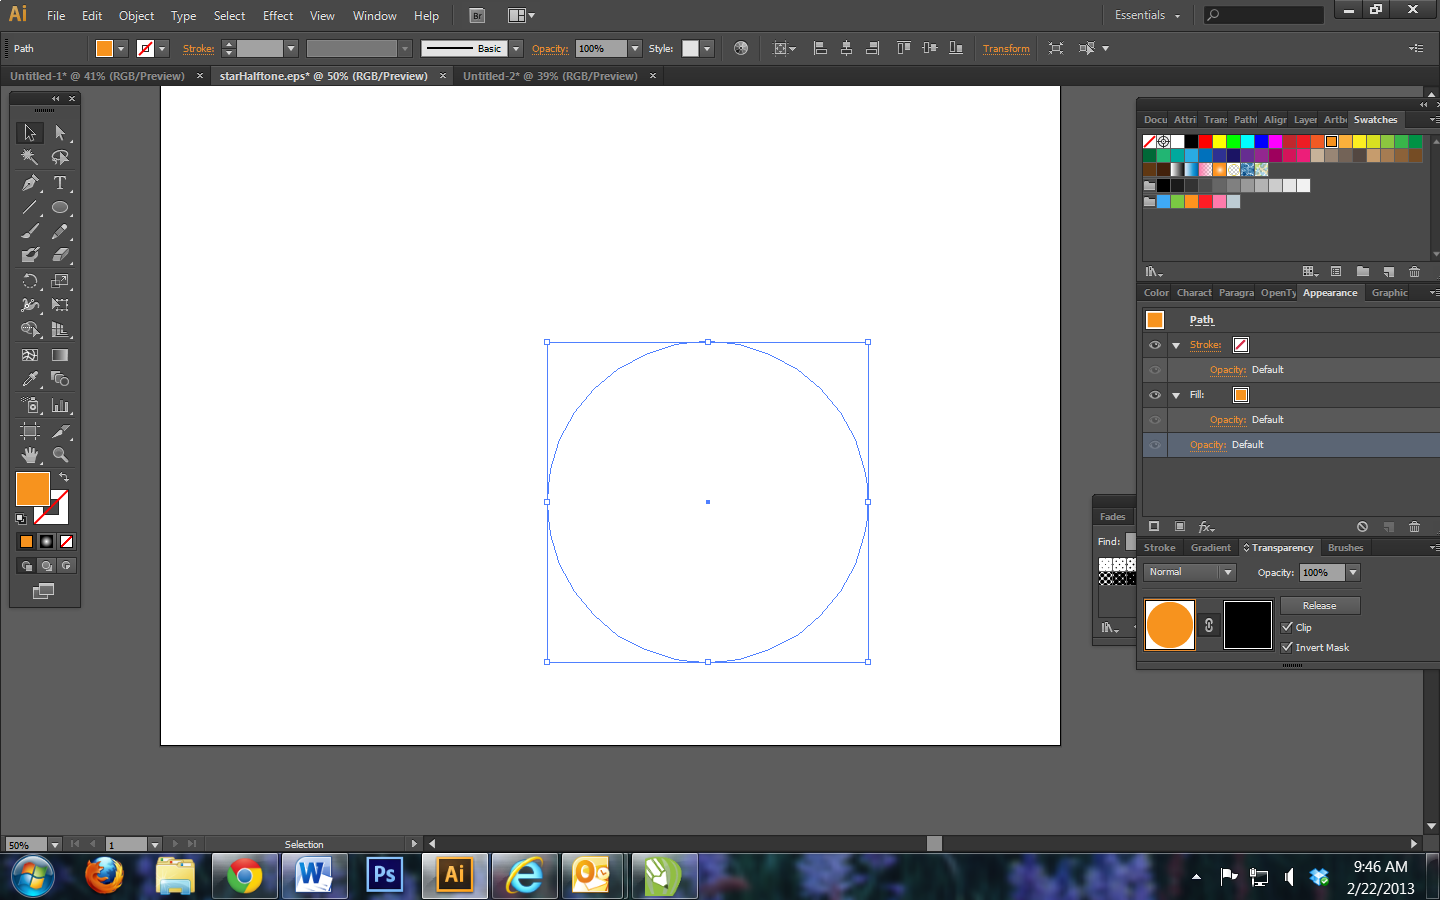
From what I can see with the mask, it's a solid orange color. How do you simply replace the fill color without it automatically looking like the first screen shot attached? You also lost me at the transparency mask...I'm afraid I haven't used that before 😕 how do you JUST select the transparency, or even see it for that matter? When I click make mask, it remains invisible even if I select invert mask, is that the point? I'm not sure I totally understand the purpose of the mask. I felt like I was following your instructions ver badem, but to no avail (see second screen shot).
I'm still relatively new to Illustrator, so any insight you can offer is GREATLY appreciated! I feel like it's so simple, I just can't get it to look like yours! Why is it that you can't just change the color of it after it's traced as black and white, like any other vector??
Thank you so much for explaining this to me! I can't find tutorials anywhere that can help me with this!


Copy link to clipboard
Copied
Hi
It looks like the step you missed was using a spot color orange. It looks like yours is RGB. Double click that orange swatch in the swatches panel, and change the drop down selection for color type from process to spot color. That makes your orange an single ink instead of a mix of other colors.
As for the transparency mask, notice that there are 2 square icons in the transparency panel. The first shows your art. the second, black one is the transparency mask. just click on that icon and Illustrator knows you want to work with the mask. Paste in your clipboard contents (the halftone pattern you made earlier) by using "paste in place" and your object will pick up the halftone appearance but still be that spot orange. Invert the mask if needed.
Remember to click back on the 1st icon in the transparency panel, the "art" icon so Illustrator knows you want to work normally again.
Try it, check back if you have more issues. Good luck!
[ signature removed by forum host - advertising is not permitted ]
Copy link to clipboard
Copied
Thank you SO MUCH Michael!! I did a little more research on transparency masks, and it makes much more sense now. I actually acheived it a slightly different way than you did, which maybe it's more trouble this way but it works, so I'm happy!! I just made a solid orange circle, copied and pasted it, then made a black and white one and converted that to halftones, image traced the black and white one, laid them on top of each other, then created a transparency mask and inverted it so the orange showed as the black.
Thank you again for all of your help!!!
Copy link to clipboard
Copied
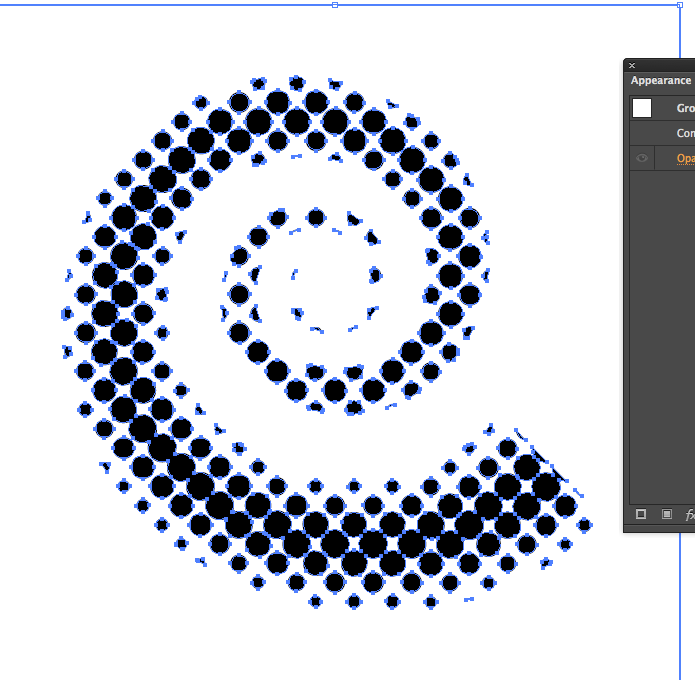
If you want the halftone dots to be vector, you can do a live trace.

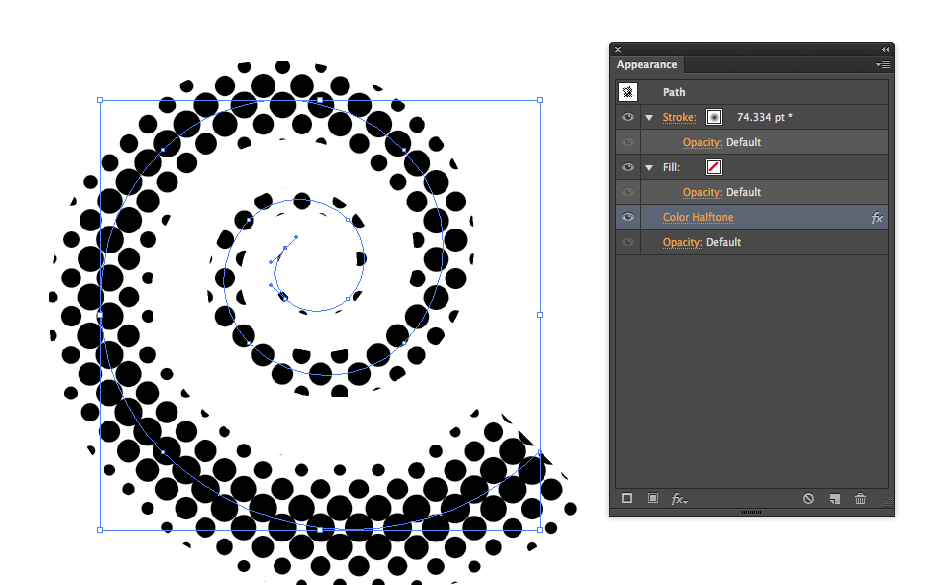
Below is a similar method without using the transprency palette.

Copy link to clipboard
Copied
Mike--
Is that CS6? If so, did you mean image trace? Because I have a really tough time getting it to trace the circles perfectly in shapes other than an ellipse, like your swirl there. What settings did you use for that? Also, one of my main things was trying to change its color once it's a vector.
Thanks!
Copy link to clipboard
Copied
What image trace setting did you use for this though, Mike? (spiral halftone). Even the high fidelity photo option doesn't usually leave you with perfect cirlces? Especially on a sprial? Which, by the way, did you just use a large stroke for and convert to color halftone?
Copy link to clipboard
Copied
It's a little convoluted, but it works!
Yes, it's (pointlessly) convoluted, but no, it doesn't work to create the vector-based "halftone" circles that jshea22 is asking how to accomplish.
I created a halftone pattern on an object with a white to black gradient...
You started with a grad filled path...
...using the Effects>Pixelate>Color Halftone option.
You applied a raster effect, therby telling Illustrator to create a raster image. The fact that it's a so-called live effect is of no consequence; it's still a raster image.
I copied that halftone to the clipboard, replaced the fill of the object with a spot orange color, and added an opacity mask in the transparency panel. Selecting the mask, I pasted the clipboard contents (paste in place) into the opacity mask and checked the invert mask option.
So now the transparency mask that is making the dot shapes is a raster image. You're not going to end up with vector path dots doing what you've described. Zoom in and you'll see that the 'halftone' dots are still raster-based.
JET
Copy link to clipboard
Copied
Hmmnnn...JET, I think you're confusing two posters as one. You pulled info from my post and Mike Gondek's and your post seems to imply we are one and the same.
I wrote "It's a little convoluted but it works!" which you criticize as pointlessly convoluted and failing to deliver vectors. It does deliver a vector solution, my process does not include rasterizing the art at all, at least not until final output. In addition to the criticism, you offer no solutions.
I wrote " I created a halftone pattern on an object with a white to black gradient..." which you attacked as incorrect, saying I started with a gradient filled path. No. That was Mike Gondek who used a gradient filled spiral path. I started with an ellipse, filled with a gradient, as I stated. Again, not sure why the need to blast away here, but you did, incorrectly.
I wrote "...using the Effects>Pixelate>Color Halftone option." which you blasted as being a raster effect. Okay, but I also told the original poster they could increase the resolution to clear up the pixelated appearance. And since it is a live effect, It offers a lot of flexibilty, right up to the point of otput. Unless the OP is creating svg files for web, I'm not sure what your beef is with using a raster effect. You didn't say. You didn't offer an alternative solution here either.
I used the halftone to create a transparency mask. You insist that it is now a raster image. No, it's not. It's still a vector with a live effect and can be continually edited and modified. And when I raise the raster effects resolution to 1200 or 2400 I see pretty nice edges, on perfectly round halftone dots, in a spot color, which is, I think, what the OP was looking for.
You're the 3rd person to jump on me since I've returned to the forums. It feels a bit like the regular posters here don't like to share the sandbox. I wouldn't mind if your criticisms were written to help the original poster, or shed some new insight into the problem, or even respectfully point out potential problems with the technique being offered. But there is none of that here.
I think the original poster can use the technique I offered to get the visual look they are after. At the very least my post was an honest attempt to provide a solution, be helpful, and contribute to the forums community. Can you say the same of your post?
Copy link to clipboard
Copied
You pulled info from my post and Mike Gondek's
Every quote in my post 10 is directly from your post 4.
JET
Copy link to clipboard
Copied
This seems to be a better solution: Illustrator Tutorial: Vector Halftone effect - YouTube
Copy link to clipboard
Copied
soulsqueeze schrieb
This seems to be a better solution:
You might want to read the thread until the end before repeating what has been said years ago (post #8 )
Find more inspiration, events, and resources on the new Adobe Community
Explore Now

