


Copy link to clipboard
Copied
I'm creating an isometric milk carton and I'm trying to get the text on the side of it; so I've put the text on the rectangle and I was just going to use the direct selection tool to move it onto the side I need, but I don't know how to make the rectangle and the text one object so it will move together. Right now this is what is happening:

Basically, I want the text to move with the rectangle and the line underneath. They're on the same layer. The text is expanded. I've grouped them. I've tried the pathfinders. I've tried merging them through layers and that still doesn't work.
Any help would really be appreciated!!!! Thank you x


 1 Correct answer

Area Text, set text.
Group
On Group level>apply Effects>3D>Extrude &Bevel.
Settings as shown for left side.
Live Text.
With Text tool, can adjust Character attributes as you wish.
Transform, Scale as you wish.
Not sure if you wanted MILK text to be placed on one side or both.
I made two area text frames. Change the color on right side, and selected Position: Isometric right.
Hope that helps
K
Explore related tutorials & articles
 8
Replies
8
8
Replies
8

Copy link to clipboard
Copied
Looks like you used the direct selection tool. That won't work.
Instead select the group with the select tool and then use the free-transform tool or the shear tool.

Copy link to clipboard
Copied
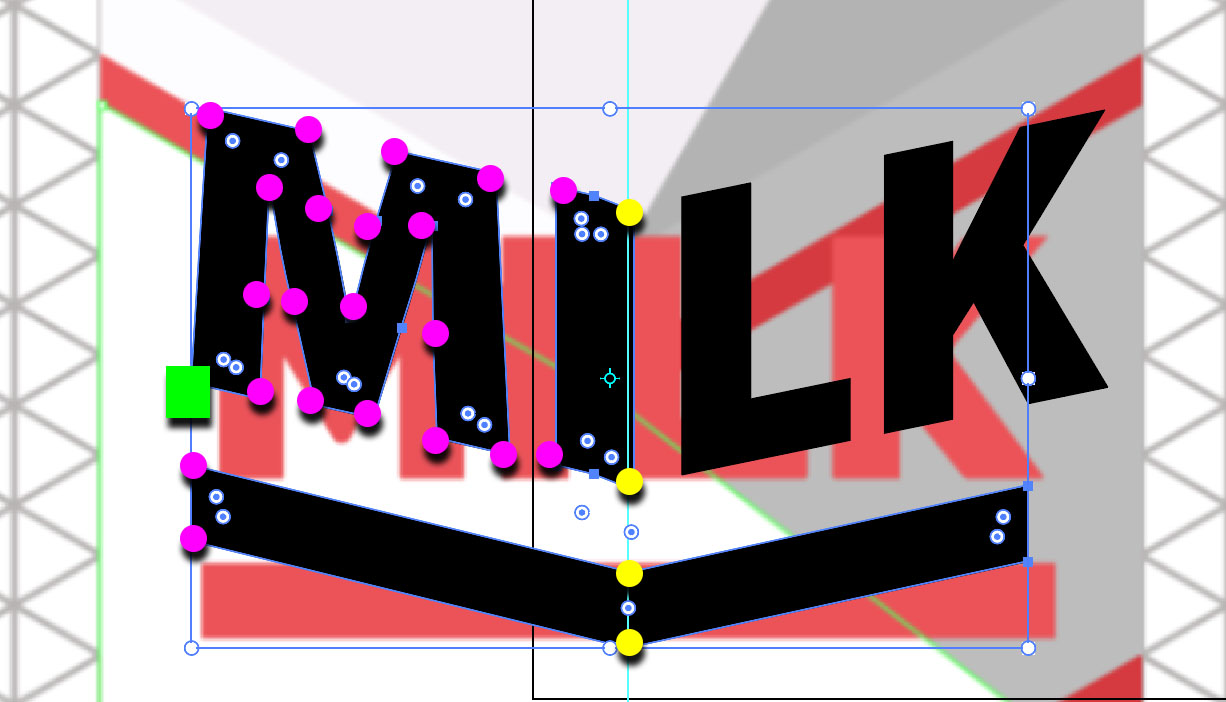
- Anchor with an anchor point on the line you want to keep in place.
- Use your Direct Selection tool and choose the anchored point and the points you want to move.
- Switch to the Free Transform tool and select the center handle
- Before you move the handle hold the modifier Option (Alt) key and drag in the direction you want to move the points. (You do need to hold the Handle then add the modifier, the exact opposite of Photoshop where you hold the modifier prior to selecting it)
- Do the same with the other side.
- The Yellow items below are the anchors and I had to add them to the rectangle. The Pink & Yellow circles are all the selected anchor points with the Direct Selection Tool. The Green Handle is what I pulled upward with the Free Transform tool while holding the Option (Alt) key to give the item a constrained transformation.
Copy link to clipboard
Copied
Area Text, set text.
Group
On Group level>apply Effects>3D>Extrude &Bevel.
Settings as shown for left side.
Live Text.
With Text tool, can adjust Character attributes as you wish.
Transform, Scale as you wish.
Not sure if you wanted MILK text to be placed on one side or both.
I made two area text frames. Change the color on right side, and selected Position: Isometric right.
Hope that helps
K
Copy link to clipboard
Copied
Great way too! k
Copy link to clipboard
Copied
Using Extrude&Bevel with an extrusion depth of 0 sounds like trouble.
Why not use the 3D > Rotate instead?
Copy link to clipboard
Copied
Monica, Hi.
Agreed, 3D>Rotate is the better choice.
I see there are Isometric settings there also.
K
Copy link to clipboard
Copied
One more 3d tool to look at is the perspective grid tool.
Copy link to clipboard
Copied
One more 3d tool to look at is the perspective grid tool.
There is no perspective in that example image.

Find more inspiration, events, and resources on the new Adobe Community
Explore Now
 AdChoices