

How to typeset this scene

Copy link to clipboard
Copied
Hi,
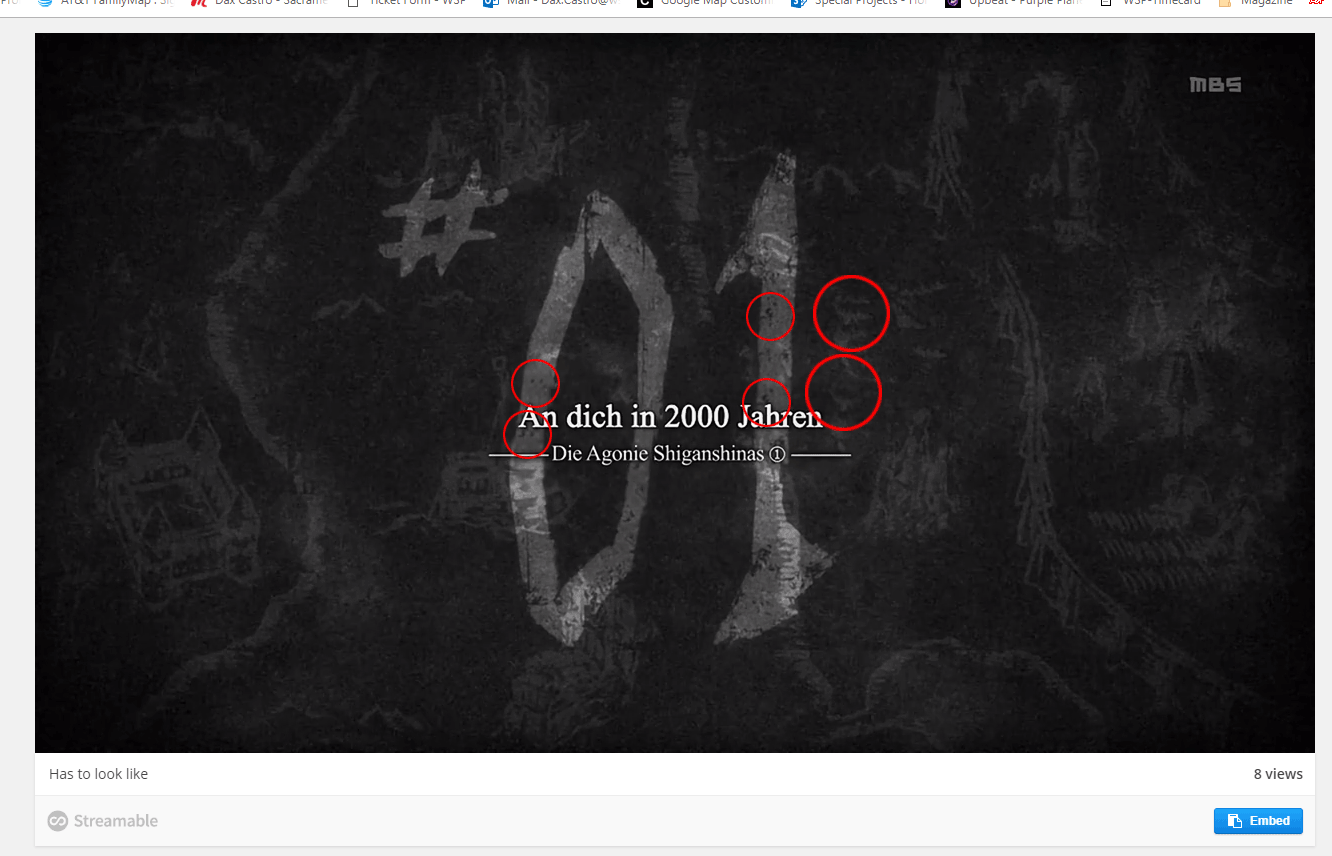
does anybody know how to typeset this scene from the "source" (Source - Streamable) to the "has to look like" (Has to look like - Streamable)?
I'd like to remove the japanese character and put something else on it.
Do i have to do it with Illustrator or Photoshop?
If yes, could anybody explain me in details how it works?
Thanks guys


Explore related tutorials & articles
 17
Replies
17
17
Replies
17

Copy link to clipboard
Copied
If all you have is a flat image (i.e., jpg of this source) then you are better off in Photoshop, as the Japanese type will have to be cloned or otherwise taken out. If you have a layered file, however, then you could just delete the text layer and put in a new layer with the English,
Copy link to clipboard
Copied
I only have the video source = flat image. This scene are like 300 frames. I don't like to edit frame by frame. At the "has to look like source" it doesn't look like that all frames got edited just only one and somehow copied to the rest.

Copy link to clipboard
Copied
You want to edit video?
Copy link to clipboard
Copied
Yeah, i`d like to edit those frames. Like i already said at my question.
Copy link to clipboard
Copied
That doesn't sound like a good idea in Illustrator.
Photoshop has the ability to import a series of frames.
And you'd maybe like to investigate applications like After Effects or Premiere.

Copy link to clipboard
Copied
I'd recommend checking out the roto brush and refine edge tool in After Effects After Effects Roto Brush, Refine Edge, and Refine Matte
Copy link to clipboard
Copied
How do i do this scene at After Effects? I don`t have a clue how i have to do this.
Copy link to clipboard
Copied
Scroll down to Josh Weiss' video with the dog. It's a good overview of how to use the tool. If you have questions on using After Effects, please post them in the After Effects forum After Effects
Copy link to clipboard
Copied
With this tool i can cut out the japanese character but without keeping the background. How does this help me to remove the japanese character + keep the background?
Thank's for you're further explanation.

Copy link to clipboard
Copied
Gitlecker - If you look closely you can see that the video has frame-by-frame edits that were most likely done in Photoshop. I would bet they did about 30 frames and the looped it and then set the new text on a layer above. You can see the obvious clone edits in the "Has to look like this" I think your exercise in this example is fairly clear. And definitely not an Illustrator solution. I know you don't want to do the frame by frame but hopefully I have given you enough info that you can use to avoid editing 300 frames.
-Dax
Copy link to clipboard
Copied
For sure don't try to edit it in Illustrator. The roto brush and refine edge in After Effects would be a way to make a selection over all the frames to mask it so that you could replace it with the content you want (most likely a still you'd make in Photoshop using Content Aware Fill), but you'd need to use motion tracking to match the wiggle.
Instead of editing all the frames of the footage, you'd probably be better off recreating it. Start with one frame in Photoshop. Select the text area you want to remove. Use Content Aware fill to restore the background. Create another layer with your text and apply a layer style for the dark area around it. I'd use glow but set the color to black and the blend mode to Multiply. Then extend that frame out for the duration you want. If you want to simulate the wiggle, then take that one Photoshop file into After Effects and apply an expression for wiggle https://www.premiumbeat.com/blog/after-effects-wiggle-expression/. You can also check out this video tutorial on creating an old film effect https://www.videocopilot.net/tutorials/old_film_look/
Copy link to clipboard
Copied
I edited 1 frame and recorded the action and ran it through the rest. (Editing all frames (actions) - Streamable)
Could you tell me how to do a text layer and put the layer above the others? Or is there a way to do a layer without the text and put it above all frames?

Copy link to clipboard
Copied
if there is no movement (aka no animation and just a still frame) ... just edit the two images import into your editor (premiere or aftereffects and just drag the time out on you 1 frame so it last however long you want/make it cut to the next image (again extended to the run time you want)
then you can put match grain effect and a shake of some kind (wiggle is mentioned earlier in the thread, I would use a low setting)
then it will appear that you still image is more dynamic (with the wiggle/animated film grain 'noise' on the 1 image).. aka has movement/life but only need to edit the 1 image once.
Copy link to clipboard
Copied
But is there a way to edit all frames like in this video (Editing all frames (actions) - Streamable) and put a layer with text or without text above the removed japanese character.
Copy link to clipboard
Copied
either make another image that is just text (rest transparent)
or if you have after effects just add a new type layer in there and position it on screen (and drag out to the length you want)
Copy link to clipboard
Copied
How did they maintain to keep all frames that they edited to look the same?

(this position, the background)
Copy link to clipboard
Copied
it is 1 frame 1 image drug out (lets say I drag it out to 1 second.. that one frame is now 29.97 frames...or whatever you frame rate is)
it will export the image to run that time.
If you keep editing the same image over and over to fill that 1 second, you will see subtle changes between each frame (because we are not robots we will end painting out, clone stamping different areas and it will be extremely obvious when playing as a video/animation)
Just use 1 image as your 'slate'.

Find more inspiration, events, and resources on the new Adobe Community
Explore Now
 AdChoices