

- Home
- Illustrator
- Discussions
- Re: How would you make a spiral coil in illustrato...
- Re: How would you make a spiral coil in illustrato...
How would you make a spiral coil in illustrator?

Copy link to clipboard
Copied
Hi!
I would like to make something like this:

but without the "laminated iron core". So what I need to know is how to make those spiral shapes. I tried using some tools but it was pretty hard to do by hand so it actually looked good.
Thanks in advance!


Explore related tutorials & articles
 15
Replies
15
15
Replies
15
Copy link to clipboard
Copied
Maybe I should mention that I'm by no means a pro using illustrator so if it's possible to describe the steps in a pedagogic way that would be very helpful.

Copy link to clipboard
Copied
that particular example could be made with a smooth zig zag effect, if you want it that simple.
Copy link to clipboard
Copied
Hm. yeah, but it looks a bit less "realistic" compared to the picture I posted. And you don't get nice connection points at the ends since you want to connect horizontal lines to the ends. Is there a way to make it a bit better than just a standard smooth zig zag?
Copy link to clipboard
Copied
like the dude said, expand it and draw your ends manually.

Copy link to clipboard
Copied
Draw a rectangle and fill it with the color you want.
Effect/Stylize/scribble

Dink with your settings
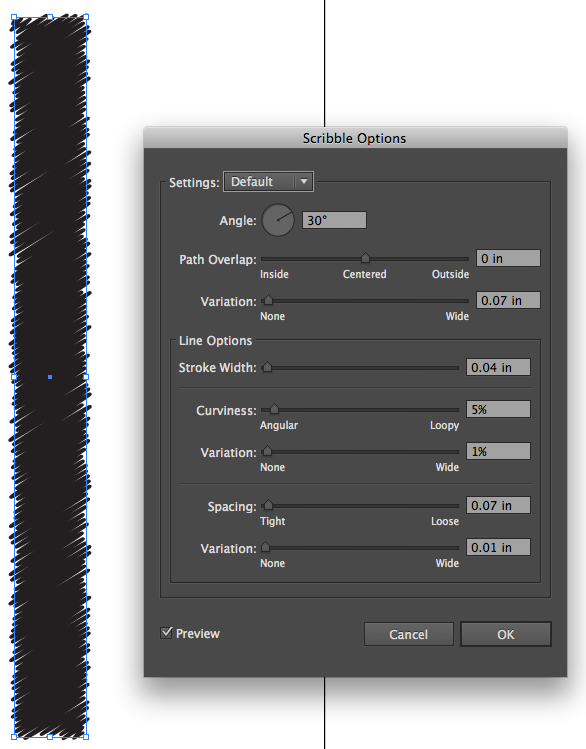
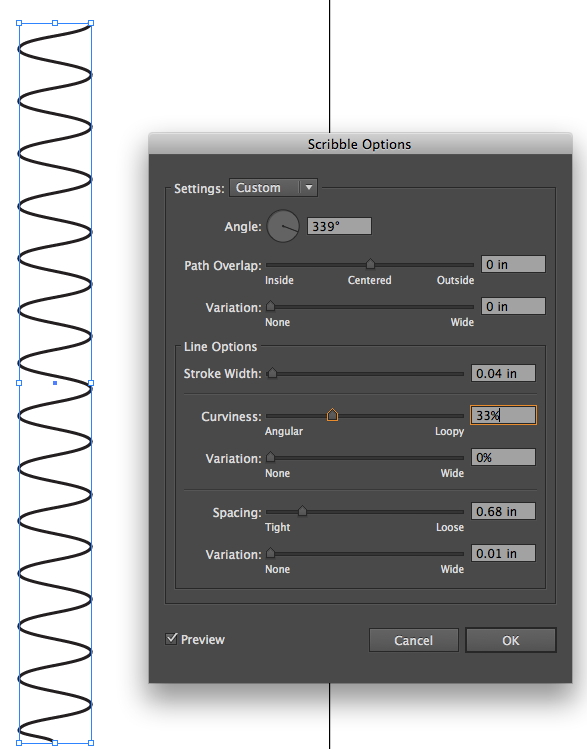
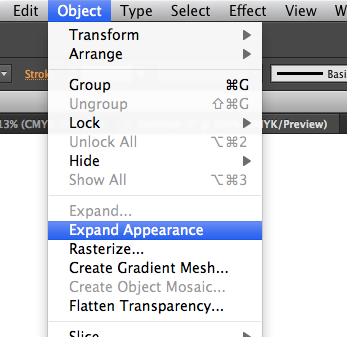
Object/Expand Appearance
Amaze your friends.

Copy link to clipboard
Copied
See this thread, posts 8 through 10:
http://forums.adobe.com/message/3800045#3800045
Do a search in this forum for "JET spiral" (without the quotes) and you'll find other threads demonstrating a variety of approaches.

JET
Copy link to clipboard
Copied
Thanks! The links were really great. One thing I'm wondering though, I can't seem to do what you're supposed to do in the third step here:
http://www.illustrationetc.com/AIbuds/SpringSpineBrush.pdf
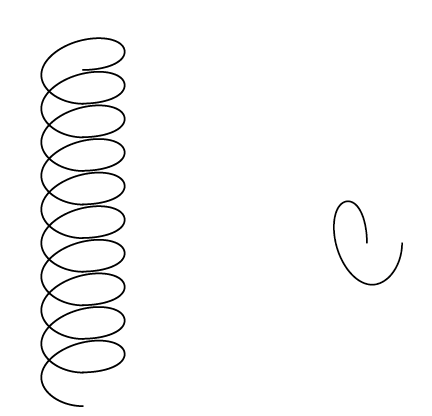
I think the design they have in the 9th step would be close to ideal for me. But when I do the third step only the lower right quarter of the ellipse seems to move. I don't get how they make the entire spiral move around the right point. Could anyone tell me what I'm doing wrong here?
Copy link to clipboard
Copied
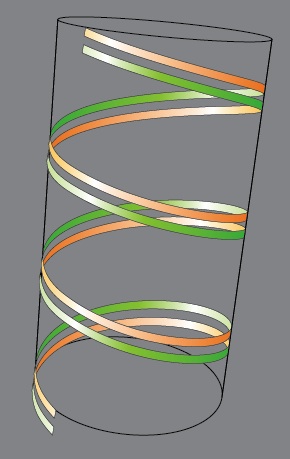
Here’s another kind of spiral done by mapping diagonal lines onto a 3D cylinder.
Copy link to clipboard
Copied
Copy link to clipboard
Copied
i don't think i'd ever really played with the reshape tool before now, but make sure you have the whole object selected before using it on the point.
Copy link to clipboard
Copied
But when I do the third step only the lower right quarter of the ellipse seems to move.
After cutting the path, deselect it. Then select the whole path (use the black pointer). Then get the Reshape Tool. Click (mouseup, mousedown) on the anchor. A box appears around it. Then drag (mousedown, drag, mouseup).
JET
Copy link to clipboard
Copied
Ok so I got the third step to work. However, I don't understand what to do on the fifty step. I do this:
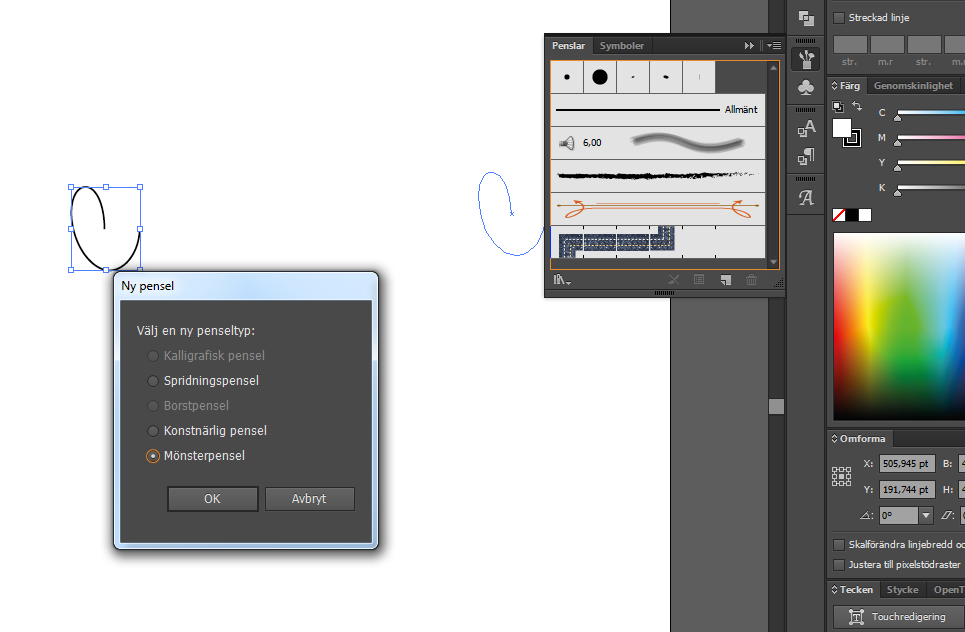
Unfortunately my illustrator is in Swedish which I don't like, but "Mönster" is "pattern" in Swedish so it seems like it's that one. Then I get a new window on my screen:
And this part looks nothing like the step-by-step guide I'm following. What exactly am I supposed to do here? If I click ok on that window I still don't see a way to do what the guide tells me to do. Does anyone know?
Copy link to clipboard
Copied
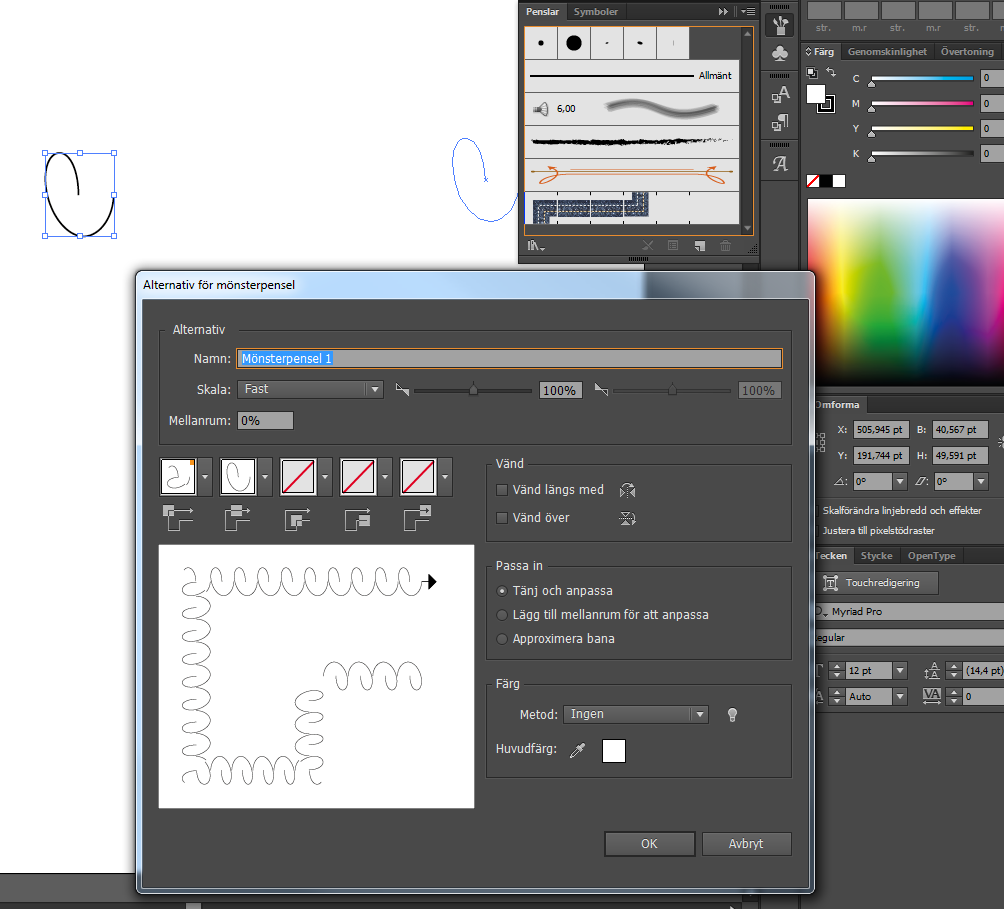
Ok. So I chose "none" on the left option so it had the exact same form as before. Then I dragged the shape onto my drawing board and pulled the "invisible box" like the guide states that you should do. So now I've got this:
So, now I choose the black pointer and select the whole path, press alt and drag the path back to the brush tile. When I let go I get another one of these windows though...:
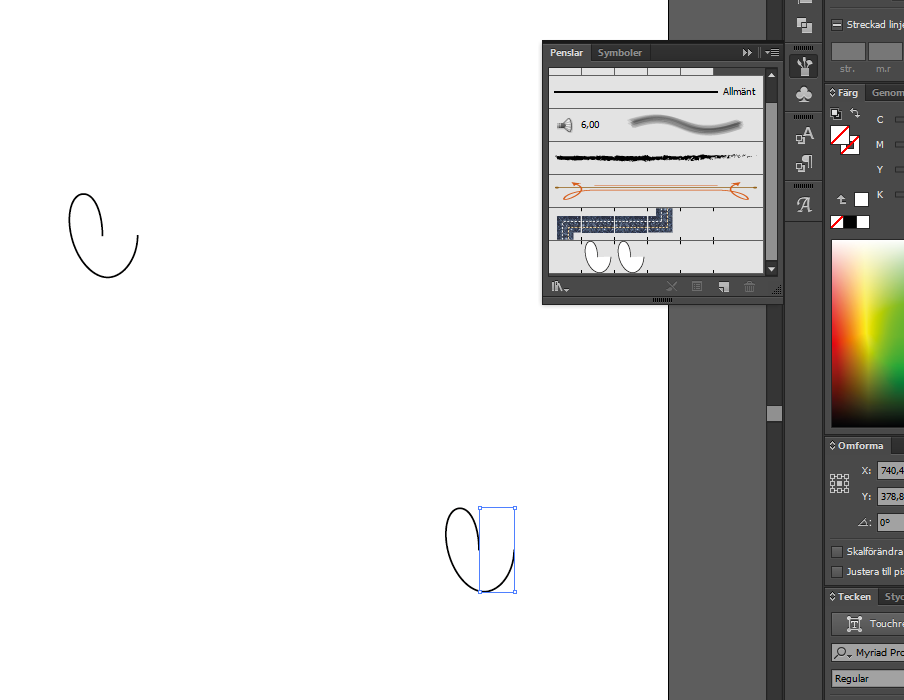
Again I have no idea what to choose or if I should just click ok. But, I try clicking ok since I really have no idea. I draw a vertical line and apply the brush and this comes out:
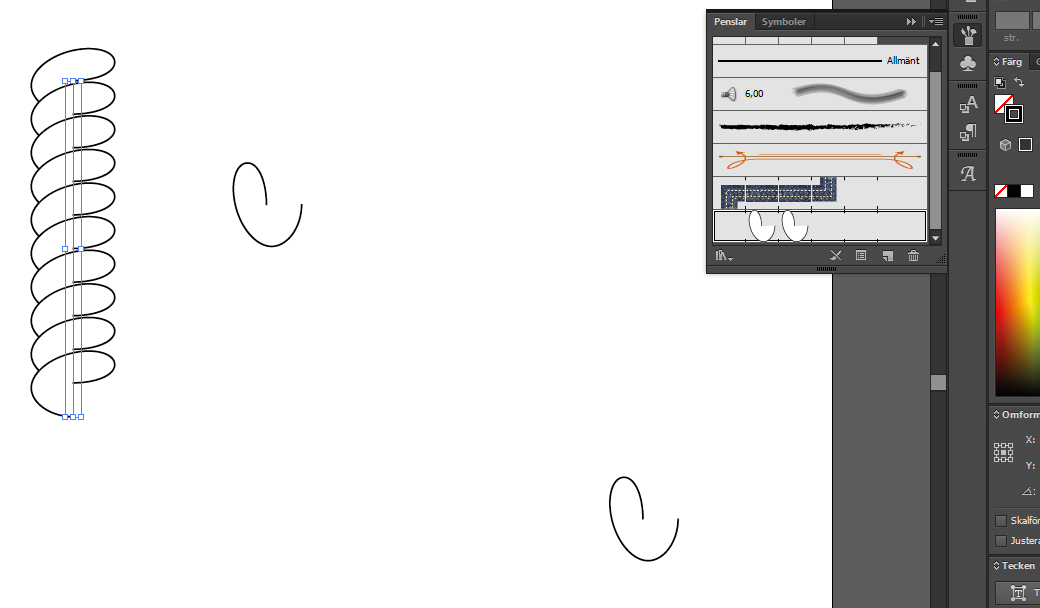
as you can see the spiral looks different from what it's supposed to. So what am I doing wrong from what the guide tells me to do?
Copy link to clipboard
Copied
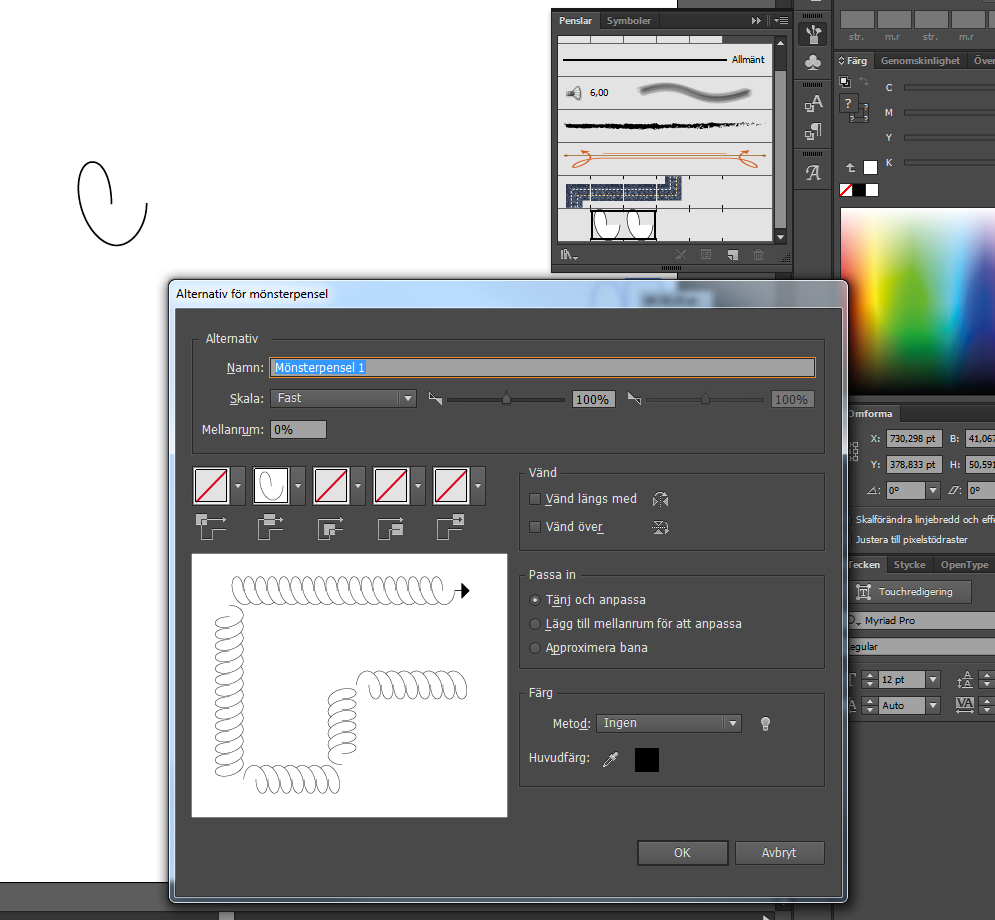
i think i see the problem; your brush segment has a fill. so each segment is obscuring part of the one next to it. remove the fill and amend the brush again.
Copy link to clipboard
Copied
Yes! That seemed to do it. Thanks a bunch!

Find more inspiration, events, and resources on the new Adobe Community
Explore Now
 AdChoices