- Home
- Illustrator
- Discussions
- Betreff: Illustrator Pattern Brush - Ends and Corn...
- Betreff: Illustrator Pattern Brush - Ends and Corn...
Copy link to clipboard
Copied
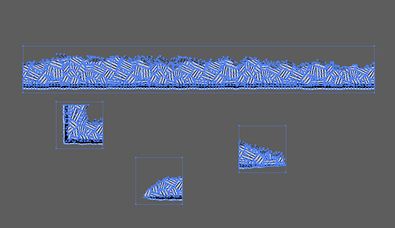
I am trying to create a PATTERN BRUSH. I setup the SIDE and ENDS ... and then created the brush. However, when it creates the brush, it makes the ENDS gigantic (see the "Pattern Brush Options" window below). How do I get this to work?
I see tons of tutorials on creating brushes, but all the ones that I've seem jump over this issue (they either create SQUARE patterns, or it "just works" for their design).
Please help! Thanks.
 2 Correct answers
You need to create the invisible rectangle in the background of your design.
These rectangles need to match.
https://helpx.adobe.com/illustrator/using/patterns.html#guidelines_for_constructing_pattern_tiles
They look OK, but one will give you a gap:
Are those rectangles no fill, no stroke and are they behind the other elements? Illustrator uses the element that is behind all others. And it needs to be no fill no stroke
Explore related tutorials & articles
Copy link to clipboard
Copied
You need to create the invisible rectangle in the background of your design.
These rectangles need to match.
https://helpx.adobe.com/illustrator/using/patterns.html#guidelines_for_constructing_pattern_tiles
Copy link to clipboard
Copied
When you say "they need to match" ... what do you mean? I have bounding boxes around all the elements, and the heights of all these boxes are all the same. The CORNER and ENDS are square (same width/height). The width of the SIDE element is the only one longer.
The Adobe instructions dont seem to be clear...
"Corner tiles must be square and have the same height as side tiles to align properly on the path. If you plan to use corner tiles with your brush pattern, align objects in the corner tiles horizontally with objects in the side tiles so that the patterns tile correctly."
Copy link to clipboard
Copied
They look OK, but one will give you a gap:
Are those rectangles no fill, no stroke and are they behind the other elements? Illustrator uses the element that is behind all others. And it needs to be no fill no stroke
Copy link to clipboard
Copied
Yes, no fill, no stroke. I tried placing the "invisible" shape behind the elements, but that still doesn't work...
Copy link to clipboard
Copied
I think I got it...
Copy link to clipboard
Copied
I have a tutorial on YouTube that shows how to make start and end tiles for a Pattern Brush. Check it out and let me know if it helps. https://www.youtube.com/watch?v=5qq7R7nAliw&t=13s
There are also videos on creating the corner tiles too.
Copy link to clipboard
Copied
Find more inspiration, events, and resources on the new Adobe Community
Explore Now


