Copy link to clipboard
Copied
Hello,
When I expand the shape and get two paths facing the entire shape,
is there a way replace them with one path in the middle.
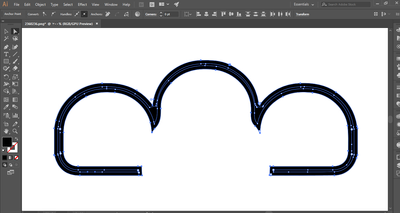
For example, I have the image below:
When I stroke the path I get two facing lines like this one.
I do not want to have two opposite lines. I want to replace the two path with one path in the middle then i will stroke it as i needed ..
Can I do that ?..
I hope my question is clear ..
thank you
 2 Correct answers
If it does not have to be a stroked path you may take the Object menu > Path > Offset Path route and use negative offset values.
default01,
Here is a more sound approach (I hope).
Presuming you started out with three identical closed body paths (it sounds better than body parts) and then combined them into the path spanning the three bodies, and presuming you still have the original paths, it could be quite simple.
As I said earlier, "Always keep the original artwork safe and destroy only a copy."
In that case you could create simple blends for each closed body path and then combine the central paths as follows:
...
Explore related tutorials & articles
Copy link to clipboard
Copied
If it does not have to be a stroked path you may take the Object menu > Path > Offset Path route and use negative offset values.
Copy link to clipboard
Copied
Thanks for your reply,
I thought my request was impossible because my question moved to the page 4 without answer,
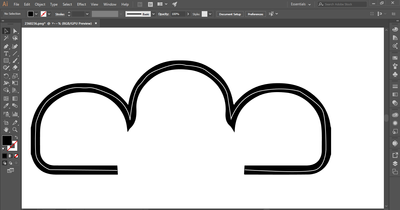
now I tried to use (Offset Path) But it did not help. This is my attempt with simple shape ..
When I use (Offset Path) it gave me this result, they were two path lines inside the shape,
My problem with this method is:
1- it need a lot of time to delete the other path (because in my case i want only want one path inside the shape) like this:
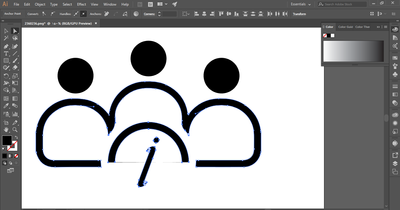
(i create this path with white stroke to show you how it should look like {only one path in middle})
second problem with Offset Path method is: 2- It is somewhat inaccurate, because it does not make the path completely in the middle, but rather makes the center of the two paths the middle, and in my case I want to make the path in the middle.
Copy link to clipboard
Copied
Yes, the Offset Path route may or may not work well.
The accuracy depends on how your objects are built. Probably more often than not you will just have to do it manually, based on some eyeballing and balancing human decisions.
Copy link to clipboard
Copied
Thank you for the explanation..
maybe Offset Path is the best way to achieve what i need ...
thanks again
Copy link to clipboard
Copied
There may be some other approaches and perhaps they may even be a bit better.
To check that I would have to take a look at some sample files from you (simple as well as more complex ones).
Can you provide a couple of sample Illustrator files (.ai)?
Copy link to clipboard
Copied
forms doesn't allowed to me to attach (.ai) extension for some reason it show me this message
- The attachment's 1.ai content type (application/postscript) does not match its file extension and has been removed.
any way now i provide that image , u can open it in Illustrator then apply (Image Trace) for it then expand then u get like my image.
I came up with the next solution. If you know a better way to achieve this result I would be grateful if you tell me about it.
1- Object > Path > Offset Path...
2- Delete unwanted paths (using Direct Selection Tool), and keep only one path
3- Resize The remaining path (using Selection Tool) and trying to put it in the middle of the shape
In this way,
we get one path instead of two,
and the location of this path is Almost in the middle of the shape..
Copy link to clipboard
Copied
default01,
In the latest simple sample you might consider the following, which would fail (or require some serious adaptation) in the first samples because the original paths are fundamentally different.
Always keep the original artwork safe and destroy only a copy.
Presuming a filled path as the shoulders and arms path:
1) For each of the four end segments (the ones following a circle that is larger than the i circle), deselect the artwork, then Direct Select the end segment and delete it, to end with two open paths, outer and inner;
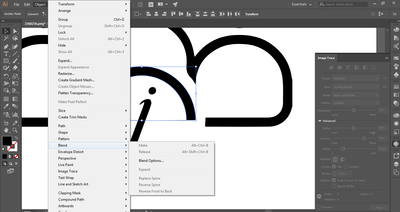
2) Object>Blend>Blend Options, setting Spacing to Specified Steps and inserting 1, and setting Orientation to Align to Path;
3) With the normal Selection Tool, select both outer and inner path, then Object>Blend>Make, then Object>Blend>Expand, then Ungroup and delete the outer and inner path.
This will give you a central path that extends (a wee bit further than) as far as the original paths towards the centre of the circle that cut the filled path; you can use a copy of the circle to snip off the excess if desired/needed.
In any case the central path will be much closer to that circle than with Offset Path which shortens it.
Copy link to clipboard
Copied
I performed Step 1 i get two open paths, outer and inner around letter (i); as shown in the picture bellow
then i selected thoses path using (Direct Selection Tool) then i follow step 2, and I didn't notice any change
then i selected thoses path using Selection Tool but i can't press (Object>Blend>Make
Please correct me in case I have performed the steps wrongly ..
Thanks
Copy link to clipboard
Copied
default01,
I apologize for my being so hasty in my first answer that I overlooked an obvious hindrance to a simple solution.
So please stop trying to use that inadequate suggestion.
I am certain that Kurt has spotted this right away and been too kind to point it out.
I will try to pull my socks up and hopefully post something usable.
Apart from that I was referring to the path (forming shoulders and arms) between the head circles and the i circle (not the i circle).
That is the path you showed and worked on with Offset path, in the post containing this text:
"now I tried to use (Offset Path) But it did not help. This is my attempt with simple shape"
What I call the four end segments are the two short (almost straight vertical) segments that form the ends of the horizontal arms pointing towards the centre of the i circle from the sides, and the two short (almost straight slanting) segments pointing down towards the i circle, the latter form the transitions between the three bodies. The remaining parts are the longer more gently curving/straight that could form the basis for the blends.
My obvious oversight was that the inner parts form three separate paths, whereas the outer part forms one single single path, and the latter would need to be cut at the corner Anchor Points at the transitions between the three bodies to form the three correponding paths.
And those outer paths would inevitably be shorter at the transitions than the inner ones, which would give central paths that were too short there (even shorter than the ones you showed) and too far from the i circle.
This would mean that the central paths would be accurate enough as far as they went, but they would need extension to meet closer to the i circle.
Copy link to clipboard
Copied
I hope that you will excuse me because I misunderstood you,
Perhaps because English is not my native language ,
So I find it difficult to understand some words, s
So seek the help of a translator and the translator as you know sometimes makes mistakes in translating words.
Anyway, Now I am amazed at your answer,
You really are creative this is what I wanted to get (regardless of some mistakes in drawing the path in the middle, which I can make simple adjustments to it to suit my need)
Now the problem is completely resolved
Thanks for both of you @Kurt Gold @Jacob Bugge
Greetings to you both
Copy link to clipboard
Copied
For my part you are welcome, default01.
And thank you for sharing, and for your kind words.
May I ask whether you (still) had original full body shapes to work with?
Copy link to clipboard
Copied
Excuse me, I may not have understood your question correctly.
If you mean the shape is the shapes that I published,
I did not draw them myself, rather I downloaded them from the internet then i open
them in a Illustrator,
and then implement (Image Trace) for it ,
and then add some effects on it to be used it in social media
that I work with as For advertising purpose.. and so on..
Copy link to clipboard
Copied
I see, default01.
Thank you.
Copy link to clipboard
Copied
default01,
Here is a more sound approach (I hope).
Presuming you started out with three identical closed body paths (it sounds better than body parts) and then combined them into the path spanning the three bodies, and presuming you still have the original paths, it could be quite simple.
As I said earlier, "Always keep the original artwork safe and destroy only a copy."
In that case you could create simple blends for each closed body path and then combine the central paths as follows:
For each closed body path which forms a Compound Path (or just for one and then use copies for the others):
1) Switch from fill to stroke and then Object>Compound Path>Release, to have an outer and an inner path, both closed;
2) Object>Blend>Blend Options, setting Spacing to Specified Steps and inserting 1, and setting Orientation to Align to Path;
3) With the normal Selection Tool, select both outer and inner path, then Object>Blend>Make, then Object>Blend>Expand, then Ungroup and delete the outer and inner path.
This will give you a closed central path for each body shape, or to copy and move, to get all three in place;
4) Combine the three central paths into a path spanning the three bodies, either using the Shape Builder Tool (see below) or cutting and joining them where they meet.
This ought to give an accurate shape that extends to the right distance from the i circle, both at the ends and at the transition corners.
https://helpx.adobe.com/illustrator/using/creating-shapes-shape-builder-tool.html
Copy link to clipboard
Copied
The forum software unfortunately still does not allow to include native .ai files (it's a pity). But you can upload .pdf files that are saved with the Preserve Illustrator Editing Capabilities option turned on.
Or you can upload to any file sharing server and provide a download link.
Copy link to clipboard
Copied
I was not aware of that..
Well, I attached a (.PDF) file ..


