Copy link to clipboard
Copied
Hi does anyone know how to make a spiral staircase in Illustrator, in isometric view/perspective - many thanks
 4 Correct answers
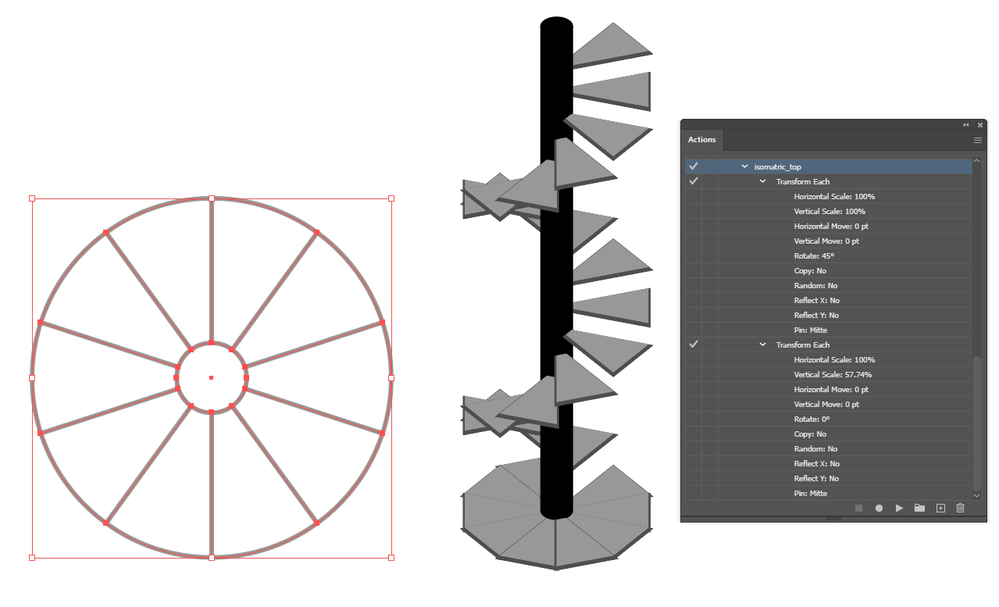
I made that overly complex. You don't need the 3D effect or symbols.
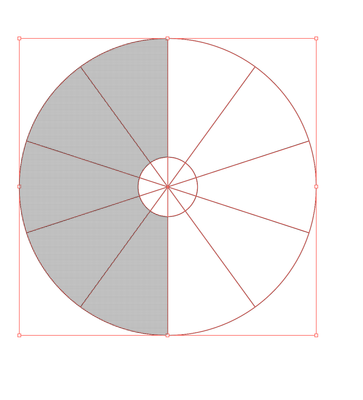
All you need is the shape on the left.
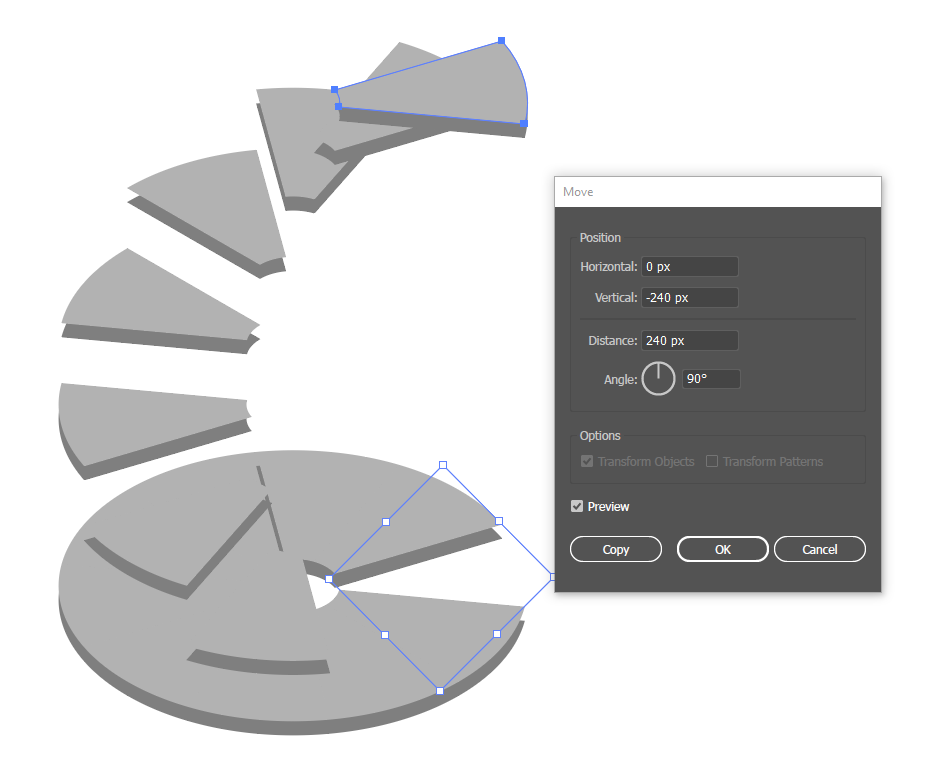
Group it and use an isometric transformation on it (I use the one shown in the actions panel).
Split the 'stairs' into individual shapes with shape builder.
Transform them vertically one at a time, creating copies, as you go round the spiral.
For example: Move the first 30px, the second 60px, the third 90px etc.
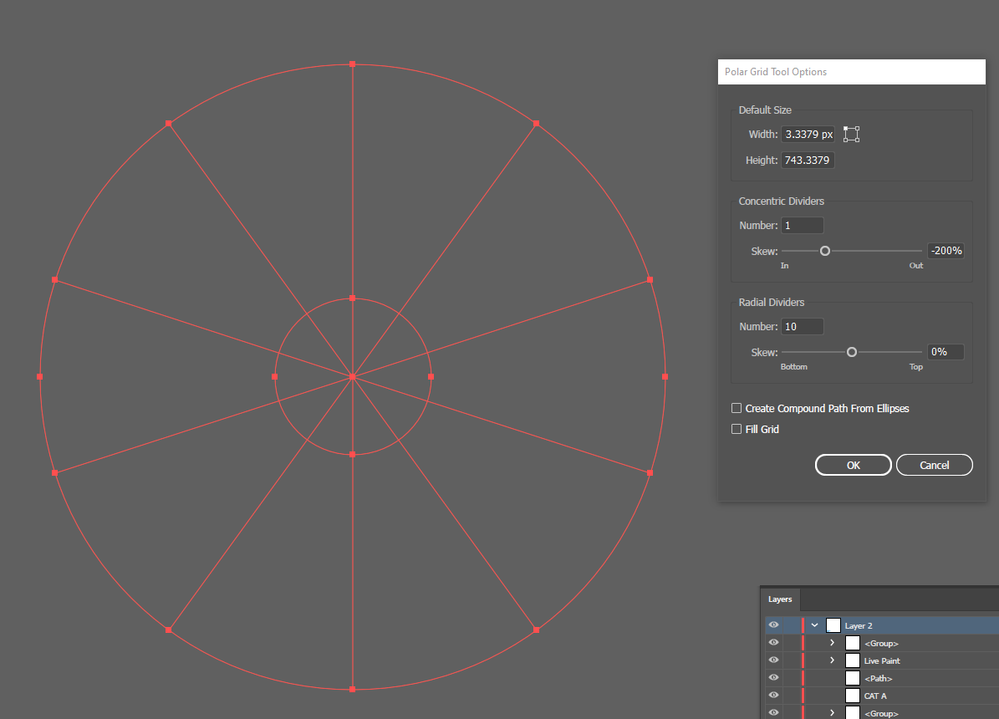
I rotated a line around the centre point, but you could get something similar with the polar grid:
I have a bit more time now so I'll do it step by step:
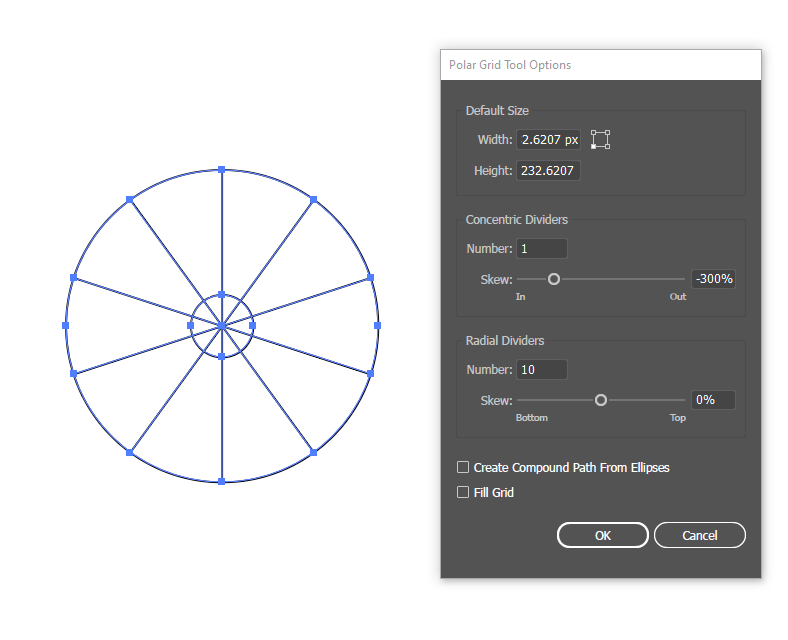
1. Create your base with the polar grid tool
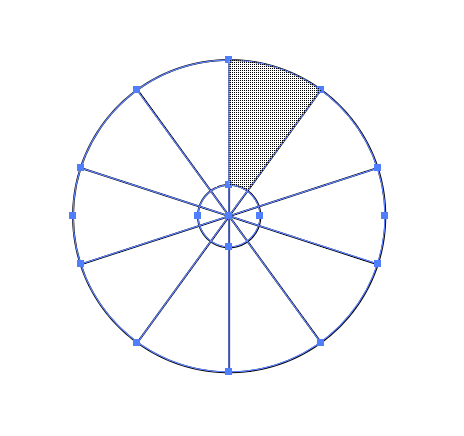
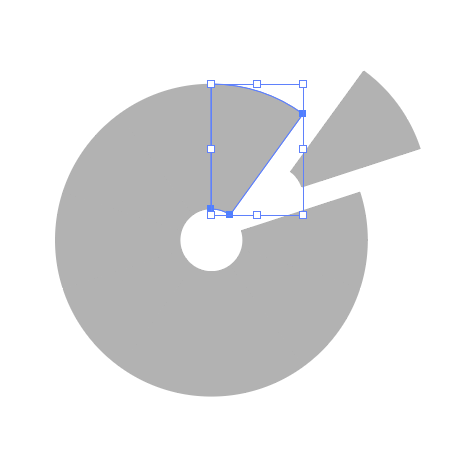
2. Ungroup it. Use shape builder -- click on each 'stair' to make it into a separate shape:
3. Delete the centre (or keep it as your future 'pole'). Give the remaining shapes a fill. They should be separate like so (but don't actually move them -- this is just for show):
4. Group it again, and use an isometric transformation on the group. This one rotates 45 degrees and then scales vertically
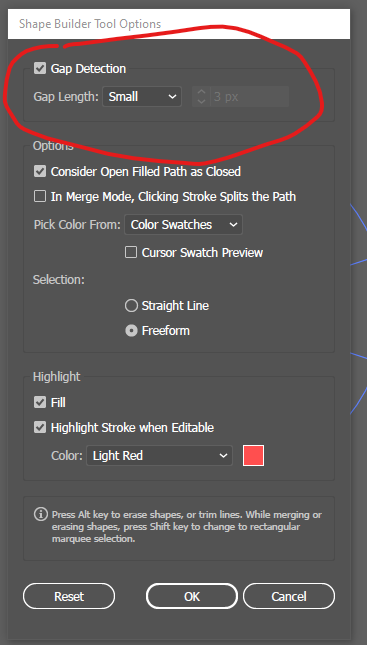
...Apologies, I see the issue with polar grid. Shape builder can be finnicky with circles. Try turning on Gap detection (double-click the tool for options):
Explore related tutorials & articles
Copy link to clipboard
Copied
Like this: 
Copy link to clipboard
Copied
Hi - many thanks for your reply. Does the result end up as an isometric view?
Copy link to clipboard
Copied
With the perspective grid you can't produce isometric views.
Copy link to clipboard
Copied
Many thanks Monika - Isometric is a must!
Copy link to clipboard
Copied
You mentioned perspective in your initial post, so I got the impression it's an option.
Copy link to clipboard
Copied
Kaye,
I agree with Monika: taken at face value, your original post can only be interpreted as
in isometric view/perspective = in isometric view or in perspective.
Copy link to clipboard
Copied
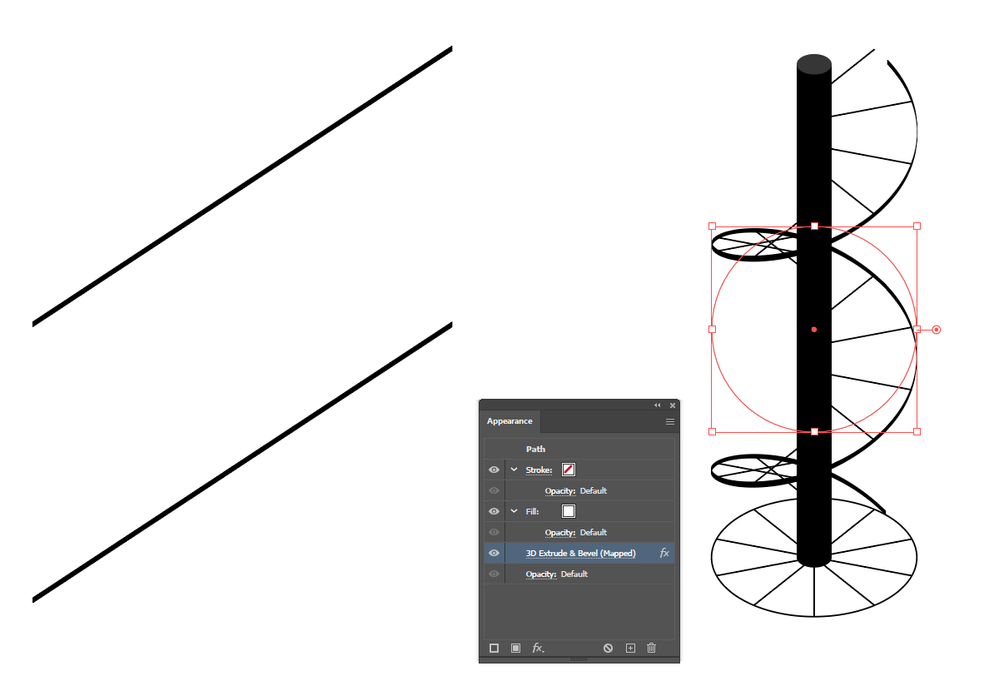
This would be my first thought:
Create a circle and use 3D > Extrude & Bevel, Isometric Top, and whatever extrude depth you need.
Create two lines (actually shapes with vertical ends, so they coincide when it repeats). Make them into a symbol.
Map the symbol to the 3D effect. Stretch to fit.
Create a circle with spokes at the base of your 3D effect.
Alt-drag each spoke up in turn so that it coincides with the spiral.
Carry on drawing from there.
Copy link to clipboard
Copied
Hi many thanks for your reply...got a little lost from step 4...
1 Create a circle and use 3D > Extrude & Bevel, Isometric Top, and whatever extrude depth you need (done this)
2 Create two lines (actually shapes with vertical ends, so they coincide when it repeats) (think I did this right)
3 Make them into a symbol (did this)
4 Map the symbol to the 3D effect. Stretch to fit. (got lost from here)
5 Create a circle with spokes at the base of your 3D effect.
6 Alt-drag each spoke up in turn so that it coincides with the spiral.
7 Carry on drawing from there.
Copy link to clipboard
Copied
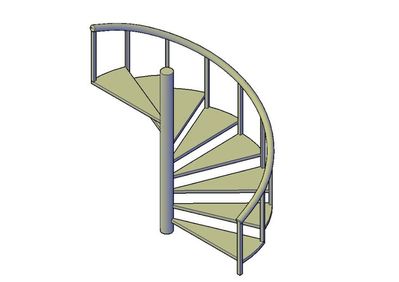
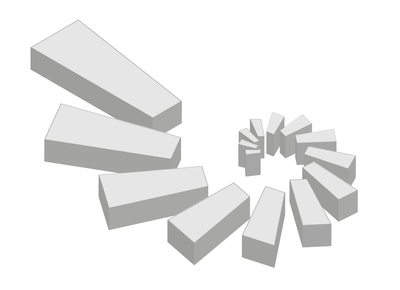
Sorry should have posted beforehand - need to create something like this in isometrc view
Copy link to clipboard
Copied
I made that overly complex. You don't need the 3D effect or symbols.
All you need is the shape on the left.
Group it and use an isometric transformation on it (I use the one shown in the actions panel).
Split the 'stairs' into individual shapes with shape builder.
Transform them vertically one at a time, creating copies, as you go round the spiral.
For example: Move the first 30px, the second 60px, the third 90px etc.
Copy link to clipboard
Copied
Hi many thanks for this getting a little closer to what I am after. Can you explain how did you make the shape on the left? Have tried using polar grid but it does not look anything like yours
Copy link to clipboard
Copied
I rotated a line around the centre point, but you could get something similar with the polar grid:
Copy link to clipboard
Copied
Hi - managed to get the shape however shape is not "whole" - still individual lines!!! Also do you mean pathfinder? Shape builder only adds or subtract whole shapes (but not lines), however pathfinder can divide whole shapes but not lines. Also, going back to your instructions and spiral, your stairs seem to "rotate" around the pole but there's no "rotate" in the instructions above. Am I missing something? Thank you
Copy link to clipboard
Copied
If you select the object and click with shape builder on the 'stairs', it'll create shapes from them.
You don't need to rotate anything -- if you view a spiral staircase from a plan view, it'll look like that shape. That's all you need to create an isometric version. Some stairs are simply in front of or behind the central pole as appropriate.
Copy link to clipboard
Copied
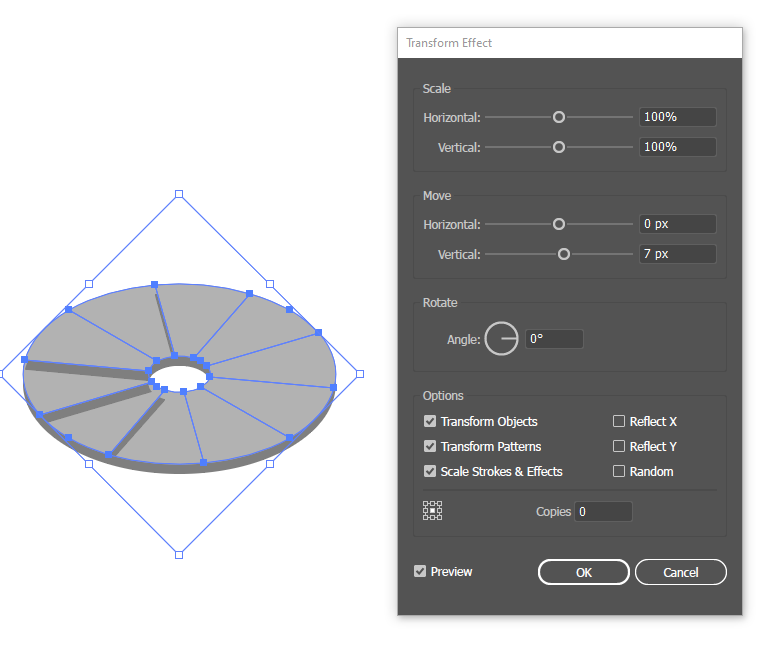
Hi - it's been a long day! Just can't seem to get your technique to work (I'm really sorry). Inbetween replies was playing with transform effect!
It looks like an option for me however only got this far by sliding and changing numbers not quite sure what I am doing/ how it works
Copy link to clipboard
Copied
I have a bit more time now so I'll do it step by step:
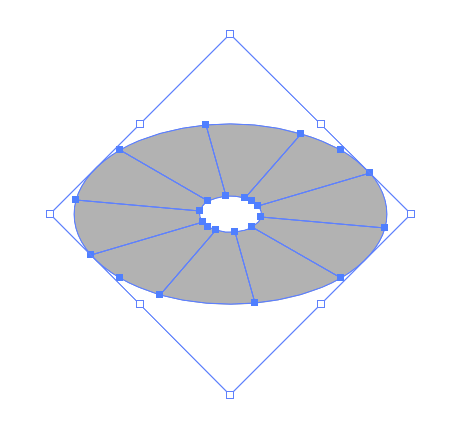
1. Create your base with the polar grid tool
2. Ungroup it. Use shape builder -- click on each 'stair' to make it into a separate shape:
3. Delete the centre (or keep it as your future 'pole'). Give the remaining shapes a fill. They should be separate like so (but don't actually move them -- this is just for show):
4. Group it again, and use an isometric transformation on the group. This one rotates 45 degrees and then scales vertically 57.74%. Use Object > Transform to do this. Once done, ungroup again.
5. Here I've given the shapes another fill, put it below the first, and used a transform effect to move it down slightly. This is to make them more visible for this demo. If you're drawing this properly, you'll want to extrude them yourself -- but that's on you I'm afraid.
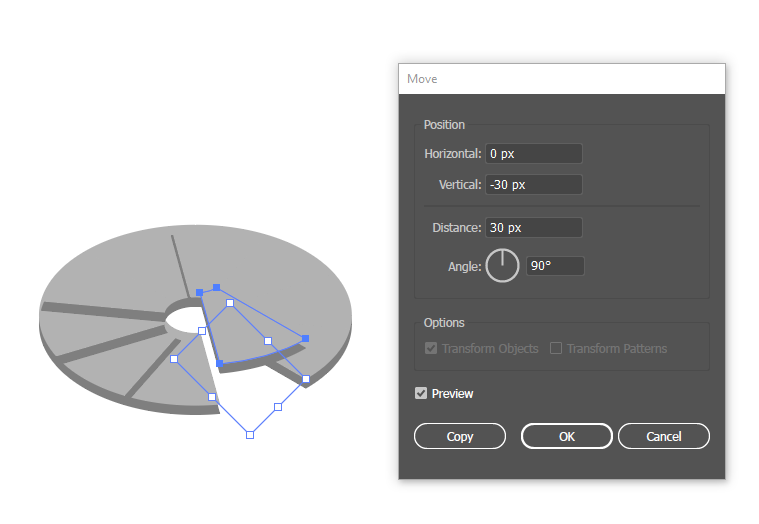
6. Start wherever you want and go around the objects moving each some arbitrary amount vertically. Here I've used 30px, which works at the scale of my drawing.
7. Move the first 30px, the second 60px, the third 90px and so on. Use the copy button so you don't run out of shapes.
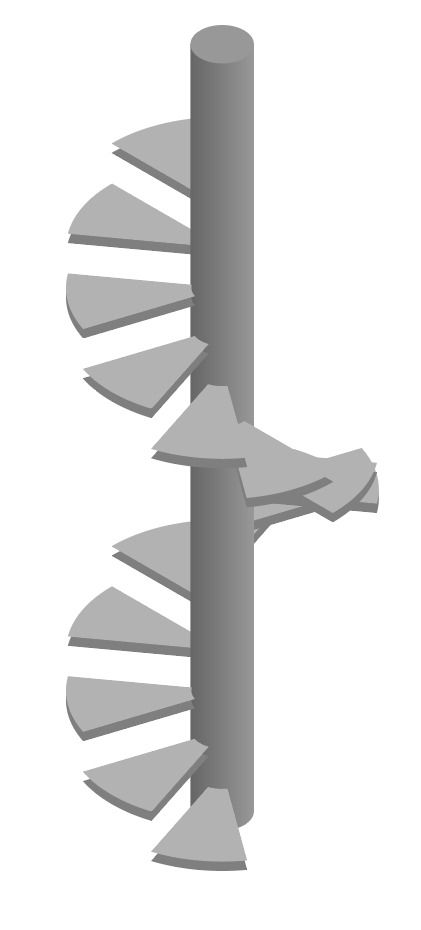
8. You could probably make the pole first, but I forgot. It could be an ellipse with Effect > 3D > Extrude and bevel, but do it however you like. Bring forward/move backward each stair relative to the pole/each other as appropriate.
Copy link to clipboard
Copied
Hi - This is what my step two looks like! I have created the polar grid with and without a fill and this is what I get each time - I'm unable to make each stair separate
Copy link to clipboard
Copied
Kaye,
You may have a further look at the Shape Builder, that Doug mentions,
You can have a look here and/or here:
https://helpx.adobe.com/illustrator/using/creating-shapes-shape-builder-tool.html
https://helpx.adobe.com/illustrator/atv/cs5-tutorials/creating-complex-art-with-the-shape-builder-to...
Copy link to clipboard
Copied
Hi thanks for your efforts everyone (especially Doug). I am familiar shapebuilder but it does not work for me the way described. I'll try again with fresh eyes at the weekend. thank you all
Copy link to clipboard
Copied
Apologies, I see the issue with polar grid. Shape builder can be finnicky with circles. Try turning on Gap detection (double-click the tool for options):
Copy link to clipboard
Copied
Many thanks Doug - will let you know when I've cracked it!!!
Copy link to clipboard
Copied
Doug, hopefully the guys who are supposed to walk down your (first) corkscrew stairs won't have one over the eight.
Copy link to clipboard
Copied
Kaye, everyone,
Curiously, all the staircases shown so far, except for the latest one by Doug, are Kerr (or Ker) style.
