Copy link to clipboard
Copied
Hi,
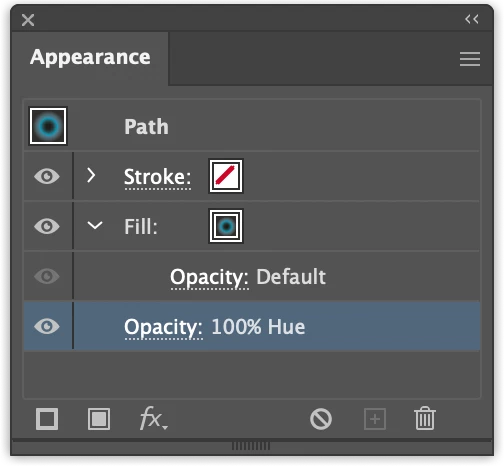
I'm relatively new to illustrations and have run into an issue while trying to place an eye (I designed it by folllowing a YT tutorial) over the top of a face. I have really simplified it here by posting a screenshot of a file with only two layers. In the actual file I'm working on there are many layers. I thought maybe it was something with one of the many other layers in my project, so I started a new file with just a solid fill face and the eye. It's clearly something to do with the eye, but I don't know what setting to tinker with to fix this issue. I have grouped the object, and as you can see in the screen shot, I have the eye on top in the layers menu, and even though I realize selecting Arrange and Bring to Front doesn't have anything to do with ordering layers, I tried that with the eye as well, and it will not move to the top of the face. I can export the eye as an asset and place it in front, but obviously it cannot be edited and reshaped with curve or pen tool at that point. Does anyone know what's going on? I appreciate any help or insight here. Thank you!
Thanks, selecting one of the objects with a filled circle next to the layer name shows a Hue transparency mode, causing the effect you are seeing.
Copy link to clipboard
Copied
Can you select the eye and show the Layers panel with the contents of the eye expanded.
And the content of the group in the expanded appearance panel.
Copy link to clipboard
Copied
Thank you for replying. I should have thought to do that to begin with. I'm not sure if you want me to expand the group within the group, but when I do that, it's a very long list of sublayers that fills many screenshots. But it's basically a bunch of sublayers each consisting of one line that was created using I think a type of radial effect. No matter what I try, the layer is only partially visible.
Copy link to clipboard
Copied
Copy link to clipboard
Copied
The filled circles next to the layer name indicate some transparency setting or effect.
Just select an item in the layers panel with a filled circle and check the Appearance panel.
Copy link to clipboard
Copied
Copy link to clipboard
Copied
There is no selection in your screendump.
Copy link to clipboard
Copied
Zooming n on your screenshot appears you have the objects on the correct layers.
Does appear your flesh tone is set to an opacity less than 100%.
Click on the radio button on the eye layer, then look into your appearance palette if you have a blending mode like multiply on the entire layer. Drag it to trash.
Or you may have a blending mode on the eye paths itself, which you can remove in the Transparency palette and set to normal.
Copy link to clipboard
Copied
Thank you for your reply. I have looked at the things you mentioned, and as I mentioned, I am not a professional, so I'm not entirely sure if the screenshots I'm posting here are what you're talking about, but the face opacity seems to be set to 100%, it seems all the individual lines are set to transparency normal, and the appearance panel, from what I can see, doesn't seem to indicate blending mode turned on. Is there something I don't understand? Thanks for the ideas. Still trying to look into them more and play with settings.
Copy link to clipboard
Copied
Something is applied to the path. You clicked on the circle on the layer. Please click on Path. There is something applied to it.
Copy link to clipboard
Copied
Thank you for your help. I have clicked on the path and I can't see anything jumping out. From this screenshot, can you tell me where I might look to see what's applied? I followed a tutorial to make the eye and I don't exactly know what's been applied and what hasn't. And when I click on path as you say, and look at things, I don't see anything that would cause it to hide partially behind and in front of the layer.
Copy link to clipboard
Copied
I have now looked at your intial post and I don't think that eye is meant to be placed on top of something. That was just an eye and the author of that tutorial probably didn't think that anyone would place the thing on top of something.
If you want to know what's happening, please upload your AI file to Creative Cloud and post a link in this forum.
Copy link to clipboard
Copied
Okay I haven't done that before. I will figure how to do that and post a link. Thank you!
Copy link to clipboard
Copied
Here is the link. If you have a moment and can see what's up, I sure would appreciate it. Thank you!
https://assets.adobe.com/id/urn:aaid:sc:US:98a4f7a2-3966-4f8a-9b32-e2f472163a94?view=difile
Copy link to clipboard
Copied
You need to change the settings for the shared file to make it downloadable
Copy link to clipboard
Copied
Thank you. Sorry about that. I changed it to downloadable now.
Copy link to clipboard
Copied
Thanks, selecting one of the objects with a filled circle next to the layer name shows a Hue transparency mode, causing the effect you are seeing.
Copy link to clipboard
Copied
This solved my issue. Thank you so much for taking the time to help me out on this!! I'm somewhat of a newb, so this was not obvious to me.
Copy link to clipboard
Copied
Good to hear that helped.
Find more inspiration, events, and resources on the new Adobe Community
Explore Now