

- Home
- Illustrator
- Discussions
- Re: Marking Anchor Point Set Distance on a Curved ...
- Re: Marking Anchor Point Set Distance on a Curved ...
Marking Anchor Point Set Distance on a Curved Path?

Copy link to clipboard
Copied
Is there a way to mark a set distance on a curved path?
Example: I want to mark an anchor point 3" down on a curved line.


Explore related tutorials & articles
 18
Replies
18
18
Replies
18

Copy link to clipboard
Copied
You mention a "curved" path, but the illustration shows a path made of two angled straight lines. Please clarify if you want to add an anchor point on a curved path or a straight path.
Copy link to clipboard
Copied
Sorry, I cut it off the picture too early. Yes I want an anchor point on a curved path at a set distance. 3" in this case. An efficient way to mark an anchor point on a straight line would also be nice. I currently make a new line of set distance and compare it with the line I want to mark and make another line to cross at that distance.

Copy link to clipboard
Copied
Brah,
If applicable, you can, if you wish the centre of the mark to be exactly at 3":
1) Copy the curved part from A down (or just as far as relevant, past the 3" mark to come),
2) With the new path selected, in the Stroke palette set the Stroke Weight to the desired mark width, then click Dashed Line and set as follows: 1st Dash = 0, 1st Gap = 216 pt minus half the desired mark width, 2nd Dash = the desired mark width, 2nd Gap = a large number so you get beyond the length of the new path to avoid the next Dashes that would otherwise be added.
Copy link to clipboard
Copied
So essentially I am using a dashed line for the measuring then...
It is not mark width I am concerned about, but length. 3" length down a curve or any other measurement. How do I mix inches and points?
Copy link to clipboard
Copied
Brah,
1 inch = 72 points, hence the 3 x 72 = 216 points in step 2); but you can also include any unit, so you can insert 3in for the first Gap and click the next, which makes the Gap show as 216, then go back and subtract half the (following) Dash width.
Copy link to clipboard
Copied
Brah,
To continue the good suggestion from Barbara about reassurance, you may copy the (copy) path and cut it at the (relevant) Dash (end) and delete the surplus, then use the Document Info or the free PathLength/Patharea filter from Telegraphics and see the length.
Telegraphics - Free plugins for Photoshop & Illustrator...and other software
Telegraphics - Free plugins for Photoshop & Illustrator...and other software
I have shown both the long and the short link, failing to remember which is newer.

Copy link to clipboard
Copied
Try the plugin VectorScribe. It has a measure tool that measures along a path.
Or try the plugin Inkscribe. It allows you to move points and snap to increments.
I'm not sure if the plugin CADtools allows you to set points at custom distances.
Copy link to clipboard
Copied
Will adobe ever make these functions part of Illustrator rather than having to purchase another tool?
Copy link to clipboard
Copied
If you think this function is crucial for your workflow, just tell them:

Copy link to clipboard
Copied
Monika,
Are you aware of any plug-ins available currently in the creative cloud market that have this feature?
Copy link to clipboard
Copied
I don't watch that closely, so I don't know.
Copy link to clipboard
Copied
Leveraging off of James Bugge's clever solution.
Select the path. The line weight doesn't matter.
Assuming that you want to add a new anchor point that is 3 inches from the upper left corner of the path, turn on Dashed Line in the Stroke panel. Make sure that Aligns Dashes to Corners is selected. Illustrator makes it easy to convert measurement systems. If you type 6 inches for the dash and 3 inches for the gap, and your units happen to be points, Illustrator will do the conversion for you once you hit the Tab key or click elsewhere to get your cursor out of the cell where the number is typed.
If you enter the numbers shown below, the dash at the corner will be 3 inches (216 points), all other dashes will be 6 inches (432 points), and the gaps will be 3 inches.

If you want the anchor point at a different position, change the dash and gap dimensions accordingly.
Copy link to clipboard
Copied
Make sure that Aligns Dashes to Corners is selected.
It mustn't be selected, because the adjustment sacrifices accuracy (of dash length) for nice looking results.
Copy link to clipboard
Copied
By the way, there is a Measure tool in Tools panel. You can drag it along a path to get an idea of the length. It's not perfectly accurate because you are dragging manually along a curved path, but can reassure you that your measurements are not completely off.


Copy link to clipboard
Copied
are those fashion patterns?
here's another way that yields accurate results
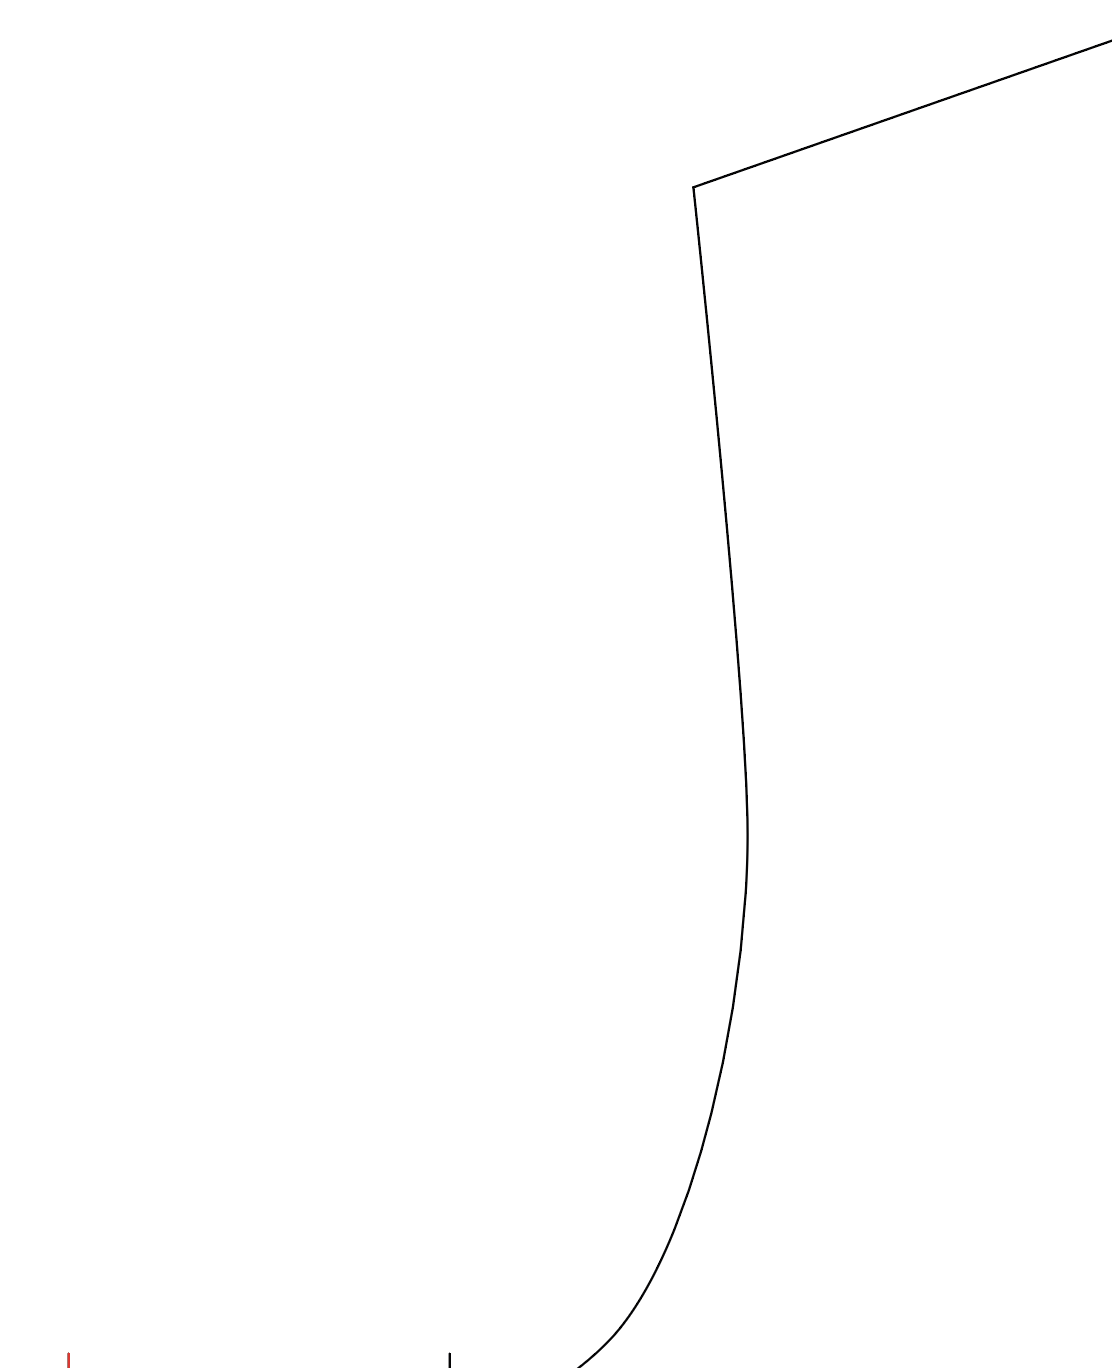
make a copy of the segment you want to add the 3" notch to (or just make a cut the 3" starting anchor then re join when done)
I made a copy of it and added an arrowhead just to note direction and where the segment ends
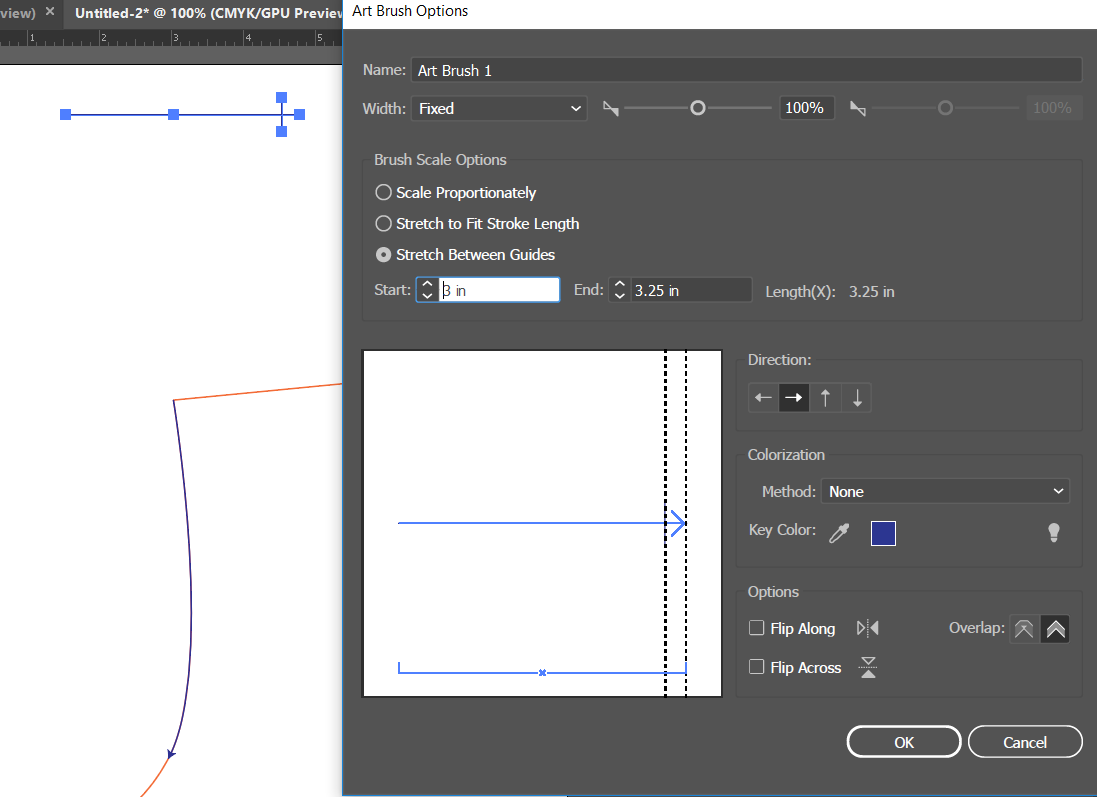
We're going to use an Art brush, so create a 3.25" horizontal line and add a vertical notch 3" from from the start.

Select both the 3.25" line and the vertical notch and created a new Art Brush. On the Scale Options, choose Stretch Between Guides and enter 3" Start and 3.25" end. Click OK.
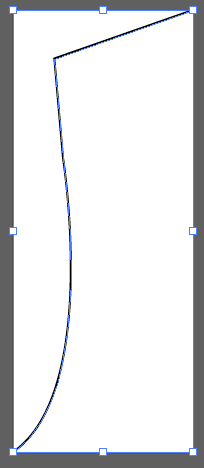
Select your segment and apply the newly created brush

Go to Object->Expand Appearance Menu
Notice the path got expanded into 3 objects, your original segment, the notch and the arrowhead
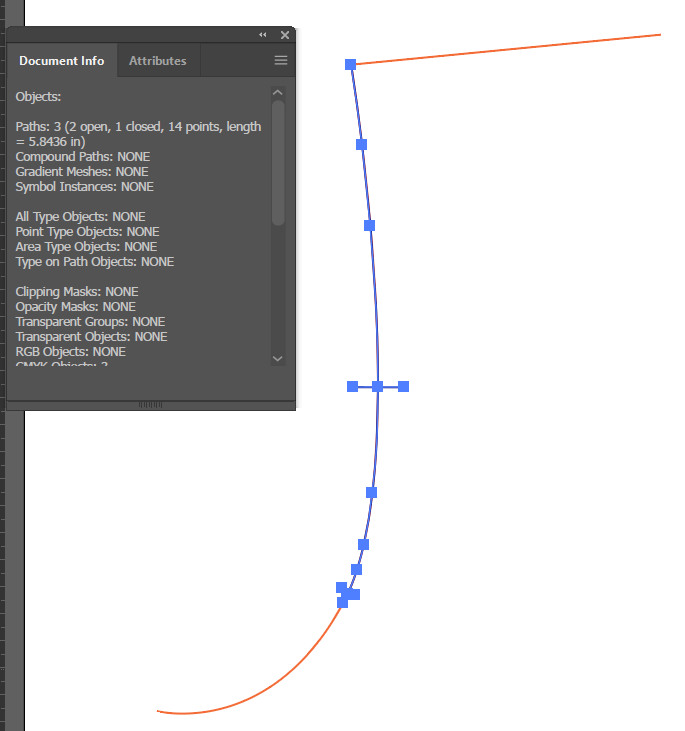
the Notch is created at the 3" mark and an anchor point was added to the segment. I just cut it with the Scissors Tool to measure it.

Copy link to clipboard
Copied
Yeah these are fashion patterns, yeah I have to do this often, so the other solution with dashed line wasn't really feasible and slightly confusing.
This is better, how would you set the brush in reverse direction of the curve?
I ended up purchasing Astute Graphics Plugin Vectorscribe
1) Add Anchor Point close to 3"
2) Reposition Point Tool to 3"
3) Keep Checking with Dynamic Measure Tool, no need to cut line.
Although, your method seems faster in certain instances.
Copy link to clipboard
Copied
I thought it could help.
to reverse the direction of the brush, double click on it to bring up the settings dialog and check "Flip Along" option.
Copy link to clipboard
Copied
You can record an Action to apply the brush and expand appearance, then assign a keystroke to it to make the process a bit faster.

Find more inspiration, events, and resources on the new Adobe Community
Explore Now
 AdChoices