

- Home
- Illustrator
- Discussions
- Need to trim a bunch of objects in a bunch of laye...
- Need to trim a bunch of objects in a bunch of laye...

Copy link to clipboard
Copied


 2 Correct answers

d,
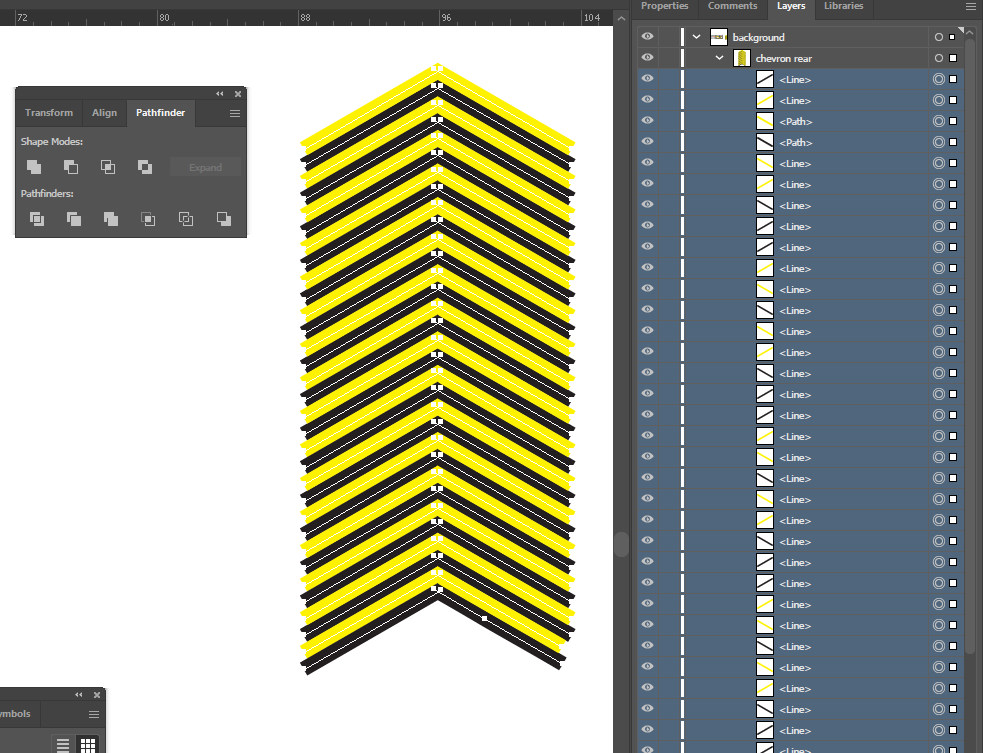
As I (misunderstand it, it is best to (almost) start over, not least because you have simple straight lines that even cross each other at the top.
To get the exact same shape, you can (Smart Guides being your friends, telling you when you are within snapping distance):
1) Duplicate the Layer and hide the original Layer;
2) With the Line Segment Tool ClickDrag along the spine of the top left yellow line, from the lower left end Anchor Point (Smart Guides say anchor) to the intersection wit
...
That's OK. I exported the layers as an image file, did the trimming in PaintshopPro, and then brought it back into Illustrator. Thanks anyway.
Explore related tutorials & articles
 5
Replies
5
5
Replies
5
Copy link to clipboard
Copied
From what you have provided I have no idea what you want to accomplish. Could you please explain in more detail?
Thanks,
Peter
Copy link to clipboard
Copied
d,
As I (misunderstand it, it is best to (almost) start over, not least because you have simple straight lines that even cross each other at the top.
To get the exact same shape, you can (Smart Guides being your friends, telling you when you are within snapping distance):
1) Duplicate the Layer and hide the original Layer;
2) With the Line Segment Tool ClickDrag along the spine of the top left yellow line, from the lower left end Anchor Point (Smart Guides say anchor) to the intersection with the spine of the top right yellow line (Smart Guides say intersect), then give the new line the same Stroke Color and Stroke Weight;
3) Repeat 2) only for the top left black line;
4) Lock the new lines created in 2) and 3) which are the two topmost object (see the expanded Layer) and delete everything else;
5) Select the yellow line from 2) and Object>Transform>Reflect, then ShiftClickDrag the copy to the right by the top left end Anchor Point to snap to the top right end Anchor Point of the original, then select both and Join them (Ctrl/Cmd+J);
6) Repeat 5) only for the top left black line;
Now you (almost) have the topmost set of chevrons, and you can complete the 16 sets in different ways depending on what you want.
You can create a Group of outlined and filled chevrons cut off the the sides as follows:
7) Select the chevrons from 5) and 6), then Object>Path>Outline Stroke, then Group, then deselect;
8) ClickHold the topmost Anchor Point of the yellow chevron and Drag it downwards while pressing Shift and Alt/Option to snap to the bottommost Anchor Point of the black chevron to create the second set;
9) Hold Ctrl/Cmd and press D 14 times to get all 16 sets;
10) With the Line Segment Tool ClickDrag from the bottom left Anchor Point of the bottommost black chevron to the bottom left Anchor Point of the topmost yellow chevron, then click one of the bottom Reference Points in the Transform panel and increase the H value to have the line extend past the topmost yellow chevron;
11) Move a copy of the line from 10) by the bottommost Anchor Point to snap to the bottom right Anchor Point of the bottommost black chevron;
12) Select each of the vertical lines from 10) and 11) and Object>Path>Divide Objects Below, then delete the unwanted end parts.
You can also create the same appearance with only one actual set of chevrons, using Effect>Distort & Transform and then applying a Clipping Mask to hide the outer parts of the chevrons; you can even do it without outlining the stroked paths.
And if you prefer, you can also completely start over with a new leftmost half of the topmost yellow chevron corresponding to 2), then jump to 5), then Object>Path>Outline Stroke as in 7) to have a new topmost yellow chevron, then move a copy downwards by ClickDragging the topmost Anchor Point to snap to the lower one while holding Shift and Alt/Option to have the second one in place and change the colour to black, then Group the two and deselect as in the rest of 7), then continue from 8) on.
Edit: Hi Peter. I have one, however silly it may be.
Copy link to clipboard
Copied
Copy link to clipboard
Copied
For my part you are welcome, d.
The reasons for the long suggestion were the difference in Stroke Weights between yellow and black lines, the slight mismatches both vertically and horizontally, and as mentioned the crossing of the left/right lines undoubtedly made to cover the gaps at the tops between the Butt Caps of the lines.
If/when there will be a next time, to avoid the crossings, you can start out with the line to the left corresponding to 2) (or just a new left line), and then turn it into a full symmetrical chevron as described in 5), as a single path (of two mirrored segments) with a fully accurate sharp corner at the top.

Copy link to clipboard
Copied
If it is bitmap, you can crop it in Illustrator using Object > Crop Image.
If it is vector, you can select all of the objects an group them. Then draw a shape, a rectangle or whatever, on top of the group. Select the group and the shape that is on top. Select Object > Clipping Mask > Make. The objects won't actually be cropped, but portions of the objects outside of the shape on top will not be visible.

Find more inspiration, events, and resources on the new Adobe Community
Explore Now
 AdChoices