

- Home
- Illustrator
- Discussions
- Re: Opacity applied to FX, not object
- Re: Opacity applied to FX, not object
Opacity applied to FX, not object

Copy link to clipboard
Copied
Hi. Is it possible to apply a different opactiy to an object from the opacity of the FX applied to the object? In other words, can I dissociate the opacity of object and the opacity of FX? This is for CS4. Thanks.


Explore related tutorials & articles
 19
Replies
19
19
Replies
19

Copy link to clipboard
Copied
which effect?
Copy link to clipboard
Copied
Let me clarify. Can I set the opacity of an object to 0% and its drop shadow to 100%, so that the object would be invisible but its drop shadow would remain?
Copy link to clipboard
Copied
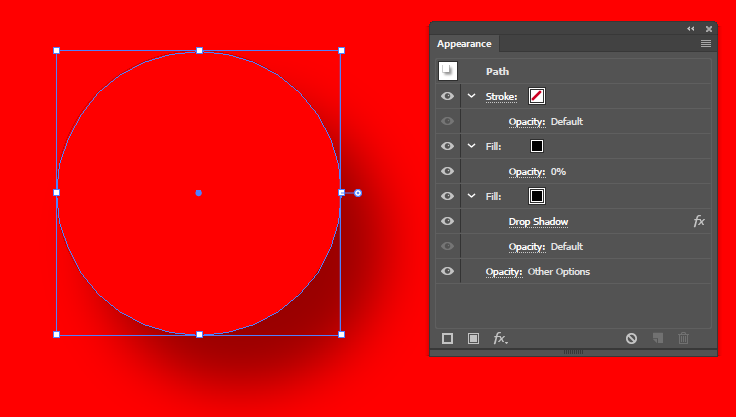
i would give the object a second fill, set the top one to 0% opacity, apply drop shadow to the bottom one, and set knockout group for the whole object:
Copy link to clipboard
Copied
Thanks Doug. I should add that my object is an embedded image with transparency! I can't apply a fill to that in Illustrator, as far as I've tried.
Copy link to clipboard
Copied
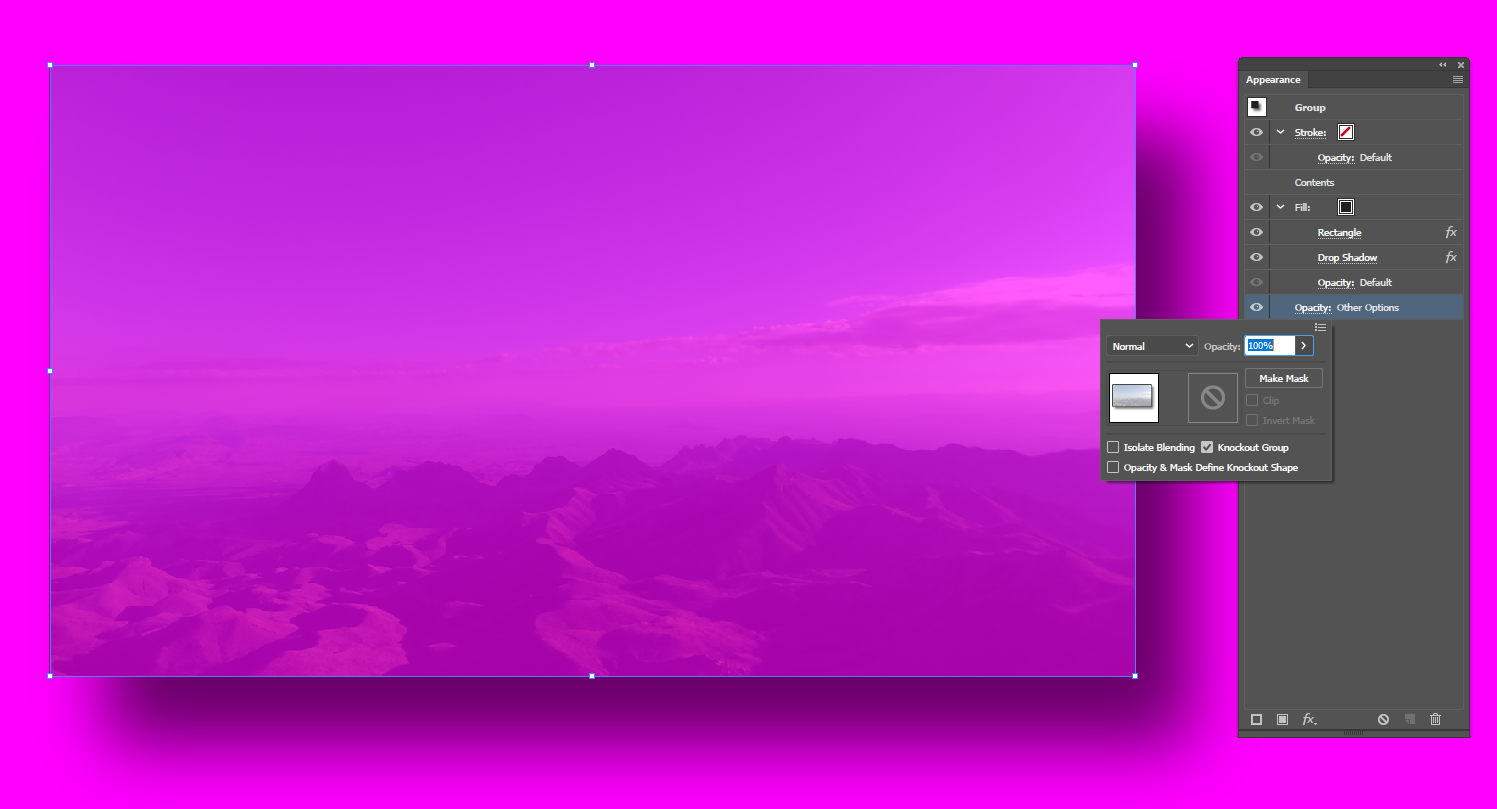
a little convoluted but you can manage it:

Copy link to clipboard
Copied

Copy link to clipboard
Copied
Hi,
I can suggest a way but it requires a little preparing in Photoshop.
I. In Photoshop
1. Load selection for your image and create Work Path (by Make Work Path in Paths Panel menu).

2. Export the path to Illustrator

II. In Illustrator:
1. Use this path to make the Clipping Mask
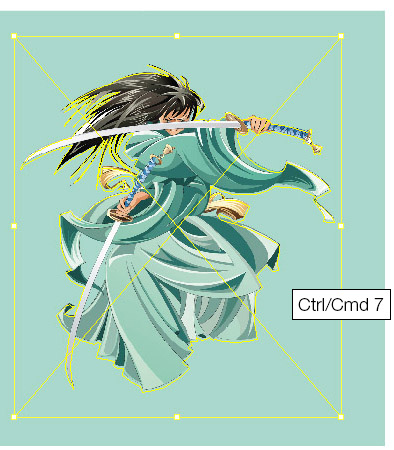
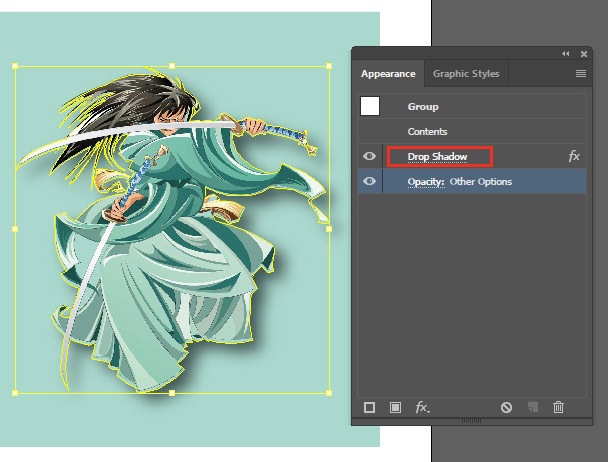
2. Add the needed effect to Clipping Group
3. Set Knockout to Clipping Group

4. In Isolated Mode set the Opacity=0 (or other needed value) to your image

So, now you have an image and an effect which may be controlled separately

of course, having the path prepared in Photoshop, you could forget the raster original at all and follow Doug's advice, but the way with a clipping mask allows you to set any transparency level for your image if you need it.
Copy link to clipboard
Copied
Thank you very much for the responses!
Monika:
I provided the information I felt was necessary for a generic problem in the original post. Only after the subsequent questions did I realise that the nature of the object (vector art, image with or without transparency, etc.) mattered.
Doug:
I tried to reproduce what you have done in the image but it's not working with the image I have (which is not a rectangle but something very similar to Anna's image she shows in step I.1: a non-transparent shape surrounded by transparency). I see a Rectangle FX under Fill. What is that for? The drop shadow seems to be applied to the rectangle. Where is the transparency in your image? Either there's a step that I misunderstood or what you are doing is not quite what I'm looking for.
Anna:
This is exactly what I would like to achieve. Based on your method, I assume there is no way of doing that entirely in Illustrator. Is that right? If I take your image in step I.1 and place it in Illustrator, then apply the Drop Shadow to it in Illustrator, I would get what you show in step II.2. If I make a clipping mask with Knockout Group of the Contents in Illustrator, the drop shadow disappears and I get something like II.1 again. It seems that Illustrator can recognise the non-transparent shape inside the image and apply the drop shadow to that but wouldn't let the user have access to the non-transparent shape. So I can't get to the image you show in II.4.
Copy link to clipboard
Copied
what type of image do you have and how was the transparency created?
to do what Anna did, you don't need to place the image in Illustrator at all. You just need the path.
Copy link to clipboard
Copied
Yes, you're right. Import in this case may be useful if the transparent version of the image is still needed.
Copy link to clipboard
Copied
1. Yes, this way uses both Photoshop and Illustrator.
2. Be careful: you should set Drop shadow AND Knockout group to the vector form of Clipping mask, not to your image. And its Opacity must be 100%.
And then you go into Isolation mode and decrease Opacity of your image.
So look: you have a non-transparent object with effect and knockout, and you have a transparent image inside it.
Copy link to clipboard
Copied
Doug:
My image is TIFF (raster, not vector) and the transparency was created not with clean borders like Anna's (she uses a vector path) but with a mask having various levels of transparency near the borders. But it's otherwise just like Anna's image with a non-transparent shape surrounded by transparency. I don't have the path so I would have to create it but it would not be clean like Anna's because of the borders.
Anna:
Understood. The steps I described were me trying to apply your method to the image, without the vector path, ENTIRELY in Illustrator. I was highlighting where I would get different results from your Photoshop+Illustrator method.
Copy link to clipboard
Copied
BTW, maybe would be easier to add an effect in Photoshop and set Layer Opacity =100 and Fill = 0. And import to Illustrator the ready image.

Copy link to clipboard
Copied
You can set the opacity for the fill, stroke, the object and the group that contains the object.
Some effects, like dropshadow, feather and glow have also an opacity setting.
Copy link to clipboard
Copied
Or just move the image outside the artboard and move the dropshadow inside.
Copy link to clipboard
Copied
Anna: I guess you meant Place as I don't have Import in Illustrator.
Ton: did you separate the two (image and its shadow) in Illustrator or Photoshop?
Copy link to clipboard
Copied
yes, surely, Place
Copy link to clipboard
Copied
sPretzel wrote
Ton: did you separate the two (image and its shadow) in Illustrator or Photoshop?
No, they are not separated, I just gave the shadow a large distance.
Copy link to clipboard
Copied
I see. That's a far-fetched workaround but it's actually an excellent suggestion!! Thanks Ton.

Find more inspiration, events, and resources on the new Adobe Community
Explore Now
 AdChoices