I am currently in the middle of designing a small custom arrow icon (24x24), and used individual paths to design the arrow rather than use a traditional stroke. Upon uniting the paths to create a single object in the Pathfinder window, the rounded edges of each overlapping path got all messed up. See the images below:
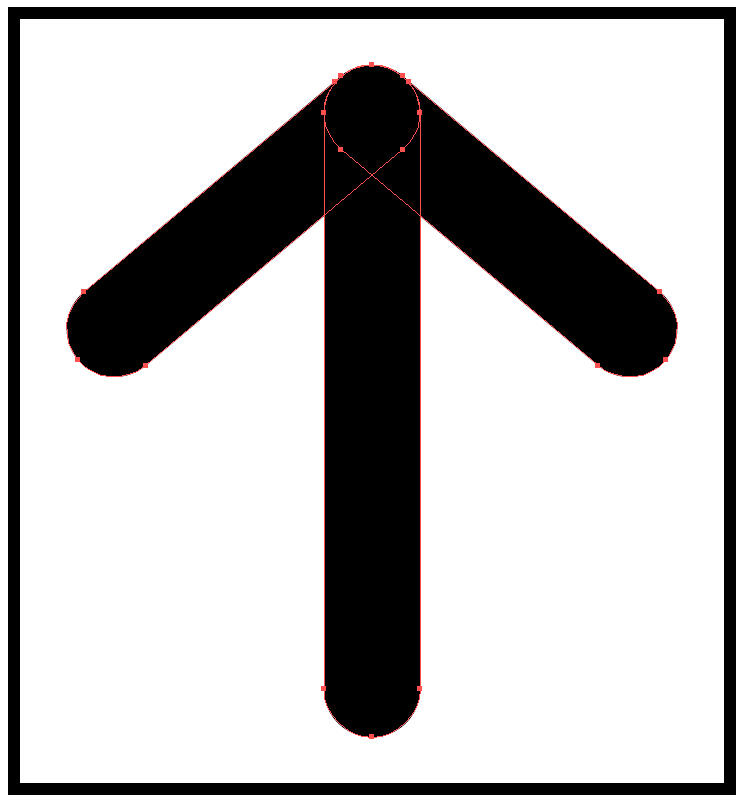
Overall shape displayed the three paths involved (all are aligned perfectly):
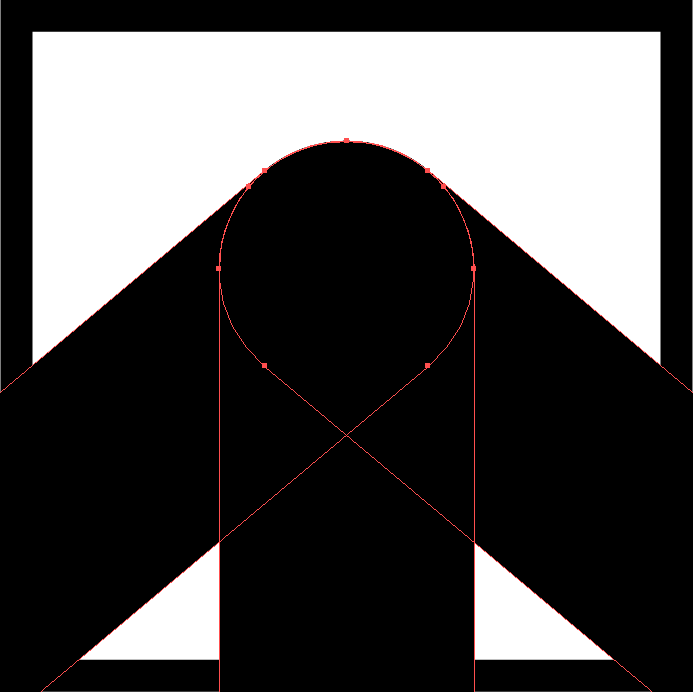
Closeup of the top of the arrow with all paths selected:
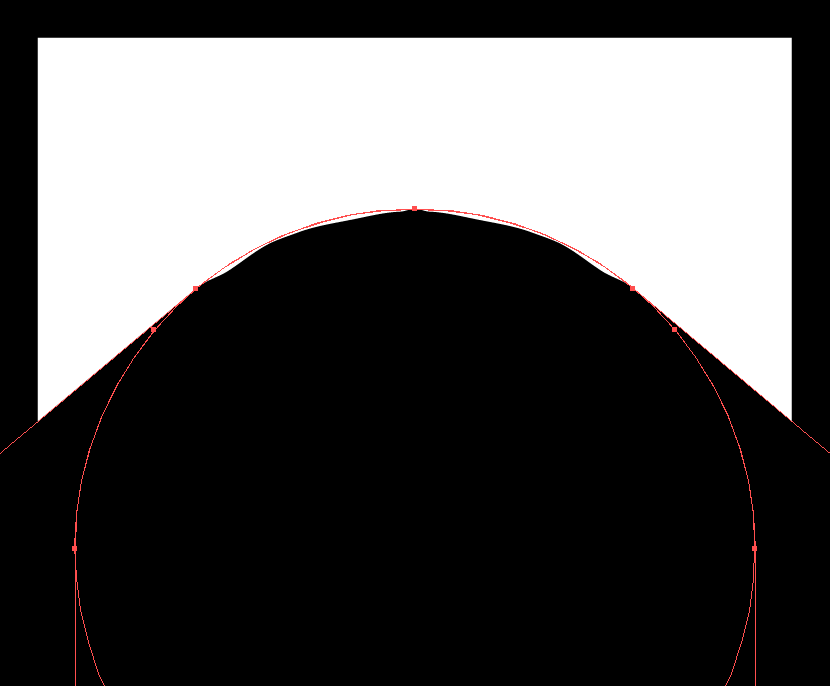
Closeup of the top of the arrow after the paths were united:

Closeup of an alt+click to show the result vs. the actual original shape:
Generally when I design in this manner there is always some finessing and smoothing out of paths and points that I do manually for clean up, but I've never experienced the entire rounded edge disappearing like that and turning into a choppy and ugly mess. Normally it may just include some spare points that I clean up, but the shape is perfectly maintained. I haven't had this issue prior to the recent CC update either.
I realize that with the update the "new objects align to pixel grid" option is gone and replaced, so I have attempted to do this both with and without Snap to Pixel on, rearranging the path layers, and in both web and print profiles with the exact same result. Now I did however also try this at a much larger size (increased scale by 1000%) and got a completely different result that didn't end up like this, so it's confusing me.
So what I'm wondering is two things:
1. Why in the world did this happen? How come the Unite option did not work as I had hoped when it always had in the past?
2. Is there another new option similar to "new objects align to pixel grid" available that anyone else is aware of that would produce a similar effect like this? If so, I do not want that checked or available.
3. Is there a certain limit when things get small enough that Illustrator does not perform as well? Granted 24x24px is not THAT small, but it's curious how I performed the exact same methods on this at different sizes and got two completely different results.
Any help would be greatly appreciated! That has been bugging me since the update!


 5
Replies
5
Replies


 AdChoices