


Copy link to clipboard
Copied
I am using the basic graphics line pattern swatch as a fill on several shapes.
I need to convert those individual lines to vector.
How can I do that?


 2 Correct answers

Try using Object>Expand. Then trim the result.

Here's what worked for me:
Object > Expand
Object > Flatten Transparency
Object (or right click shape) > Ungroup
Object (or right click shape) > Release clipping mask
Select only the stripes (not the clipping mask outline) then Object > Compound Path > Make (or command+8)
Then select both the stripes and the clipping mask and use Pathfinder > Intersect
Now the shape is a vector you can fill with any colour.
A lot of steps but definitely better than drawing all the stripes by hand!
Explore related tutorials & articles
 21
Replies
21
21
Replies
21
Copy link to clipboard
Copied
Try using Object>Expand. Then trim the result.
Copy link to clipboard
Copied
I can't seem to get that to work, I am sure it is my fault..!
Can you take a look at this and see what I am doing wrong?
http://www.trinitifx.com/wip/Tartan_for_Banner.AI
I am sending this to be printed on a banner, and their software does not show the vector pattern fill..

Copy link to clipboard
Copied
There's another pattern applied in your design: the back diagonal stripes are also a pattern.
Copy link to clipboard
Copied
That is correct, there is a white stripe layer with the diagonal pattern vector fill, and a black stripe layer with the diagonal pattern vector fill. I need all of those as vector shapes on their own layer (white, black, and blue on the bottom layer).. Possible?
Copy link to clipboard
Copied
You need to expand them as well use the same method as above.
Copy link to clipboard
Copied
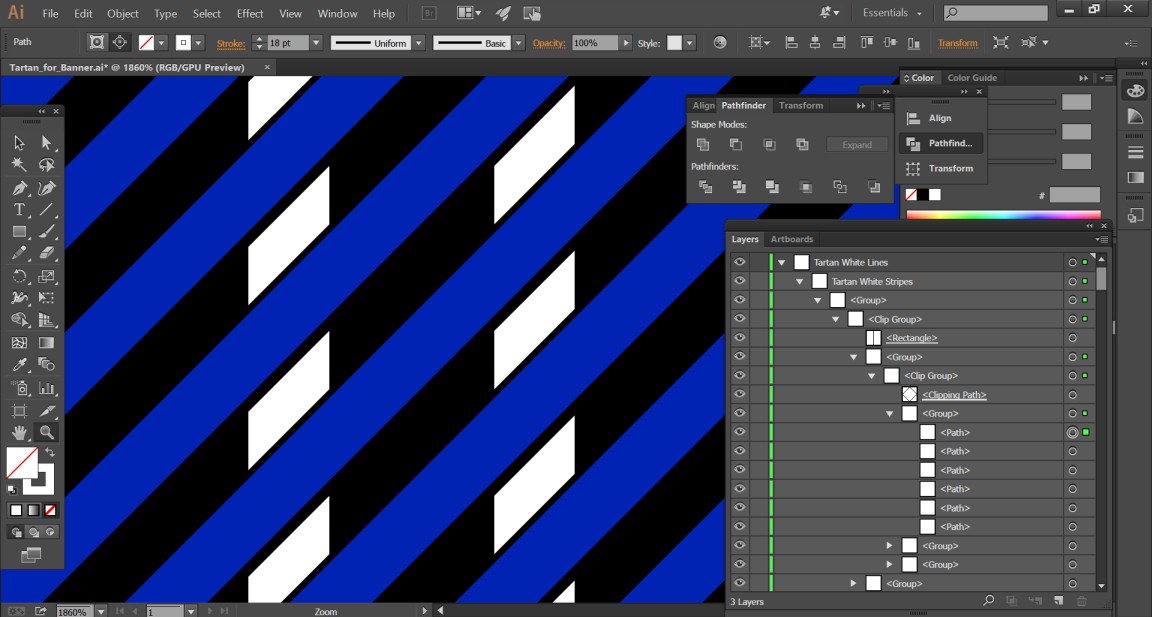
When I select the white stripes layer and use object->expand, the new white stripes are thinner than the pattern fill stripes. You can see that here with the white stripes over the non-expanded black stripes. Is there a way to keep them the same thickness as the pattern fill?
Copy link to clipboard
Copied
This an RGB document.
Turn off align to pixels.
Then try again.
Copy link to clipboard
Copied
Do you mean 'align to pixel grid'?
It is not checked now.
With it still off, I object->expand(ed) again and the same thing happened.
Copy link to clipboard
Copied
You could try and go a different way.
Instead of using Expand, try and select all and then:
Object > Flatten transparency.
Copy link to clipboard
Copied
I can't see that flattening the transparency does anything at all.
I guess I will just have to re-create the pattern shape-by-shape.. arg..

Copy link to clipboard
Copied
Thats what I just had 2 do, so fustrating that the pattern tool wont work for paths is odd conidering illistrator is used for paths!
Copy link to clipboard
Copied
What do you mean - the pattern tool doesn't work for paths?
Copy link to clipboard
Copied
I made a path then put it in swatch list then added that swatch 2 my outline and now its not path its just a pic then when i follow steps above the pattern always turns out wrong or missing items from pattern
Copy link to clipboard
Copied
Can you perhaps post examples?
It's not clear at all what you are doing and what you are expecting to happen.

Copy link to clipboard
Copied
This is not a sufficient answer. Correct steps below.

Copy link to clipboard
Copied
You are a god. My patterns were pixelated when rotated. Expanding fixed it.
Copy link to clipboard
Copied
Here's what worked for me:
Object > Expand
Object > Flatten Transparency
Object (or right click shape) > Ungroup
Object (or right click shape) > Release clipping mask
Select only the stripes (not the clipping mask outline) then Object > Compound Path > Make (or command+8)
Then select both the stripes and the clipping mask and use Pathfinder > Intersect
Now the shape is a vector you can fill with any colour.
A lot of steps but definitely better than drawing all the stripes by hand!
Copy link to clipboard
Copied
Nice! I had to swap the "Ungroup" and "Release Clipping Mask" steps but great step-by-step 👍 Thank you!

Copy link to clipboard
Copied
Perfect! Thank you 🙂

Copy link to clipboard
Copied
This is a game changer for me, thank you!!

Copy link to clipboard
Copied
Thanks so much! This worked very well.
I had a dot grid pattern that I needed to create a gradient mask over and it was not working as intended on my Expand-ed dots. My dots also got a bit wonky after Expand (had some excess) but the last step trimmed the excess off and cleared it all up.

Find more inspiration, events, and resources on the new Adobe Community
Explore Now
 AdChoices