- Home
- Illustrator
- Discussions
- Re: Possible to move objects (symmetrically) furth...
- Re: Possible to move objects (symmetrically) furth...
Copy link to clipboard
Copied
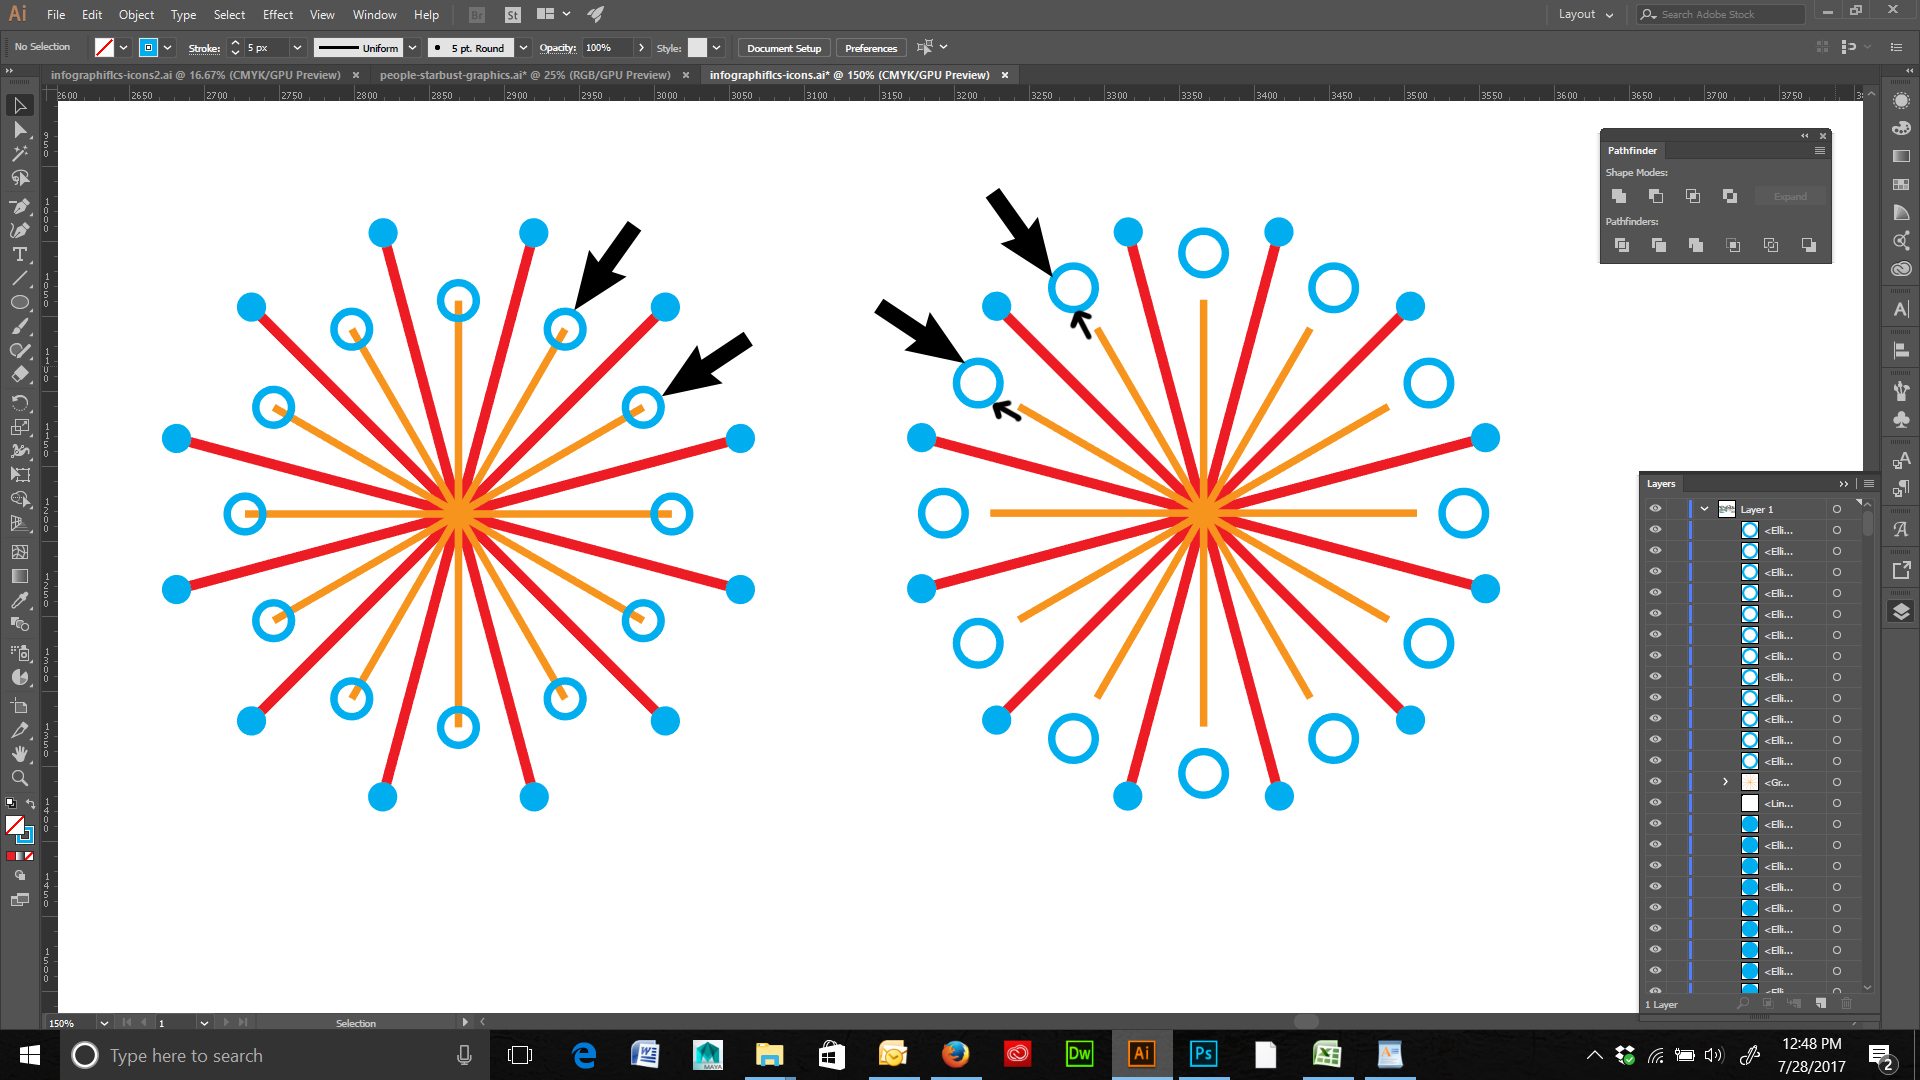
Is there a way in Illustrator to move objects symmetrically from their original position without changing their size? For example, in the attached image I have a starburst on the left that has small circles on the ends of some shapes. I would like to move those circles further away from the ends of those shapes so that they are positioned in the same place as the image on the right. However, I do not want them to change from the size that they are now.
Is there a way to move these circles further out without changing their scale/shape but do so symmetrically? Or do I have to manually move each one and hope that they are in the correct symmetrical space? I am hoping to be able to do this without creating a new circle, placing it, and using the rotate/copy method to place those shapes. Reason being, I am still learning Illustrator and I am trying to learn the capabilities of the program to see what is and is not possible.
(BTW-- In the image on the right I simply selected all of the circles and scaled them up in order to get them in the correct position.)

 1 Correct answer
Hi Hedger,
There are multiples ways of doing this. Mike has a good idea. But you can also, select a circle you wish to move, then write down it's width and height values found in the control panel (the horizontal bar that runs across the top of your screen). Then, select all the circles you wish to move, group them, then scale them upwards (or downwards). Then, ungroup the selection and input the width and height values to each individual circle. Hope this helps.
Explore related tutorials & articles
Copy link to clipboard
Copied
Great Question! Curious if any better solutions exist to this, than my simple method.
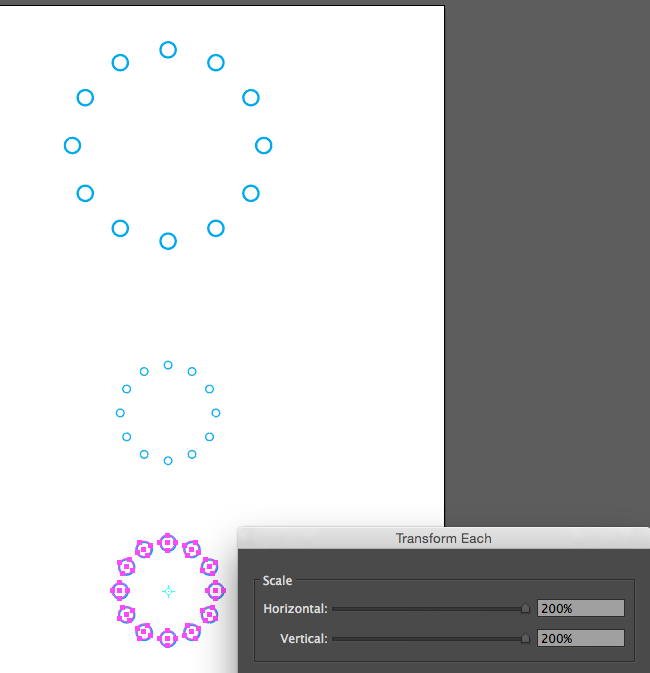
- Select them and scale 50%
- Select and transform each 200%.

Use different numbers per your need.
Copy link to clipboard
Copied
Hi Hedger,
There are multiples ways of doing this. Mike has a good idea. But you can also, select a circle you wish to move, then write down it's width and height values found in the control panel (the horizontal bar that runs across the top of your screen). Then, select all the circles you wish to move, group them, then scale them upwards (or downwards). Then, ungroup the selection and input the width and height values to each individual circle. Hope this helps.
Copy link to clipboard
Copied
dmanzeno schrieb
input the width and height values to each individual circle.
I would prefer Mike's solution actually. It's elegant and simple.
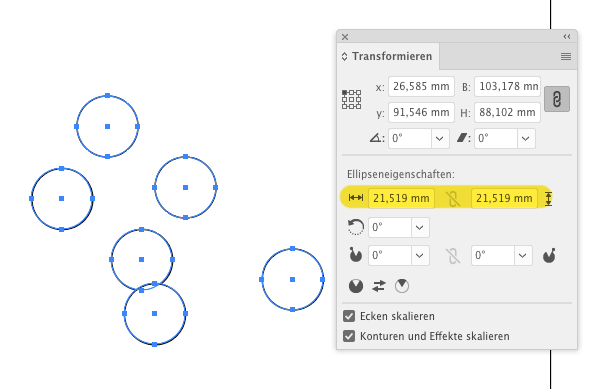
But just In case all the circles are still live shapes you don't have to input the size for each of them, but can do that for all of them at once. Just input the size here:

Copy link to clipboard
Copied
Thank you to everyone for all your time and help. I appreciate knowing the various ways that I could achieve the same result. I wasn't aware of the "transform each" option. After playing with the different options I found that for me the best method is to select all of the circles, scale them up to the distance that I want, and while keeping them all still selected to change their height and width back to the original size. So it is really a combination of using dmanzeno's AND Monika's solution. My problem with using just Mike's solution is that I had to go back and forth between scale and transform each several times in order to get everything to be the right distance and correct height and width.
Copy link to clipboard
Copied
There are some ways to achieve that and one way is, of course, to create a new circle at the right place and copy rotate it with the Rotate tool. Although you mentioned that you would rather like to avoid that, it is a reasonable way in many cases.
However, in your example with equally sized circles one can also remember the exact dimension of a single circle, select the circles which are (not) going to be resized and then go to Effect > Convert to Shape > Ellipse. In the Shape Options dialog choose an absolute size and set the appropriate dimensions. Then go to the Transform Palette menu and disable the Scale Strokes & Effects option. From now on you can resize your flock of circles in any order without changing the size of the individual circles. If you are done, you may select the modified circles and go to Object > Expand Appearance to flatten the Convert to Shape effect.
There is another method that works pretty well if that kind of scaling and non-scaling is required very often: Use symbol instances instead of common paths. For example, draw a circle and define it as a symbol in the Symbols palette. Take a symbol instance and copy rotate it around a specified reference point. Then select all symbol instances and scale the selection. After that, go to the Symbols palette menu and choose the Reset Transformation command to get the original dimensions of the individual circles.
There are some other techniques (e.g. using scripts), though my favourite way to do such transformations is another one. It may not always be practical, but at least it is a bit of fun with brushes. You can download a sample .ai file (CC format) and have a look. Open the unzipped file, make sure that the Scale Strokes & Effects option is turned off, then select all and increase or decrease the selection.
Sample file: scatter_scale_001.ai.zip - Google Drive
Get ready! An upgraded Adobe Community experience is coming in January.
Learn more

