

- Home
- Illustrator
- Discussions
- Re: Transparency Knock out Question
- Re: Transparency Knock out Question

Copy link to clipboard
Copied
Hello All.
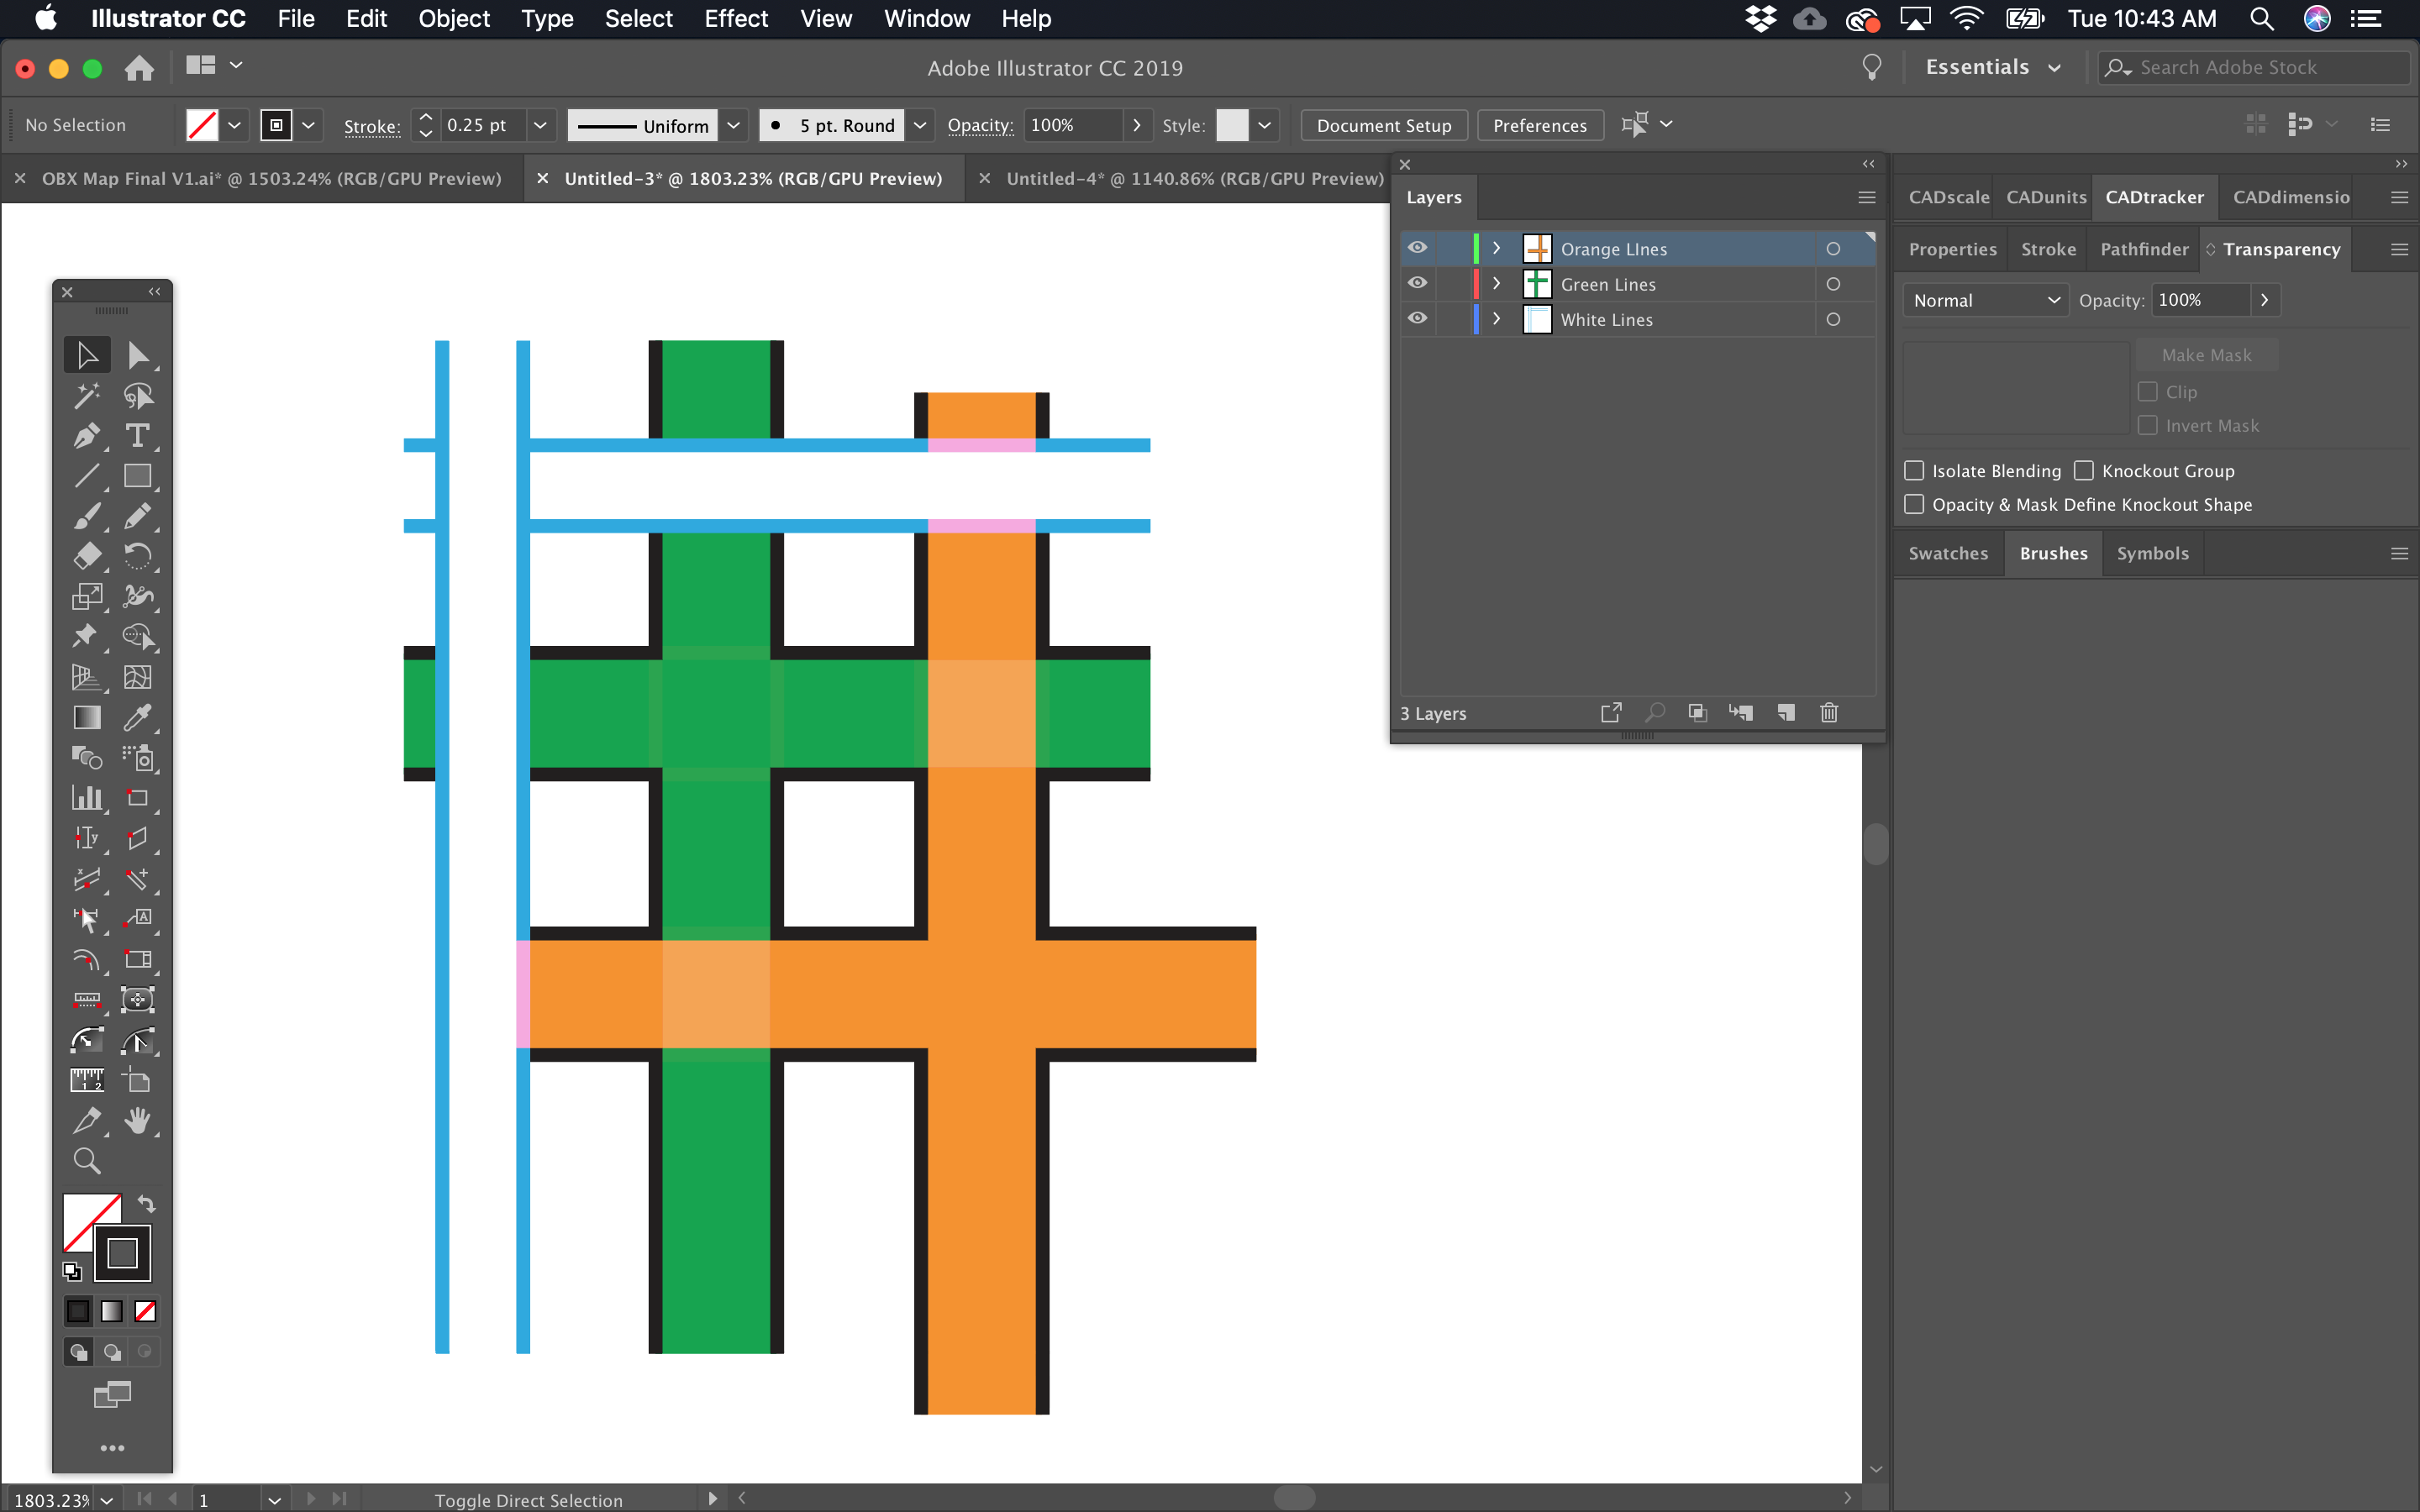
I'm trying to create three layers shown below: White Shapes, Green Shapes, Orange shapes.
Each Layer is comprised of many shapes (or will be) and I want to have those shapes all to have a lighten transparency.
The problem is that when I over lap the layers, they all show through each other. Which I DO NOT want. I want the shapes to blend together within the layers. But I do not want the layers to blend with other layers. Does that make sense?
I thought I could use "Knock-out" on a per layer basis - but that seems to have no effect at all. Maybe I do not understand what knock out or Isolate Blending is doing but I thought it would let the layer blending mode prohibit it's blending with other layers.
Any help is appreciated. Hope that makes sense.
Thanks.
.


 1 Correct answer

To create this what you have to do:
1. Set up the layers in your file. One layer for each street style you want to have
2. Draw the streets. Delete all strokes from them
3. Target the layer (click on th circle in the layers panel)
4. Open the appearance panel
5. Create a new stroke to the layer and apply the stroke weight and color.
6. Create anew stroke or duplicate this one . Then color the bottom one of the strokes in black and make it thicker. That's it.
I have a (German) video about the process: KREUZUNGEN bei Anfahrtsskizzen mit Illustrator erstellen | Tutorial Deutsch - YouTube
...Explore related tutorials & articles
 11
Replies
11
11
Replies
11
Copy link to clipboard
Copied
What is it that you want to achieve? The roadmap?
Copy link to clipboard
Copied
Yep. Exactly.
Copy link to clipboard
Copied
OK. What should the white with blue outline do? Run on top of them all?
Copy link to clipboard
Copied
White = base underneath all
Green = 2nd layer runs over white
Orange = 3rd layer runs over top of them all.
Copy link to clipboard
Copied
The black outline should run around them all? And the blue outline?
Copy link to clipboard
Copied
This is the look I'm going for.
I'm hoping to keep the blue and black outlines on a per layer basis as well...
I can get there by expanding all my strokes and merging them in pathfinder but I don't want to do that method.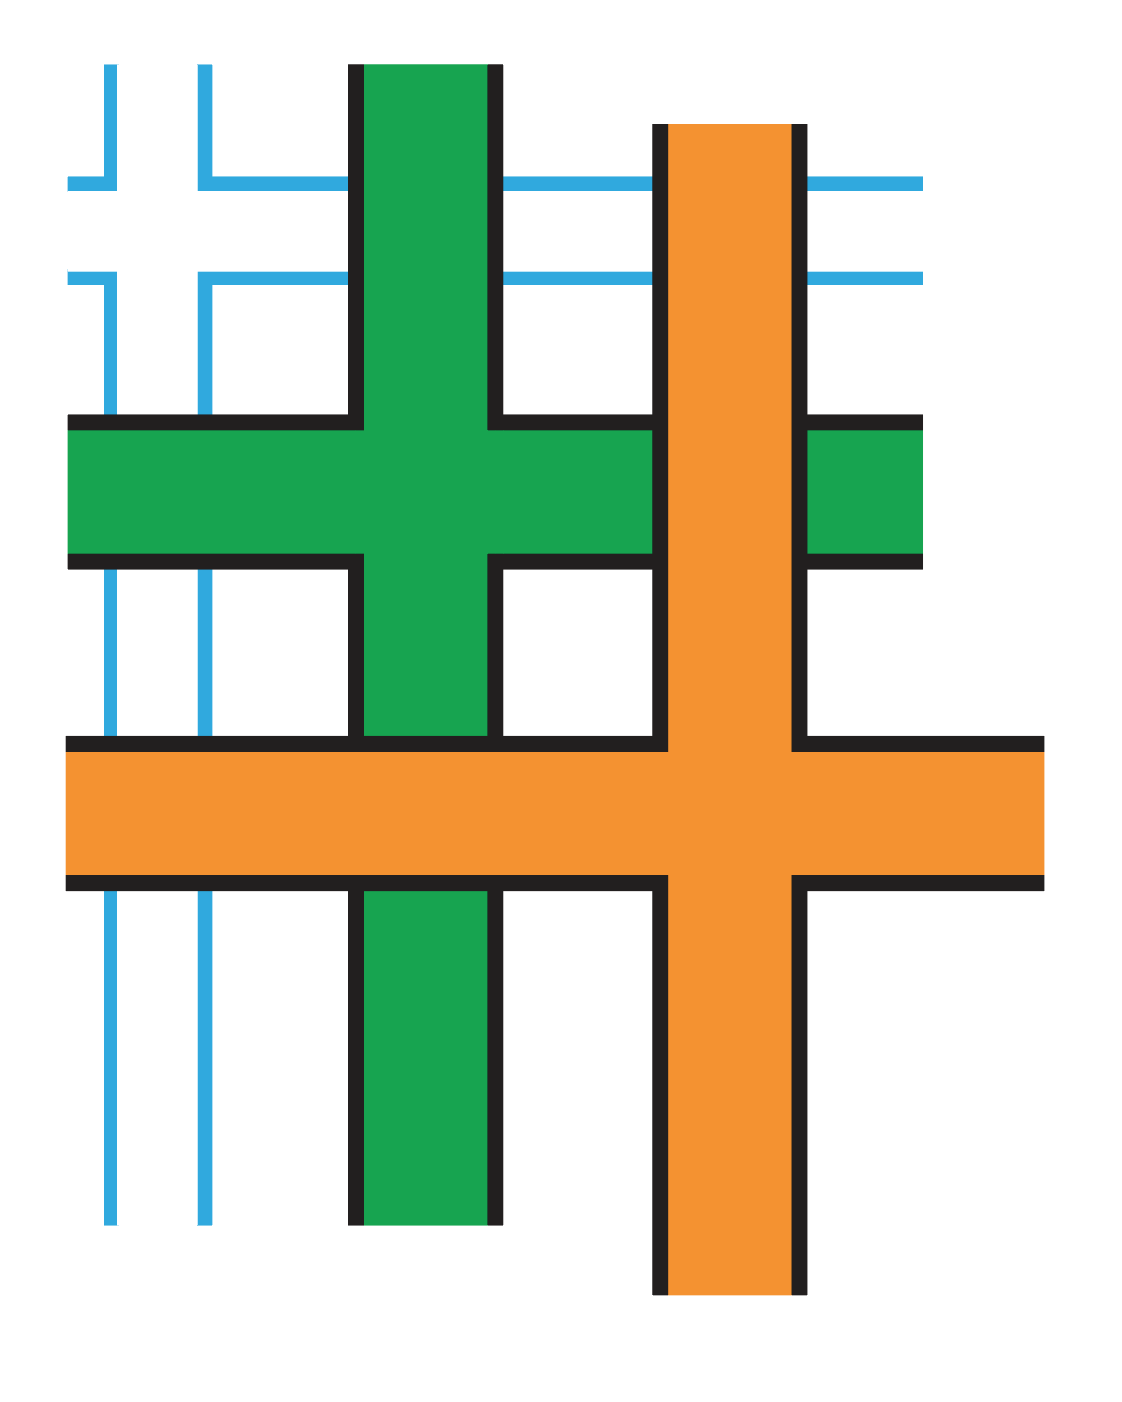
Copy link to clipboard
Copied
In that case it's even easier. I have updated the file.
It's really just stacking strokes of different weight in the appearance panel. I have applied them to the layer, because then they unite automatically.
Copy link to clipboard
Copied
To create this what you have to do:
1. Set up the layers in your file. One layer for each street style you want to have
2. Draw the streets. Delete all strokes from them
3. Target the layer (click on th circle in the layers panel)
4. Open the appearance panel
5. Create a new stroke to the layer and apply the stroke weight and color.
6. Create anew stroke or duplicate this one . Then color the bottom one of the strokes in black and make it thicker. That's it.
I have a (German) video about the process: KREUZUNGEN bei Anfahrtsskizzen mit Illustrator erstellen | Tutorial Deutsch - YouTube
Copy link to clipboard
Copied
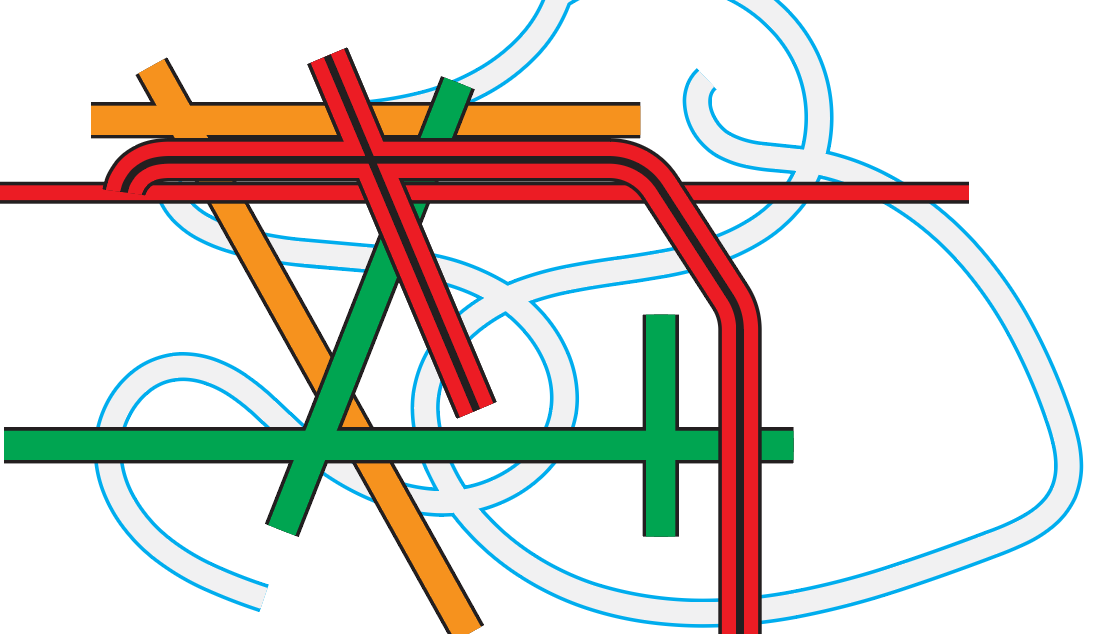
Traffic nightmare loop.  Typical here in Los Angeles.
 You are a genius.
Thank you. This works perfectly.

Copy link to clipboard
Copied
Franky
interesting thread
Each Layer is comprised of many shapes (or will be) and I want to have those shapes all to have a lighten transparency.
How does the transparency need to look / work?
Copy link to clipboard
Copied
What can work is this:
All the strokes are applied to the layers. And this relies heavily on layer hierarchy and appearances. Click on the target symbol in the layers panel to inspect it.

Find more inspiration, events, and resources on the new Adobe Community
Explore Now
 AdChoices