Jamie,
As also mentioned in the previous post, you can use a new way of doing it in the old way of drawing the bounding lines of the shadow between two instances of the letter/shape casting the shadow, then filling it, only now with the help of Illy (job description Adobe Illustrator) and a few of her friends, and fully accurate and clean.
The ruler used in the old days is replaced by the free Common Tangents script in this free script collection made available by 佐藤浩之, (Satō Hiroyuki) here for rounded parts,
http://shspage.com/aijs/en/
and/or the Line Segment Tool with Smart Guides as your friends for sharp corners.
It is simpler/easier than it may seem at first glance, when/once you understand long shadows, especially that all the bounding lines are straight parallel lines (and that they are) combining identical points on (identical parts of) the two identical letters/shapes that define the shadow.
The new way, presented here in the form of the original approach which always leads to few possibly relevant lines, is a flexible and careful use of visual observation, concentrating on relevant parts and convenience. It can be applied for single letters/shapes, and also for combined letters/shapes which may be overlapping/abutted/separated and may be treated in the most convenient way possibly treating individual letters/shapes separately.
Maybe it can be (further) scripted to a certain extent.
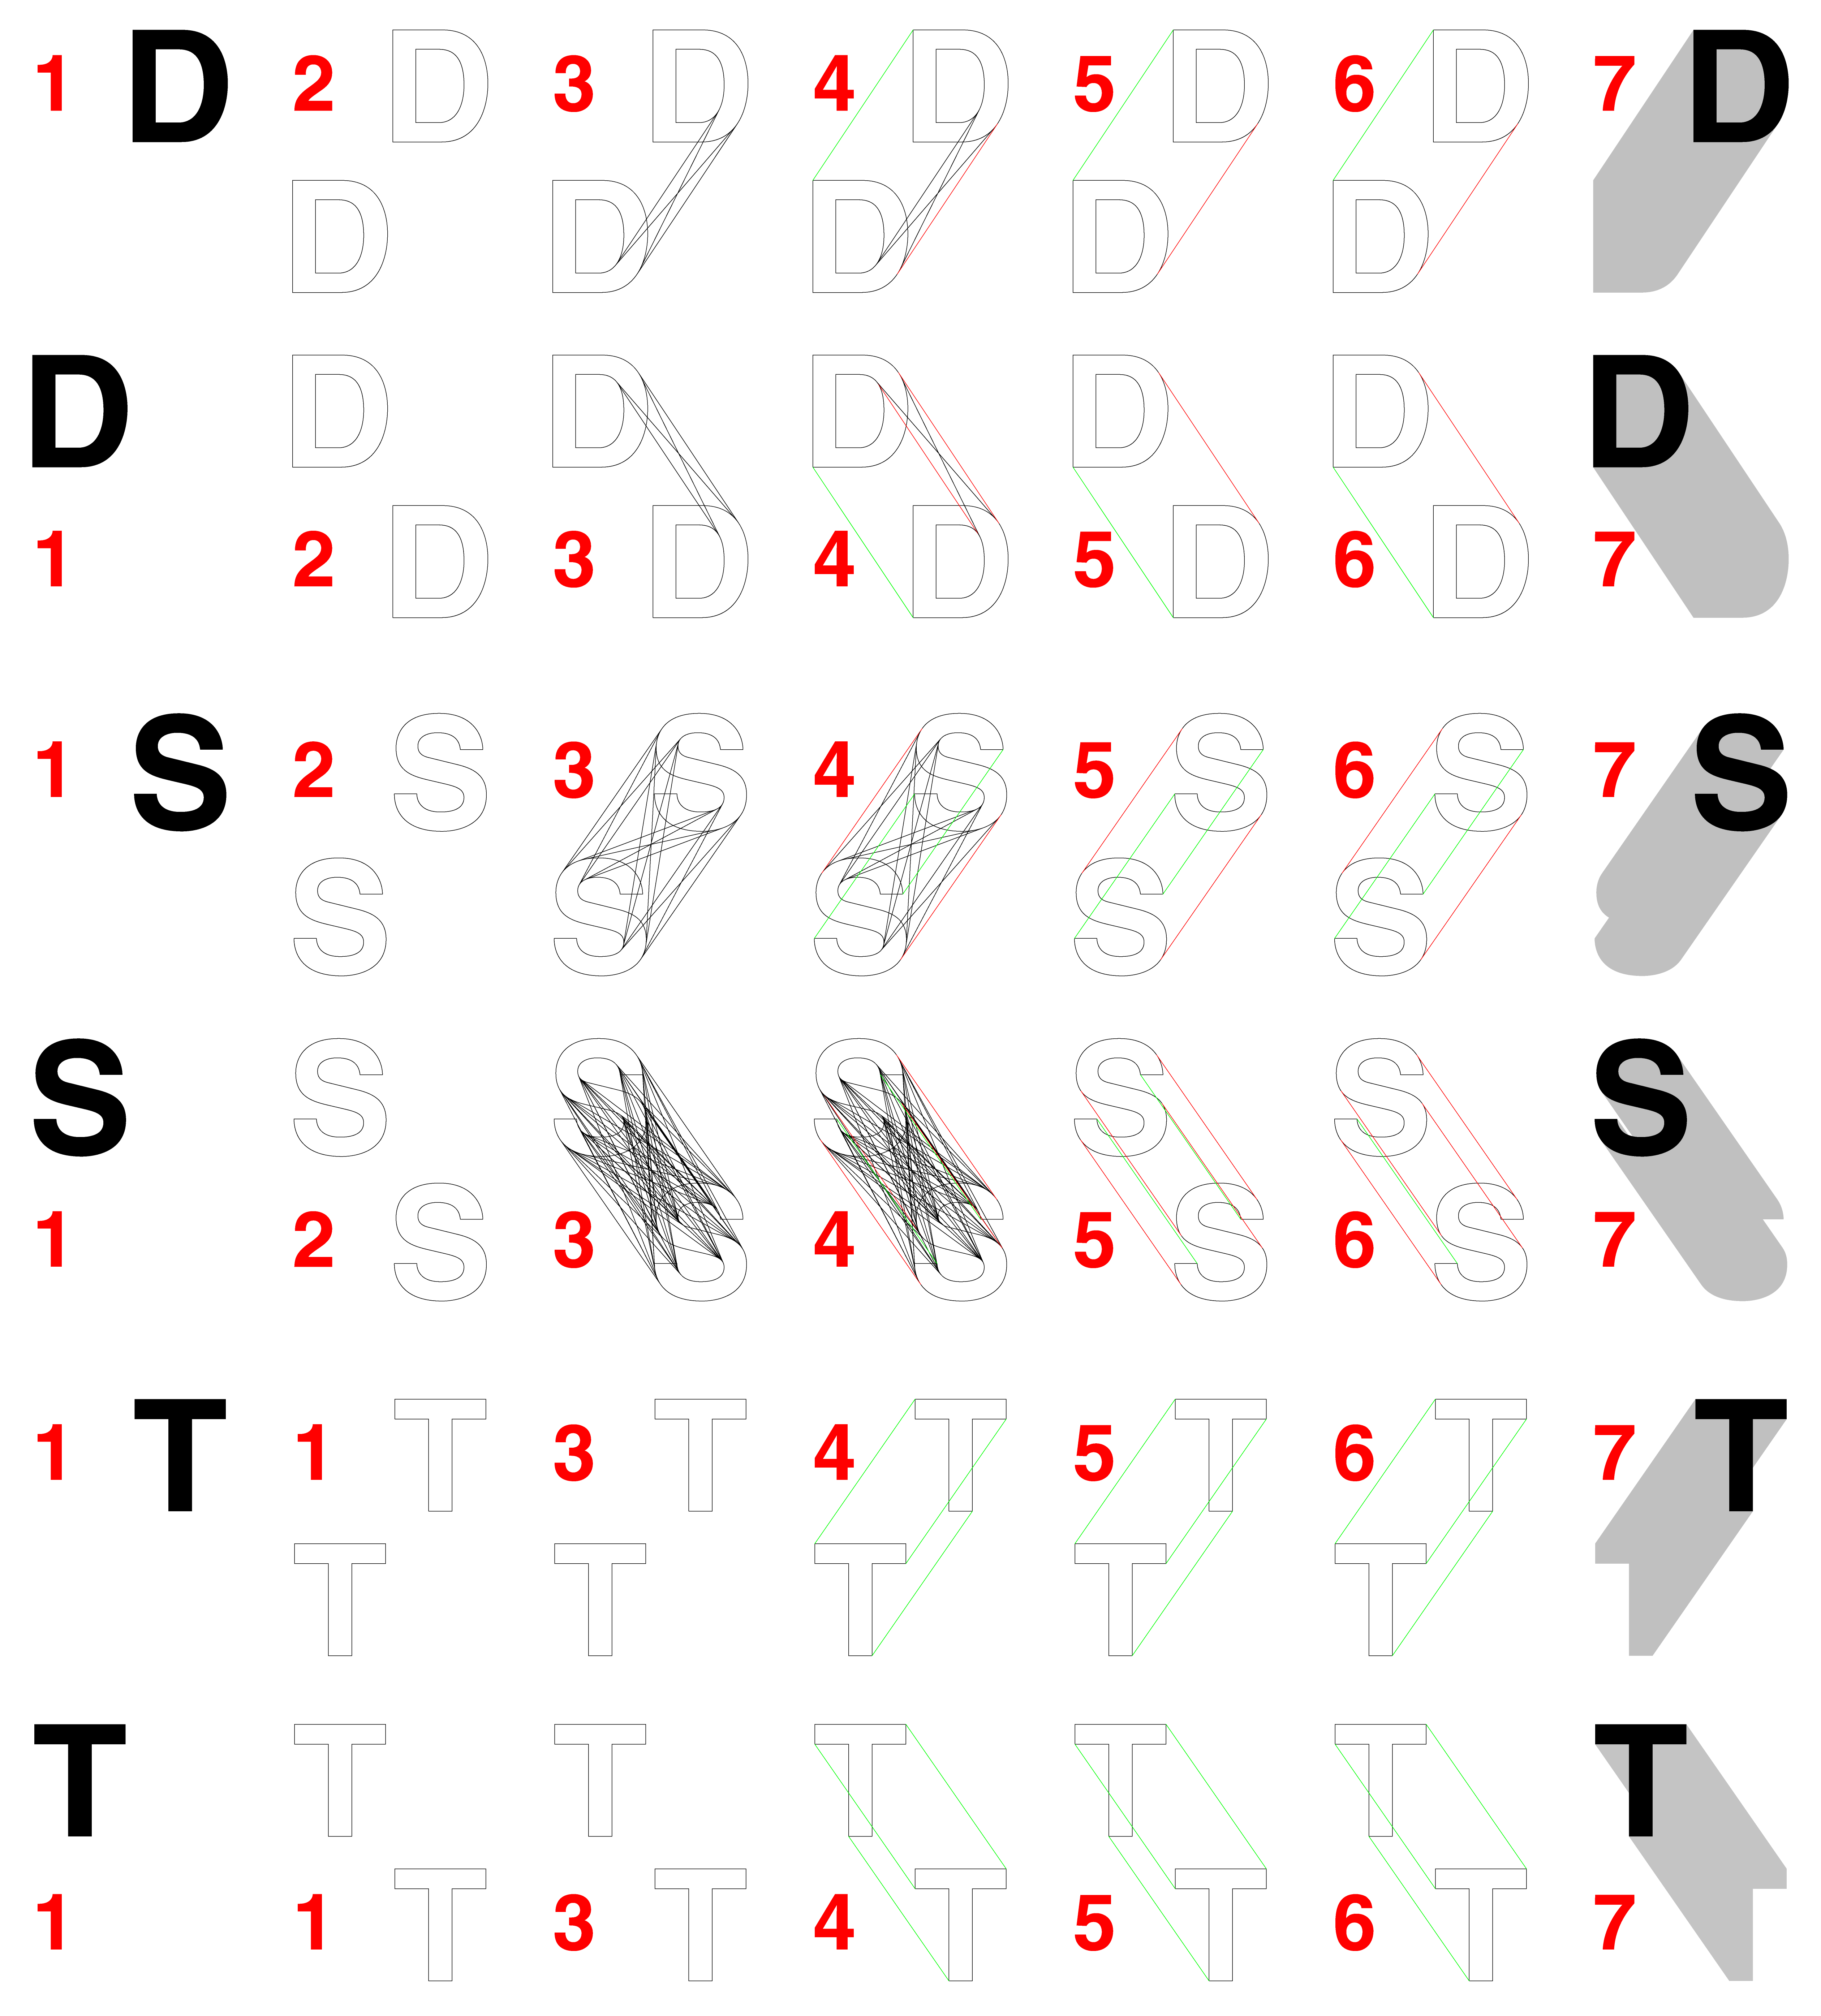
You can proceed as follows with an outlined letter/other shape, see the steps in the image below, depending on the occurrence of relevant rounded parts and/or sharp corners, which again depends on font/actual letter(s) or other kind of shape(s).
1) Select the original fill/nostroke letter/shape (shown in black), then hold Ctrl/Cmd and press C followed by B to have a copy instance behind the original;
2) Hide the original (in the expanded Layer in the Layers panel), then select the original copy and switch from fill to a rather thin stroke so you can see what you are doing (shown in black), then hold Alt/Option and ClickDrag to move the shadow copy to the desired position determining the end of the shadow;
3) If the original copy letter/shape has relevant rounded parts, Direct Select each possibly relevant path segment on both the original and shadow copy, then hold Ctrl/Cmd and press F then C then X then C to bring them to the very front, then recolour them (shown in red); if adjacent path segments are possibly relevant, Direct Select them then hold Ctrl/Cmd and press J to join them;
4) Direct Select each set of corresponding coloured front paths from 3) on the original and shadow copy and run the Common Tangents script, and get just one bounding line of the shadow, and/or if the original letter/shape has relevant sharp corners add the lines between sharp corners that are possible bounding lines of the shadow by ClickDragging/Snapping with the Line Segment Tool and recolour them (shown in green);
5) Delete the coloured front paths;
6) Optionally, you can delete any unneeded coloured lines (any not being bounding lines);
7) Create the whole long shadow as one (simple/compound) path by combining the coloured lines and the letters/shapes, using the preferred way such as Live Paint, Shape Builder, or Pathfinder Unite (requiring more/different work but possibly (even) more accurate), then switch from stroke to the desired fill colour (shown as grey), then show the filled copy of the original that was hidden in 1).
The image shows the creation of long shadows in two directions from an outlined D and an outlined S and an outlined T (all Helvetica Bold, font size 72, line Stroke Weight 0.25 pt) at 600%.
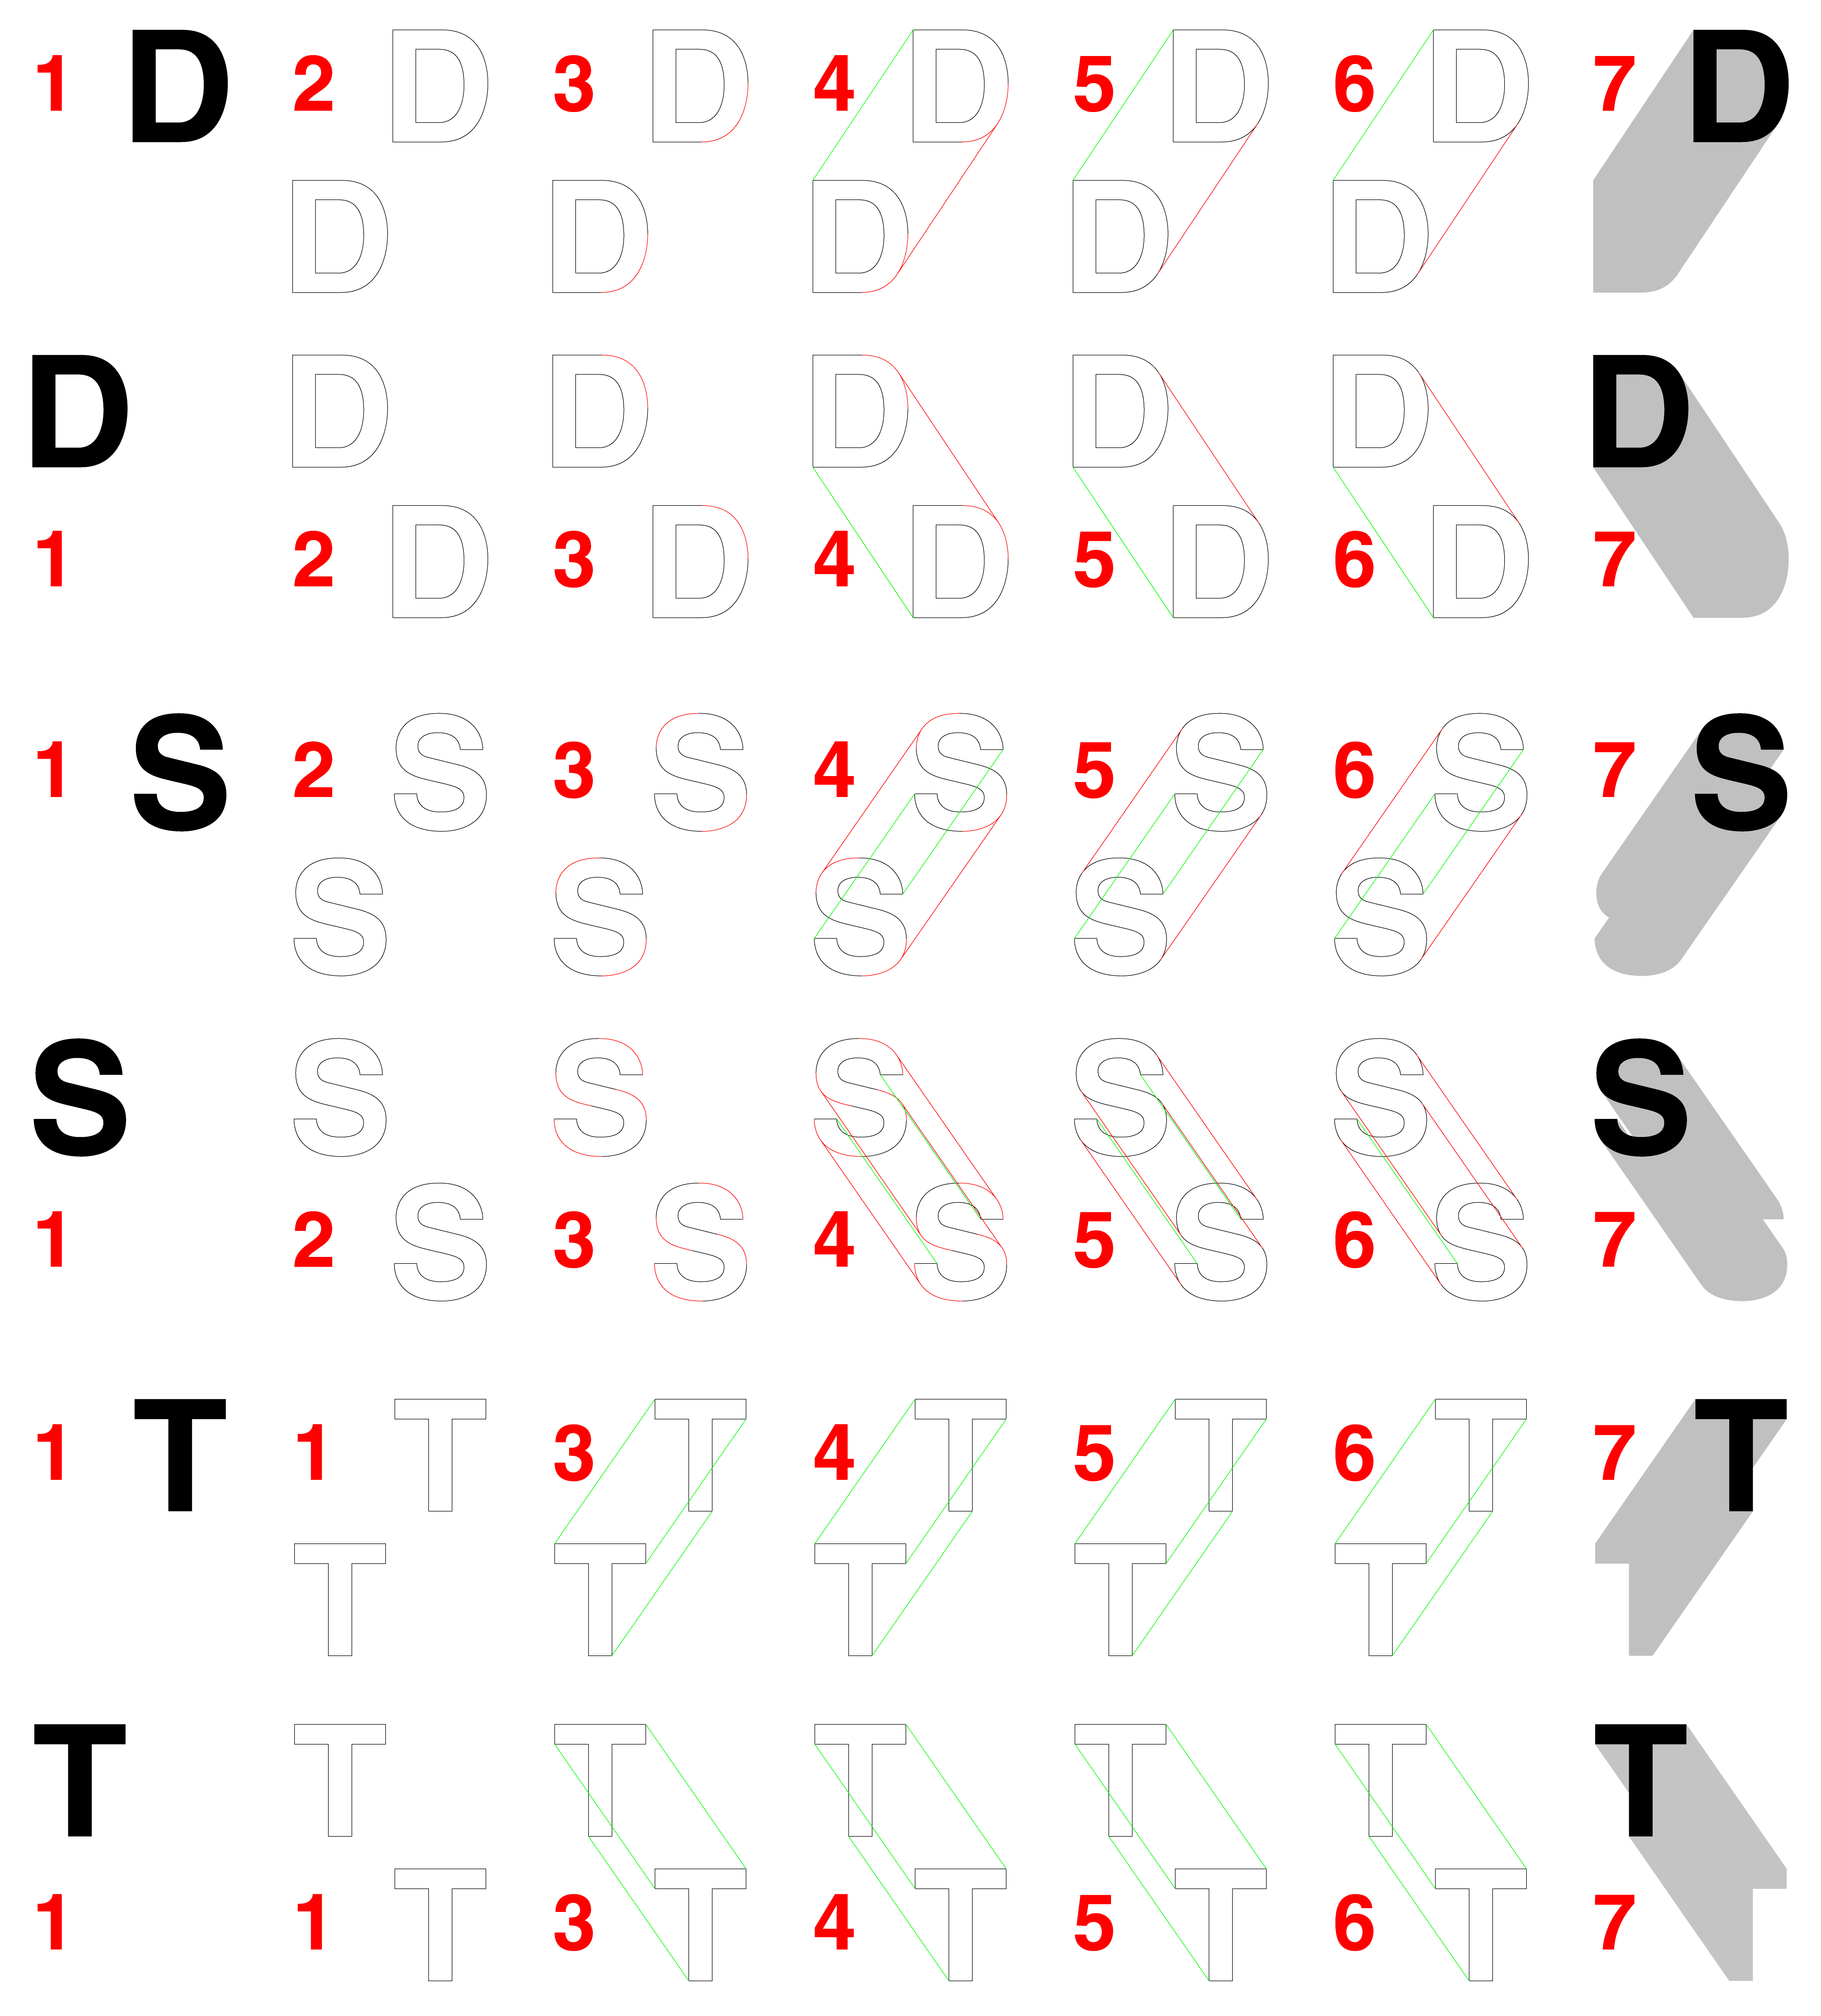
Click/RightClick to see the whole image in a new Tab and Click the desired step to see it in full size/detail; you can use the bottom scroll bar to run through the different steps for the same letter/shadow, and you can use the side scroll bar to run through the same step for different letters/shadows; and you can Click again to get back to the whole image.
Or Click Here to see in Chrome


 4
Replies
4
Replies


 AdChoices
.jpg)