- Home
- Illustrator
- Discussions
- Re: Wrapping objects around other objects.
- Re: Wrapping objects around other objects.
Copy link to clipboard
Copied
I have been trying to figure out how to do this for the longest time. I usually just break down and do the project in Photoshop, but I am determined to figure out how to do this in Illustrator.
Below you will see a screen shot of my Illustrator project. What I want to do is make that sash look like it is wrapped around the thistle plant. So those edges should be behind the plant while the middle section is on top.
I've been googling but nothing is coming up for "object wraps around another object illustrator." The only thing that comes up pertains to text. I hope someone can help me figure out what this is called AND how to do it.
PS I am by no means proficient with Illustrator. I have never really understood Compound Paths or Clipping Masks... in Photoshop or Illustrator.
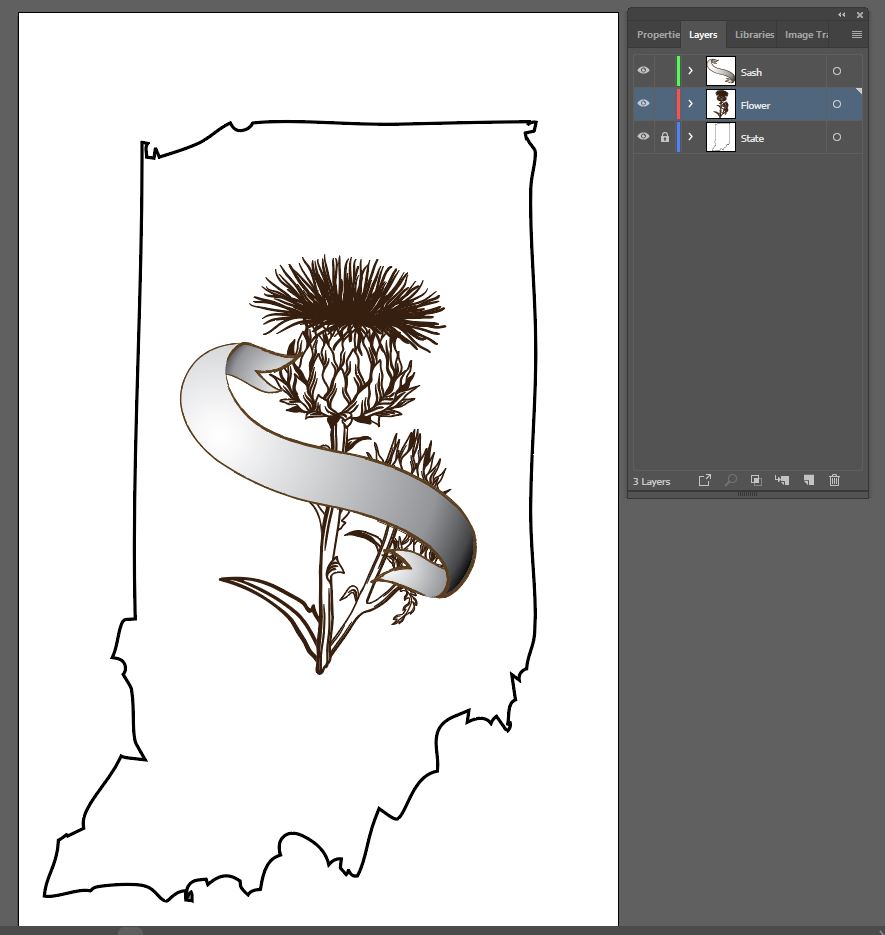
Thank you for your help.
Kim
 1 Correct answer
I found this thread in 2024, and it was helpful in manually doing some wrapping on a logo concept I'm working on.
However, for anyone else finding it who also doesn't know, if you're using a new version of Illustrator, there's a tool called "intertwine" that makes this much much easier! At least with paths. I'm not sure about raster objects. Here's a short video that helped get me started. Intertwine will make these tasks much easier going forward.
Thank you to everyone on this thread who helped
Explore related tutorials & articles
Copy link to clipboard
Copied
well, the easiest way is
1. to divide the banner into 3 separate parts
2. Save your raster illustration in Photoshop with a transparent area around the object (e.g. in PSD format)
3. Place the illustration into your artwork and put the central part above the illustration and edges under it (using Ctrl/Cmd+[ and Ctrl/Cmd+] key combinations)
4. Adjust the details' positions.
If you need any explanation about certain steps, just ask and I'll give the more detailed description.
Copy link to clipboard
Copied
I really didn't want to take it into Photoshop. I was hoping to learn how to do this in Illustrator. What action is needed to do this? Maybe I can find a tutorial on youtube?
Kim
Copy link to clipboard
Copied
did you draw the main illustration also in Illustrator?
If yes, the action is just to set the z-position of each detail (above/under) using Ctrl/Cmd+[ and Ctrl/Cmd+] shortcuts
Copy link to clipboard
Copied
So, something like this, with the curled ends of the sash as separate paths actually under (or behind) the thistle and the front of the sash
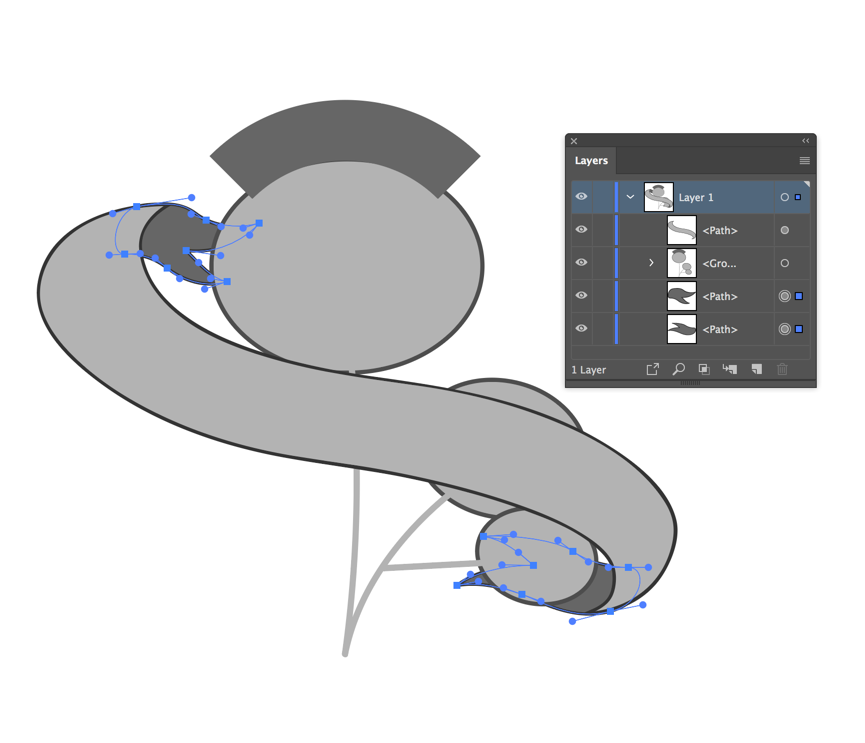
Peter
Copy link to clipboard
Copied
If your illustration is raster, you can choose one of 2 ways.
1. If the image is hard black/White and you don't mind about some small inaccuracy of lines, you can use Image Trace option:
- Place the image and click an Image Trace button on Control Panel
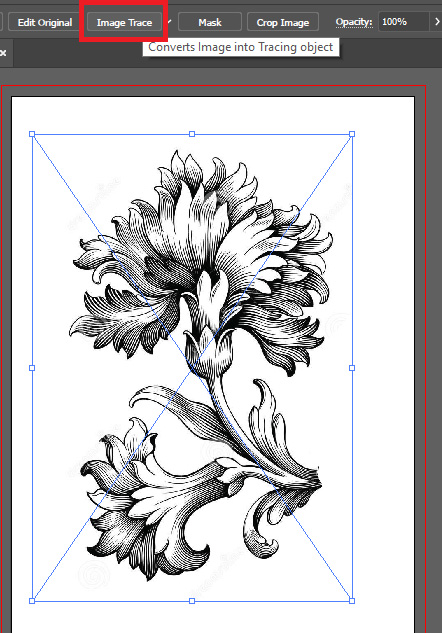
- Expand the Image Trace result
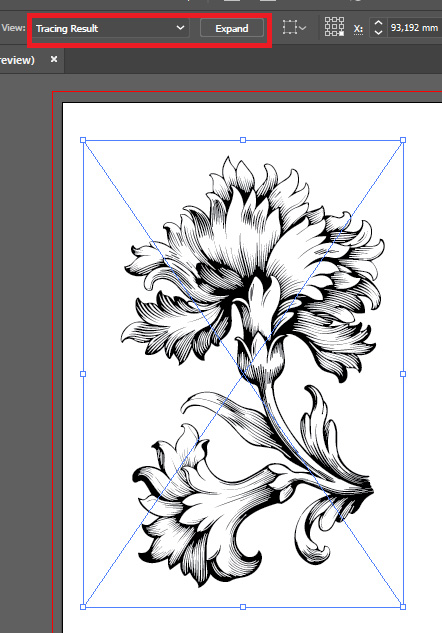
- Double-click on the image to come into the group, select the "background" shape and delete it
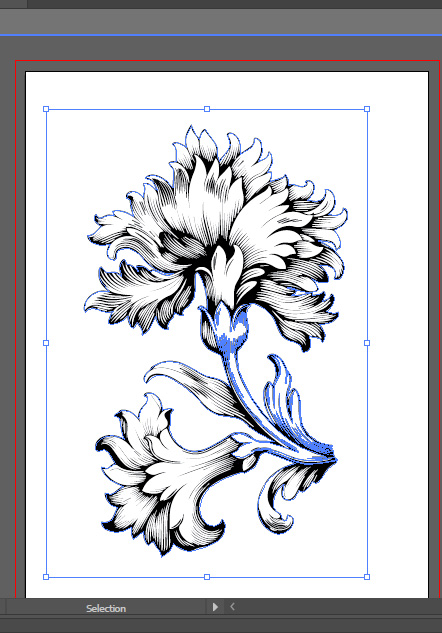
- Close the Isolated Mode (double-click anywhere on the screen out of the image)
- Draw the details of wrapping banner
- Select the "back" details and use Ctrl/Cmd+Shift+[ shortcut to send them totally back or Ctrl/Cmd+[ to send them 1-level backward.
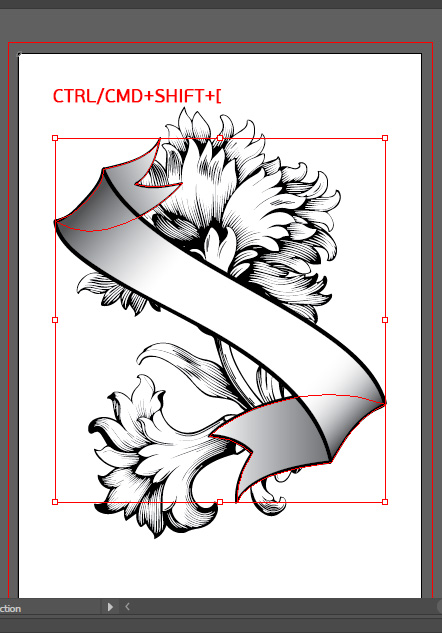
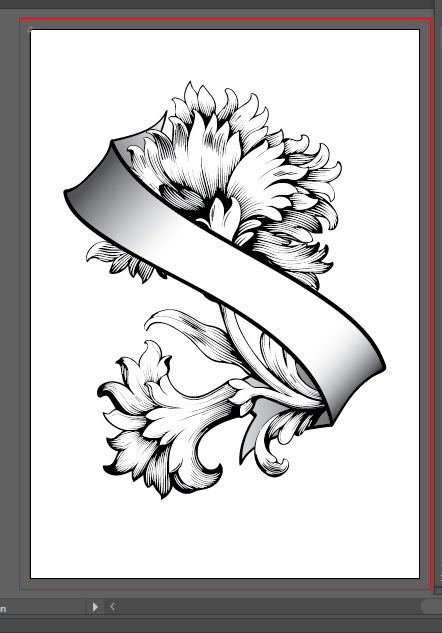
- Here is the result:
Copy link to clipboard
Copied
if the illustration is more complex and you want to keep it fine, you have to not be afraid of Clipping Masks ![]()
The first and last parts (placing the image and from drawing the ribbon) are the same as in the previous version. But intermediate steps are different.
- After placing the image, use the Pen tool to draw more or less precise contour around the illustration. The more precise shape, the better result.
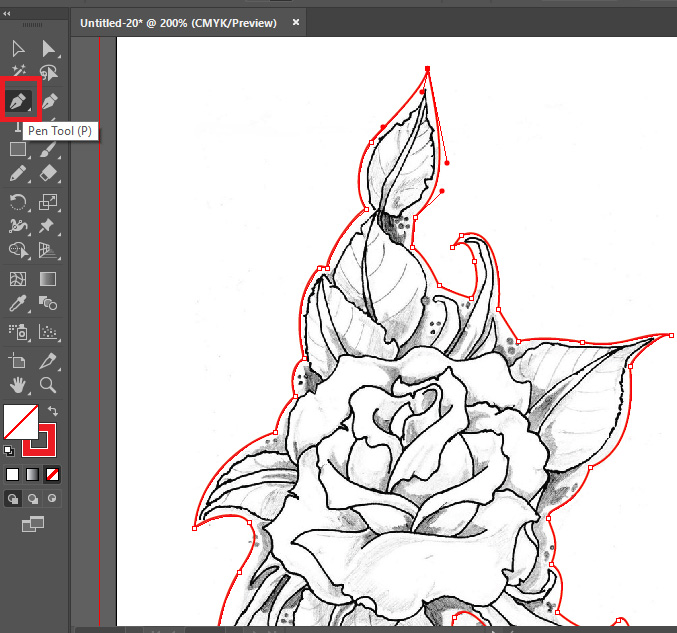
- Choose Object -> Clipping Mask -> Make
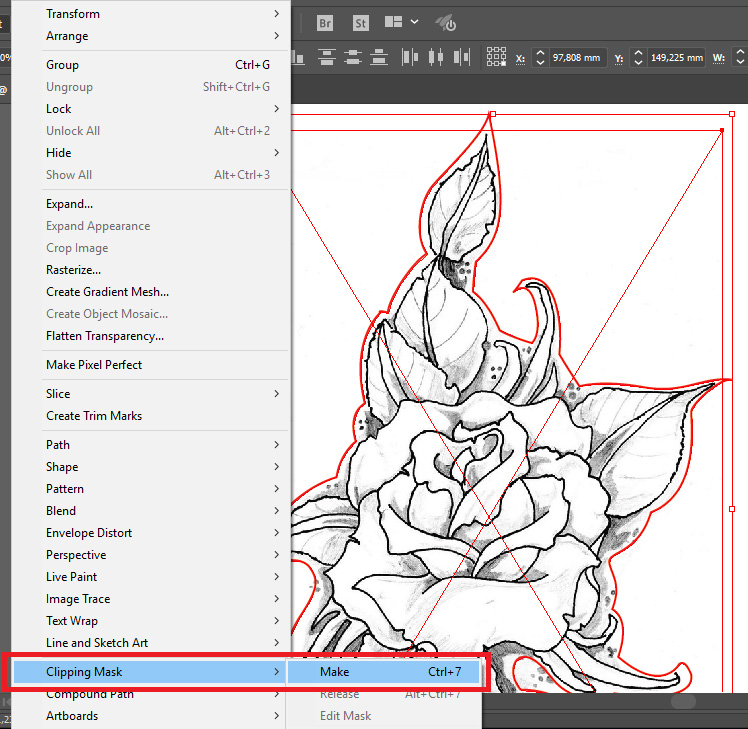
- The area around the object become hidden.
- Draw the ribbon and adjust z-position like is described in the previous post.
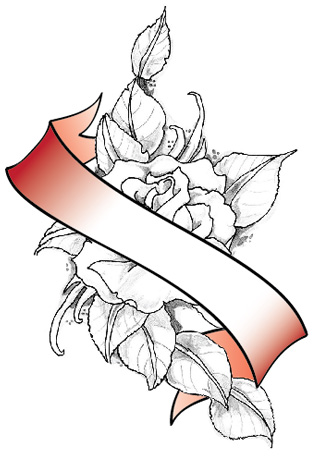
Copy link to clipboard
Copied
Awesomeness!
Copy link to clipboard
Copied
Hey Kim
I think what you're probably after here will involve an opacity mask—they are very similar to masks in Photoshop, too so you should be able to get up and running very quickly.
Create solid shapes based on the parts of the thistle that you's like to be in front of the banner, and copy those to the clipboard, then select the banner, go to the Transparency panel, and select Make Mask.
Click the mask to activate it and paste in your artwork. Same as Photoshop—white to reveal, black to conceal—although Illustrator gives you a couple more options below the mask.
If that's not enough info, look at this page or come back to us. Hope that helps.
Copy link to clipboard
Copied
We could start the Royal Society for Wrapping Objects Around Other Objects.
Copy link to clipboard
Copied
Good grief, Jacob, I go away for a few minutes and everyone shows up! Must be my bedtime.
Copy link to clipboard
Copied
I found this thread in 2024, and it was helpful in manually doing some wrapping on a logo concept I'm working on.
However, for anyone else finding it who also doesn't know, if you're using a new version of Illustrator, there's a tool called "intertwine" that makes this much much easier! At least with paths. I'm not sure about raster objects. Here's a short video that helped get me started. Intertwine will make these tasks much easier going forward.
Thank you to everyone on this thread who helped already!
Get ready! An upgraded Adobe Community experience is coming in January.
Learn more


