Known Participant
April 27, 2020
Answered

How to make objects precisely rotate and match the angle of random diagonal lines, and make it snap

  • April 27, 2020
  • 2 replies
  • 9628 views

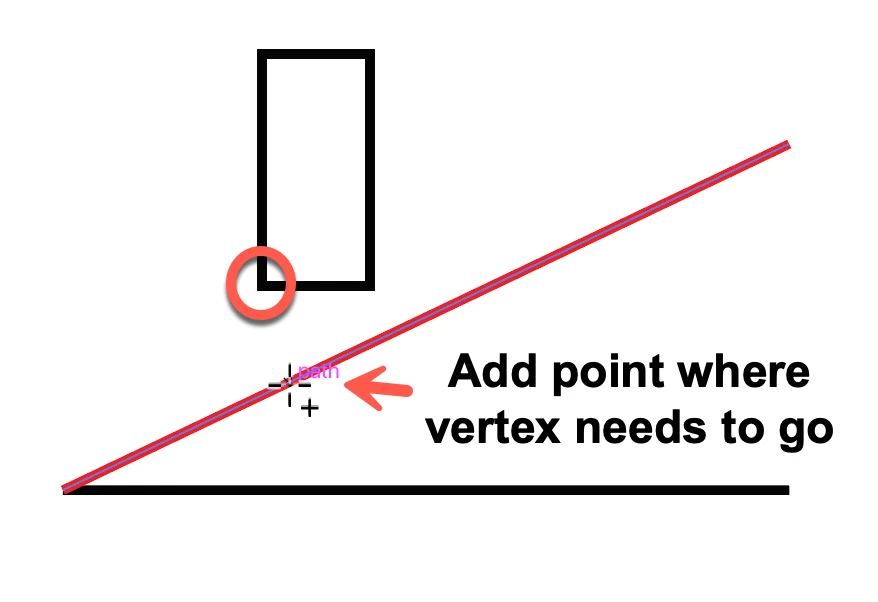
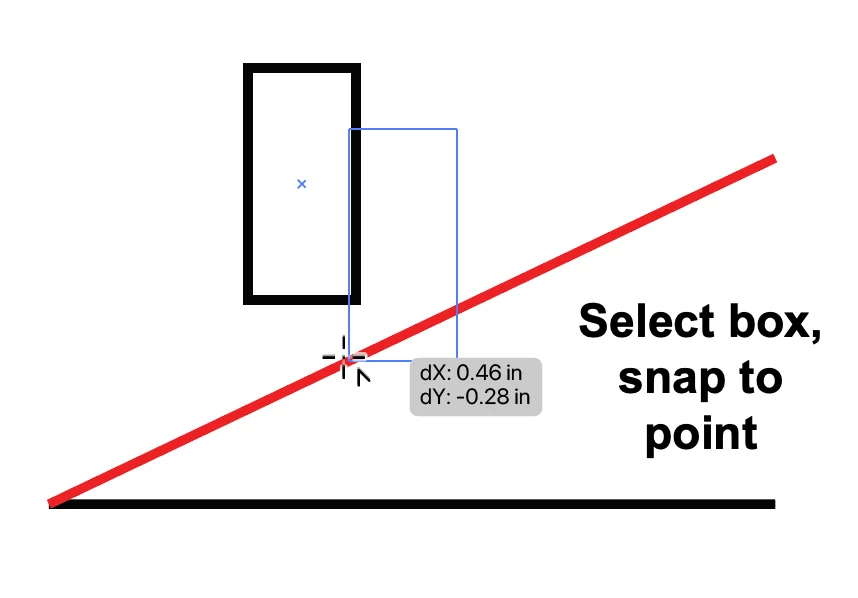
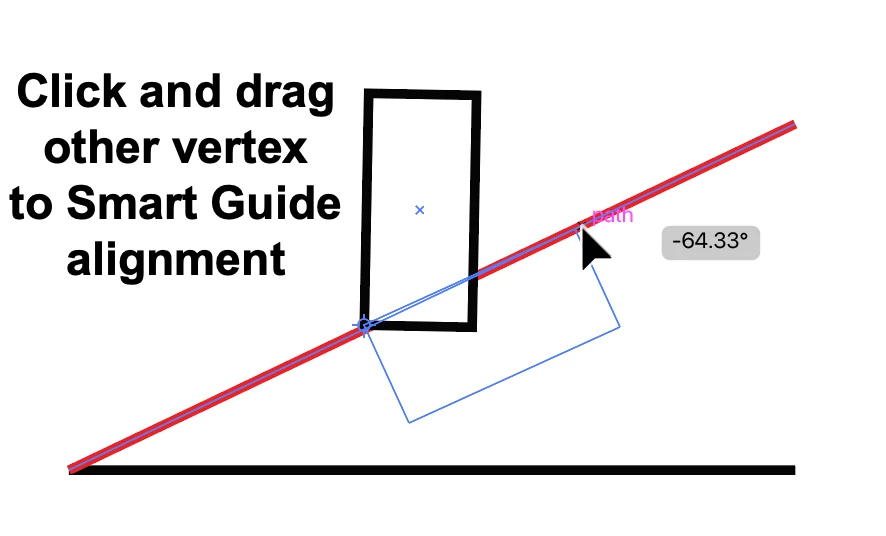
I want to know if there's a precise method of rotating objects to match the angle of random diagonal lines. For example, on the picture below, I want an object (circled black) to rotate and precisely match the red sides of the angles. On the angle on the left (circled red), that angle is exactly 90° and its red side is a vertical straight line, so I can just easily adjust my object and make it snap to that red side.


But I have no easy method that I know of on how to be precise on the angles on the right (circled blue). Angle #1 is basically 45° so I can just make the object rotate while holding shift to match that angle and be precise with it, but I can't make the object snap to that red side unlike the one earlier (the one circled red). For Angle #2 and #3, I really have no clue on how to be precise with my rotation on the object.

This topic has been closed for replies.
Correct answer tromboniator

I'm sure there are other ways, but this is what occurs to me at the moment.


Peter


2 replies

Jacob Bugge
Community Expert
Community Expert
April 27, 2020

Zernolf,


I would also do as Peter says.


Smart Guides can be your best friends, especially when they are allowed to.


Often, Snap to [Whatever] is overused, especially Snap to Grid as mentioned by Monika, which will wreck the use of Smart Guides.


And Smart Guides work fine without other snapping, just their own.


With the Anchor Point as shown by Peter, you can see in his screenshot that Smart Guides say anchor when you are within snapping distance; when you are within snapping distance of the line (and move along it) they say path. (until you get into snapping distance of Anchor Points or intersections or whatever).


You may also consider which Smart Guides options/settings suit you best (and omit unecessary/confusing ones).


If you need the other corner of your box to hit the other line exactly, as may be the case in your #3, you can do (almost) the same, only (kind of) reversed, as follows:


1) Select the red line and Object>Path>Offset Path with the offset equalling the box height,

2) ClickDrag the box by its lower right corner to snap to the intersection of the red offset path and the black line, Smart Guides say, guess what, intersect;

3) Set that corner as the centre of rotation and ClickDrag the opposite corner to snap to the red line, Smart Guides say path;

4) Delete the red offset path.


tromboniator
Community Expert
tromboniatorCommunity ExpertCorrect answer
Community Expert
April 27, 2020

I'm sure there are other ways, but this is what occurs to me at the moment.


Peter


Z_GeovaniAuthor
Known Participant
April 27, 2020

I tried following your process step by step, but I wasn't really able to do it the way you did. The corner point of my object just doesn't snap to the point I created in the red line/side of the angle. I guess the snapping feature just behaves differently in my Illustrator. In order to make mine work, I had to drag guides from the ruler to mark the point that I added in the red line/side of the angle, and use those guides to make my object snap to that point. After that, I just followed your use of the Rotate Tool, and I was able to do it. Thanks for the help!


tromboniator
Community Expert
Community Expert
April 27, 2020

You're welcome. I'm glad you were able to find some use in my method. There are doubtless some points of finesse that I overlooked.


Peter