Geuse
Participant
June 13, 2019
Answered

Need some guidance on how to design the magic carpet from Aladdin

  • June 13, 2019
  • 2 replies
  • 2528 views

Hi! I thought I'd start a project and learn some illustrator at the same time.

What I want to achieve is the design of the carpet in Aladdin(1992) to then be used as a texture for 3D-animation.

Now I'm pretty confident in Photoshop, but I have never used Illustrator before.

I'm not entirely sure how you you'd start tackling this. Just to be clear. This is the design.

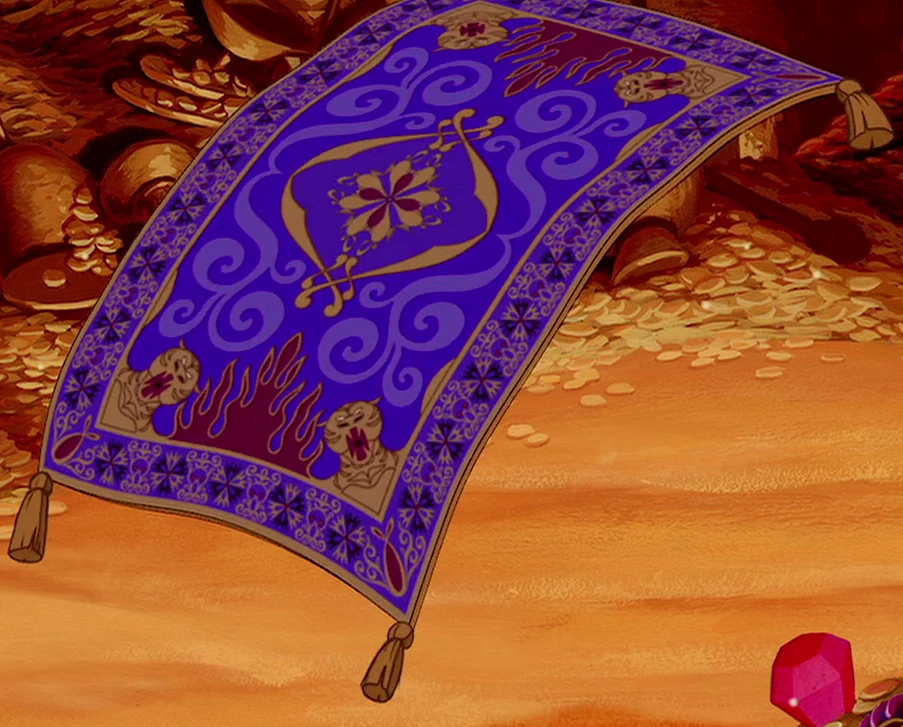
Sadly there doesn't exist a really accurate illustration of it on the web so I'm eyeballing and estimating the dimension of things.

Creating the vector paths is pretty straight forward and seems to be the same thing as I do in Photoshop.

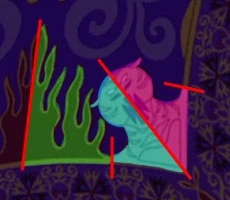
My main issue at the moment are the tigers in the corners and the fire. I want the tigers to be symmetrical and then I need the fire on one side and on the other side it should just continue upwards.

Like in this picture I'm thinking I want it separated and have it so the fire lines up on one side and on the other the border around the carpet should line up.

My main obsession is that I want it to be easy to modify so I can go in and change stroke thickness and tweak the tigers if need be. What kind of mechanism ar there for this? Because of this I think I need to decide whether to create the line art in one piece like so

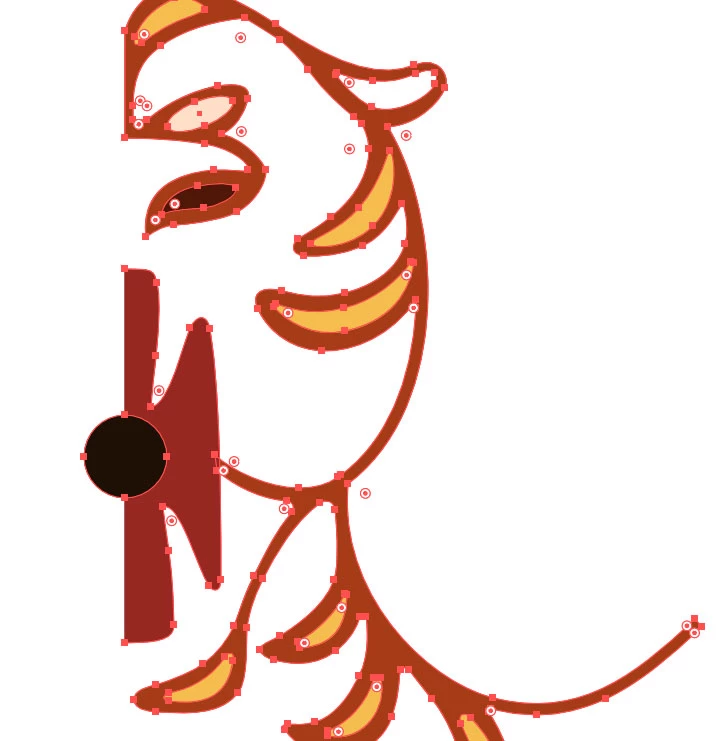
but that would make it harder to change stroke thickness.

My other idea is to just add a stroke around the design which thickness can be easily modified and then fill in the design with separate shapes that's easier to move. Here I've added a black stroke to visualize the separated parts lying on top of each other

Also, from the image above, is there a way to make the border stroke not show on certain sides?

Ok, that's plenty of pictures. I hope my questions come across.

    This topic has been closed for replies.
    Correct answer Jacob Bugge

    geuse,

    You may create symmetrical shapes with live mirroring:

    1) Create the outer carpet rectangle;

    2) Create one half of each symmetrical shape (flames and tiger and so on) in its position on the carpet (for the tiger you may select everything and rotate by -45 degrees (or 45 degrees if you choose the left bottom corner), then rotate everything back (in exactly the some position) afterwards; by using an outer path with a stroke and adding strokes into the shapes you keep the highest possible degree of editability (rather than outlined strokes as shown in your third image), and you can use Live Paint Group if you wish different fill colours; by using live mirroring you can see the full picture as you go, thereby getting there or getting closer in the first go, see how below;

    3) Rotate copies of the finished shapes to the other positions.

    For a simple one to two mirroring as yours, you may see the reflection live after each Anchor Point if you start out as follows (for Pen Tool with vertical reflection to the right, similar for other directions):

    1) Create the first two Anchor Points of your basic left half path;

    2) Effect>Distort&Transform>Transform>ReflectX with 1 copy and the middle right side Reference Point chosen;

    3) With the Pen Tool ClickDrag (or Click) anew from the second Anchor Point and go on;

    If you wish, you may:

    4) Object>Expand Appearance and Ctrl/Cmd+J to join the half paths.

    Ctrl/Cmd+Z Undo is your friend: you can just go back and redo while drawing the basic path.

    Or you can use the MirrorMe plugin from Astute Graphics,

    http://www.astutegraphics.com/software/mirrorme/

    2 replies

    Jacob Bugge
    Community Expert
    Jacob BuggeCommunity ExpertCorrect answer
    Community Expert
    June 13, 2019

    geuse,

    You may create symmetrical shapes with live mirroring:

    1) Create the outer carpet rectangle;

    2) Create one half of each symmetrical shape (flames and tiger and so on) in its position on the carpet (for the tiger you may select everything and rotate by -45 degrees (or 45 degrees if you choose the left bottom corner), then rotate everything back (in exactly the some position) afterwards; by using an outer path with a stroke and adding strokes into the shapes you keep the highest possible degree of editability (rather than outlined strokes as shown in your third image), and you can use Live Paint Group if you wish different fill colours; by using live mirroring you can see the full picture as you go, thereby getting there or getting closer in the first go, see how below;

    3) Rotate copies of the finished shapes to the other positions.

    For a simple one to two mirroring as yours, you may see the reflection live after each Anchor Point if you start out as follows (for Pen Tool with vertical reflection to the right, similar for other directions):

    1) Create the first two Anchor Points of your basic left half path;

    2) Effect>Distort&Transform>Transform>ReflectX with 1 copy and the middle right side Reference Point chosen;

    3) With the Pen Tool ClickDrag (or Click) anew from the second Anchor Point and go on;

    If you wish, you may:

    4) Object>Expand Appearance and Ctrl/Cmd+J to join the half paths.

    Ctrl/Cmd+Z Undo is your friend: you can just go back and redo while drawing the basic path.

    Or you can use the MirrorMe plugin from Astute Graphics,

    http://www.astutegraphics.com/software/mirrorme/

    Geuse
    GeuseAuthor
    Participant
    June 14, 2019

    Thank you very much Monika Gause.

    My main grip is that whenever I offset a path I create a new one, disconnected from my main shape, so if I need to tweak the overall shape I will have to redo the offset or tweak the shape and it's impossible to alignot perfectly. For instance if I need it to be 5 pixels apart I just have to rely on eyeballing it. Or that's what I'm thinking anyways. I guess I'm kinda looking for a way to have the stroke just follow the inside contour just like the stroke effect in Photoshop does. I think that is what's going to be best for this design as I will need to have to tweak it. One thing that struck me also is the "smart object" function. This ought to exist in Illustrator as well?

    I can create my right side, then save it as an ai file and then do "import as smart object". First I import it in a document where I mirror it, then save it as a new ai file. Lastly I import it into my final carpet assembly file, position it and line up the edges with the fire and the border.

    @Jacob Bugge, thank you. I have some things to look into now.

    Jacob Bugge
    Community Expert
    Community Expert
    June 14, 2019

    Geuse,

    My main grip is that whenever I offset a path I create a new one, disconnected from my main shape,

    You may, to create an offset duplicate that follows the original:

    1) Create the path,

    2) In the Appearance palette (flyout) Add New Stroke,

    3) Effect>Path>Offset Path.

    When certain, you may Object>Expand Appearance to get (a Group of) two separate paths.

    Monika Gause
    Community Expert
    Community Expert
    June 13, 2019

    You're correct that it would be easier to adjust line thickness when everything is in single pieces. Instead of applying a stroke to the shape, you could also use the Effect > Path > Offset path with either positive or negative values. You will need to Expand appearance afterwards in order to get the effect turned into paths.