

- Home
- InDesign
- Discussions
- Re: Aligning paragraph shading offset to margin
- Re: Aligning paragraph shading offset to margin

Copy link to clipboard
Copied
Hi all,
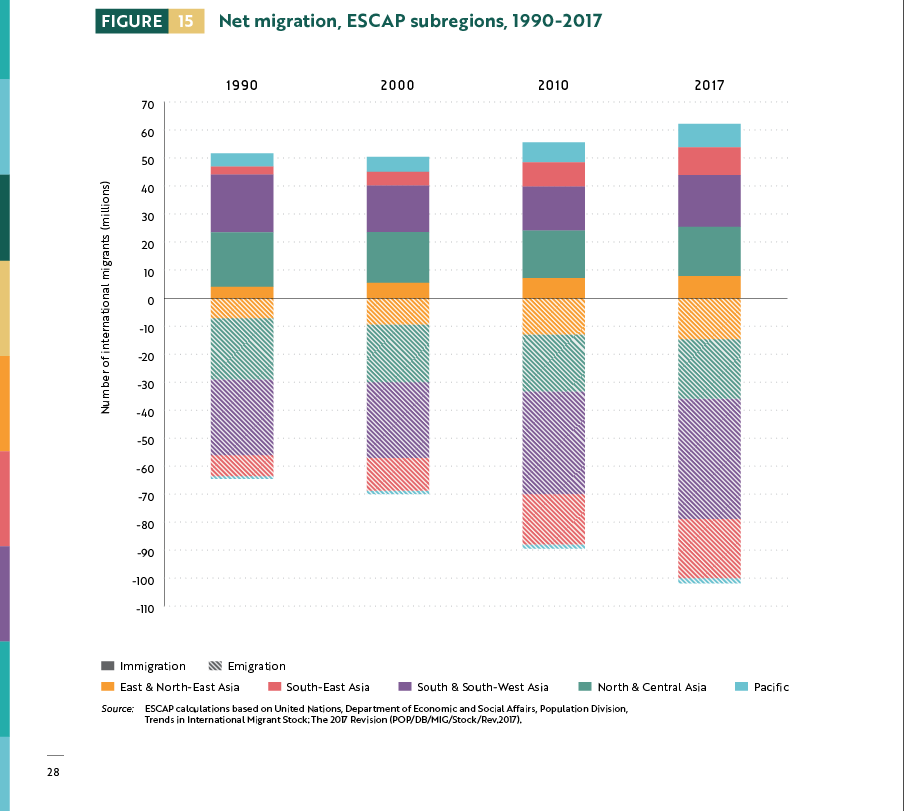
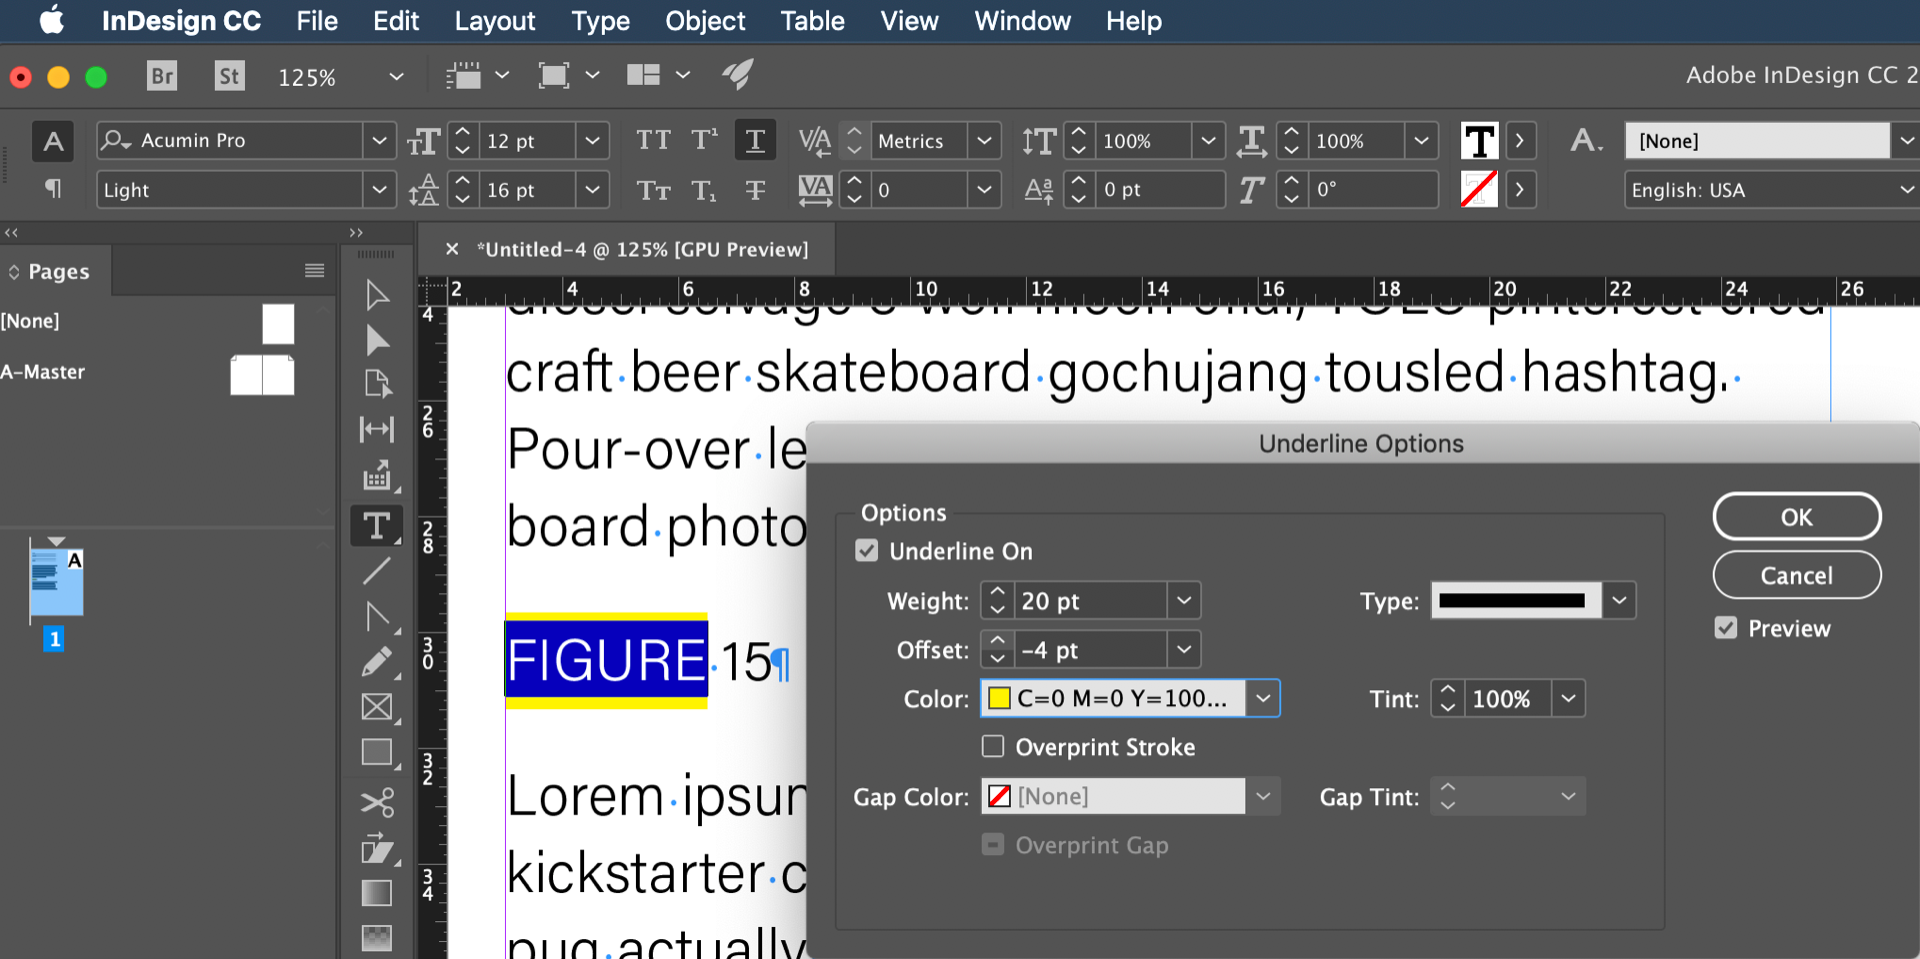
I use paragraph shading with offset to create a box for title name of graphs (FIGURE 15).
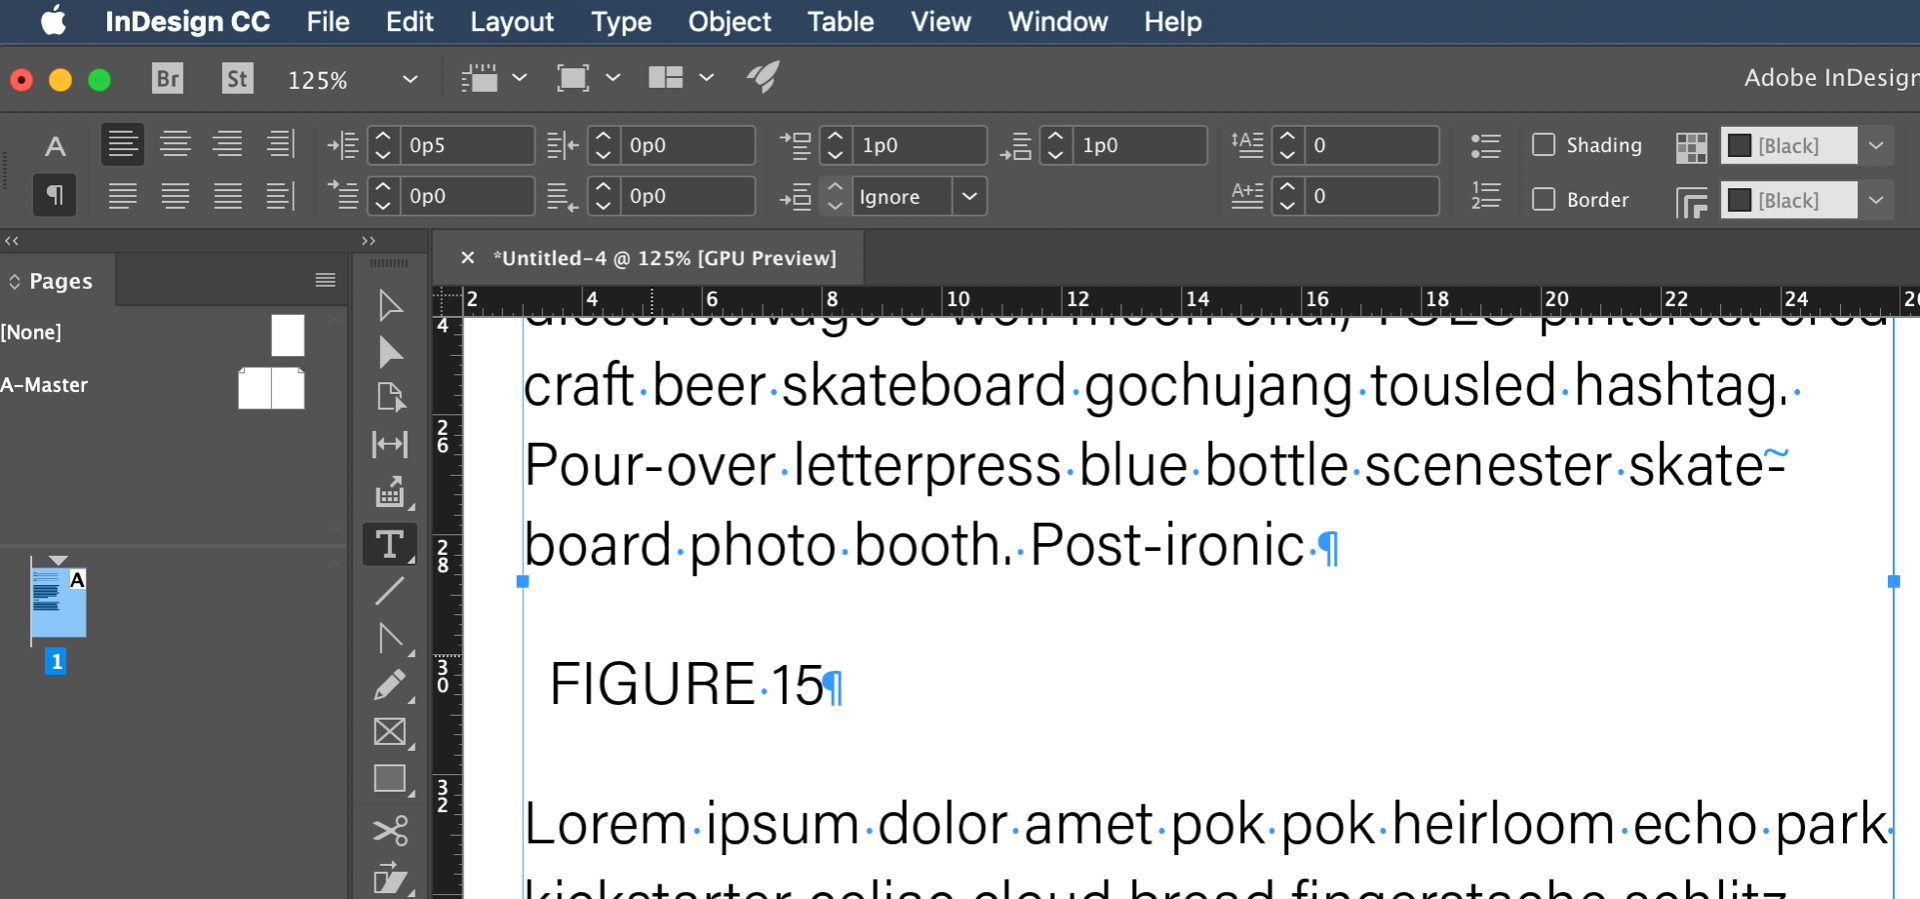
However, the offset goes over the margin:

How do I make it so the text box automatically adjust so that the green shading offset aligns perfectly with the margin? I tried using paragraph style inset but it doesn't work. I used Object Style Size and Position options and it does work. Is there a way to set this using paragraph style only, without using object style?
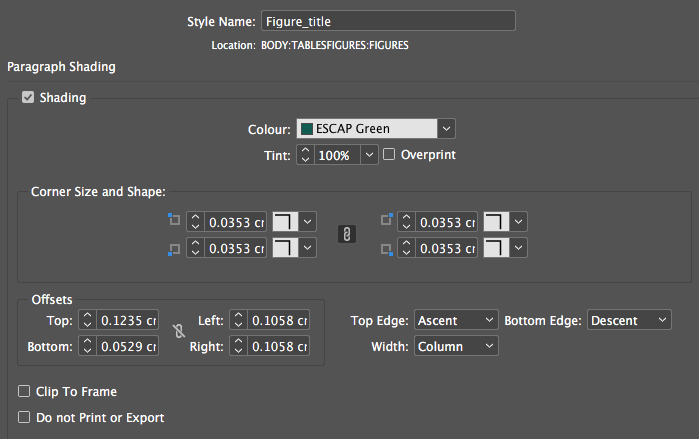
Here's my screen cap for paragraph shading style:


 1 Correct answer

Hi wuts23143389 :
I would set up a paragraph style as follows:
- Define a left indent for the figure title.
- Adjust the offsets as desired.
~Barb
 11
Replies
11
11
Replies
11

Copy link to clipboard
Copied
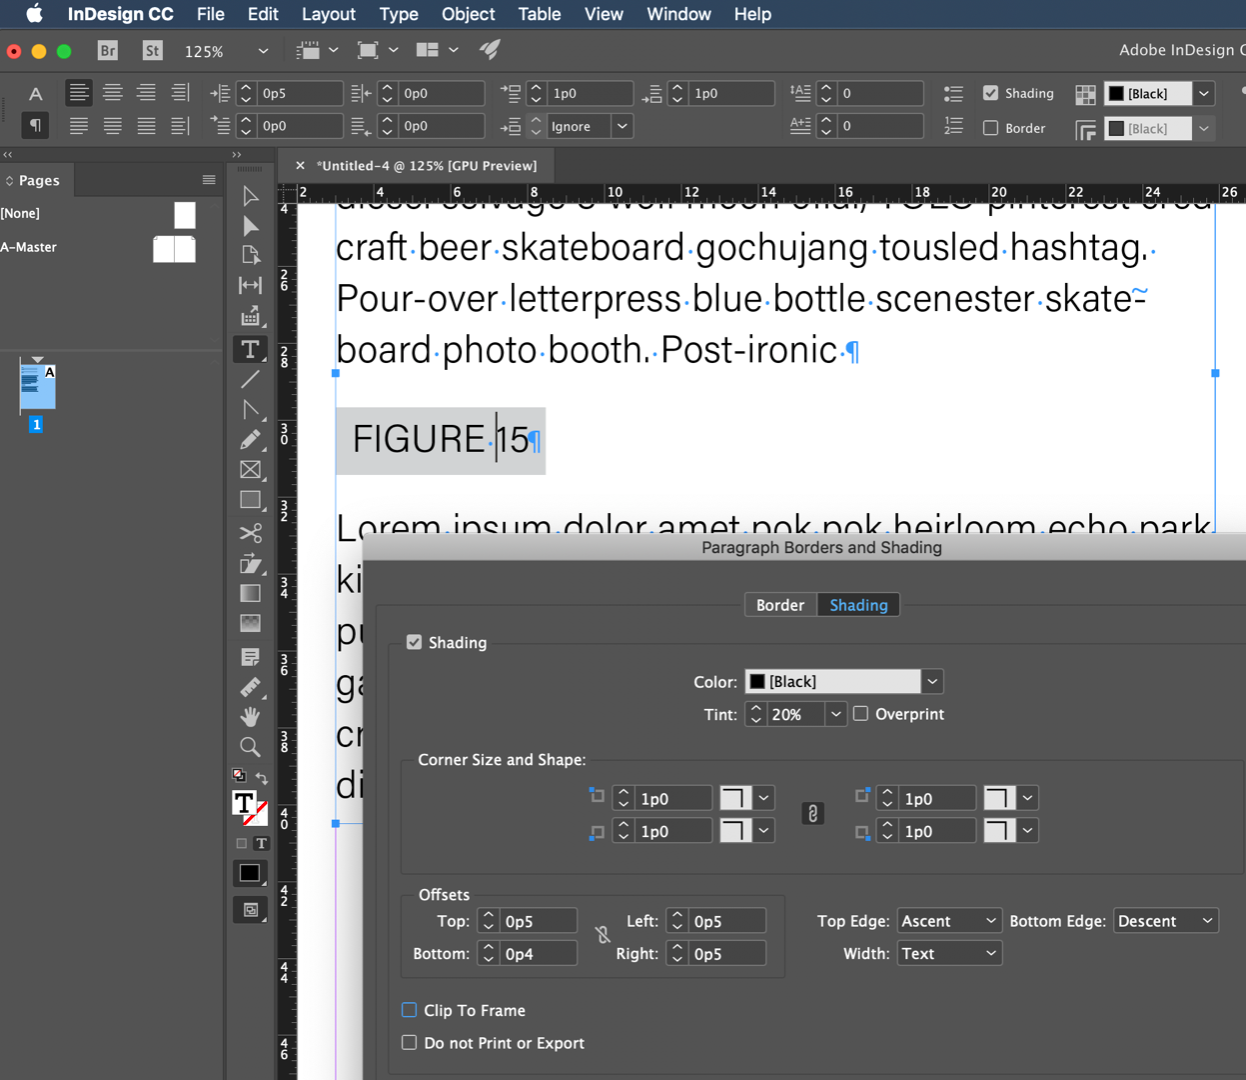
Either make an inset in the paragraph style or make an offset in the frame settings (cmd+B) and save both in styles (Paragraph or Object Styles or both).
I would strongly recommend you to use one (1!!!!) single frame instead 3 as you do now.
Alternatives are: Paragraph Linke, Underline and Strike Through to accomplish it with a single frame and a single Paragraph Style with Nested Styles.)
Copy link to clipboard
Copied
Hi Willi thank you so much. I managed to fix the problem according to your advice.
I'd love to do single text frame as well; however I want the word "Figure" to have green shading, the figure number to have yellow shading, and the following title to have no shading. How do I do that with nested style? Nested style only allows me to apply character styles, not paragraph styles? Is there a way to include shading in character style?

Copy link to clipboard
Copied
Hi wuts23143389 :
I would set up a paragraph style as follows:
- Define a left indent for the figure title.
- Adjust the offsets as desired.
~Barb
Copy link to clipboard
Copied
Thank you Barb, that works. I forgot to clear the left offset after applying left inset, you made me re-evaluate my paragraph style and now it works 
Before I marked this thread as answered, can I also ask you the same question as I asked Willi?
How do I make the figure heading into single text frame instead of multiple ones? Willi suggested nested style but I don't know how to apply green paragraph shading to the word "figure", then yellow to the number, then no paragraph shading for the text.

Copy link to clipboard
Copied
Hi wuts23143389 :
Sorry, I meant to address that earlier—border and shading are paragraph level commands so if you want different shading they have to be different paragraphs, which them means that they won't be able to appear on the same line, as they do now. Unless you want to draw manual boxes behind the text, which I don't recommend.
As I tell my students, sometimes it is worth letting go of a look that you like and redesigning the document in a way that works with the software, rather than fighting it.
~Barb
Copy link to clipboard
Copied
Thank you Barb for your insights. Just out of curiosity, is it possible to recreate this though using the underline function in the character style?
Copy link to clipboard
Copied
Well yes, darn it!
You can underline the word Figure, Alt/Opt click on the Underline icon on the Control panel and set up the desired look.( Note that I added an en space on both sides—you can play with the spacing.)
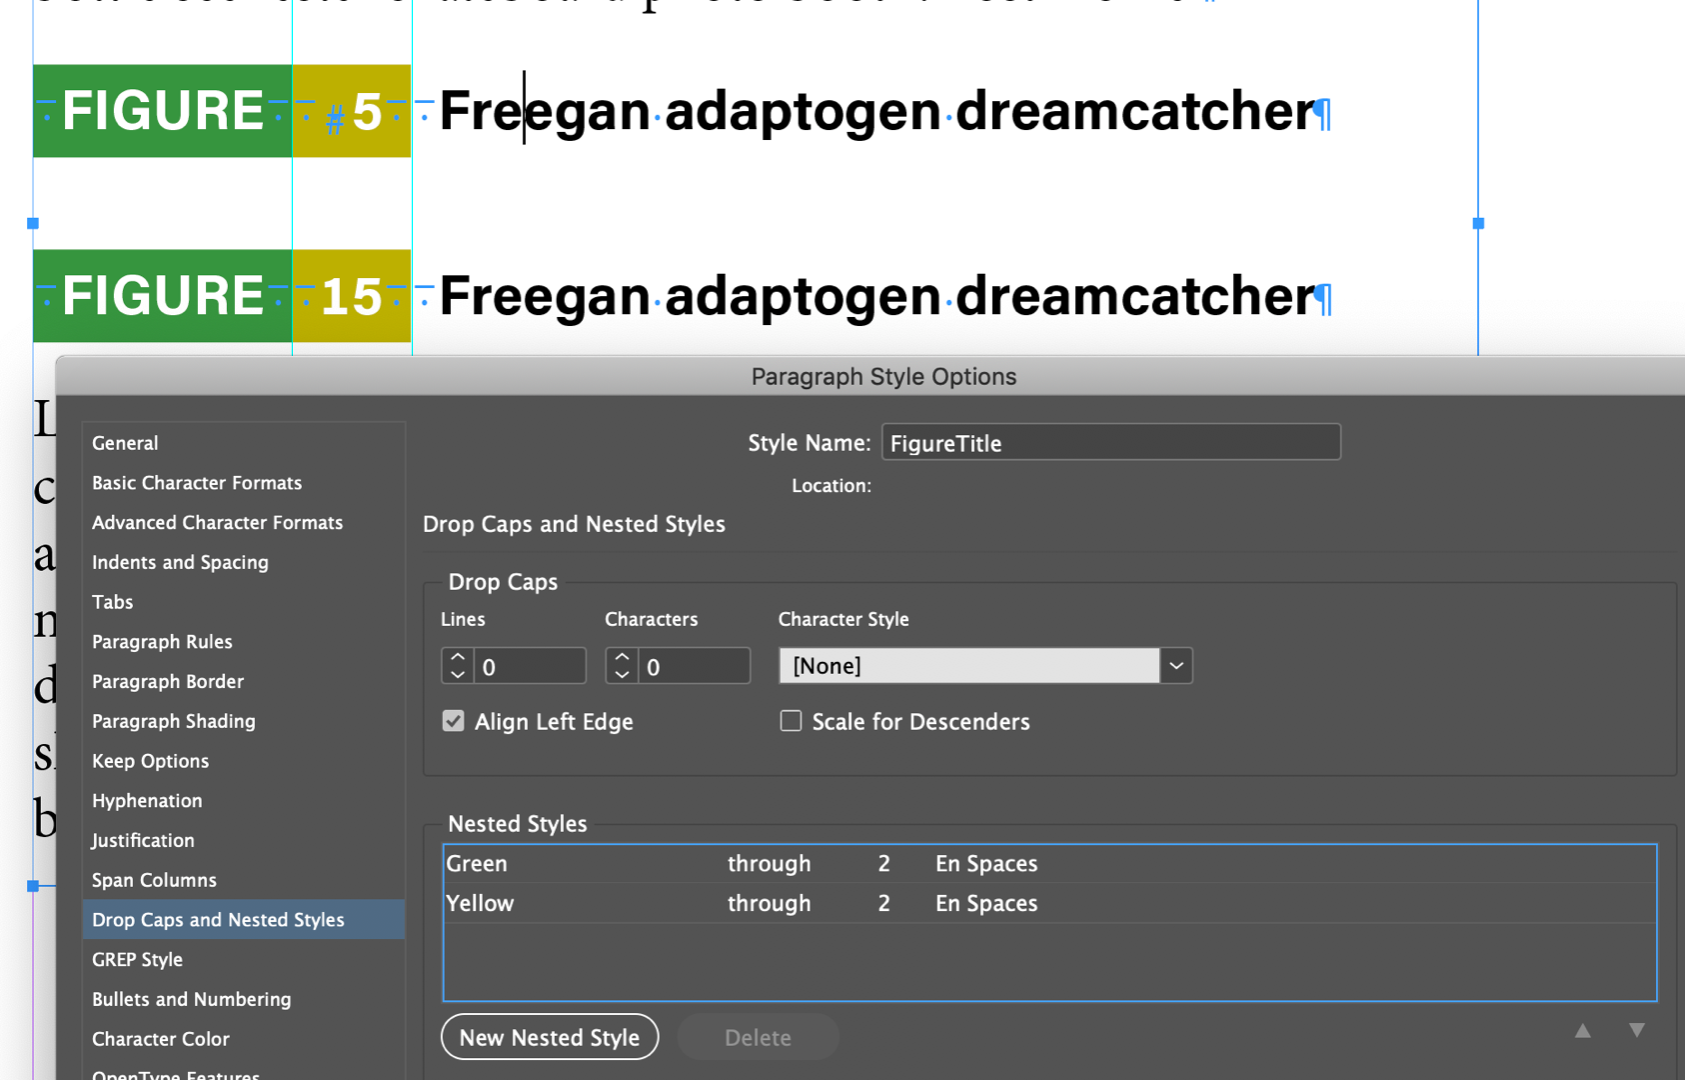
Save it as a character style and repeat for the number. After setting up both, you can nest the character styles into the Paragraph style with Drop Caps and Nested Styles so that you can assign them all with a single click.
~Barb

Copy link to clipboard
Copied
Hi Barb, thank you so much.
While I was waiting for your reply I came up with very similar solution:

I created 3 character styles:
1) Green Shading
2) Yellow Shading (based on green shading)
3) No Shading (based on green shading, but disable all caps, and change character color)
Then I also used the en dashes to control the spacing, then apply nest style to the paragraph.
However, there are two problems I see:
1) In the future if there are more figures, that mean I have to reformat the figure titles with this exact amount of en spaces, so it can be quite tedious. I guess I could use GREP find and replace function for this.
2) More importantly, unlike paragraph shading where you can control the spacing to be fixed, the yellow shading will change in width according to the character:

As you can see, Figure 2 will have less width than Figure 15, which isn't what I want. I want the yellow shading behind the numbers to be of the same width. Do you know if there's a solution to this?
Willi Adelberger – perhaps you could help? (don't know how to mention your name since it has space in it, hope you see this)
Copy link to clipboard
Copied
Hi wuts23143389:
You can use a figure space with tabular lining figures in front of the single digits.

~Barb
Copy link to clipboard
Copied
Hi Barb thank you.
Regarding using figure space with tabular lining, that would mean the single digit won't be aligned to the center of the yellow shading though.
Regarding the nested style, I see what you meant more clearly now. I definitely didn't need the "no shading" character style. Thank you!

Using only two character styles now

Copy link to clipboard
Copied
And yes to GREP find/change to add the myriad em spaces (and figure space for the single digits).
Did you understand what I meant about the nested styles?
Starting here:

After defining the nested styles (total of 2—you don't need one for the text without a colored background), it's one click to format:
~Barb

Get ready! An upgraded Adobe Community experience is coming in January.
Learn more
 AdChoices