


Copy link to clipboard
Copied
Because of problems with figure numbering in an existing document, I decided to make a fresh start with a new document. However, I'm not getting bleed lines 0.0625" outside the page borders, as I thought I had received by default with previous documents. Or maybe something changed within inDesign?
Would one of you please show me how to get the bleed lines added to page masters.
Best,
jwc


 1 Correct answer

You need to check the link icon to select different measurements.

 20
Replies
20
20
Replies
20

Copy link to clipboard
Copied
In an existing document, go to File > Document Setup > expand the bottom section, and set the bleed. It will show up on all pages. In a new document, you can do it in the New dialog box.
If you did this and they are not showing check a couple of things:
- If you are in Preview mode, you won't see guides. Change to Normal mode (View menu)
- Make sure your guides are visible and not hiding (View menu)
Copy link to clipboard
Copied
Thanks, I'm almost there, with a document 8.5" square with facing pages and .01525 bleed lines. All looks good until i select 'OK'; then the bleed lines disappear. When I return to document setup, all settings are reset back to zero.
What else is required to make these settings permanent, and have the bleed lines show up where they should . be?
Copy link to clipboard
Copied
You should be adding 0.125” to each edge, top, bottom and side (not the inner margin of the facing pages) and check you’re in Normal mode (as opposed to Preview mode).
Copy link to clipboard
Copied
The only 'Preview' I found was a checkbox at lower L corner of the Document Setup page. If I uncheck that to go to normal, all bleed lines disappear.
Or is there a different place to set preview/normal mode?
Copy link to clipboard
Copied
There are several ways to do this, maybe the easiest way is to use the keyboard shortcut - with nothing selected, press the “w” key - it toggles backwards and forwards between the Preview and Normal views.
I always pres Esc before hitting “w” to ensure I have nothing selected.
Copy link to clipboard
Copied
OK, In normal mode(?) I see the document bleed lines and margin lines. Then I press ‘w’ to go to preview(?) , and all lines are gone. If I press ‘w’ again’, the lines return. Again, in order to see bleed lines I still need to retain a 1/16” inside bleed, but do not see the harm in that.
BTW, for the benefit of anyone from Adobe, I do not believe that the video linked to the Help system on this topic s current. The buttons that the instructor pointed to are not visible on my inDesign CC v. 13.1.
Best,
jwc
Copy link to clipboard
Copied
You are not talking to Adobe on this forum, it's run by volunteers.
Here's a screen shot of what your new document set-up should look like, using your example of a TPS of 8.5" x 8.5".
You would also need to decide on the margins, columns and whether you wanted to use a Primary Text Frame and the number of pages, though that number can be added or reduced later.
The Preview is to see the page on the pasteboard when you're setting it up, it's not Preview Mode.

Copy link to clipboard
Copied
Jack wrote
BTW, for the benefit of anyone from Adobe, I do not believe that the video linked to the Help system on this topic s current. The buttons that the instructor pointed to are not visible on my inDesign CC v. 13.1.
Good morning, Jack,
Could you please post the link to the Help video you saw? If it it out of date, I can report it to the right people at Adobe. I'd be happy to look at it!
~ Jane
Copy link to clipboard
Copied
Jack wrote
The only 'Preview' I found was a checkbox at lower L corner of the Document Setup page. If I uncheck that to go to normal, all bleed lines disappear. Or is there a different place to set preview/normal mode?
Yes, Preview mode is different from Preview for a dialog box.
Preview in Dialog Boxes
In most dialog boxes, you have the option to Preview the changes you are making. It is optional if you check this. When you choose the OK command button, you will still get the settings you select. I asked an Illustrator engineer why the Preview checkbox wasn't on by default and he said that on older, slower systems Preview can cause crashes.

Screen Modes
You have five screen modes, and can access them in three places or use shortcuts. When you are in Preview Mode, you will not see the bleed guides (or other guides), which is what I said earlier. (Why do engineers use the same word in different places to mean different things?!?)
- View menu > Screen Mode

- Application bar > Screen Mode
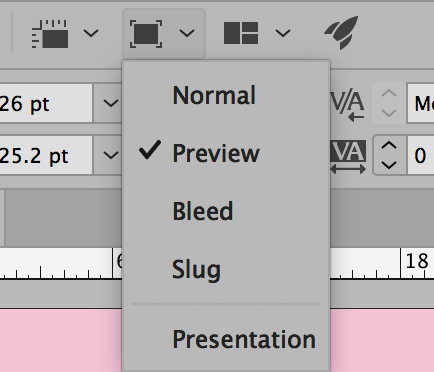
- Toolbar > Screen mode button

- “Shift + W” is the shortcut for Presentation
“W” is the shortcut to toggle between Normal and Preview, Bleed, or Slug, depending on which you used last.
Pressing Escape first ensures you have the Selection tool and do not type Ws into your text.
Does this help?
Copy link to clipboard
Copied
Yes, very helpful
Copy link to clipboard
Copied
When you set up a new document with print as the intent, you select the Trimmed Page Size (TPS) for example A4, and to this dimension you add the Bleed to each outer edge, which is normally 3mm / 1/8”. That is unless you have facing pages, where you don’t have bleed on the inner edges.
Copy link to clipboard
Copied
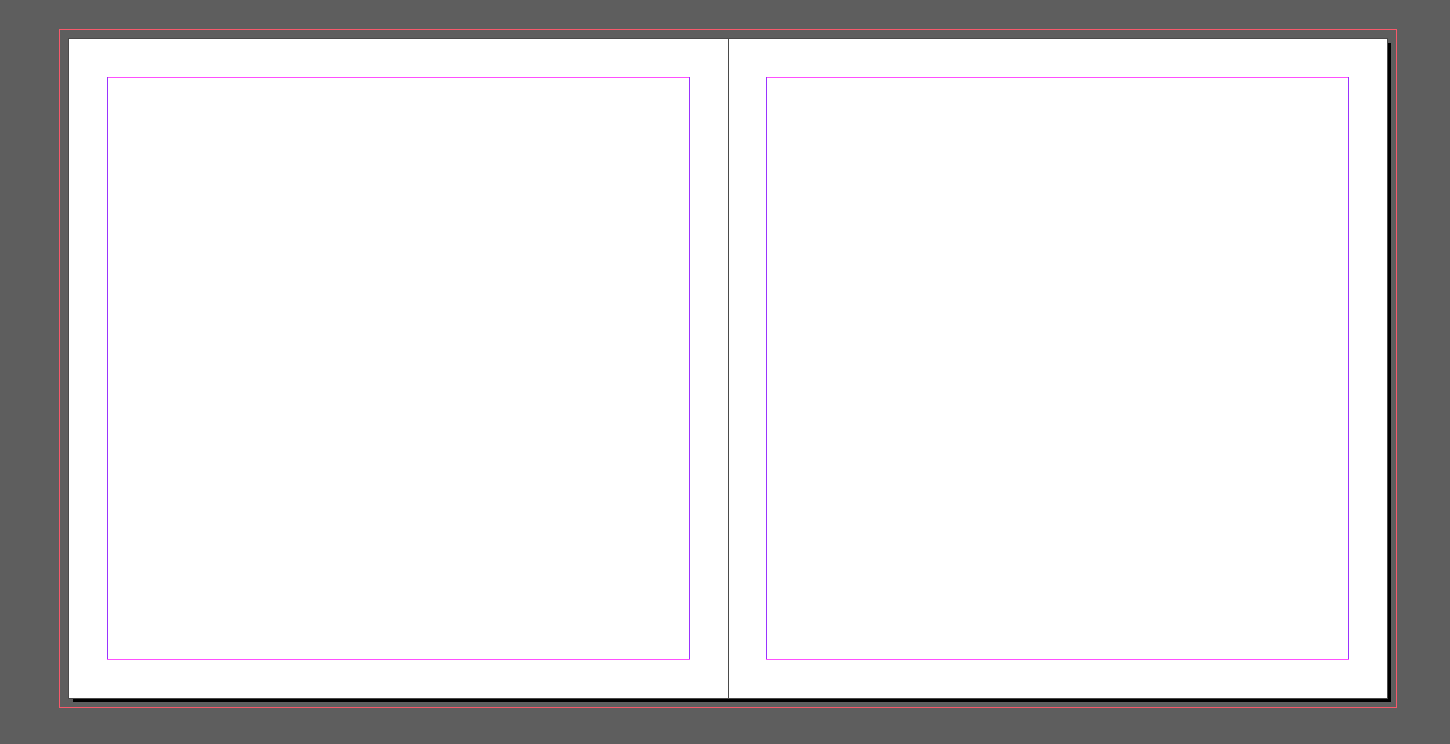
This is how a double page spread on the above setup would look like on your screen in Normal mode (View > Screen Mode > Normal). You can see the page size plus the this red line outside which is the bleed area.
Copy link to clipboard
Copied
Yes, that is exactly what I am seeing. But I believe that the inner bleed lines are somehow being masked by the inner joint in the spread.
Best,
jwc
Copy link to clipboard
Copied
There's no such thing as "inner bleed lines", do you mean the lines that indicate the margins? You can adjust these if you've already set up your new document – Layout > Margins and Columns.
Copy link to clipboard
Copied
Forgive me, I was just pointing out that the document setup (bleed) requires1/16”. for inner bleeds even though they are not display. I tried setting only those to zero, but when I did that, I lost all bleeds.
jwc
Copy link to clipboard
Copied
1/16" bleed is very unusual – as is inner bleed. What kind of binding is your document to have?
By the way, which version of InDesign and OS do you have?
Copy link to clipboard
Copied
This one is perfect-bound (glued together).
Copy link to clipboard
Copied
You need to check the link icon to select different measurements.
Copy link to clipboard
Copied
OK, got it, thanks.
jwc
Copy link to clipboard
Copied
1/16” bleed is what jy printer requires for images designed to occupy entire pages or spreads.
jwc

Find more inspiration, events, and resources on the new Adobe Community
Explore Now
 AdChoices