


Copy link to clipboard
Copied
Hi there guys,
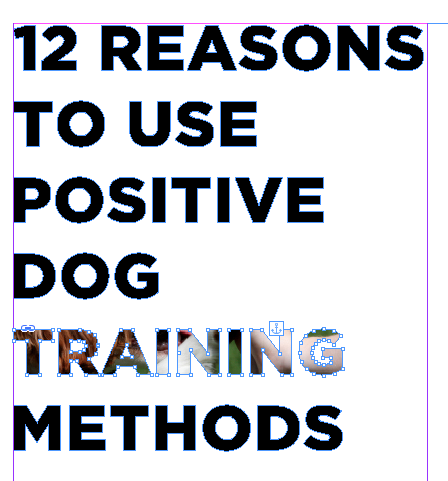
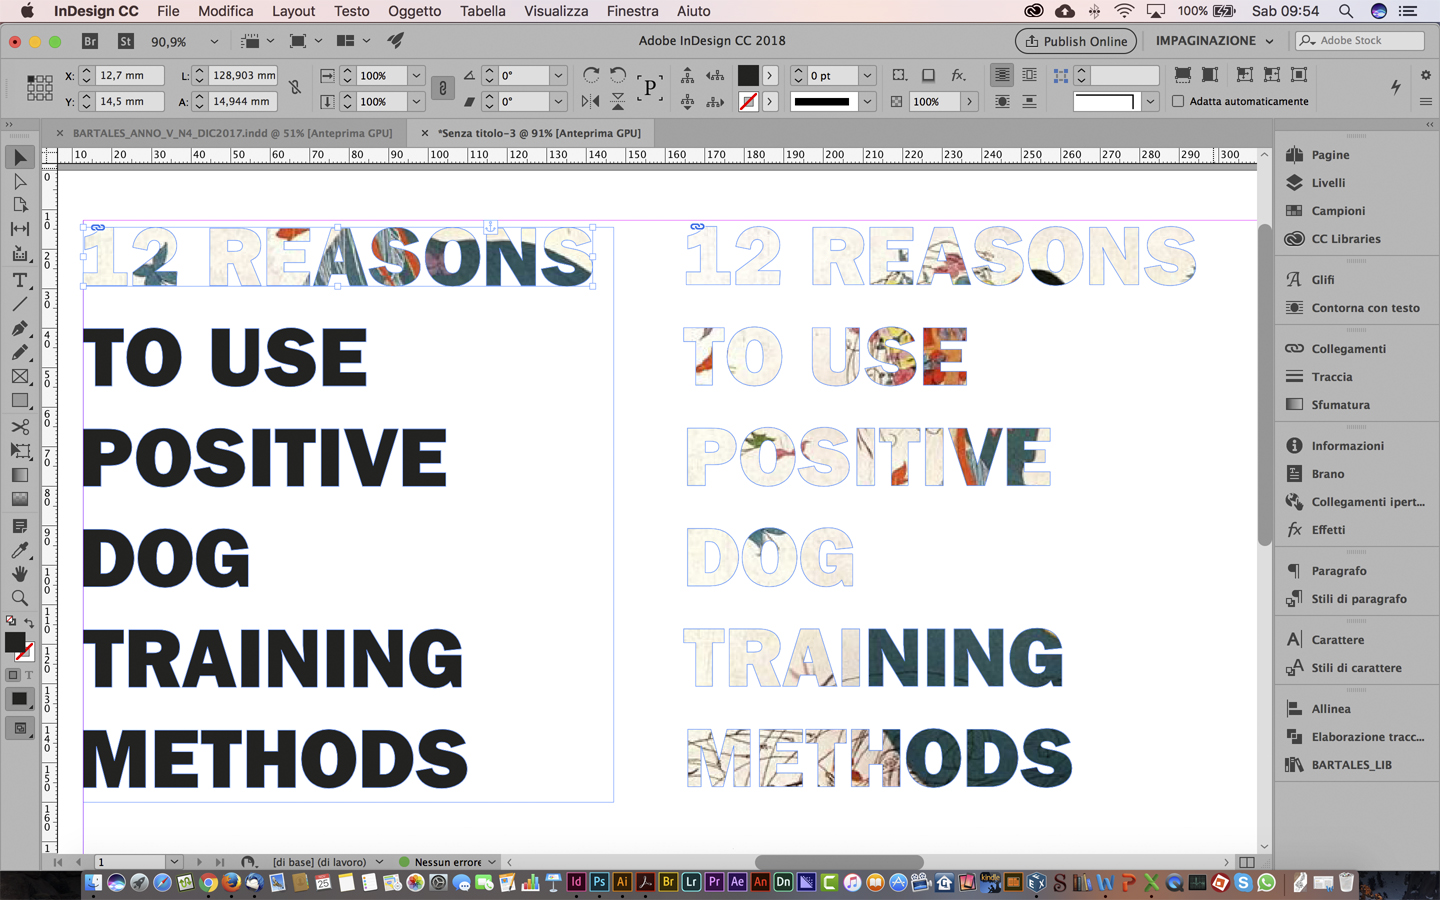
Totally newbie to Indesign. What does the blue anchor symbol mean on the bounding box. 
I have just covered my text to a object because i want to put a picture in it. The problem I find is that I can only place my picture in one line of converted text, not multiple lines.
I am using CC.
Thank you,


 1 Correct answer

Hi,
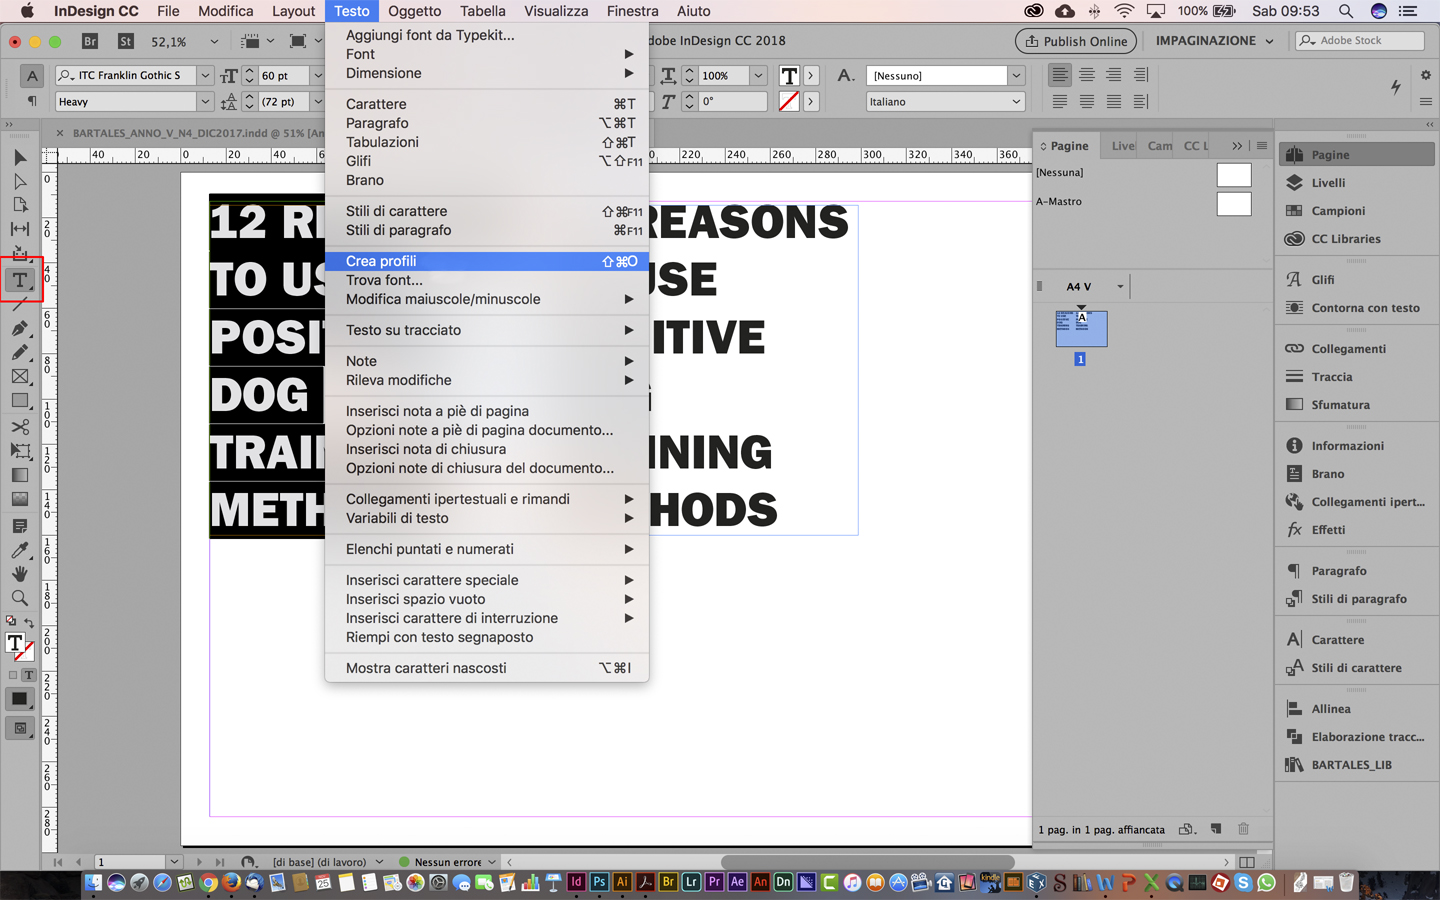
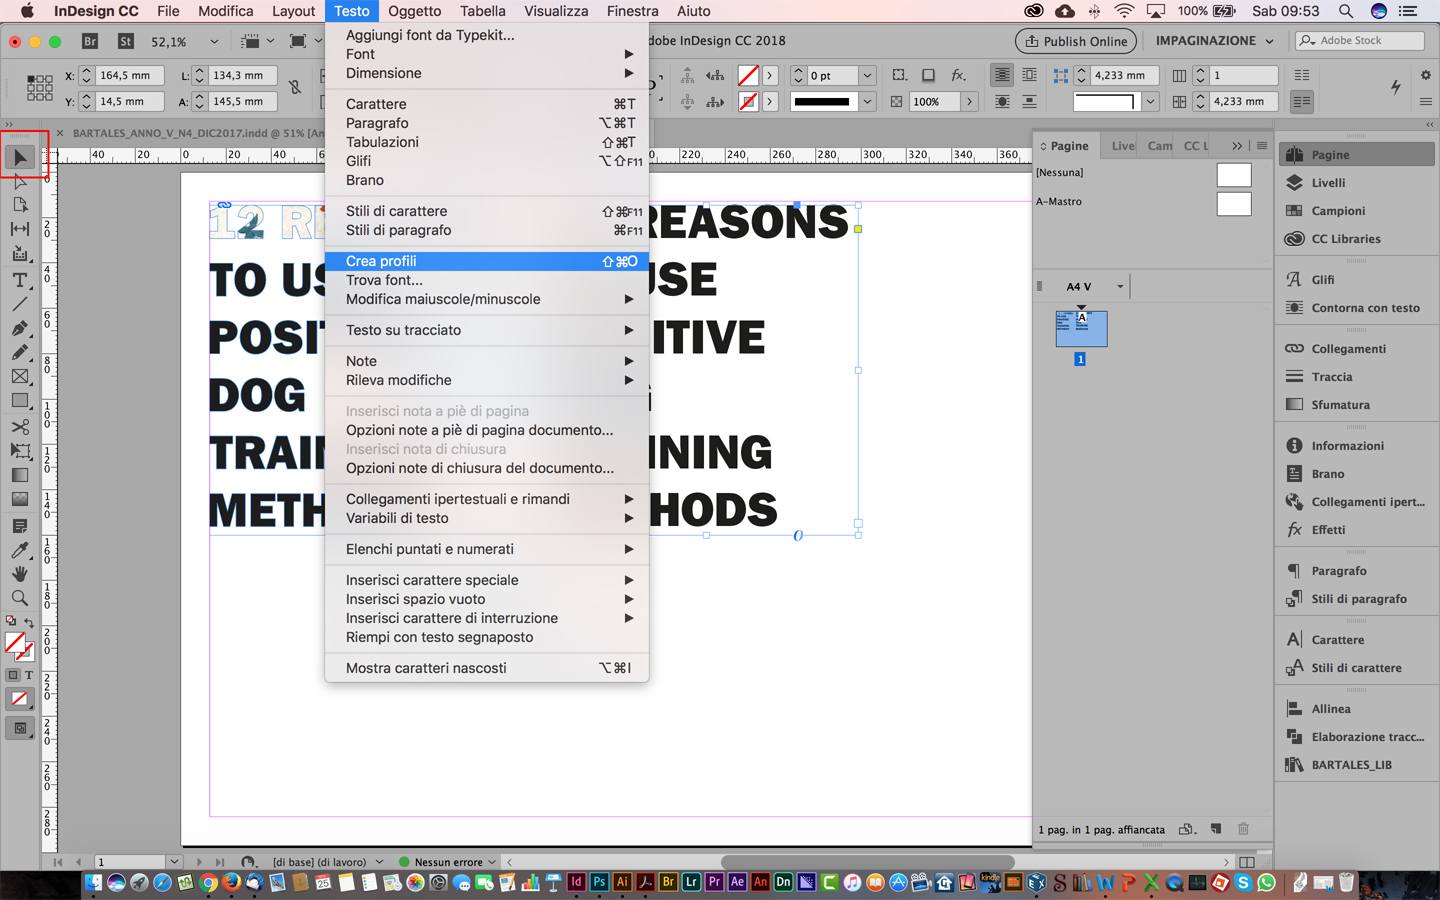
there is a difference in InDesign if you convert a text in outline selecting it as a text (text tool) or selecting it as an object (black arrow tool). In the first case you'll get an anchored object (identified by blue anchor symbol): it's an object in a text frame, each line of text is separated.
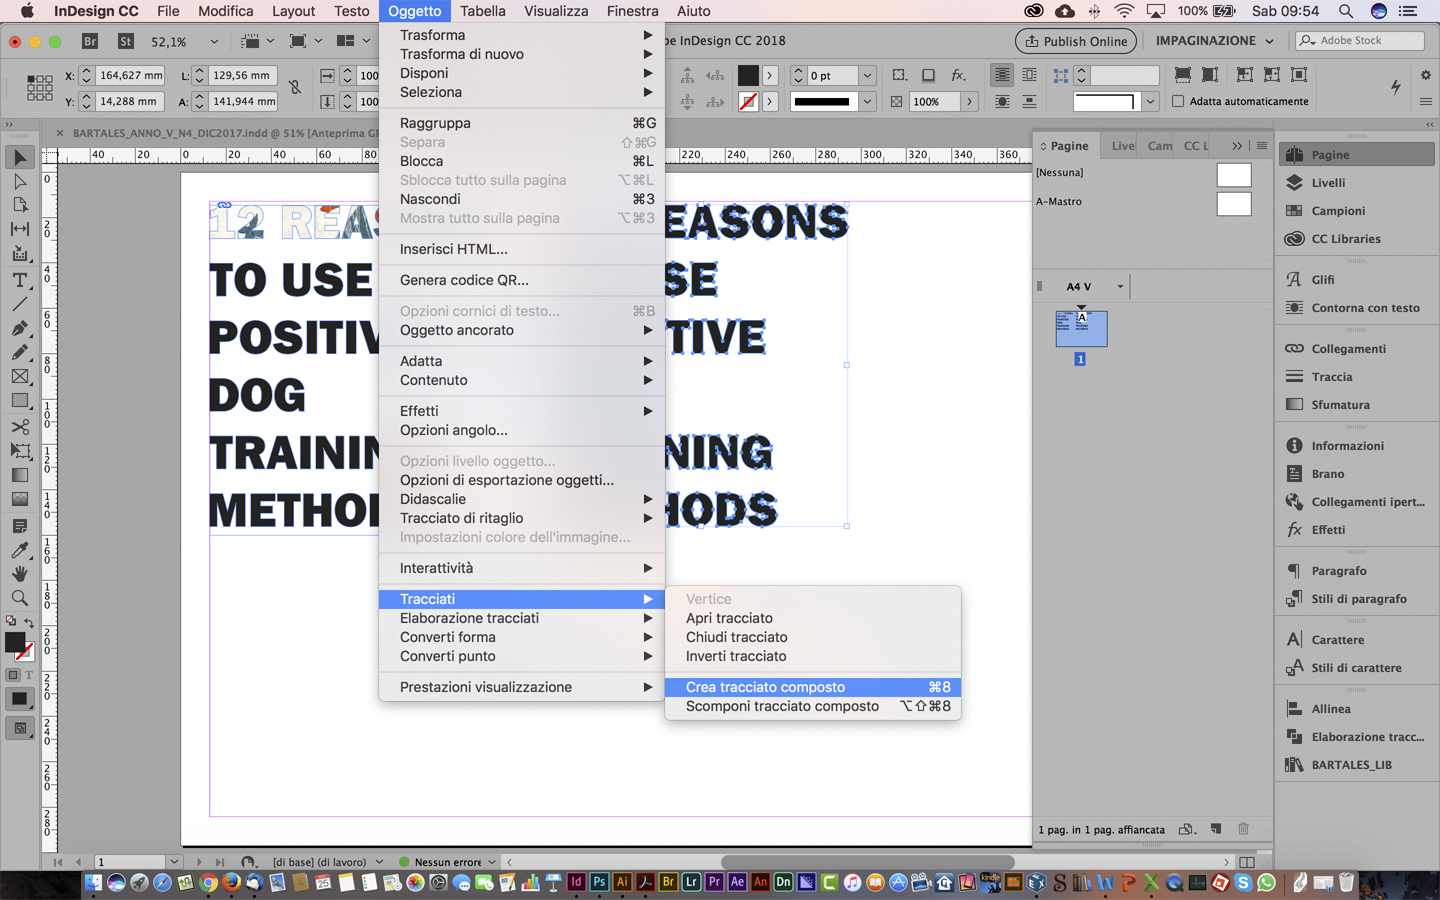
In the second case you'll get a single independent object. If you ungroup that object and convert it in a compound path you can insert an image in whole object.
In English the menus stay in the same p
... 6
Replies
6
6
Replies
6

Copy link to clipboard
Copied
It would be easier to do this is Photoshop.

Copy link to clipboard
Copied
Hi,
Once you create outlines, the text gets converted to compound path. The blue anchor indicates, that those paths are anchored at that very position.
You can segment your image into as many parts as the number of lines and place the segments order wise in the lines.
-Aman
Copy link to clipboard
Copied
Hi,
there is a difference in InDesign if you convert a text in outline selecting it as a text (text tool) or selecting it as an object (black arrow tool). In the first case you'll get an anchored object (identified by blue anchor symbol): it's an object in a text frame, each line of text is separated.
In the second case you'll get a single independent object. If you ungroup that object and convert it in a compound path you can insert an image in whole object.

In English the menus stay in the same position.

Copy link to clipboard
Copied
Supporting cinziamarotta's correct answer:
- Undo what you have already done/start over
- Select the frame
- Type > Create Outlines
- Object > Ungroup
- Object > Path > Create Compound Path
- With the frame still selected, either:
- File > Place your image, or
- Copy an existing image, then Edit > Paste Into
- To move the image within the words, double click on the image with the letters and drag your mouse
~Barb
Copy link to clipboard
Copied
Thank you! Problem solved!

Copy link to clipboard
Copied
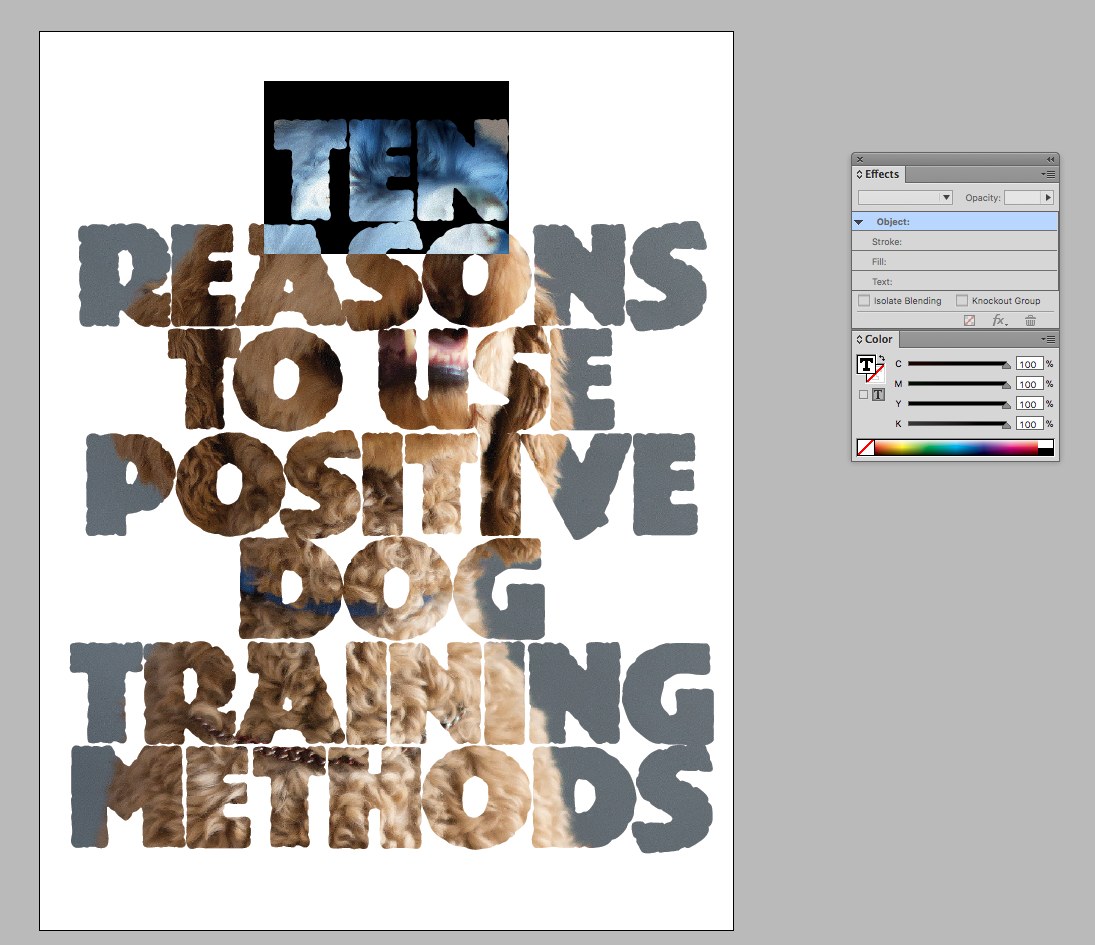
In some cases you can also do it with a transparency effect, which has the advantage of keeping the text live and editable:
Here I have a text frame with no fill and the text filled with Registration placed over the image. In the Effects dialog I've set the Text to Screen, which makes it transparent.
If your Transparency Blend Space is CMYK you'll need an absolute black like Registration to get full transparency.
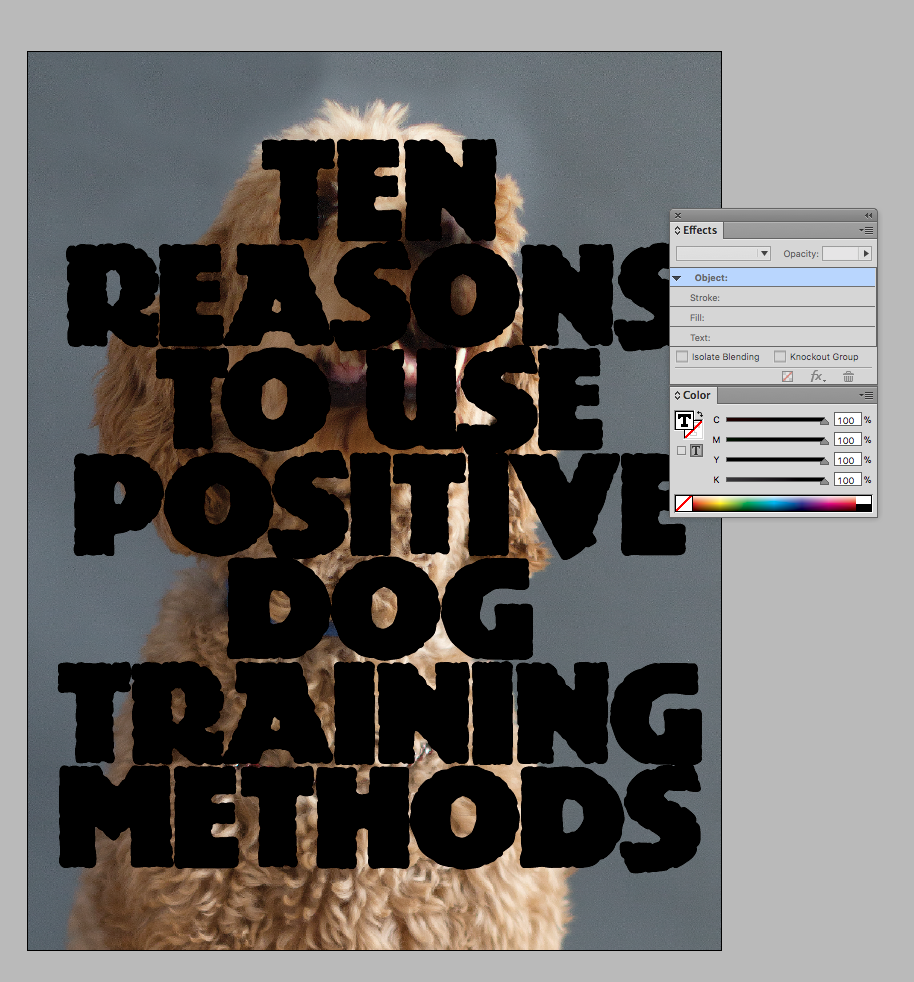
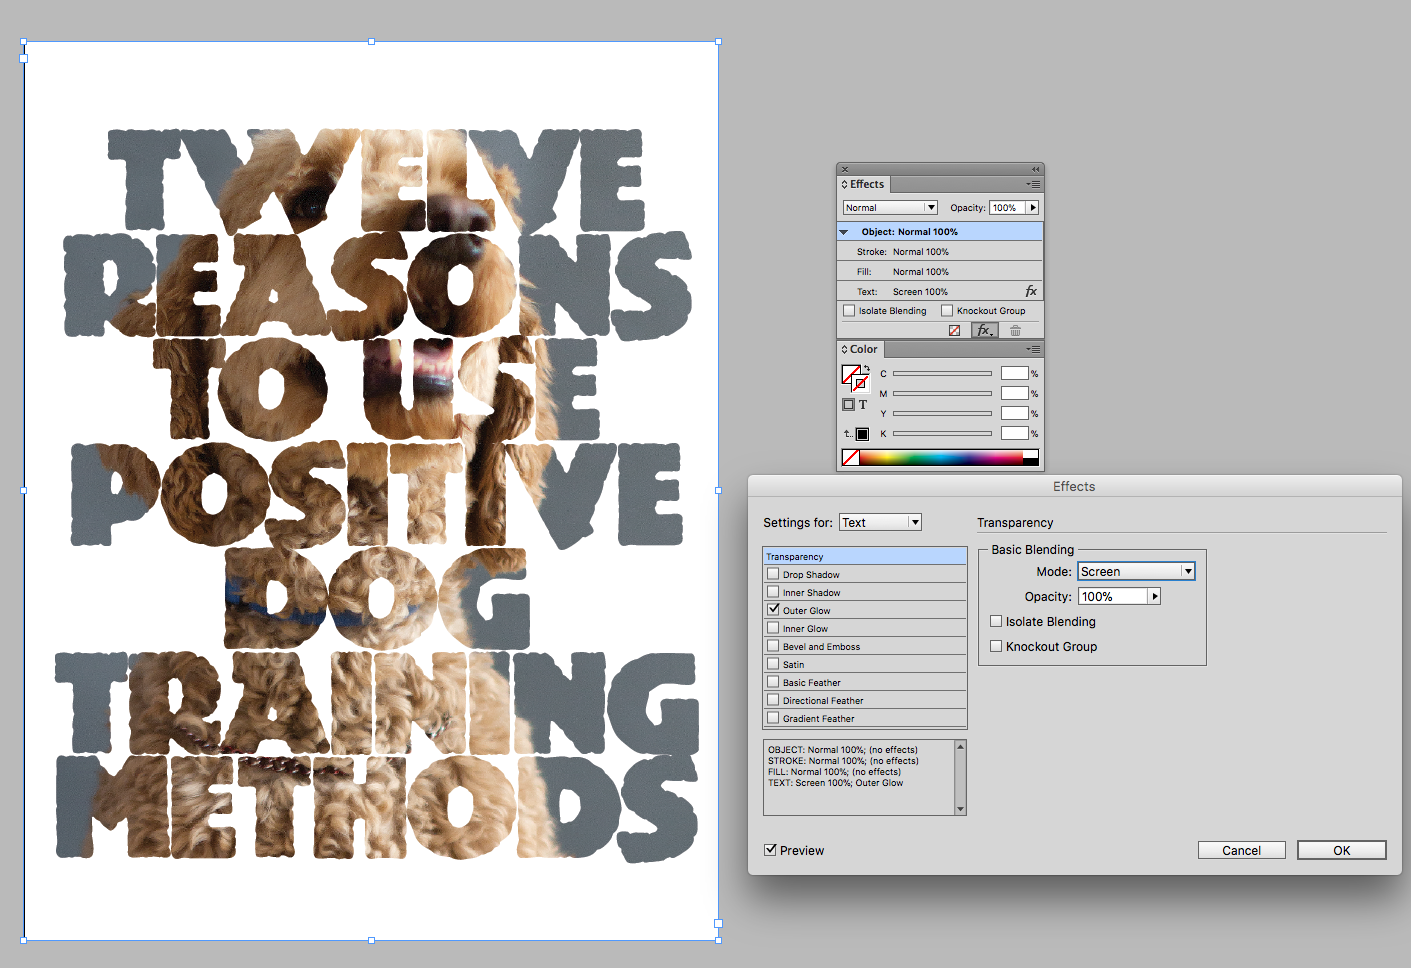
I've also added an Outer Glow with the Blend mode as Normal, the fill as white, the size as 10", and the Spread set to 100%. The Outer Glow creates the white fill.
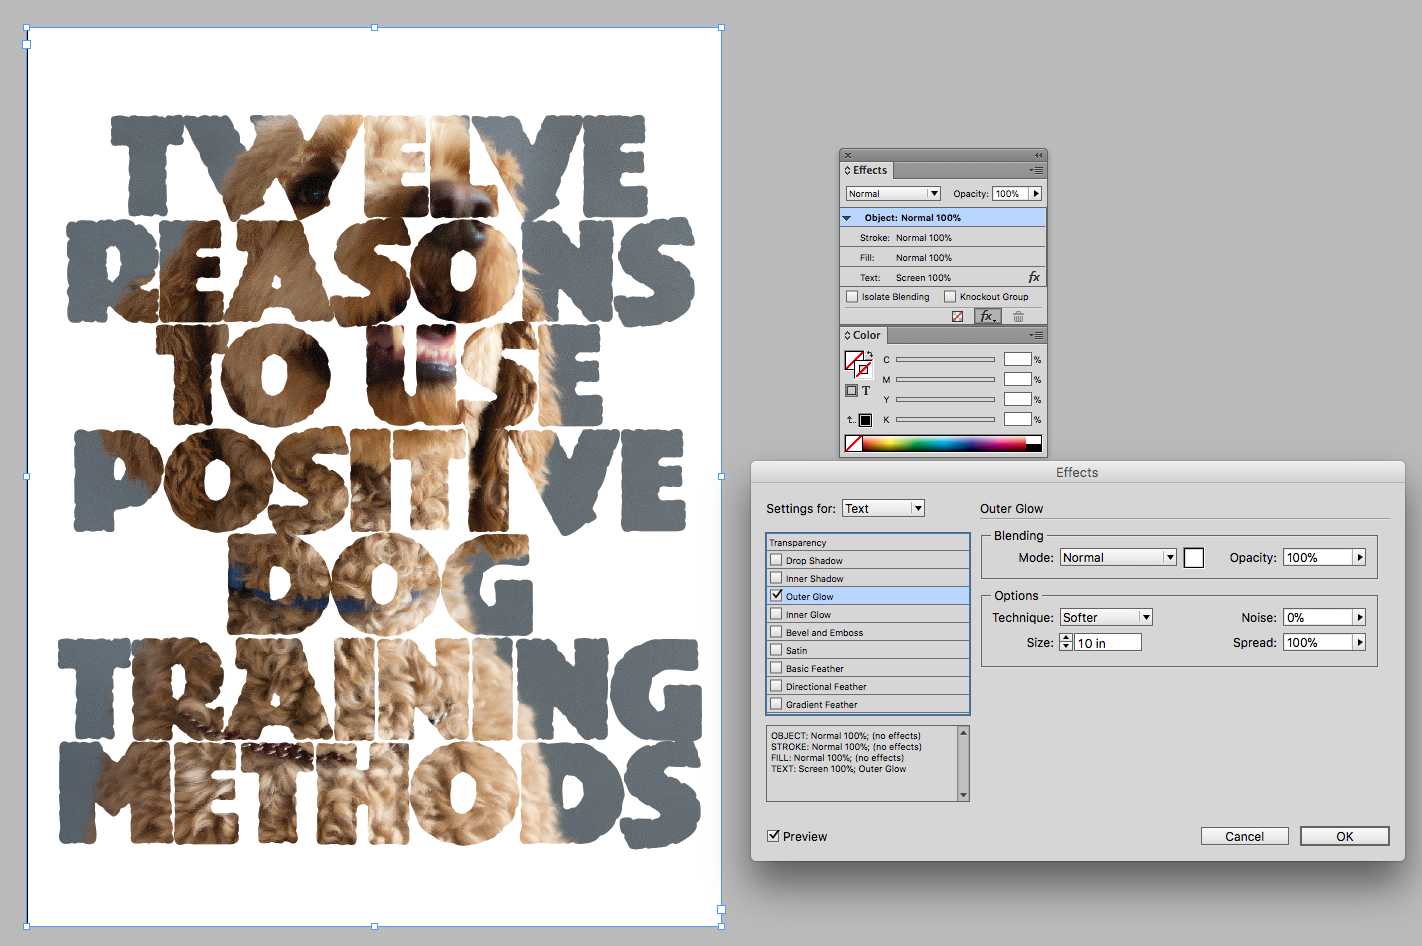
In this case the text is fully editable:

Find more inspiration, events, and resources on the new Adobe Community
Explore Now
 AdChoices